
Cabbage growing secret method – sounds intriguing, doesn’t it? I’m so excited to share some insider tips that will transform your cabbage patch from a humble vegetable garden into a thriving, bountiful harvest! For centuries, cabbage has been a staple in diets around the world, from the hearty stews of Eastern Europe to the vibrant slaws of North America. Its cultivation dates back to ancient times, with evidence suggesting its presence in gardens as early as 2500 BC!
But let’s be honest, growing cabbage can sometimes feel like a battle against pests, diseases, and unpredictable weather. That’s where these DIY tricks and hacks come in. I’ve learned these secrets over years of trial and error, and I’m confident they’ll help you avoid common pitfalls and maximize your yield. Imagine serving up the freshest, most delicious homemade sauerkraut, coleslaw, or stuffed cabbage rolls, all made with cabbage you grew yourself.
This article isn’t just about planting seeds; it’s about unlocking the cabbage growing secret method that seasoned gardeners swear by. We’ll delve into soil preparation, pest control, watering techniques, and even some clever DIY solutions to protect your precious plants. So, grab your gardening gloves, and let’s get ready to cultivate some cabbage success!
Unlock Cabbage Growing Secrets: From Seed to Harvest!
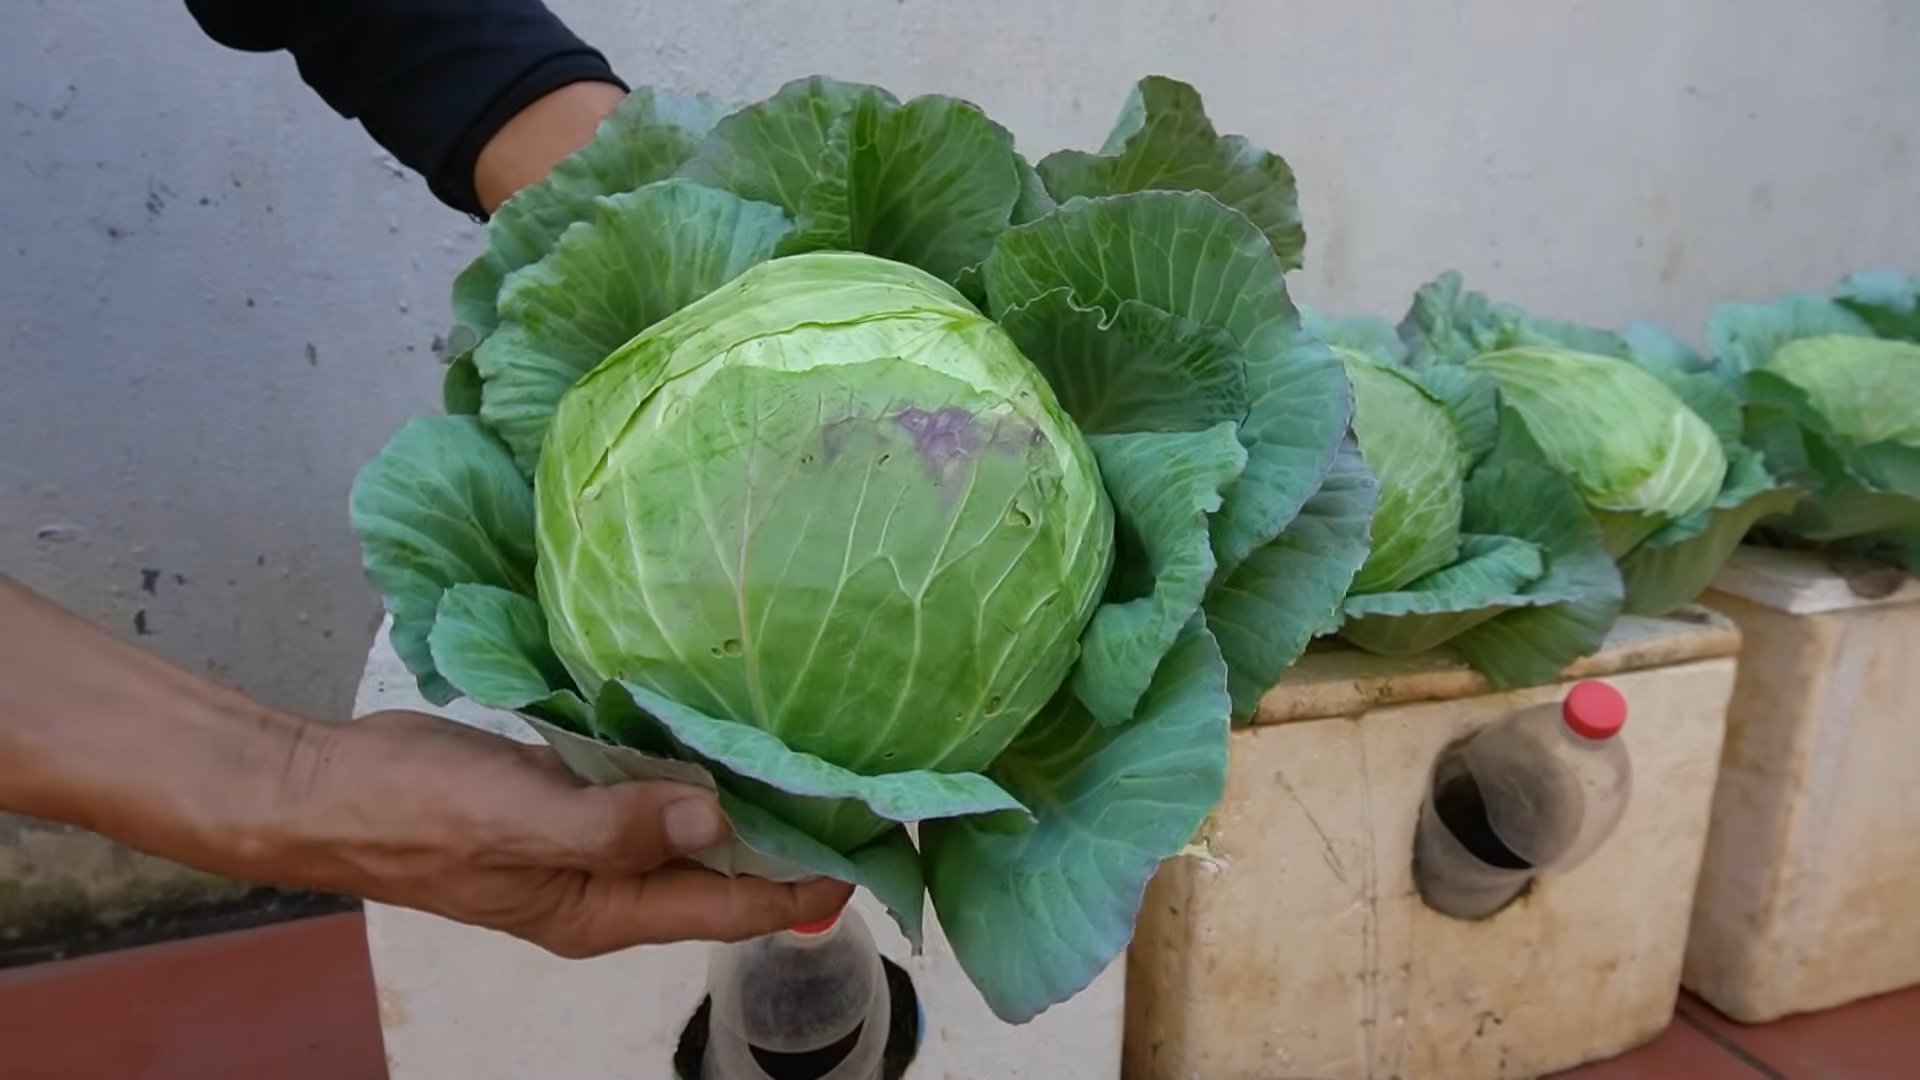
Hey fellow gardeners! I’m so excited to share my tried-and-true method for growing HUGE, healthy cabbages. Forget those tiny, worm-eaten heads you sometimes see at the grocery store. We’re going for cabbage royalty here! This guide will walk you through every step, from choosing the right variety to protecting your precious plants from pests. Let’s get started!
Choosing the Right Cabbage Variety
Before we even think about planting, let’s talk cabbage varieties. Not all cabbages are created equal! The best choice for you will depend on your climate, growing season length, and personal preferences.
* Early Varieties: These mature quickly (around 60-70 days) and are great for short growing seasons or for getting an early harvest. Examples include ‘Golden Acre’ and ‘Early Jersey Wakefield’.
* Mid-Season Varieties: These take a bit longer (70-85 days) but often produce larger heads. ‘Copenhagen Market’ and ‘Savoy Ace’ are popular choices.
* Late Varieties: These need the longest growing season (85+ days) and are often grown for winter storage. ‘Danish Ballhead’ and ‘January King’ are excellent options.
* Savoy Cabbages: These have crinkled leaves and a milder flavor. ‘Savoy Ace’ is a reliable choice.
* Red Cabbages: These add a beautiful splash of color to your garden and are packed with antioxidants. ‘Red Acre’ is a classic.
* Chinese Cabbages (Napa Cabbage): These have elongated heads and a delicate flavor, perfect for stir-fries and salads.
My Recommendation: I personally love growing ‘Copenhagen Market’ for its reliable yields and delicious flavor. I also always plant a few ‘Red Acre’ cabbages for their vibrant color and nutritional benefits.
Starting Cabbage Seeds Indoors (Recommended)
While you *can* direct sow cabbage seeds, I highly recommend starting them indoors. This gives them a head start and protects them from early-season pests and unpredictable weather.
* Timing is Key: Start your seeds about 6-8 weeks before the last expected frost in your area.
* Seed Starting Mix: Use a high-quality seed starting mix that’s light and well-draining.
* Containers: I prefer using seed starting trays with individual cells, but small pots work too.
* Lighting: Cabbage seedlings need plenty of light. A grow light is ideal, but a sunny windowsill can work if you supplement with artificial light.
Step-by-Step Instructions:
1. Moisten the Seed Starting Mix: Before filling your containers, thoroughly moisten the seed starting mix. It should be damp but not soggy.
2. Fill the Containers: Fill each cell or pot with the moistened seed starting mix, leaving about half an inch of space at the top.
3. Sow the Seeds: Plant 2-3 cabbage seeds per cell or pot, about ¼ inch deep.
4. Cover the Seeds: Gently cover the seeds with more seed starting mix.
5. Water Gently: Water the seeds gently using a spray bottle or watering can with a fine rose. Avoid overwatering.
6. Provide Warmth: Cabbage seeds germinate best at temperatures between 65-75°F (18-24°C). Use a heat mat if needed.
7. Provide Light: Once the seedlings emerge (usually within 5-10 days), provide them with plenty of light. If using a grow light, position it a few inches above the seedlings.
8. Thin the Seedlings: Once the seedlings have their first true leaves (the second set of leaves), thin them to one seedling per cell or pot. Choose the strongest, healthiest seedling and snip off the others at the soil line.
9. Water Regularly: Keep the soil consistently moist, but not soggy. Water when the top inch of soil feels dry.
10. Fertilize Lightly: Start fertilizing the seedlings with a diluted liquid fertilizer (half strength) about 2 weeks after they emerge.
11. Harden Off the Seedlings: About a week before you plan to transplant the seedlings outdoors, you’ll need to “harden them off.” This means gradually exposing them to outdoor conditions to help them adjust. Start by placing them outdoors in a sheltered location for a few hours each day, gradually increasing the amount of time they spend outside.
Preparing the Garden Bed
Cabbages are heavy feeders, so preparing the garden bed properly is crucial for success.
* Sunlight: Cabbages need at least 6 hours of sunlight per day.
* Soil: They prefer well-drained, fertile soil with a pH between 6.0 and 7.0.
* Amendments: Amend the soil with plenty of compost or well-rotted manure to improve drainage and fertility.
* Fertilizer: Incorporate a slow-release fertilizer into the soil before planting.
Step-by-Step Instructions:
1. Choose a Sunny Location: Select a spot in your garden that receives at least 6 hours of sunlight per day.
2. Clear the Area: Remove any weeds, rocks, or debris from the area.
3. Test the Soil pH: Use a soil testing kit to determine the pH of your soil. If it’s too acidic (below 6.0), add lime to raise the pH. If it’s too alkaline (above 7.0), add sulfur to lower the pH.
4. Amend the Soil: Spread a 2-3 inch layer of compost or well-rotted manure over the area.
5. Incorporate the Amendments: Use a garden fork or tiller to incorporate the compost or manure into the soil to a depth of 12 inches.
6. Add Fertilizer: Sprinkle a slow-release fertilizer over the area according to the package directions.
7. Rake the Soil: Rake the soil smooth and level.
Transplanting Cabbage Seedlings
Once your seedlings are hardened off and the danger of frost has passed, it’s time to transplant them into the garden.
* Timing: Transplant on a cloudy day or in the late afternoon to minimize stress on the seedlings.
* Spacing: Space the seedlings 12-18 inches apart in rows that are 24-36 inches apart.
* Watering: Water the seedlings thoroughly after transplanting.
Step-by-Step Instructions:
1. Dig Holes: Dig holes that are slightly larger than the root balls of the seedlings.
2. Remove Seedlings from Containers: Gently remove the seedlings from their containers, being careful not to damage the roots.
3. Place Seedlings in Holes: Place each seedling in a hole, making sure the top of the root ball is level with the surrounding soil.
4. Fill in Holes: Fill in the holes with soil and gently firm the soil around the seedlings.
5. Water Thoroughly: Water the seedlings thoroughly after transplanting.
6. Mulch: Apply a layer of mulch around the seedlings to help retain moisture, suppress weeds, and regulate soil temperature. Straw, wood chips, or shredded leaves are good choices.
Caring for Your Cabbage Plants
Once your cabbage plants are in the ground, it’s important to provide them with the care they need to thrive.
* Watering: Cabbages need consistent moisture, especially during head formation. Water deeply and regularly, especially during dry spells.
* Fertilizing: Side-dress the plants with a nitrogen-rich fertilizer every 2-3 weeks.
* Weeding: Keep the area around the plants free of weeds.
* Pest Control: Monitor the plants regularly for pests and diseases.
Step-by-Step Instructions:
1. Water Regularly: Water the plants deeply and regularly, especially during dry spells. Aim for about 1-1.5 inches of water per week.
2. Fertilize Regularly: Side-dress the plants with a nitrogen-rich fertilizer every 2-3 weeks. Sprinkle the fertilizer around the base of the plants and water it in.
3. Weed Regularly: Remove any weeds that emerge around the plants. Weeds compete with the cabbage plants for water and nutrients.
4. Monitor for Pests: Inspect the plants regularly for pests such as cabbage worms, aphids, and flea beetles.
5. Control Pests: If you find pests, take action to control them. Handpicking pests, using insecticidal soap, or applying Bacillus thuringiensis (Bt) are effective methods.
6. Protect from Cabbage White Butterflies: These butterflies lay eggs that hatch into cabbage worms.
Conclusion
So, there you have it! This simple yet incredibly effective DIY trick for boosting your cabbage crop is a game-changer. We’ve walked you through the process, highlighting how easy it is to implement and the significant benefits you’ll reap. From larger, healthier heads of cabbage to a more resilient and productive garden, this method truly delivers.
Why is this a must-try? Because it addresses some of the most common challenges faced by cabbage growers. It provides essential nutrients directly to the roots, promoting vigorous growth and preventing nutrient deficiencies. It also helps to retain moisture in the soil, reducing the need for frequent watering, especially during hot summer months. And perhaps most importantly, it contributes to a stronger, healthier plant that is better equipped to resist pests and diseases.
But don’t just take our word for it! The beauty of this DIY approach is its adaptability. Feel free to experiment with variations to suit your specific needs and growing conditions. For example, if you live in an area with acidic soil, you might consider adding a small amount of lime to your DIY mixture to help balance the pH. Or, if you’re looking for an extra boost of phosphorus, you could incorporate some bone meal into the mix. The possibilities are endless!
Consider adding other organic materials to your DIY mix. Coffee grounds, for example, are a great source of nitrogen and can also help to deter slugs and snails. Crushed eggshells provide calcium, which is essential for strong cell walls and can help prevent blossom-end rot. Just remember to research the specific needs of your cabbage plants and adjust your mixture accordingly.
Another variation you might want to explore is the timing of application. While we recommend applying the DIY mixture at planting time, you can also reapply it as a side dressing throughout the growing season. This is particularly beneficial if you notice any signs of nutrient deficiency, such as yellowing leaves or stunted growth. Simply sprinkle the mixture around the base of the plants and gently work it into the soil.
Ultimately, the best way to discover what works best for you is to experiment and observe your plants closely. Pay attention to their growth habits, leaf color, and overall health. Keep track of your results and adjust your approach accordingly.
We are confident that this DIY trick will transform your cabbage growing experience. It’s a simple, cost-effective, and environmentally friendly way to achieve bigger, better, and healthier cabbage heads. So, what are you waiting for? Give it a try and see the difference for yourself!
We encourage you to try this **cabbage growing secret method** and share your experiences with us. Let us know what variations you tried, what challenges you encountered, and what successes you achieved. Your feedback will help us refine this method and make it even more effective for other gardeners. Share your photos and stories on our social media pages using the hashtag #CabbageGrowingSecret. We can’t wait to see your amazing cabbage crops! Happy gardening!
Frequently Asked Questions (FAQ)
What exactly is this “DIY trick” for growing cabbage?
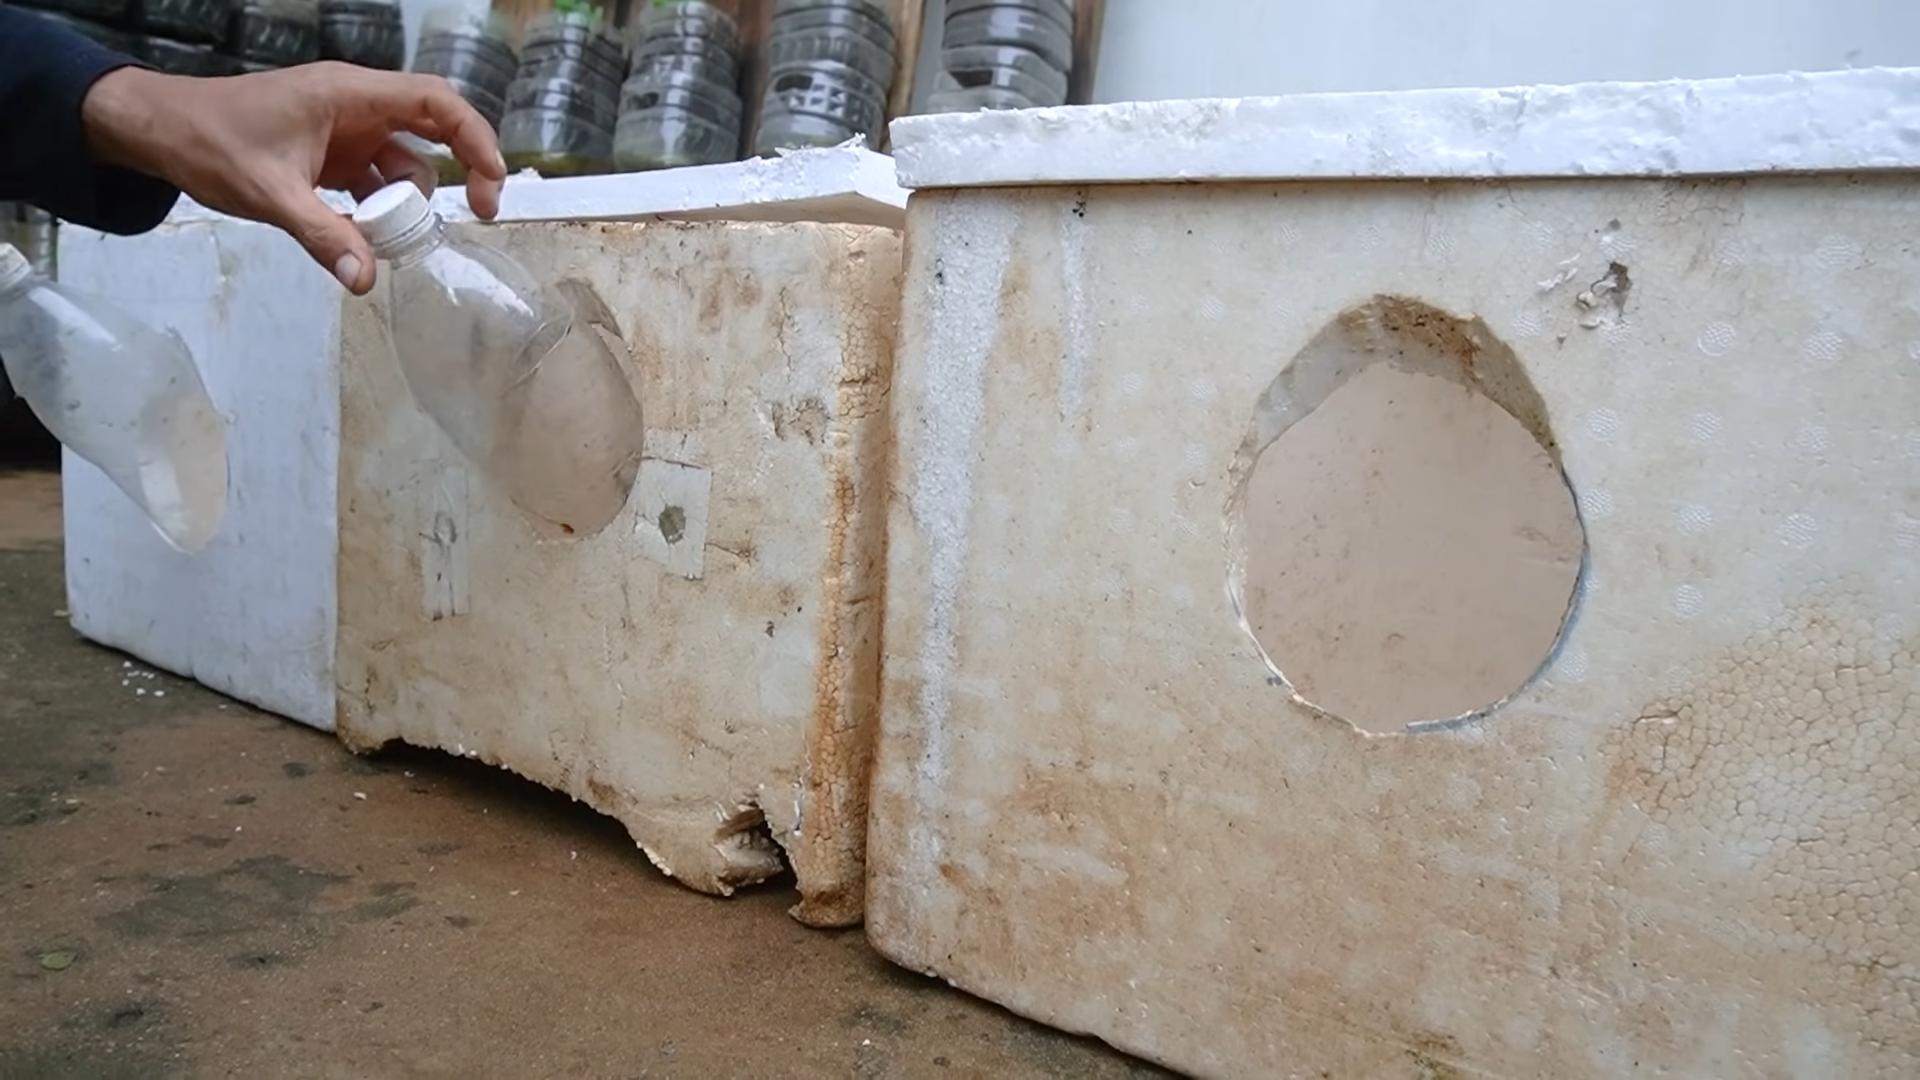
This DIY trick involves creating a nutrient-rich mixture that you place directly in the planting hole when you transplant your cabbage seedlings. This mixture typically includes ingredients like compost, aged manure, and other organic materials that provide essential nutrients and improve soil structure. The goal is to give your cabbage plants a strong start and promote healthy growth throughout the season.
What are the main benefits of using this method?
The benefits are numerous! Firstly, it provides a readily available source of nutrients directly to the roots, leading to faster growth and larger heads of cabbage. Secondly, it improves soil drainage and aeration, which is crucial for healthy root development. Thirdly, it helps to retain moisture in the soil, reducing the need for frequent watering. Finally, it promotes a healthier, more resilient plant that is better able to resist pests and diseases.
What ingredients can I use in my DIY mixture?
The possibilities are endless, but some common and effective ingredients include:
* **Compost:** Provides a balanced source of nutrients and improves soil structure.
* **Aged Manure:** Rich in nitrogen, phosphorus, and potassium, essential for plant growth.
* **Bone Meal:** A great source of phosphorus, which promotes root development.
* **Blood Meal:** A good source of nitrogen, which promotes leafy growth.
* **Epsom Salts:** Provides magnesium, which is important for chlorophyll production.
* **Coffee Grounds:** Adds nitrogen and helps deter slugs and snails.
* **Crushed Eggshells:** Provides calcium, which is essential for strong cell walls.
* **Wood Ash:** Provides potassium and helps to raise the pH of acidic soils.
Remember to use these ingredients in moderation and adjust the amounts based on your specific soil conditions and the needs of your cabbage plants.
How much of the DIY mixture should I use per plant?
A good rule of thumb is to use about one to two cups of the mixture per plant. You want to create a small reservoir of nutrients around the roots of the seedling, but you don’t want to overwhelm the plant with too much fertilizer.
When is the best time to apply this DIY mixture?
The best time to apply the mixture is at planting time, when you transplant your cabbage seedlings into the garden. This gives the plants a strong start and ensures that they have access to the nutrients they need from the very beginning. You can also reapply the mixture as a side dressing throughout the growing season if you notice any signs of nutrient deficiency.
Can I use this method for other vegetables besides cabbage?
Yes, absolutely! This DIY trick can be adapted for use with a wide variety of vegetables, especially those that are heavy feeders, such as tomatoes, peppers, and broccoli. Just be sure to research the specific nutrient needs of each vegetable and adjust your mixture accordingly.
What if I don’t have access to all of the ingredients listed?
Don’t worry! You can still create an effective DIY mixture with just a few basic ingredients. Compost and aged manure are the most important components, so focus on those if you have them available. You can also substitute other organic materials, such as leaf mold or grass clippings, for some of the less essential ingredients.
Is this method safe for organic gardening?
Yes, as long as you use organic ingredients, this method is perfectly safe for organic gardening. Be sure to source your compost, manure, and other materials from reputable suppliers who follow organic practices.
How often should I water my cabbage plants after applying this mixture?
Water your cabbage plants regularly, especially during dry periods. The DIY mixture will help to retain moisture in the soil, but it’s still important to provide supplemental watering as needed. Aim to keep the soil consistently moist but not waterlogged.
What are some common problems that cabbage growers face, and how can this method help?
Some common problems include nutrient deficiencies, pest infestations, and diseases. This DIY method can help to address these problems by providing essential nutrients, improving soil health, and promoting a stronger, more resilient plant. A well-nourished plant is better able to resist pests and diseases and is more likely to thrive.
How do I know if my cabbage plants are getting enough nutrients?
Look for signs of nutrient deficiency, such as yellowing leaves, stunted growth, or poor head formation. If you notice any of these symptoms, you may need to reapply the DIY mixture or supplement with additional fertilizer.
Where can I find more information about growing cabbage?
There are many excellent resources available online and in print. Check out your local library, university extension office, or reputable gardening websites for more information. You can also find helpful tips and advice from experienced gardeners in your community.


Leave a Comment