
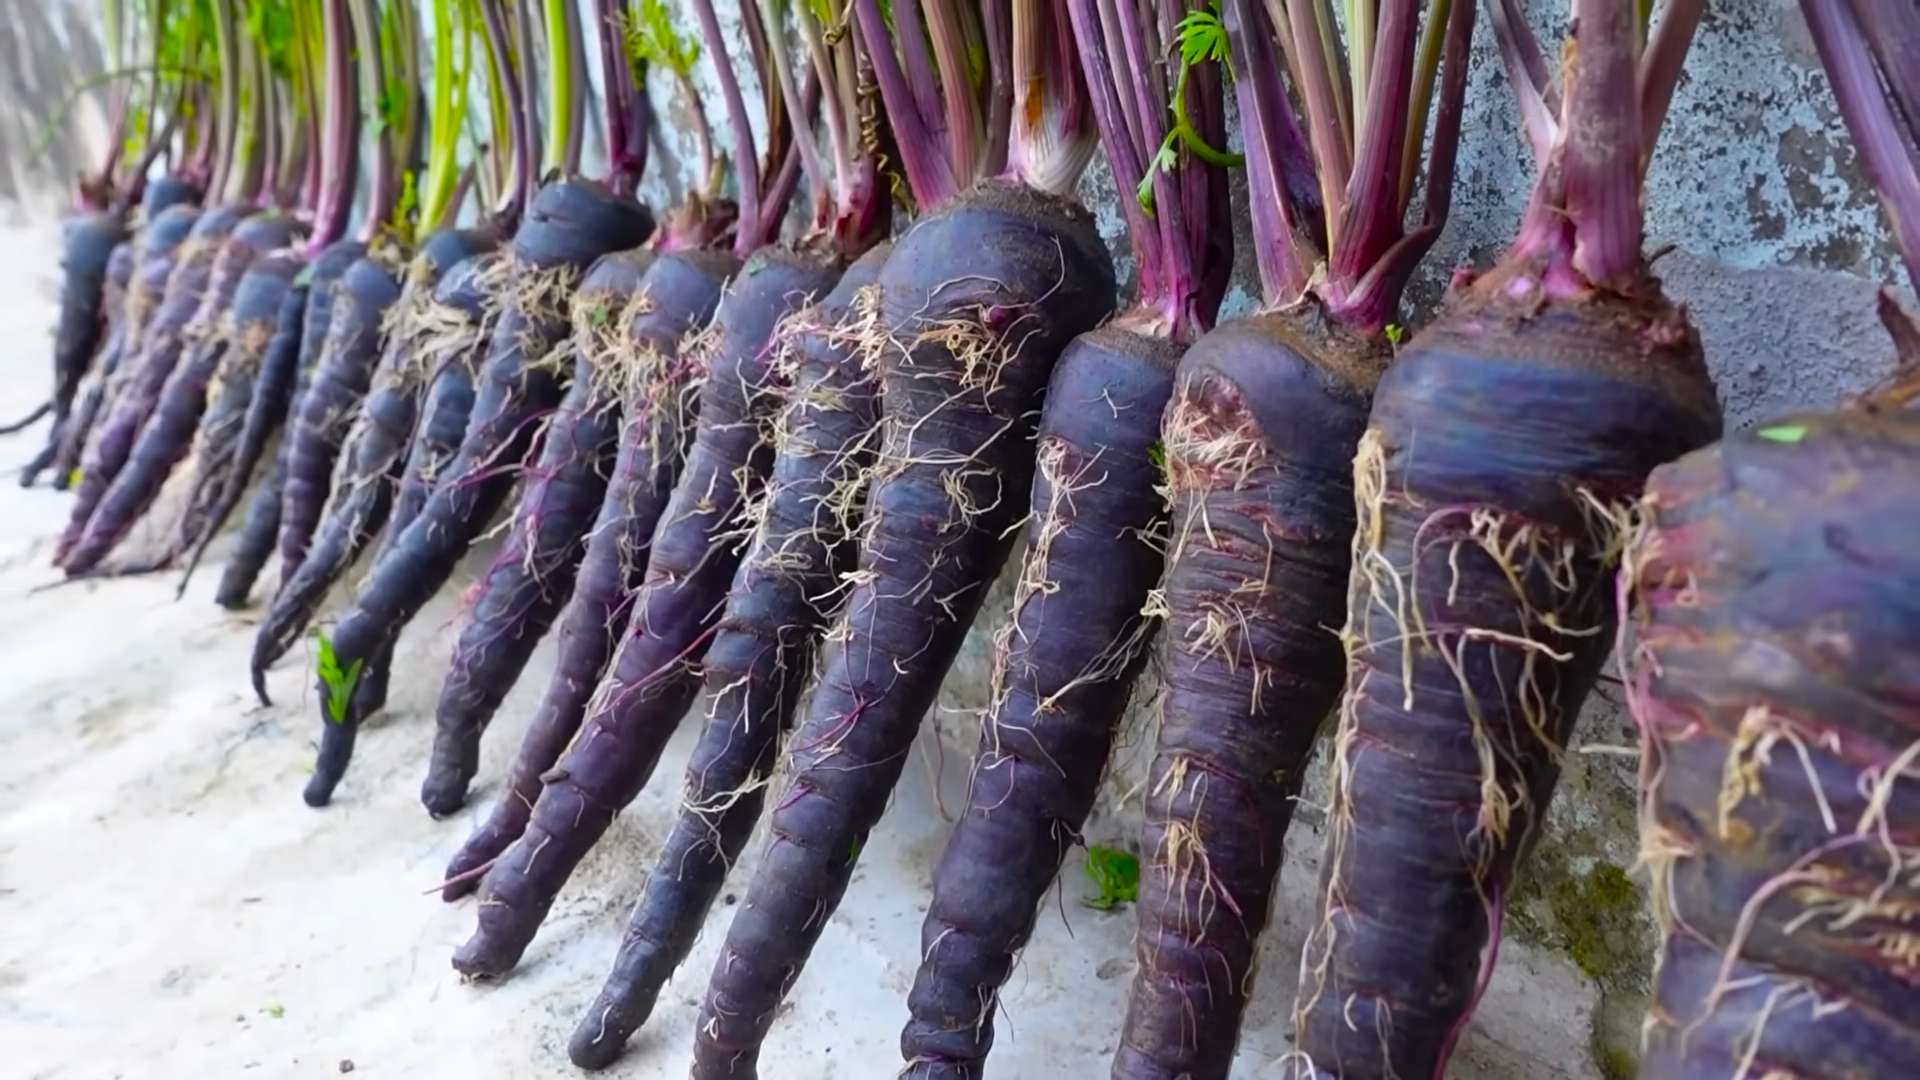
Carrot Growing Beginners Guide: Ready to ditch the bland, store-bought carrots and sink your teeth into something truly delicious – something you grew yourself? I’m so excited to share my ultimate guide to growing carrots, even if you’ve never touched a trowel before! For centuries, carrots have been a staple in diets around the world, from their humble beginnings as wild, purple roots to the vibrant orange varieties we know and love today. They’re not just tasty; they’re packed with vitamins and add a beautiful splash of color to any meal.
But let’s be honest, getting those perfect, crunchy carrots from seed to table can feel a little daunting. Maybe you’ve tried before and ended up with stunted, forked roots, or maybe you’re just intimidated by the whole process. That’s where this Carrot Growing Beginners Guide comes in! I’m going to walk you through every step, from choosing the right seeds and preparing your soil to troubleshooting common problems and harvesting your bounty.
Imagine the satisfaction of pulling a plump, juicy carrot straight from the earth, knowing you nurtured it from a tiny seed. No more mystery ingredients or questionable farming practices – just pure, homegrown goodness. So, grab your gardening gloves, and let’s get started! I promise, with a little patience and these simple tips, you’ll be enjoying the sweetest, most flavorful carrots you’ve ever tasted in no time.
Grow Your Own Delicious Carrots: A Beginner’s Guide
Hey there, fellow gardening enthusiasts! I’m so excited you’re thinking about growing your own carrots. Trust me, there’s nothing quite like pulling a vibrant, crunchy carrot straight from the earth and knowing you grew it yourself. It’s easier than you might think, and I’m here to guide you through every step of the process. Let’s get our hands dirty!
Choosing the Right Carrot Variety
Before we even think about planting, we need to decide what kind of carrots we want to grow. There are tons of varieties out there, each with its own unique characteristics. Here’s a quick rundown to help you choose:
* Nantes: These are classic, cylindrical carrots with a sweet flavor and smooth texture. They’re a great all-around choice and mature relatively quickly.
* Danvers: These are longer and more tapered than Nantes carrots, with a slightly stronger flavor. They’re known for their good storage qualities.
* Chantenay: These are shorter, thicker carrots that are perfect for heavier soils. They have a robust flavor and are often used in processing.
* Imperator: These are the long, slender carrots you often see in supermarkets. They require loose, well-drained soil to grow properly.
* Round Carrots (Parisian): These are small, round carrots that are perfect for containers or shallow soils. They’re also great for kids to grow!
Consider your soil type, growing space, and personal preferences when making your decision. I personally love Nantes carrots for their sweetness and ease of growing.
Preparing the Soil: The Key to Success
Carrots need loose, well-drained soil to grow long and straight. Rocky or compacted soil will result in stunted, misshapen carrots. This is probably the most important step, so don’t skip it!
* Soil Testing: Before you do anything, it’s a good idea to get your soil tested. This will tell you the pH level and nutrient content of your soil, so you can amend it accordingly. You can usually get a soil test done through your local agricultural extension office.
* Loosening the Soil: Carrots need soil that’s loose and easy for their roots to penetrate. Use a garden fork or tiller to loosen the soil to a depth of at least 12 inches.
* Removing Rocks and Debris: This is crucial! Pick out any rocks, stones, or other debris that could impede the growth of your carrots. Even small pebbles can cause carrots to fork or split.
* Adding Organic Matter: Incorporate plenty of compost or well-rotted manure into the soil. This will improve drainage, add nutrients, and help retain moisture.
* Creating Raised Beds (Optional): If you have heavy clay soil, consider growing your carrots in raised beds. This will improve drainage and make it easier to control the soil quality.
Planting Carrot Seeds: Getting Started
Carrot seeds are tiny, so they can be a bit tricky to handle. But don’t worry, I’ll show you some tricks to make it easier.
1. Timing is Everything: Carrots are a cool-season crop, so they’re best planted in early spring or late summer. Check your local frost dates to determine the best time to plant in your area. I usually aim for 2-3 weeks before the last expected frost in spring, or 8-10 weeks before the first expected frost in fall.
2. Creating Furrows: Use a hoe or trowel to create shallow furrows in the soil, about 1/4 to 1/2 inch deep. Space the furrows about 2-3 inches apart.
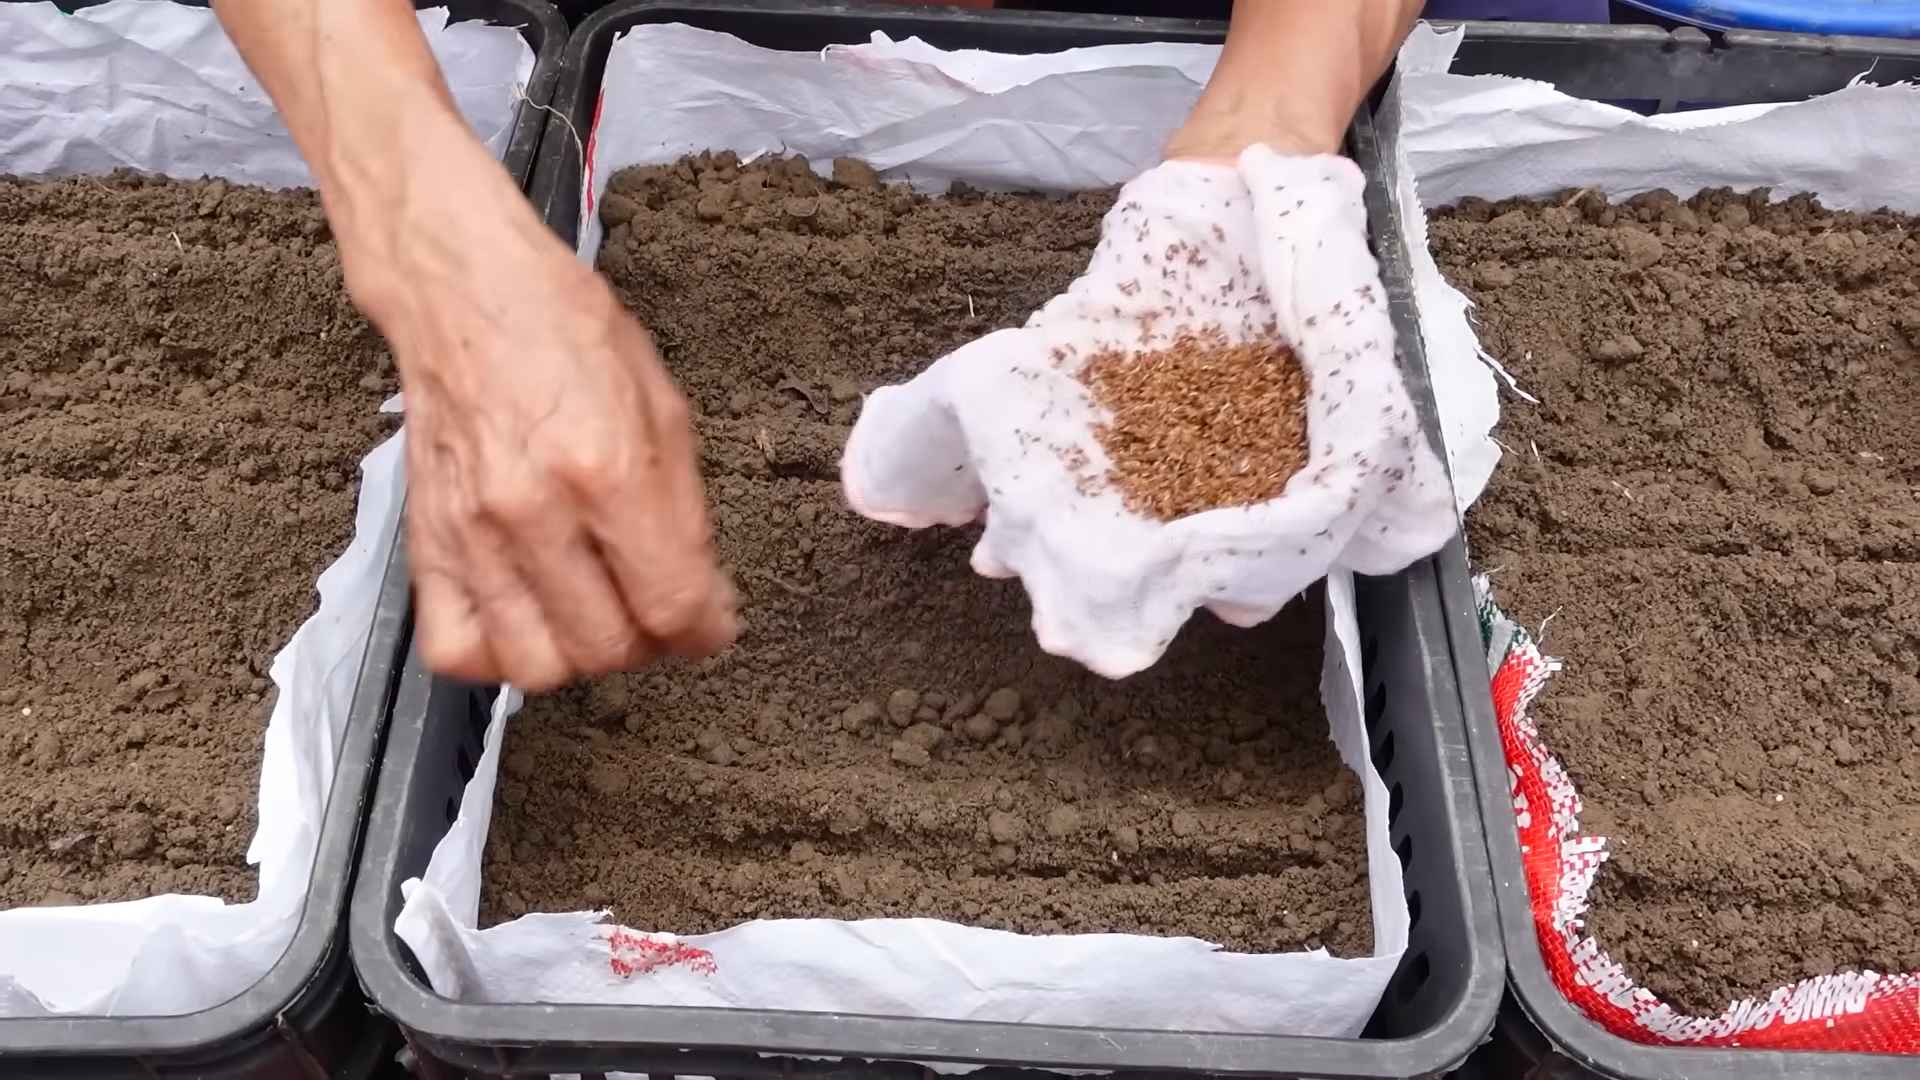
3. Sowing the Seeds: This is where it gets a little tricky. Carrot seeds are tiny and tend to clump together. To avoid overcrowding, try mixing the seeds with sand or coffee grounds before sowing. This will help you spread them out more evenly. Aim for about 2-3 seeds per inch.
4. Covering the Seeds: Gently cover the seeds with a thin layer of soil. You can also use a fine layer of vermiculite or sand.
5. Watering Gently: Water the soil gently with a watering can or hose with a gentle spray nozzle. Be careful not to wash away the seeds.
6. Marking the Rows: Use plant markers to label the rows with the carrot variety and planting date. This will help you keep track of what you’ve planted.
Caring for Your Carrots: Nurturing Growth
Once your carrots are planted, it’s important to provide them with the care they need to thrive.
* Watering: Carrots need consistent moisture to grow properly. Water them regularly, especially during dry spells. Aim for about 1 inch of water per week.
* Thinning: This is crucial! If you don’t thin your carrots, they’ll be overcrowded and won’t develop properly. When the seedlings are about 2 inches tall, thin them to about 1-2 inches apart. When they’re about 4 inches tall, thin them again to about 3-4 inches apart. Don’t be afraid to pull them out! It’s better to have fewer, larger carrots than a bunch of small, stunted ones.
* Weeding: Keep the area around your carrots free of weeds. Weeds compete with carrots for water and nutrients, and they can also attract pests. Hand-pull weeds carefully to avoid disturbing the carrot roots.
* Fertilizing: Carrots are not heavy feeders, but they will benefit from a light feeding of fertilizer. Use a balanced fertilizer, such as 10-10-10, or a fertilizer specifically formulated for root vegetables. Follow the instructions on the fertilizer package.
* Mulching: Apply a layer of mulch around your carrots to help retain moisture, suppress weeds, and regulate soil temperature. Straw, hay, or shredded leaves are all good choices.
Dealing with Pests and Diseases
Carrots are generally pest-resistant, but there are a few common problems to watch out for.
* Carrot Rust Fly: This is a common pest that can damage carrot roots. The larvae of the carrot rust fly tunnel into the roots, causing them to become discolored and distorted. To prevent carrot rust fly, cover your carrots with row covers or netting. You can also use a sticky trap to catch adult flies.
* Nematodes: These microscopic worms can attack carrot roots, causing them to become stunted and deformed. To prevent nematodes, practice crop rotation and amend your soil with organic matter.
* Leaf Spot Diseases: These fungal diseases can cause spots on carrot leaves. To prevent leaf spot diseases, provide good air circulation and avoid overhead watering.
Harvesting Your Carrots: The Sweet Reward
The moment you’ve been waiting for! You’ll know your carrots are ready to harvest when the tops are about 1/2 to 3/4 inch in diameter.
1. Loosening the Soil: Before you pull your carrots, loosen the soil around them with a garden fork or trowel. This will make it easier to pull them out without breaking them.
2. Pulling the Carrots: Grasp the carrot tops firmly and gently pull the carrots straight up out of the ground. If they’re difficult to pull, try wiggling them back and forth.
3. Cleaning the Carrots: Brush off any excess soil from the carrots. You can also wash them with water.
4. Storing the Carrots: To store your carrots, cut off the tops and store them in a cool, dark place, such as a refrigerator or root cellar. You can also store them in a container of moist sand or sawdust.
Troubleshooting Common Carrot Growing Problems
Even with the best care, you might encounter some problems along the way. Here are a few common issues and how to fix them:
* Carrots are forked or split: This is usually caused by rocky or compacted soil. Make sure to prepare your soil properly before planting.
* Carrots are small and stunted: This could be due to overcrowding, poor soil, or lack of water. Thin your carrots properly, amend your soil with organic matter, and water them regularly.
* Carrots are bitter: This can be caused by hot weather or inconsistent watering. Try to plant your carrots in a location that gets some afternoon shade, and water them consistently.
* Carrot tops are wilting: This could be due to pests, diseases, or lack of water. Check your carrots for pests and diseases, and water them regularly.
Growing your own carrots is a rewarding experience. With a little bit of effort and attention, you can enjoy fresh, delicious carrots straight from your garden. Happy gardening!
Conclusion
So, there you have it! Your comprehensive guide to embarking on the rewarding journey of growing your own carrots. We’ve covered everything from selecting the right carrot varieties and preparing your soil to planting, nurturing, and finally, harvesting those vibrant, homegrown delights. But why is this DIY approach a must-try? Because nothing compares to the taste of a freshly harvested carrot, still warm from the sun and bursting with natural sweetness. Store-bought carrots simply can’t replicate that experience. Plus, you have complete control over the growing process, ensuring your carrots are free from harmful pesticides and herbicides.
Beyond the superior flavor and health benefits, growing your own carrots is incredibly satisfying. It’s a chance to connect with nature, learn about the life cycle of plants, and enjoy the fruits (or rather, vegetables!) of your labor. It’s a project the whole family can enjoy, fostering a love for gardening and healthy eating habits.
Don’t be afraid to experiment! Try different carrot varieties to discover your favorites. Consider companion planting with herbs like rosemary or sage to deter pests and enhance flavor. You can even try growing carrots in containers if you have limited garden space. The possibilities are endless.
This guide to carrot growing for beginners is just the starting point. As you gain experience, you’ll develop your own techniques and preferences. The most important thing is to get started! Don’t be discouraged if your first attempt isn’t perfect. Gardening is a learning process, and every mistake is an opportunity to improve.
We encourage you to take the plunge and experience the joy of growing your own carrots. Imagine the satisfaction of pulling those vibrant orange roots from the soil, knowing you nurtured them from tiny seeds. Share your experiences with us! Let us know what varieties you tried, what challenges you faced, and what successes you celebrated. Post pictures of your carrot harvest on social media and tag us. We can’t wait to see your gardening triumphs!
Now, get out there and get growing! Your delicious, homegrown carrots await.
Frequently Asked Questions (FAQs)
What is the best time of year to plant carrots?
The ideal time to plant carrots depends on your climate. In general, carrots are a cool-season crop, meaning they thrive in temperatures between 60°F and 70°F (15°C and 21°C). For most regions, this means planting in early spring (as soon as the soil can be worked) or late summer for a fall harvest. In warmer climates, you can plant carrots throughout the fall and winter. Check your local planting calendar for specific dates tailored to your region. Successive planting every 2-3 weeks will ensure a continuous harvest throughout the growing season.
How deep should I plant carrot seeds?
Carrot seeds are very small and should be planted shallowly. Aim for a depth of about ¼ to ½ inch (0.6 to 1.3 cm). Cover the seeds lightly with soil or fine compost and gently water them in. Keep the soil consistently moist until the seedlings emerge, which can take anywhere from 7 to 21 days, depending on soil temperature and moisture levels. Using a seed starting mix can help with germination.
What kind of soil is best for growing carrots?
Carrots need loose, well-drained soil to develop properly. Rocky or compacted soil can lead to stunted or misshapen roots. Amend your soil with plenty of organic matter, such as compost or well-rotted manure, to improve drainage and fertility. Avoid using fresh manure, as it can cause forking. A slightly acidic soil pH of 6.0 to 6.8 is ideal. Consider raised beds or containers if your native soil is heavy clay or very rocky.
How often should I water my carrots?
Carrots need consistent moisture to thrive. Water deeply and regularly, especially during dry periods. Aim for about 1 inch of water per week. Avoid overwatering, as this can lead to root rot. Check the soil moisture regularly by sticking your finger into the soil. If the top inch feels dry, it’s time to water. Mulching around your carrot plants can help retain moisture and suppress weeds.
Why are my carrots forking or splitting?
Forking or splitting carrots is often caused by compacted soil, rocks, or uneven watering. As the carrot root grows, it encounters resistance and splits into multiple roots. To prevent this, ensure your soil is loose and well-drained, remove any rocks or debris, and water consistently. Avoid adding too much nitrogen fertilizer, as this can also contribute to forking.
What are some common carrot pests and diseases?
Common carrot pests include carrot rust flies, aphids, and nematodes. Carrot rust flies lay their eggs near the base of the plants, and the larvae burrow into the roots, causing damage. Aphids suck sap from the leaves, weakening the plants. Nematodes are microscopic worms that can damage the roots. Common carrot diseases include leaf blight and root rot. Practice crop rotation, use disease-resistant varieties, and control pests promptly to prevent problems. Companion planting with onions or garlic can help deter pests.
How do I know when my carrots are ready to harvest?
Carrots are typically ready to harvest when they reach the desired size, which depends on the variety. Check the seed packet for specific maturity dates. You can also gently brush away the soil around the top of the carrot to check its size. Carrots are generally ready to harvest when the shoulders are about ¾ to 1 inch in diameter. Harvest carrots on a dry day to prevent rot. Gently loosen the soil around the carrots and pull them straight up.
Can I grow carrots in containers?
Yes, you can successfully grow carrots in containers, especially shorter varieties like ‘Thumbelina’ or ‘Parisian’. Choose a container that is at least 12 inches deep and wide to allow the roots to develop properly. Use a well-draining potting mix and water regularly. Place the container in a sunny location. Container gardening is a great option for those with limited space or poor soil.
What are some good companion plants for carrots?
Carrots benefit from companion planting with several herbs and vegetables. Onions and garlic deter carrot rust flies. Rosemary and sage also repel pests. Lettuce and radishes can be planted between rows of carrots to help break up the soil and provide shade. Marigolds attract beneficial insects that prey on pests. Avoid planting carrots near fennel or dill, as they can inhibit growth.
How do I store my harvested carrots?
To store harvested carrots, remove the green tops and gently brush off any excess soil. Do not wash the carrots until you are ready to use them. Store the carrots in a cool, dark, and humid place, such as a refrigerator or root cellar. You can wrap them in a damp paper towel or store them in a perforated plastic bag to help retain moisture. Carrots can typically be stored for several weeks or even months under the right conditions.
Can I save carrot seeds for next year?
Saving carrot seeds is possible, but it’s a two-year process. Carrots are biennials, meaning they produce flowers and seeds in their second year. You’ll need to overwinter your best carrot plants and allow them to flower the following spring. However, carrots are cross-pollinated, so if you’re growing multiple varieties, the seeds may not be true to type. For best results, isolate your carrot plants to prevent cross-pollination.
Leave a Comment