
Cauliflower growing tips are essential for anyone dreaming of harvesting their own creamy, delicious heads of this versatile vegetable. Have you ever imagined strolling through your backyard, basket in hand, ready to pluck a perfectly formed cauliflower, knowing exactly where it came from and how lovingly it was grown? It’s a rewarding experience, and with the right knowledge, it’s totally achievable, even for beginner gardeners!
Cauliflower, a member of the Brassica family, has a rich history, dating back to ancient times in the Mediterranean region. Over centuries, it has evolved from its wild ancestor into the familiar vegetable we enjoy today. Growing your own cauliflower connects you to this long tradition, allowing you to cultivate a piece of history right in your backyard.
But let’s be honest, growing cauliflower can sometimes feel like a challenge. Pests, diseases, and unpredictable weather can all threaten your crop. That’s why I’ve put together this guide filled with practical cauliflower growing tips and DIY hacks to help you navigate these hurdles and ensure a bountiful harvest. We’ll cover everything from soil preparation and seed starting to pest control and harvesting techniques. With these simple yet effective strategies, you’ll be well on your way to enjoying homegrown cauliflower in no time!
Growing Cauliflower Like a Pro: My Foolproof DIY Guide
Hey there, fellow gardeners! I’m so excited to share my tried-and-true method for growing gorgeous, healthy cauliflower. I know, I know, cauliflower can be a bit finicky, but trust me, with a little planning and these simple steps, you’ll be harvesting beautiful heads in no time. I’ve learned a lot over the years, and I’m here to break it down for you in a way that’s easy to understand and follow. Let’s get started!
Choosing the Right Cauliflower Variety
Before we even think about planting, it’s crucial to pick the right cauliflower variety for your climate and growing season. Different varieties mature at different rates, so you’ll want to choose one that fits your local conditions.
* Consider your climate: If you live in a warmer climate, look for heat-tolerant varieties. If you have shorter summers, opt for early-maturing types.
* Think about your growing season: How long is your growing season? This will determine which varieties you can successfully grow.
* Do some research: Check with your local garden center or online resources to find out which varieties are recommended for your area.
Some of my personal favorites include:
* Snowball Y Improved: A classic, reliable variety that produces medium-sized, pure white heads.
* Cheddar: This one’s fun! It produces beautiful orange heads that are packed with nutrients.
* Graffiti: If you want to add some color to your garden, Graffiti cauliflower produces stunning purple heads.
* Early White Hybrid: A great choice for shorter growing seasons.
Preparing Your Soil: The Foundation for Success
Cauliflower is a heavy feeder, meaning it needs nutrient-rich soil to thrive. Proper soil preparation is absolutely essential for a successful harvest.
* Choose a sunny location: Cauliflower needs at least 6 hours of direct sunlight per day.
* Test your soil: A soil test will tell you the pH level and nutrient content of your soil. Cauliflower prefers a slightly acidic to neutral pH (around 6.0 to 7.0).
* Amend your soil: Based on your soil test results, amend your soil with compost, well-rotted manure, or other organic matter. This will improve drainage, aeration, and nutrient content.
* Ensure good drainage: Cauliflower doesn’t like soggy soil, so make sure your soil drains well. If you have heavy clay soil, consider adding sand or perlite to improve drainage.
Starting Your Cauliflower Seeds (or Buying Transplants)
You have two options for starting your cauliflower: you can either start your own seeds indoors or buy transplants from a garden center. I personally prefer starting my own seeds because it gives me more control over the process, but buying transplants is a perfectly fine option, especially if you’re short on time or space.
Starting Seeds Indoors:
1. Sow your seeds: About 4-6 weeks before the last expected frost, sow your cauliflower seeds in seed trays or small pots filled with seed-starting mix. Plant the seeds about 1/4 inch deep.
2. Keep the soil moist: Water the seeds gently and keep the soil consistently moist, but not soggy.
3. Provide warmth: Cauliflower seeds germinate best at temperatures between 65-75°F (18-24°C). You can use a heat mat to help maintain the proper temperature.
4. Provide light: Once the seedlings emerge, provide them with plenty of light. If you don’t have a sunny window, you can use grow lights.
5. Harden off the seedlings: Before transplanting the seedlings outdoors, you’ll need to harden them off. This means gradually exposing them to outdoor conditions over a period of 7-10 days. Start by placing them in a sheltered spot for a few hours each day, gradually increasing the amount of time they spend outdoors.
Buying Transplants:
1. Choose healthy transplants: Look for transplants that are healthy and vigorous, with green leaves and a strong stem. Avoid plants that are yellowed, wilted, or have signs of pests or diseases.
2. Harden off the transplants: Even if you buy transplants, it’s still a good idea to harden them off for a few days before planting them in your garden.
Planting Your Cauliflower: Giving Them a Good Start
Now comes the fun part – planting your cauliflower in the garden!
1. Choose a cloudy day: Plant your cauliflower on a cloudy day or in the late afternoon to minimize stress on the plants.
2. Space them properly: Space your cauliflower plants about 18-24 inches apart in rows that are 24-36 inches apart. This will give them enough room to grow and mature.
3. Dig the holes: Dig holes that are slightly larger than the root ball of the transplants.
4. Plant the transplants: Gently remove the transplants from their containers and place them in the holes. Make sure the top of the root ball is level with the surrounding soil.
5. Fill in the holes: Fill in the holes with soil and gently firm the soil around the plants.
6. Water thoroughly: Water the transplants thoroughly after planting.
Caring for Your Cauliflower: Keeping Them Happy and Healthy
Once your cauliflower is planted, it’s important to provide them with the care they need to thrive.
* Water regularly: Cauliflower needs consistent moisture, especially during hot, dry weather. Water deeply and regularly, aiming for about 1-2 inches of water per week.
* Fertilize regularly: As I mentioned, cauliflower is a heavy feeder, so you’ll need to fertilize them regularly. Use a balanced fertilizer or a fertilizer specifically formulated for vegetables. Follow the instructions on the fertilizer package. I like to use a liquid fertilizer every couple of weeks.
* Weed regularly: Keep your cauliflower patch free of weeds. Weeds compete with cauliflower for nutrients and water.
* Mulch: Apply a layer of mulch around your cauliflower plants to help retain moisture, suppress weeds, and regulate soil temperature. I like to use straw or wood chips.
* Protect from pests: Cauliflower is susceptible to a variety of pests, including cabbage worms, aphids, and flea beetles. Inspect your plants regularly for signs of pests and take action to control them if necessary. I prefer using organic pest control methods, such as insecticidal soap or neem oil.
* Blanching (Optional): Blanching is the process of covering the developing cauliflower head to keep it white. While not strictly necessary, blanching can help prevent the head from turning yellow or brown. To blanch, simply tie the outer leaves of the plant together over the developing head when it reaches about 2-3 inches in diameter. Use twine or rubber bands to secure the leaves.
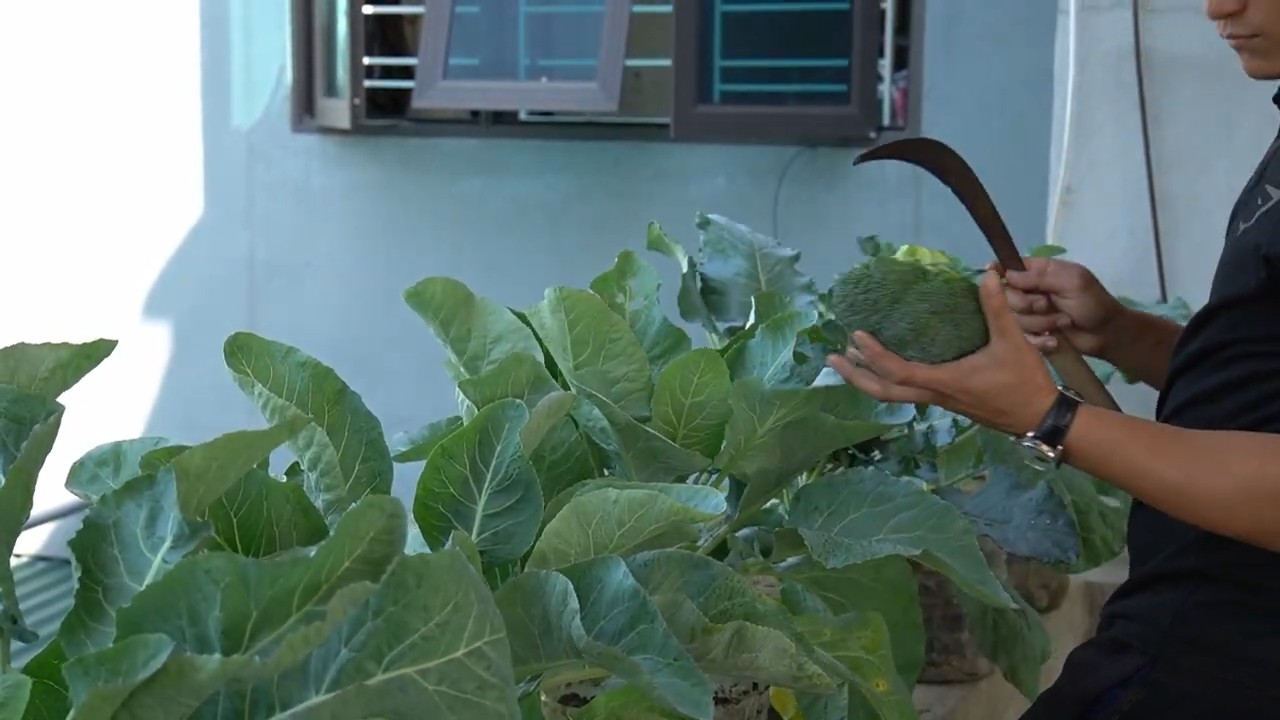
Harvesting Your Cauliflower: The Moment of Truth
After all your hard work, it’s finally time to harvest your cauliflower!
1. Check for maturity: Cauliflower is typically ready to harvest when the head is firm, compact, and about 6-8 inches in diameter. The exact size will depend on the variety.
2. Cut the head: Use a sharp knife to cut the head from the plant, leaving a few leaves attached to protect the head.
3. Harvest in the morning: Harvest your cauliflower in the morning, when the temperatures are cooler.
4. Store properly: Store your cauliflower in the refrigerator for up to a week.
Troubleshooting Common Cauliflower Problems
Even with the best care, you may encounter some problems when growing cauliflower. Here are a few common issues and how to address them:
* Buttoning: This is when the cauliflower head forms prematurely and remains small. It’s often caused by stress, such as lack of water or nutrients. Make sure you’re providing your cauliflower with adequate water and fertilizer.
* Yellowing heads: Yellowing heads can be caused by sun exposure or nutrient deficiencies. Blanching can help prevent yellowing.
* Pest infestations: As mentioned earlier, cauliflower is susceptible to a variety of pests. Inspect your plants regularly and take action to control pests as needed.
* Clubroot: This is a soilborne disease that can cause stunted growth and swollen roots. To prevent clubroot, make sure your soil is well-drained and has a pH of at least 7.0. You can also rotate your crops to avoid planting cauliflower in the same spot year after year.
Extra Tips for Cauliflower Success
* Succession planting: To extend your harvest, consider succession planting. This means planting new cauliflower plants every few weeks.
* Companion planting: Plant cauliflower with companion plants, such as herbs and flowers, to attract beneficial insects and deter pests.
* Don’t give up! Cauliflower can be a bit challenging to grow, but don’t get
Conclusion
So, there you have it! Mastering the art of growing cauliflower doesn’t have to be an intimidating endeavor. By implementing these simple yet effective DIY tricks, you’re well on your way to harvesting beautiful, bountiful heads of cauliflower right in your own backyard. We’ve covered everything from soil preparation and seed starting to pest control and harvesting, providing you with a comprehensive guide to success.
Why is this a must-try? Because store-bought cauliflower simply can’t compare to the flavor and satisfaction of growing your own. Imagine the crisp, fresh taste of cauliflower picked straight from the garden, knowing you nurtured it from seed to table. Plus, you have complete control over the growing process, ensuring your cauliflower is free from harmful pesticides and chemicals. This is especially important if you are looking for organic produce.
But the journey doesn’t end here! Feel free to experiment with different varieties of cauliflower. Try growing purple, orange, or even Romanesco cauliflower for a visually stunning and equally delicious harvest. Consider companion planting to deter pests naturally. Marigolds, for example, are excellent at repelling nematodes, while rosemary can help keep cabbage moths away.
Don’t be afraid to adjust the watering schedule based on your local climate and soil conditions. Remember, consistent moisture is key, but avoid overwatering, which can lead to root rot. If you live in an area with intense sunlight, provide some afternoon shade to protect the developing heads from scorching.
And speaking of variations, consider pickling your cauliflower for a tangy treat, roasting it with your favorite spices for a flavorful side dish, or even pureeing it into a creamy, low-carb soup. The possibilities are endless!
We are confident that these **cauliflower growing tips** will empower you to cultivate a thriving cauliflower patch. But the real magic happens when you put these tips into practice and adapt them to your own unique garden environment.
We encourage you to embark on this rewarding gardening adventure. Start small, be patient, and don’t be discouraged by initial setbacks. Gardening is a learning process, and every season brings new opportunities for growth and improvement.
Most importantly, we want to hear about your experiences! Share your successes, challenges, and any additional tips you discover along the way. Connect with fellow gardeners online, exchange ideas, and inspire others to embrace the joy of growing their own food. Post pictures of your beautiful cauliflower heads on social media using relevant hashtags and tag us! Let’s create a community of passionate cauliflower growers who are dedicated to sharing their knowledge and helping each other succeed.
Happy gardening, and may your cauliflower harvest be abundant!
Frequently Asked Questions (FAQ)
1. What is the best time of year to plant cauliflower?
The best time to plant cauliflower depends on your climate. Cauliflower thrives in cool weather, so it’s typically planted in the spring or fall. For a spring crop, start seeds indoors 6-8 weeks before the last expected frost. Transplant seedlings outdoors 2-3 weeks before the last frost. For a fall crop, start seeds indoors in mid-summer and transplant seedlings outdoors in late summer or early fall. The goal is to have the cauliflower mature during cool weather, as high temperatures can cause the heads to become loose and bitter. Check your local extension office for specific planting dates in your area.
2. What kind of soil does cauliflower need?
Cauliflower requires well-drained, fertile soil that is rich in organic matter. The ideal soil pH is between 6.0 and 7.0. Before planting, amend the soil with compost, aged manure, or other organic materials to improve drainage and fertility. Cauliflower is a heavy feeder, so it’s also beneficial to incorporate a slow-release fertilizer into the soil at planting time. Consider a soil test to determine any nutrient deficiencies and amend accordingly.
3. How much sun does cauliflower need?
Cauliflower needs at least 6 hours of direct sunlight per day to thrive. Choose a planting location that receives full sun for optimal growth and head development. If you live in a hot climate, providing some afternoon shade can help prevent the heads from scorching.
4. How often should I water cauliflower?
Cauliflower needs consistent moisture to produce large, healthy heads. Water deeply and regularly, especially during dry periods. Aim to keep the soil consistently moist but not waterlogged. Mulching around the plants can help retain moisture and suppress weeds. A good rule of thumb is to water when the top inch of soil feels dry to the touch.
5. How do I prevent cauliflower from bolting (going to seed)?
Bolting is often caused by stress, such as extreme temperatures or inconsistent watering. To prevent bolting, choose heat-tolerant varieties if you live in a warm climate. Provide consistent moisture and avoid letting the soil dry out completely. Protect the plants from extreme temperature fluctuations by providing shade during hot weather and covering them during cold snaps.
6. What are common pests and diseases that affect cauliflower?
Common pests that affect cauliflower include cabbage worms, aphids, flea beetles, and cabbage root maggots. Common diseases include clubroot, black rot, and downy mildew. To prevent pest and disease problems, practice crop rotation, use row covers to protect plants from pests, and choose disease-resistant varieties. Inspect plants regularly for signs of pests or diseases and take action promptly. Organic pest control methods include using insecticidal soap, neem oil, and Bacillus thuringiensis (Bt).
7. How do I know when cauliflower is ready to harvest?
Cauliflower is ready to harvest when the head is firm, compact, and reaches the desired size. The size of the head will vary depending on the variety. The curds should be tightly packed and white (or the color of the variety you are growing). Check the back of the seed packet for the expected head size and maturity date. Harvest cauliflower in the morning when the heads are cool and crisp.
8. What is blanching cauliflower and why is it important?
Blanching is the process of covering the developing cauliflower head to protect it from sunlight. This helps to keep the head white and prevents it from turning yellow or brown. To blanch cauliflower, simply tie the outer leaves together over the head when it reaches about 2-3 inches in diameter. Use twine or rubber bands to secure the leaves. Check the head regularly and harvest when it reaches the desired size. Some varieties are self-blanching, meaning the leaves naturally curl inward to protect the head.
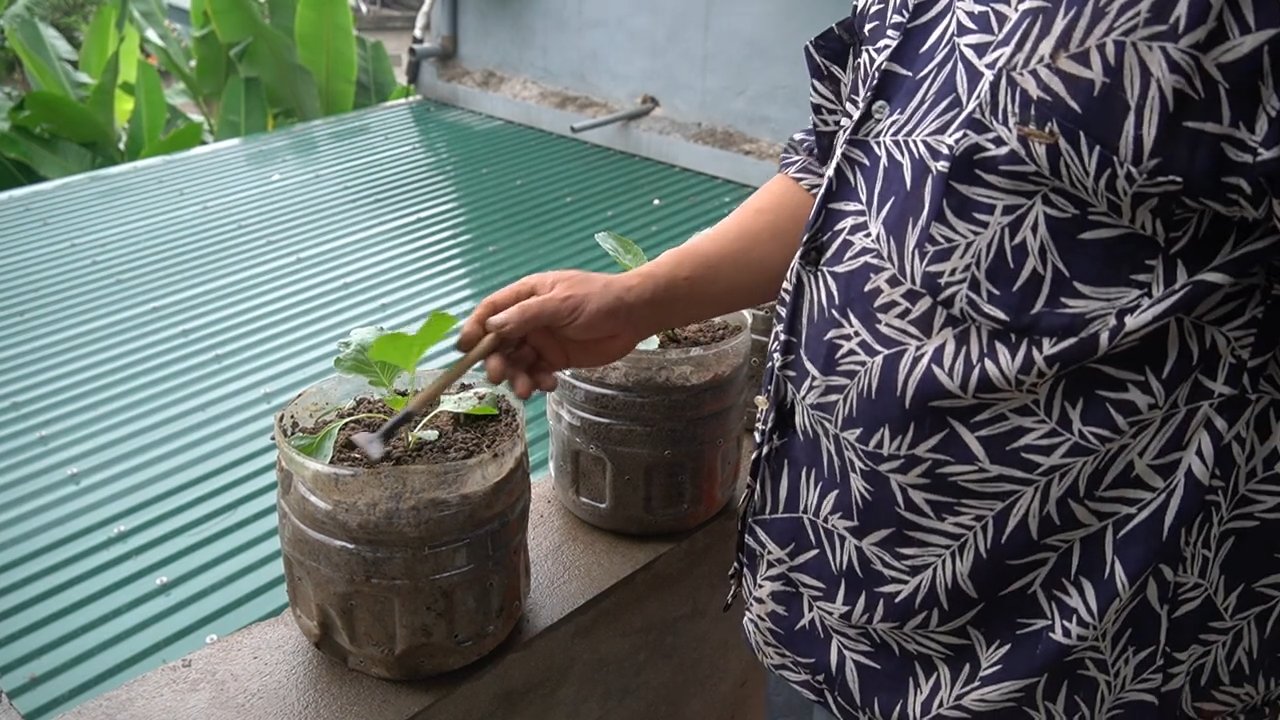
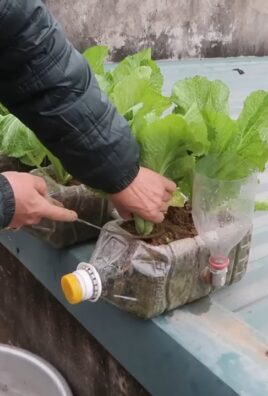
9. Can I grow cauliflower in containers?
Yes, you can grow cauliflower in containers, but you’ll need to choose a large container (at least 5 gallons) to accommodate the plant’s root system. Use a well-draining potting mix and provide regular watering and fertilization. Container-grown cauliflower may require more frequent watering than plants grown in the ground.
10. What are some good companion plants for cauliflower?
Good companion plants for cauliflower include herbs like rosemary, thyme, and sage, which can help deter pests. Marigolds are also effective at repelling nematodes. Other beneficial companion plants include beans, peas, and onions. Avoid planting cauliflower near strawberries or tomatoes, as they can inhibit growth.
11. How can I improve the flavor of my homegrown cauliflower?
The flavor of homegrown cauliflower can be enhanced by providing optimal growing conditions. Ensure the plants receive adequate sunlight, water, and nutrients. Harvest the heads when they are fully mature but before they become overripe. Cooking methods can also affect the flavor. Roasting cauliflower with herbs and spices can bring out its natural sweetness, while steaming or boiling can result in a milder flavor.
12. What should I do if my cauliflower head is loose or has small florets?
A loose cauliflower head with small florets can be caused by several factors, including high temperatures, inconsistent watering, or nutrient deficiencies. To prevent this, choose heat-tolerant varieties, provide consistent moisture, and fertilize regularly. If you notice a loose head developing, try providing some afternoon shade to protect the plant from excessive heat.

Leave a Comment