
Container tomato growing shortcuts – who doesn’t want them? Imagine biting into a juicy, sun-ripened tomato, bursting with flavor, all grown right on your patio or balcony. Sounds idyllic, right? But let’s be honest, sometimes the reality of container gardening can feel a little less idyllic and a little more…laborious. That’s where these clever DIY tricks come in!
For centuries, humans have cultivated tomatoes, tracing back to their origins in South America. From humble beginnings, they’ve become a global staple, a symbol of summer abundance. But not everyone has access to sprawling gardens. That’s why container gardening, and specifically container tomato growing shortcuts, are so essential for modern living.
I know I’ve been there – spending hours watering, fertilizing, and battling pests, only to end up with a handful of lackluster tomatoes. It’s frustrating! That’s why I’ve compiled this collection of easy-to-implement DIY hacks that will help you maximize your yield, minimize your effort, and finally achieve that dream of homegrown tomato goodness. These aren’t just random tips; they’re tried-and-true methods that I’ve personally used to transform my own container tomato garden. So, ditch the overwhelm and get ready to discover some game-changing secrets to successful container tomato growing!
Container Tomato Growing: My Foolproof Shortcuts for a Bountiful Harvest!
Hey fellow gardeners! I’m so excited to share my favorite container tomato growing hacks with you. I’ve been growing tomatoes in containers for years, and I’ve learned a thing or two about maximizing yield and minimizing effort. Forget complicated setups and endless watering – these shortcuts will have you harvesting juicy, delicious tomatoes in no time!
Choosing the Right Container and Soil
This is where it all begins! Don’t skimp on this step; it’s crucial for success.
* Container Size Matters: Go big or go home! Seriously, for most tomato varieties, you’ll want a container that’s at least 20 gallons. I prefer 25-gallon containers; they give the roots plenty of room to spread out. Smaller containers will work for dwarf or patio varieties, but even then, bigger is generally better.
* Drainage is Key: Make sure your container has excellent drainage holes. Tomatoes hate sitting in soggy soil. If your container doesn’t have enough holes, drill a few more.
* Container Material: Plastic, resin, terracotta – they all work! Plastic and resin containers retain moisture better, which can be a plus in hot climates. Terracotta looks beautiful but dries out faster, so you’ll need to water more frequently. I personally use a mix of plastic and resin containers.
* Soil Selection: Don’t use garden soil! It’s too heavy and compacts easily in containers. Instead, opt for a high-quality potting mix specifically formulated for vegetables. I like to amend my potting mix with compost for added nutrients and drainage.
Planting Your Tomato Seedlings (The Right Way!)
Getting your seedlings off to a good start is essential.
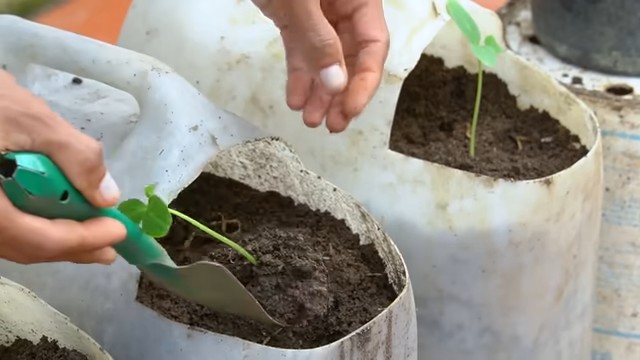
1. Harden Off Your Seedlings: If you’re starting with seedlings from a nursery, gradually acclimate them to outdoor conditions before planting. This process, called “hardening off,” involves exposing them to increasing amounts of sunlight and wind over a week or two. Start with an hour or two of shade and gradually increase the time and sun exposure. This prevents transplant shock.
2. Plant Deep: This is one of my biggest secrets! When planting your tomato seedlings, bury the stem up to the first set of leaves. Tomatoes can grow roots along their stems, so planting deep encourages a stronger, more extensive root system. This leads to a healthier, more productive plant.
3. Add Mycorrhizae: Sprinkle mycorrhizae fungi into the planting hole before placing the seedling. These beneficial fungi form a symbiotic relationship with the tomato roots, helping them absorb nutrients and water more efficiently. It’s like giving your plants a super boost!
4. Water Thoroughly: After planting, water the seedlings deeply to settle the soil and encourage root growth.
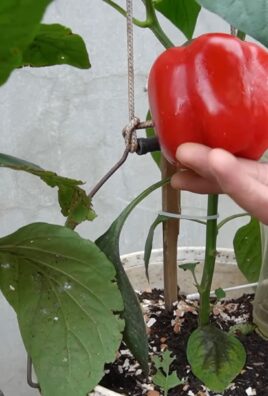
Support System: Staking, Caging, or Trellising
Tomatoes are notorious for getting heavy and sprawling. Providing support is crucial to prevent them from collapsing and to keep the fruit off the ground.
* Staking: This is the simplest option. Drive a sturdy stake into the ground near the seedling and tie the main stem to the stake as it grows.
* Caging: Tomato cages provide all-around support. Choose a sturdy cage that’s tall enough for your tomato variety.
* Trellising: This is my preferred method for indeterminate tomato varieties (the ones that keep growing and producing all season). Trellising allows for better airflow and makes it easier to harvest the fruit. I use a simple A-frame trellis made from wood.
Watering and Feeding: The Lazy Gardener’s Approach
Consistent watering and feeding are essential for healthy tomato plants, but you don’t have to spend hours fussing over them.
1. Water Deeply and Infrequently: Water deeply whenever the top inch or two of soil feels dry. Avoid shallow, frequent watering, which encourages shallow root growth. Deep watering encourages the roots to grow deeper, making the plant more drought-tolerant.
2. Mulch, Mulch, Mulch!: Apply a thick layer of mulch around the base of the plants. Mulch helps retain moisture, suppress weeds, and regulate soil temperature. I use straw, shredded leaves, or wood chips.
3. Slow-Release Fertilizer: Incorporate a slow-release fertilizer into the potting mix at planting time. This provides a steady supply of nutrients throughout the growing season. I like to use an organic fertilizer specifically formulated for tomatoes.
4. Foliar Feeding (Optional): Once the plants start setting fruit, I occasionally give them a foliar feeding with a seaweed extract. This provides a boost of micronutrients and helps improve fruit quality.
Pruning for Maximum Production
Pruning can seem intimidating, but it’s actually quite simple and can significantly increase your tomato yield.
* Identify Suckers: Suckers are small shoots that grow in the “armpit” between the main stem and a branch.
* Prune Suckers on Indeterminate Varieties: For indeterminate varieties, prune the suckers regularly. This directs the plant’s energy into producing fruit rather than foliage. I usually prune them when they’re a few inches long.
* Don’t Prune Determinate Varieties: Determinate varieties (bush tomatoes) don’t need much pruning. Just remove any dead or diseased leaves.
Pest and Disease Control: Keeping it Simple
Prevention is always better than cure when it comes to pests and diseases.
1. Choose Disease-Resistant Varieties: Look for tomato varieties that are resistant to common diseases like early blight, late blight, and verticillium wilt.
2. Good Air Circulation: Ensure good air circulation around your plants by spacing them properly and pruning away any overcrowded foliage.
3. Water at the Base of the Plants: Avoid wetting the foliage when watering, as this can create a favorable environment for fungal diseases.
4. Inspect Regularly: Check your plants regularly for signs of pests or diseases. The sooner you catch a problem, the easier it is to control.
5. Organic Pest Control: If you do encounter pests, try organic control methods first. Insecticidal soap, neem oil, and Bacillus thuringiensis (Bt) are all effective against common tomato pests.
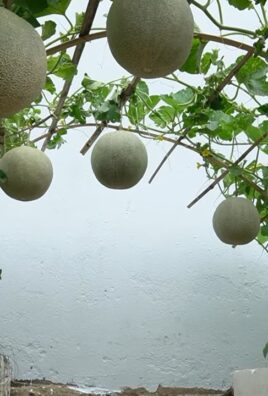
Harvesting Your Bounty
This is the best part!
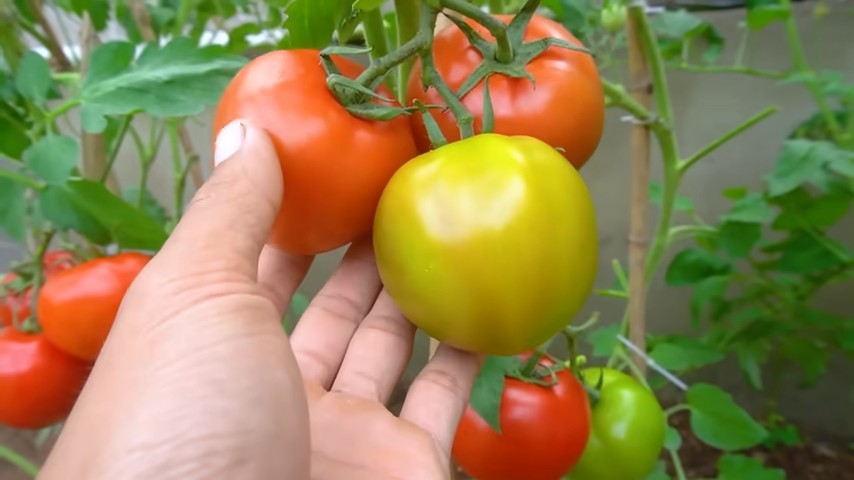
1. Wait for Full Color: Allow the tomatoes to ripen fully on the vine for the best flavor. They should be uniformly colored and slightly soft to the touch.
2. Gently Twist and Pull: To harvest, gently twist and pull the tomato from the vine.
3. Enjoy! Eat them fresh, make sauce, or preserve them for later.
Specific Hacks I Swear By
Okay, now for the real gold – my personal hacks that have made all the difference in my container tomato growing journey!
* Epsom Salt Boost: When planting, I add a tablespoon of Epsom salt to the planting hole. Epsom salt provides magnesium, which helps with nutrient uptake and prevents blossom end rot.
* Coffee Grounds: I sprinkle used coffee grounds around the base of my tomato plants. Coffee grounds are a great source of nitrogen and other nutrients. Plus, they help deter slugs and snails.
* Eggshells: I crush eggshells and add them to the soil. Eggshells are a good source of calcium, which helps prevent blossom end rot.
* Companion Planting: I plant basil and marigolds near my tomatoes. Basil repels tomato hornworms and other pests, while marigolds deter nematodes.
* Self-Watering Containers (DIY): You can easily convert a large plastic container into a self-watering container. This reduces the need for frequent watering and helps keep the soil consistently moist. There are tons of tutorials online!
* Bottom Pruning: As the plant grows, prune the bottom leaves that touch the soil. This helps prevent soil-borne diseases from splashing onto the plant.
* Sun Protection: In extremely hot climates, provide some afternoon shade for your tomato plants. This can prevent sunscald and improve fruit quality. A simple shade cloth works wonders.
Troubleshooting Common Problems
Even with the best care, you might encounter some problems along the way. Here are a few common issues and how to address them:
* Blossom End Rot: This is caused by a calcium deficiency. Add calcium to the soil (egg shells, bone meal) and ensure consistent watering.
* Early Blight: This fungal disease causes dark spots on the leaves. Remove affected leaves and apply a fungicide.
* Tomato Hornworms: These large green caterpillars can quickly defoliate your tomato plants. Handpick them off or use Bt.
* Aphids: These small insects suck the sap from the leaves. Spray them with insecticidal soap.
* Whiteflies: These tiny white insects fly up when you disturb the plant. Spray them with insecticidal soap or neem oil.
Choosing the Right Tomato Variety for Containers
Not all tomato varieties are created equal when it comes to container gardening. Here’s a quick guide:
*
Conclusion
So, there you have it! Mastering the art of container tomato growing doesn’t have to be a daunting task. By incorporating these simple yet effective DIY tricks, you’re not just growing tomatoes; you’re cultivating a thriving, bountiful garden right on your patio, balcony, or even windowsill. We’ve explored how to optimize drainage with readily available materials, create nutrient-rich soil amendments using kitchen scraps, and construct ingenious support systems to keep your precious plants upright and healthy.
These aren’t just shortcuts; they’re smart cuts. They’re about working *with* nature, understanding the needs of your tomato plants, and providing them with the optimal environment to flourish. Think of the satisfaction of biting into a sun-ripened tomato, bursting with flavor, knowing that you nurtured it from seedling to harvest using your own ingenuity and resourcefulness. That’s a reward that store-bought tomatoes simply can’t match.
But the beauty of these DIY tricks lies in their adaptability. Feel free to experiment! Instead of plastic bottles for drainage, try using old terracotta shards. If you don’t have eggshells for calcium, consider adding bone meal to your soil mix. Get creative with your support systems – bamboo stakes, repurposed tomato cages, or even a trellis made from salvaged wood can all work wonders. The possibilities are endless!
Embrace the DIY Spirit
Don’t be afraid to get your hands dirty and try something new. Gardening is a journey of learning and discovery, and these container tomato growing shortcuts are just the beginning. The most important thing is to observe your plants, pay attention to their needs, and adjust your approach accordingly.
Share Your Success (and Challenges!)
We’re incredibly excited for you to embark on this container tomato growing adventure. And we want to hear all about it! Share your experiences, your successes, and even your challenges in the comments below. What DIY tricks worked best for you? What variations did you try? What lessons did you learn along the way? Your insights can help other gardeners, both beginners and experienced, to grow even more delicious tomatoes.
So, grab your containers, gather your supplies, and get ready to transform your space into a tomato-growing paradise. With a little bit of effort and a whole lot of creativity, you’ll be enjoying fresh, homegrown tomatoes in no time. Happy gardening!
Frequently Asked Questions (FAQ)
What are the most common problems people face when growing tomatoes in containers?
One of the biggest challenges is providing adequate drainage. Containers, unlike garden beds, can easily become waterlogged, leading to root rot and other fungal diseases. Another common issue is nutrient deficiency. Container soil tends to deplete nutrients faster than garden soil, so regular fertilization is crucial. Insufficient sunlight is also a frequent problem, as tomatoes need at least 6-8 hours of direct sunlight per day. Finally, lack of support can cause plants to become leggy and prone to breakage, especially when laden with fruit. These DIY tricks address all of these common problems, offering simple and effective solutions.
How often should I water my container tomatoes?
Watering frequency depends on several factors, including the size of your container, the type of soil you’re using, the weather conditions, and the stage of growth of your tomato plants. As a general rule, water deeply whenever the top inch of soil feels dry to the touch. During hot, sunny weather, you may need to water daily, or even twice a day. Avoid overwatering, as this can lead to root rot. A good way to check is to stick your finger about an inch into the soil. If it feels dry, it’s time to water. If it feels moist, wait a day or two.
What kind of fertilizer should I use for container tomatoes?
Tomatoes are heavy feeders, so they need a fertilizer that is rich in nitrogen, phosphorus, and potassium (NPK). A balanced fertilizer with an NPK ratio of 5-10-5 or 10-10-10 is a good starting point. You can also use a fertilizer specifically formulated for tomatoes. Organic options, such as compost tea, fish emulsion, and bone meal, are also excellent choices. Fertilize regularly, following the instructions on the fertilizer package. Typically, you’ll want to fertilize every 2-3 weeks during the growing season. Remember that the DIY soil amendments mentioned in the article, like eggshells and coffee grounds, can also contribute to the nutrient content of your soil.
How do I prevent pests and diseases from attacking my container tomatoes?
Prevention is key when it comes to pests and diseases. Start by choosing disease-resistant tomato varieties. Ensure good air circulation around your plants by spacing them properly and pruning away any suckers (the small shoots that grow between the main stem and the branches). Regularly inspect your plants for signs of pests or diseases. If you spot any problems, address them promptly. Insecticidal soap and neem oil are effective organic treatments for many common tomato pests. For fungal diseases, try using a copper-based fungicide. Also, avoid overhead watering, as this can create a humid environment that encourages fungal growth.
Can I grow tomatoes in containers indoors?
Yes, you can grow tomatoes in containers indoors, but it requires providing them with adequate light. Tomatoes need at least 6-8 hours of direct sunlight per day, which can be difficult to achieve indoors. If you don’t have a sunny window, you’ll need to supplement with grow lights. Choose a full-spectrum grow light and position it close to your plants. Also, be sure to pollinate your tomato flowers manually, as there won’t be any bees or other pollinators indoors. You can do this by gently shaking the plants or using a small brush to transfer pollen from one flower to another.
What size container is best for growing tomatoes?
The ideal container size depends on the type of tomato you’re growing. Determinate tomatoes, which are bushier and more compact, can be grown in containers as small as 5 gallons. Indeterminate tomatoes, which are vining and can grow very tall, need larger containers, at least 10 gallons or more. The larger the container, the more room the roots will have to grow, and the more water and nutrients the plant will be able to access.
How do I know when my tomatoes are ripe?
The color of the tomato is a good indicator of ripeness. Most tomato varieties will turn from green to red, yellow, orange, or pink when they are ripe. The tomato should also feel slightly soft to the touch, but not mushy. Gently squeeze the tomato; if it gives slightly, it’s ready to be picked. The stem should also detach easily from the plant when the tomato is ripe.
What are some variations on the DIY tricks mentioned in the article?
Instead of plastic bottles for drainage, you can use packing peanuts, gravel, or even old pieces of broken terracotta pots. For soil amendments, you can add other kitchen scraps, such as banana peels (for potassium) and coffee filters (for nitrogen). For support systems, you can use bamboo stakes, tomato cages, or even build your own trellis from salvaged wood. Get creative and experiment with different materials and techniques to see what works best for you.
What if I don’t have a compost bin for making compost tea?
No problem! You can still make a simple compost tea by steeping a handful of compost in a bucket of water for a few days. Strain the mixture and use the liquid to water your tomato plants. This will provide them with a boost of nutrients and beneficial microbes.
How can I encourage more fruit production on my tomato plants?
Pruning is key to encouraging more fruit production. Remove any suckers that grow between the main stem and the branches. These suckers will steal energy from the plant and reduce fruit production. Also, be sure to provide your plants with adequate sunlight, water, and fertilizer. Pollinating the flowers manually can also help to increase fruit set, especially if you’re growing tomatoes indoors or in an area with few pollinators.
Leave a Comment