
Cowpea garden DIY projects are a fantastic way to bring fresh, nutritious food right to your doorstep! Have you ever dreamed of strolling into your backyard and harvesting a bounty of delicious cowpeas, also known as black-eyed peas? Well, dream no more! This article is packed with simple, effective DIY tricks and hacks that will transform even the most novice gardener into a cowpea-growing pro.
Cowpeas have a rich history, dating back thousands of years to Africa, where they were a staple food. They eventually made their way to other parts of the world, including the Americas, where they became an integral part of Southern cuisine. Growing your own cowpeas is not just about fresh food; it’s about connecting with a legacy of sustainable agriculture and delicious flavors.
Why do you need these cowpea garden DIY tricks? Because growing your own food is empowering! Store-bought produce can be expensive and often lacks the flavor and freshness of homegrown vegetables. Plus, knowing exactly where your food comes from and how it was grown gives you peace of mind. I’m here to guide you through the process, sharing easy-to-follow steps and clever hacks that will help you cultivate a thriving cowpea garden, regardless of your experience level. Get ready to roll up your sleeves and discover the joy of growing your own delicious cowpeas!

DIY Kuhbohnen-Garten: Dein eigener kleiner Ernte-Himmel!
Hey Gartenfreunde! Ich liebe es, frisches Gemüse direkt aus dem Garten zu ernten, und Kuhbohnen sind da keine Ausnahme. Sie sind nicht nur super lecker, sondern auch unglaublich einfach anzubauen, selbst wenn du keinen riesigen Garten hast. In diesem Artikel zeige ich dir, wie du deinen eigenen Kuhbohnen-Garten anlegen kannst, egal ob im Beet, im Topf oder sogar vertikal! Lass uns loslegen!
Was du für deinen Kuhbohnen-Garten brauchst:
Bevor wir loslegen, hier eine Liste der Dinge, die du benötigst:
* Kuhbohnensamen: Wähle eine Sorte, die dir gefällt! Es gibt Buschbohnen, Stangenbohnen und viele verschiedene Farben und Geschmacksrichtungen.
* Gartenerde: Gute, nährstoffreiche Erde ist das A und O. Du kannst entweder Gartenerde aus dem Baumarkt verwenden oder deine eigene Kompostmischung herstellen.
* Dünger: Ein organischer Dünger, wie Kompost oder Hornspäne, hilft den Pflanzen beim Wachsen.
* Pflanzgefäße (optional): Wenn du keinen Garten hast, kannst du Kuhbohnen auch in Töpfen oder Kübeln anbauen. Achte darauf, dass sie groß genug sind (mindestens 30 cm Durchmesser).
* Rankhilfe (optional): Für Stangenbohnen brauchst du eine Rankhilfe, wie z.B. ein Spalier, ein Zaun oder Bambusstäbe.
* Gießkanne oder Gartenschlauch: Zum Bewässern deiner Pflanzen.
* Gartenwerkzeug: Eine Schaufel, eine Harke und eventuell ein Unkrautstecher.
* Mulch (optional): Mulch hilft, die Feuchtigkeit im Boden zu halten und Unkraut zu unterdrücken. Stroh, Holzhackschnitzel oder Grasschnitt eignen sich gut.
Die Vorbereitung: Der Grundstein für eine reiche Ernte
Bevor du mit dem Pflanzen beginnst, ist es wichtig, den Boden vorzubereiten. Kuhbohnen bevorzugen einen sonnigen Standort mit gut durchlässigem Boden.
1. Standortwahl: Suche dir einen sonnigen Platz in deinem Garten oder auf deinem Balkon aus. Kuhbohnen brauchen mindestens 6 Stunden Sonne pro Tag.
2. Bodenbearbeitung: Lockere den Boden mit einer Schaufel oder Harke auf. Entferne Steine, Wurzeln und Unkraut.
3. Bodenverbesserung: Mische Kompost oder anderen organischen Dünger in den Boden, um ihn mit Nährstoffen anzureichern.
4. Boden einebnen: Glätte die Oberfläche des Bodens mit einer Harke, damit die Samen gleichmäßig keimen können.
Aussaat: Der Start in ein grünes Abenteuer
Jetzt kommt der spannende Teil: das Aussäen der Kuhbohnensamen!
1. Aussaatzeitpunkt: Kuhbohnen sind wärmeliebend und sollten erst nach den letzten Frösten ausgesät werden. In Deutschland ist das meist ab Mitte Mai der Fall.
2. Aussaattiefe: Säe die Samen etwa 2-3 cm tief in den Boden.
3. Aussaatabstand: Halte einen Abstand von etwa 10-15 cm zwischen den Samen ein. Bei Stangenbohnen kannst du die Samen auch in kleinen Gruppen um die Rankhilfe herum säen.
4. Gießen: Gieße die Samen nach dem Aussäen vorsichtig an. Achte darauf, dass der Boden feucht, aber nicht nass ist.
5. Markieren: Beschrifte die Stelle, an der du die Kuhbohnen ausgesät hast, damit du weißt, wo sie wachsen.
Pflege: Damit deine Kuhbohnen prächtig gedeihen
Kuhbohnen sind relativ pflegeleicht, aber ein paar Dinge solltest du beachten, damit sie gut wachsen und viele leckere Schoten produzieren.
1. Bewässerung: Gieße deine Kuhbohnen regelmäßig, besonders während trockener Perioden. Achte darauf, dass der Boden immer leicht feucht ist. Vermeide aber Staunässe, da dies zu Wurzelfäule führen kann.
2. Düngung: Dünge deine Kuhbohnen alle paar Wochen mit einem organischen Dünger. Komposttee ist eine gute Option.
3. Unkrautbekämpfung: Entferne regelmäßig Unkraut, das um deine Kuhbohnen herum wächst. Unkraut konkurriert mit den Pflanzen um Nährstoffe und Wasser.
4. Rankhilfe (für Stangenbohnen): Leite die Triebe der Stangenbohnen an der Rankhilfe entlang, damit sie nach oben wachsen können.
5. Schutz vor Schädlingen: Kontrolliere deine Kuhbohnen regelmäßig auf Schädlinge wie Blattläuse oder Bohnenkäfer. Bei Bedarf kannst du natürliche Schädlingsbekämpfungsmittel einsetzen.
6. Mulchen: Eine Mulchschicht hilft, die Feuchtigkeit im Boden zu halten, Unkraut zu unterdrücken und den Boden zu düngen.
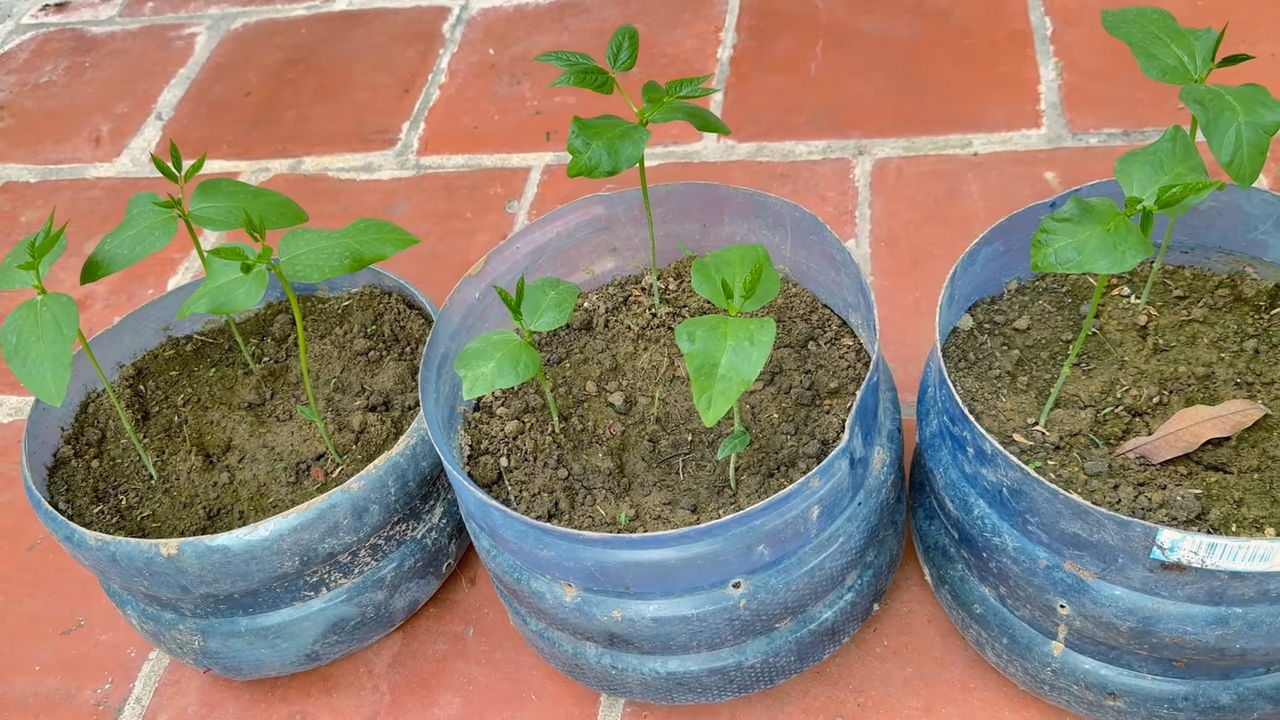
Kuhbohnen im Topf anbauen: Dein Garten für den Balkon
Kein Garten? Kein Problem! Kuhbohnen lassen sich auch wunderbar in Töpfen oder Kübeln auf dem Balkon oder der Terrasse anbauen.
1. Wähle den richtigen Topf: Der Topf sollte mindestens 30 cm Durchmesser haben, damit die Wurzeln genügend Platz haben.
2. Verwende gute Erde: Fülle den Topf mit hochwertiger Gartenerde oder einer speziellen Topferde.
3. Aussaat: Säe die Samen wie oben beschrieben in den Topf.
4. Standort: Stelle den Topf an einen sonnigen Platz.
5. Pflege: Gieße und dünge die Kuhbohnen regelmäßig.
6. Rankhilfe (für Stangenbohnen): Auch im Topf brauchen Stangenbohnen eine Rankhilfe. Du kannst z.B. Bambusstäbe in den Topf stecken.
Vertikaler Kuhbohnen-Garten: Platzsparend und dekorativ
Wenn du wenig Platz hast, ist ein vertikaler Kuhbohnen-Garten eine tolle Idee. Du kannst z.B. eine alte Palette, eine Gitterwand oder eine selbstgebaute Konstruktion verwenden.
1. Wähle eine geeignete Konstruktion: Die Konstruktion sollte stabil sein und genügend Platz für die Pflanzen bieten.
2. Befestige Pflanzgefäße: Befestige Töpfe, Pflanzsäcke oder andere Pflanzgefäße an der Konstruktion.
3. Befülle die Pflanzgefäße: Fülle die Pflanzgefäße mit guter Gartenerde.
4. Aussaat: Säe die Samen wie oben beschrieben in die Pflanzgefäße.
5. Standort: Stelle den vertikalen Garten an einen sonnigen Platz.
6. Pflege: Gieße und dünge die Kuhbohnen regelmäßig.
Ernte: Der Lohn deiner Mühe
Nach etwa 60-80 Tagen kannst du deine ersten Kuhbohnen ernten!
1. Erntezeitpunkt: Ernte die Schoten, wenn sie prall und fest sind, aber noch nicht ganz trocken.
2. Erntemethode: Schneide die Schoten mit einer Schere oder einem Messer ab.
3. Regelmäßige Ernte: Ernte die Schoten regelmäßig, um die Produktion neuer Schoten anzuregen.
4. Verwendung: Du kannst die Kuhbohnen frisch essen, kochen, braten oder einfrieren.
Sortenempfehlungen: Meine persönlichen Favoriten
Es gibt unzählige Kuhbohnensorten, aber hier sind ein paar meiner persönlichen Favoriten:
* ‘Black Eyed Peas’: Eine klassische Sorte mit cremeweißen Bohnen und einem schwarzen “Auge”.
* ‘Pink Eye Purple Hull’: Eine Sorte mit rosa-lila Schoten und cremeweißen Bohnen mit einem rosa “Auge”.
* ‘Whippoorwill’: Eine Sorte mit gesprenkelten Schoten und braunen Bohnen.
* ‘Yardlong Bean’: Eine Sorte mit extrem langen Schoten (bis zu 90 cm!).
Häufige Probleme und Lösungen: Keine Panik, ich helfe dir!
Auch beim Kuhbohnenanbau können mal Probleme auftreten. Hier
Conclusion
So, there you have it! Transforming your outdoor space with a thriving cowpea garden is not only achievable but also incredibly rewarding. We’ve explored a simple yet effective DIY trick that bypasses common gardening hurdles and sets you up for a bountiful harvest. This isn’t just about growing vegetables; it’s about connecting with nature, understanding the life cycle of plants, and enjoying the unparalleled taste of homegrown goodness.
Why is this DIY approach a must-try? Because it simplifies the process, making it accessible even to novice gardeners. It addresses potential issues like poor soil quality, limited space, and pest control in a proactive and sustainable manner. By focusing on creating a healthy and supportive environment from the start, you’re significantly increasing your chances of success. Plus, the satisfaction of nurturing your own food from seed to table is an experience that’s hard to beat.
But don’t stop there! Experiment with different cowpea varieties to discover your favorites. Try adding companion plants like marigolds or basil to deter pests and attract beneficial insects. Consider using different types of organic fertilizers to boost growth and yield. The possibilities are endless, and the journey of discovery is part of the fun.
Ready to embark on your cowpea garden adventure? We wholeheartedly encourage you to give this DIY trick a try. It’s a small investment of time and effort that yields a significant return in terms of fresh produce, personal satisfaction, and a deeper appreciation for the natural world.
And most importantly, we want to hear about your experience! Share your photos, tips, and challenges in the comments below. Let’s create a community of cowpea enthusiasts who can learn from each other and inspire others to get their hands dirty. Your insights could be invaluable to someone just starting out, and together, we can cultivate a greener, healthier, and more sustainable future, one cowpea garden at a time. Remember, successful gardening is a journey, not a destination. Embrace the process, learn from your mistakes, and celebrate your successes. Happy gardening!
Frequently Asked Questions (FAQ)
What exactly are cowpeas, and why should I grow them?
Cowpeas, also known as black-eyed peas, are a type of legume packed with nutrients like protein, fiber, iron, and folate. They’re incredibly versatile in the kitchen, lending themselves well to soups, stews, salads, and side dishes. Growing your own cowpeas ensures you have access to fresh, organic produce, free from harmful pesticides and herbicides. Plus, cowpeas are nitrogen-fixing plants, meaning they enrich the soil with nitrogen, benefiting subsequent crops. They are also relatively drought-tolerant, making them a good choice for gardeners in drier climates.
What if I don’t have a lot of space for a garden? Can I still grow cowpeas?
Absolutely! One of the beauties of cowpeas is that they can be grown in containers. Choose a large pot (at least 12 inches in diameter) with good drainage. Use a high-quality potting mix and follow the same planting and care instructions as you would for an in-ground garden. You might need to water container-grown cowpeas more frequently, especially during hot weather. Consider using a trellis or support system for vining varieties to maximize space and keep the plants tidy. Vertical gardening is your friend!
What kind of soil is best for growing cowpeas?
Cowpeas are relatively adaptable to different soil types, but they thrive in well-drained soil with a pH between 6.0 and 7.0. If your soil is heavy clay or sandy, amend it with compost or other organic matter to improve drainage and fertility. Avoid soils that are waterlogged, as this can lead to root rot. A soil test can help you determine the pH and nutrient levels of your soil and guide you in making necessary amendments.
How often should I water my cowpea plants?
Water cowpea plants deeply but infrequently, allowing the soil to dry out slightly between waterings. Overwatering can lead to root rot, while underwatering can stress the plants and reduce yields. The frequency of watering will depend on the weather, soil type, and stage of growth. Seedlings need more frequent watering than mature plants. Mulching around the plants can help retain moisture in the soil.
What are some common pests and diseases that affect cowpeas, and how can I prevent them?
Common pests that can affect cowpeas include aphids, bean beetles, and nematodes. Diseases include fungal infections like powdery mildew and root rot. To prevent pest and disease problems, practice good garden hygiene, such as removing weeds and debris that can harbor pests and diseases. Use organic pest control methods like insecticidal soap or neem oil to control aphids and bean beetles. Ensure good drainage to prevent root rot. Crop rotation can also help prevent soilborne diseases. Consider using resistant varieties of cowpeas if you live in an area with a history of pest or disease problems.
When is the best time to harvest cowpeas?
The timing of harvest depends on whether you want to harvest fresh green pods or dried beans. For fresh green pods, harvest when the pods are plump and tender, usually about 60-70 days after planting. For dried beans, allow the pods to dry completely on the plant before harvesting. The pods should be brittle and the beans should rattle inside. Shell the beans and store them in an airtight container in a cool, dry place.
Can I save seeds from my cowpea plants to grow next year?
Yes, you can save seeds from your cowpea plants, but it’s important to choose open-pollinated varieties rather than hybrid varieties. Hybrid varieties may not produce true-to-type seeds. To save seeds, allow the pods to dry completely on the plant. Shell the beans and store them in an airtight container in a cool, dry place. Label the container with the variety name and date.
What are some good companion plants for cowpeas?
Good companion plants for cowpeas include corn, sunflowers, and squash. Corn and sunflowers provide support for vining varieties of cowpeas. Squash helps to suppress weeds and retain moisture in the soil. Other beneficial companion plants include marigolds, basil, and rosemary, which deter pests. Avoid planting cowpeas near onions or garlic, as they can inhibit growth.
How can I improve the yield of my cowpea garden?
To improve the yield of your cowpea garden, ensure that the plants receive adequate sunlight, water, and nutrients. Amend the soil with compost or other organic matter to improve fertility. Use a balanced fertilizer to provide essential nutrients. Control pests and diseases promptly. Provide support for vining varieties to maximize space and sunlight exposure. Harvest the pods regularly to encourage continued production.
Is it really worth the effort to grow my own cowpeas?
Absolutely! While it requires some initial effort, growing your own cowpeas offers numerous benefits, including access to fresh, organic produce, a deeper connection with nature, and the satisfaction of nurturing your own food. Plus, homegrown cowpeas taste far superior to store-bought ones. The health benefits, cost savings, and environmental advantages make it a worthwhile endeavor for any gardener. Give it a try, and you might just discover a new passion!
Leave a Comment