
DIY tomato bottle garden: Ever dreamed of harvesting juicy, sun-ripened tomatoes right outside your kitchen window, even if you don’t have a sprawling backyard? I know I have! For centuries, humans have cultivated tomatoes, tracing back to their origins in South America. From humble beginnings to becoming a staple in cuisines worldwide, the tomato’s journey is as vibrant as its color. But what if I told you that you could bypass the traditional garden plot and create a thriving tomato patch using something you probably already have lying around – plastic bottles?
This DIY tomato bottle garden project isn’t just a fun craft; it’s a game-changer for urban dwellers, apartment residents, or anyone with limited space. Imagine transforming discarded plastic into a vertical garden bursting with fresh, homegrown goodness. Not only is it incredibly satisfying to nurture your own food, but it’s also an eco-friendly way to reduce waste and enjoy the unparalleled flavor of homegrown tomatoes. Plus, who doesn’t love a good DIY project that saves money and adds a touch of green to their living space? Let’s dive into the wonderful world of creating your very own DIY tomato bottle garden!
DIY Tomato Bottle Garden: Grow Your Own Delicious Tomatoes with Recycled Plastic!
Hey there, fellow gardening enthusiasts! I’m so excited to share this super easy and rewarding DIY project with you: creating a tomato bottle garden. It’s a fantastic way to recycle plastic bottles, save space, and grow your own fresh, juicy tomatoes right at home. Whether you have a sprawling backyard or just a sunny balcony, this project is perfect for you. Let’s get started!
What You’ll Need
Before we dive in, let’s gather all the necessary materials. Don’t worry, most of these are probably already lying around your house!
* Large Plastic Bottles: Think 2-liter soda bottles, juice bottles, or even larger water bottles. The bigger, the better, as it gives your tomato plants more room to grow. You’ll need one bottle per tomato plant you want to grow.
* Tomato Seedlings: You can either start your own from seeds (which is super rewarding!) or buy established seedlings from your local garden center. Choose a variety that suits your space and climate. Determinate (bush) varieties are often a good choice for container gardening.
* Potting Soil: Use a high-quality potting mix specifically formulated for vegetables. This will provide your tomato plants with the nutrients they need to thrive.
* Scissors or a Utility Knife: For cutting the plastic bottles. Be careful!
* Drill or Nail and Hammer: To create drainage holes.
* Watering Can or Hose: For watering your tomato plants.
* Optional: Twine or String: For supporting your tomato plants as they grow.
* Optional: Small Rocks or Gravel: To improve drainage at the bottom of the bottle.
* Optional: Fertilizer: A slow-release fertilizer or liquid tomato feed will help your plants produce lots of delicious tomatoes.
Preparing the Bottles
This is where we transform those discarded plastic bottles into mini-gardens!
1. Clean the Bottles: Thoroughly wash the plastic bottles with soap and water to remove any residue. Rinse them well and let them dry completely. This is crucial to prevent any unwanted chemicals from affecting your plants.
2. Cut the Bottles: This step depends on how you want to set up your bottle garden. I prefer two methods:
* Method 1: Hanging Bottle Garden: Cut the bottle in half horizontally. You’ll be using the top half (the part with the bottle neck) upside down as the planter, and the bottom half as a water reservoir.
* Method 2: Standing Bottle Garden: Cut off the top third of the bottle. You’ll be using the bottom two-thirds as the planter. You can discard the top third or use it for another project!
Important Safety Tip: Be extremely careful when using scissors or a utility knife. Always cut away from yourself and use a stable surface.
3. Create Drainage Holes: If you’re using the hanging bottle garden method, drill or poke several drainage holes in the bottle cap. If you’re using the standing bottle garden method, drill or poke several drainage holes in the bottom of the bottle. This is essential to prevent waterlogging, which can rot the roots of your tomato plants.
4. Optional: Add Gravel: Place a layer of small rocks or gravel at the bottom of the bottle. This will further improve drainage and prevent the potting soil from clogging the drainage holes.
Planting Your Tomato Seedlings
Now for the fun part – planting your tomato seedlings!
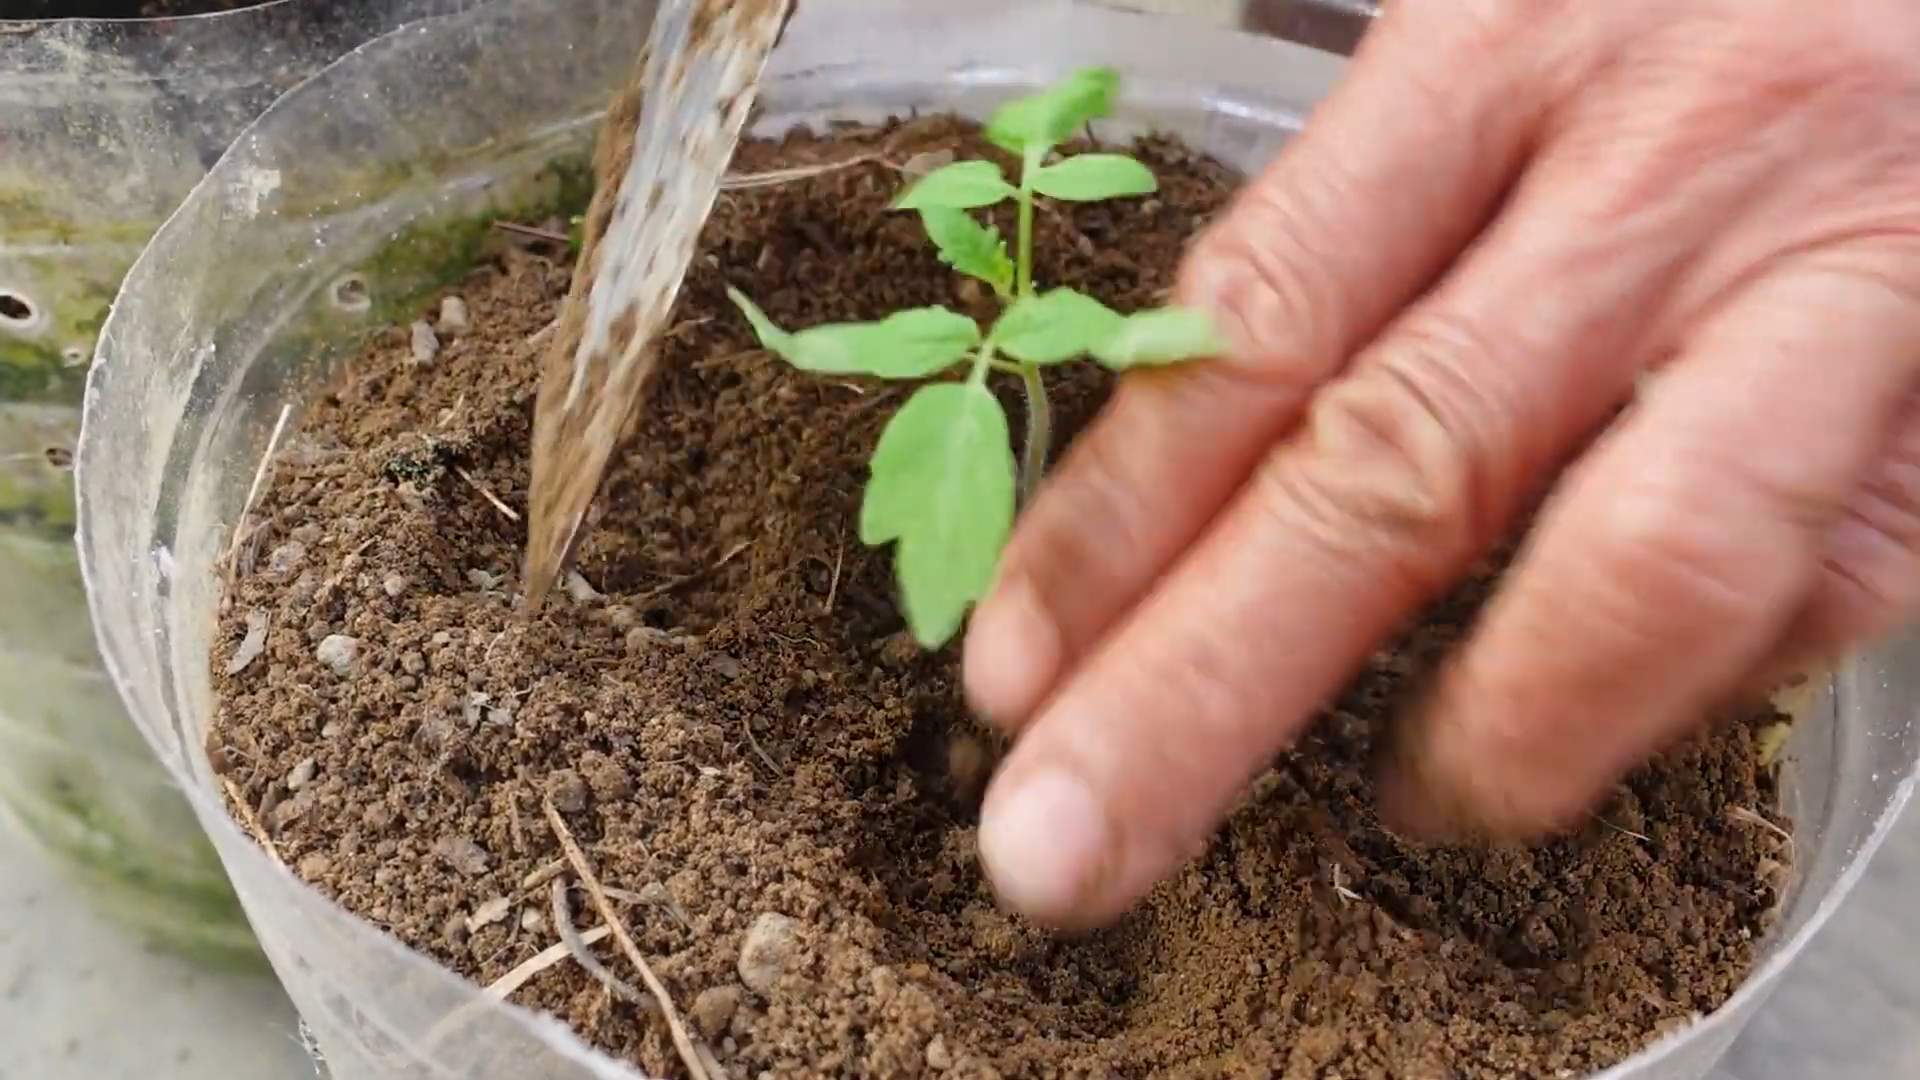
1. Fill the Bottle with Potting Soil: Carefully fill the prepared bottle with potting soil, leaving about an inch of space at the top. Gently pat down the soil to remove any air pockets.
2. Create a Planting Hole: Use your finger or a small trowel to create a hole in the center of the potting soil, large enough to accommodate the root ball of your tomato seedling.
3. Remove the Seedling from its Container: Gently squeeze the sides of the seedling’s container to loosen the root ball. Carefully remove the seedling, being careful not to damage the roots.
4. Plant the Seedling: Place the seedling in the planting hole and gently backfill with potting soil. Make sure the top of the root ball is level with the surrounding soil.
5. Water Thoroughly: Water the newly planted seedling thoroughly until water drains out of the drainage holes. This will help settle the soil and ensure the roots are properly hydrated.
Caring for Your Tomato Bottle Garden
Now that your tomato seedlings are planted, it’s time to provide them with the care they need to thrive and produce delicious tomatoes!
1. Sunlight: Tomato plants need at least 6-8 hours of direct sunlight per day. Place your bottle garden in a sunny location, such as a south-facing balcony or patio. If you don’t have enough natural sunlight, you can supplement with grow lights.
2. Watering: Water your tomato plants regularly, especially during hot, dry weather. Check the soil moisture by sticking your finger into the soil. If the top inch feels dry, it’s time to water. Avoid overwatering, as this can lead to root rot. When watering, water at the base of the plant to avoid wetting the leaves, which can encourage fungal diseases.
3. Fertilizing: Tomato plants are heavy feeders and need regular fertilization to produce abundant fruit. Use a slow-release fertilizer at planting time, or feed your plants with a liquid tomato feed every 2-3 weeks. Follow the instructions on the fertilizer packaging.
4. Support: As your tomato plants grow, they may need support to prevent them from falling over. You can use twine or string to tie the stems to a stake or trellis. This will also help keep the fruit off the ground, preventing rot.
5. Pruning: Pruning your tomato plants can help improve air circulation and encourage fruit production. Remove any suckers (small shoots that grow between the main stem and the branches) as they appear. You can also remove any yellowing or diseased leaves.
6. Pest and Disease Control: Keep an eye out for pests and diseases, such as aphids, whiteflies, and tomato blight. If you notice any problems, take action immediately. You can use organic pest control methods, such as insecticidal soap or neem oil, to control pests. For diseases, remove any affected leaves and improve air circulation around the plants.
Harvesting Your Tomatoes
The most rewarding part of this whole process is, of course, harvesting your own homegrown tomatoes!
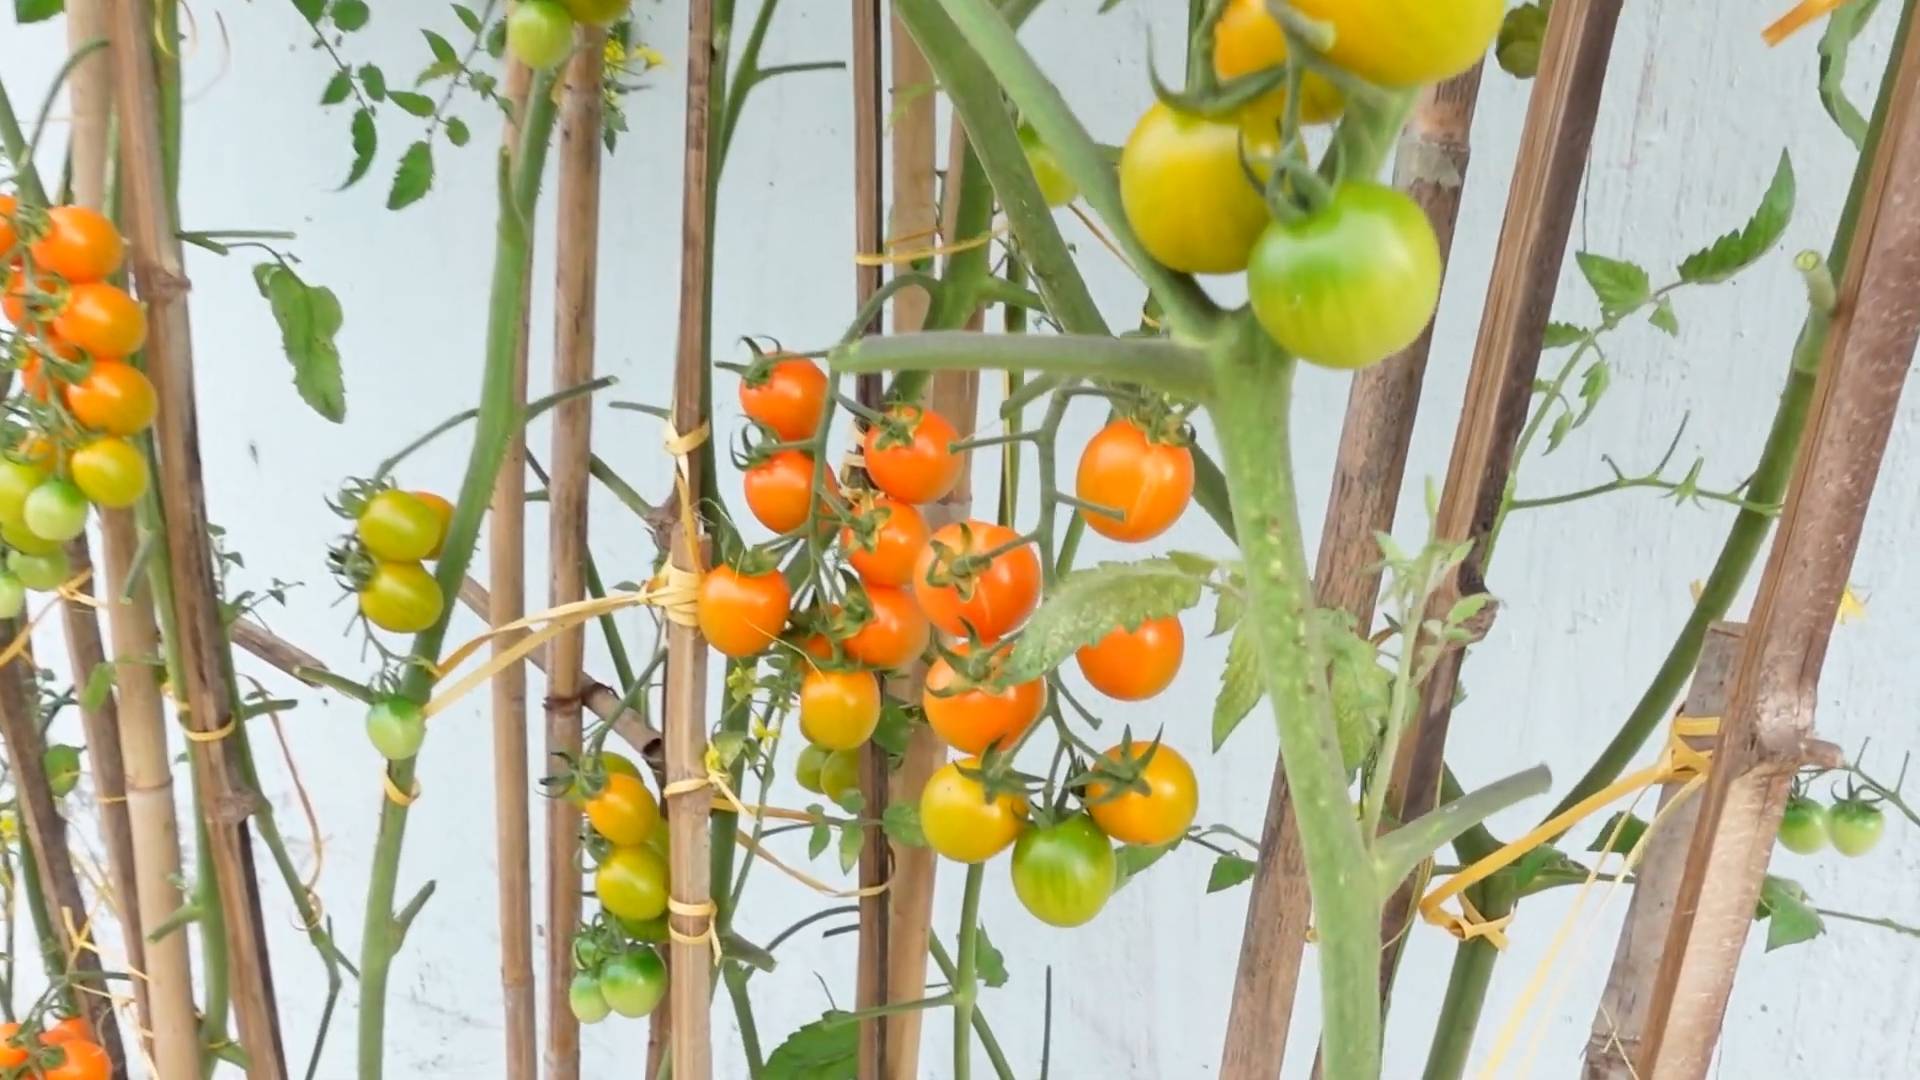
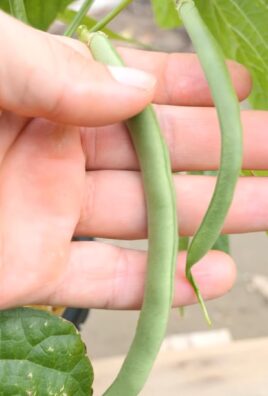
1. Ripeness: Tomatoes are ready to harvest when they are fully colored and slightly soft to the touch. The color will depend on the variety you’re growing.
2. Harvesting: Gently twist or cut the tomato from the vine. Be careful not to damage the plant.
3. Enjoy! Enjoy your delicious, homegrown tomatoes in salads, sandwiches, sauces, or simply eat them fresh off the vine!
Troubleshooting Tips
Even with the best care, you might encounter some challenges along the way. Here are a few common problems and how to address them:
* Yellowing Leaves: This could be a sign of overwatering, underwatering, nutrient deficiency, or disease. Check the soil moisture, fertilize your plants, and inspect them for pests or diseases.
* Blossom End Rot: This is caused by a calcium deficiency and results in a dark, leathery spot on the bottom of the tomato. Ensure your soil has adequate calcium and water your plants consistently.
* Lack of Fruit: This could be due to lack of pollination, insufficient sunlight, or extreme temperatures. Hand-pollinate your plants by gently shaking the flowers, ensure they are getting enough sunlight, and protect them from extreme temperatures.
* Pests: Regularly inspect your plants for pests and take action immediately if you find any.
Variations and Ideas
This DIY tomato bottle garden is just a starting point! Here are a few ideas to customize it and make it your own:
* Vertical Garden: Create a vertical garden by hanging multiple bottle gardens from a wall or fence.
* Herb Garden: Grow other herbs and vegetables in plastic bottles, such as basil, lettuce, or peppers.
* Painted Bottles: Decorate your plastic bottles with paint or markers to add a personal touch.
* Self-Watering System: Create a self-watering system by using a wick to draw water from the reservoir to the potting soil.
I hope you found this guide helpful and inspiring! Growing your own tomatoes in recycled plastic bottles is a fun, rewarding, and sustainable way to enjoy fresh, delicious produce. Happy gardening!
Conclusion
So, there you have it! Transforming discarded plastic bottles into thriving tomato havens is more than just a quirky gardening project; it’s a sustainable, space-saving, and incredibly rewarding way to cultivate your own delicious tomatoes. This DIY tomato bottle garden method offers a fantastic solution for urban dwellers, balcony gardeners, or anyone looking to maximize their yield in a limited space. It’s a testament to the power of resourcefulness and a tangible step towards reducing waste.
But why is this a must-try? Beyond the obvious environmental benefits, consider the sheer satisfaction of nurturing a plant from seedling to harvest, all within the confines of a repurposed bottle. You’re not just growing tomatoes; you’re growing a connection to nature, a sense of accomplishment, and a deeper appreciation for the food you consume. Plus, let’s be honest, there’s a certain undeniable charm to these quirky, bottle-based gardens. They’re conversation starters, eye-catching additions to any outdoor space, and a unique way to showcase your green thumb.
Don’t be afraid to experiment with variations! Try using different types of plastic bottles – larger bottles for larger tomato varieties, or smaller bottles for cherry tomatoes. You can also explore different growing mediums. While we’ve recommended a standard potting mix, you could incorporate compost, coco coir, or even a DIY soil blend tailored to your specific tomato variety. Consider adding companion plants like basil or marigolds to your bottle gardens to deter pests and enhance the flavor of your tomatoes. You can even paint the bottles to add a splash of color and protect the roots from excessive sunlight.
Furthermore, think about vertical stacking. By creating a tiered system with your bottle gardens, you can maximize your vertical space and create a stunning green wall. Use sturdy wire or rope to connect the bottles, ensuring they are securely fastened. This is a particularly effective method for balconies or small patios where ground space is limited.
The possibilities are truly endless! The key is to embrace the spirit of experimentation and adapt the method to suit your specific needs and preferences.
We wholeheartedly encourage you to give this DIY tomato bottle garden a try. It’s a simple, cost-effective, and incredibly fulfilling project that will reward you with a bounty of fresh, homegrown tomatoes. And most importantly, we want to hear about your experiences! Share your photos, tips, and challenges in the comments below. Let’s create a community of bottle-gardening enthusiasts and inspire others to embrace sustainable gardening practices. What tomato varieties did you choose? What challenges did you face, and how did you overcome them? What innovative modifications did you make to the original design? Your insights could be invaluable to other aspiring bottle gardeners.
So, grab those empty plastic bottles, gather your supplies, and get ready to embark on a rewarding gardening adventure. Happy growing!
Frequently Asked Questions (FAQ)
What type of plastic bottle is best for a tomato bottle garden?
Ideally, you should use PET (Polyethylene Terephthalate) plastic bottles, which are commonly used for soda and water bottles. These are generally considered food-safe and durable enough to withstand outdoor conditions. Avoid using bottles that have contained harsh chemicals or cleaning products, as these could contaminate your soil and harm your plants. Make sure to thoroughly clean the bottles with soap and water before using them. The size of the bottle will depend on the tomato variety you plan to grow. Larger varieties will require larger bottles to accommodate their root systems.
How often should I water my tomato bottle garden?
The watering frequency will depend on several factors, including the weather, the size of the bottle, and the type of soil you’re using. As a general rule, check the soil moisture daily. If the top inch of soil feels dry to the touch, it’s time to water. Water thoroughly until excess water drains out of the drainage holes. Avoid overwatering, as this can lead to root rot. During hot, sunny weather, you may need to water your tomato bottle garden more frequently, possibly even twice a day. Conversely, during cooler, cloudy weather, you may only need to water every few days.
What kind of soil should I use for my tomato bottle garden?
A well-draining potting mix is essential for successful tomato bottle gardening. Avoid using garden soil, as it can be too heavy and compact, hindering root growth. A good potting mix will provide adequate drainage, aeration, and nutrients for your tomato plants. You can also amend your potting mix with compost or other organic matter to improve its fertility and water retention. Consider adding perlite or vermiculite to further enhance drainage. A slightly acidic soil pH (around 6.0 to 6.8) is ideal for tomatoes.
How much sunlight do tomato bottle gardens need?
Tomatoes are sun-loving plants and require at least 6-8 hours of direct sunlight per day to thrive. Choose a location for your tomato bottle garden that receives ample sunlight throughout the day. If you live in a particularly hot climate, you may need to provide some afternoon shade to prevent the plants from overheating. If you don’t have access to enough natural sunlight, you can supplement with grow lights.
How do I fertilize my tomato bottle garden?
Tomatoes are heavy feeders and require regular fertilization to produce a bountiful harvest. Start fertilizing your tomato plants a few weeks after transplanting them into the bottle gardens. Use a balanced fertilizer specifically formulated for tomatoes, following the instructions on the package. You can also use organic fertilizers, such as compost tea or fish emulsion. Fertilize every 2-3 weeks throughout the growing season. Avoid over-fertilizing, as this can lead to excessive foliage growth and reduced fruit production.
How do I prevent pests and diseases in my tomato bottle garden?
Regularly inspect your tomato plants for signs of pests or diseases. Common tomato pests include aphids, whiteflies, and tomato hornworms. You can control these pests with insecticidal soap, neem oil, or by hand-picking them off the plants. Common tomato diseases include early blight, late blight, and blossom end rot. Prevent these diseases by providing good air circulation, avoiding overhead watering, and using disease-resistant tomato varieties. If you notice signs of disease, remove the affected leaves or plants immediately to prevent the spread of the disease. Companion planting with basil or marigolds can also help deter pests and diseases.
Can I grow different types of tomatoes in bottle gardens?
Absolutely! You can grow a wide variety of tomato types in bottle gardens, from cherry tomatoes to Roma tomatoes to heirloom varieties. The key is to choose a bottle size that is appropriate for the size of the tomato plant. Cherry tomatoes and other smaller varieties can be grown in smaller bottles, while larger varieties will require larger bottles. Consider the growth habit of the tomato variety as well. Determinate varieties, which grow to a certain size and then stop, are generally better suited for bottle gardens than indeterminate varieties, which continue to grow throughout the season.
What do I do with the tomato bottle garden in the winter?
If you live in a climate with cold winters, you will need to protect your tomato plants from frost. You can either bring the bottle gardens indoors or cover them with frost blankets. If you bring them indoors, make sure they receive enough sunlight or supplement with grow lights. Alternatively, you can harvest any remaining tomatoes and compost the plants. You can then clean the bottles and store them for use in the next growing season.
Leave a Comment