
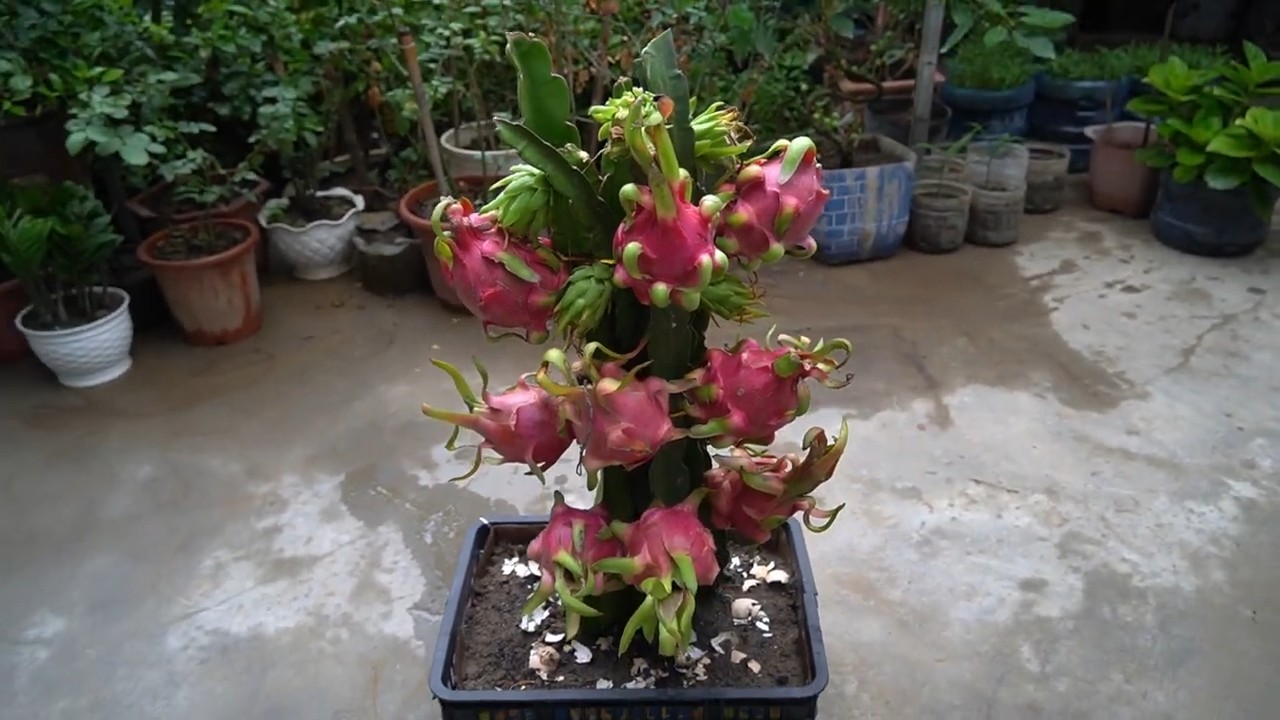
Dragon Fruit Propagation Cuttings: Ever dreamt of having your own exotic dragon fruit vine cascading with vibrant, otherworldly fruit? I know I have! And guess what? It’s easier than you think to turn that dream into a reality, even if you don’t have a green thumb. This isn’t just about growing a plant; it’s about cultivating a piece of tropical paradise right in your backyard.
For centuries, dragon fruit, also known as pitaya, has been cherished in Southeast Asia and Latin America, not only for its delicious taste but also for its stunning beauty. Imagine bringing that same exotic flair to your home! But instead of buying expensive fruit from the store, you can easily grow your own.
Why should you learn this DIY trick? Well, for starters, propagating dragon fruit from cuttings is incredibly cost-effective. Forget buying established plants; with a little patience and the right technique, you can multiply your dragon fruit supply from just a few cuttings. Plus, it’s incredibly rewarding to nurture a plant from a small cutting to a thriving vine. I’m going to show you how to master dragon fruit propagation cuttings, ensuring you have a bountiful harvest of this delicious and nutritious fruit for years to come. Let’s get started!
Drachenfrucht Vermehrung: Dein DIY-Guide für Stecklinge
Hey Pflanzenfreunde! Hast du dich jemals gefragt, wie du mehr von diesen wunderschönen, exotischen Drachenfrüchten bekommen kannst? Die gute Nachricht ist, dass es super einfach ist, Drachenfrüchte durch Stecklinge zu vermehren. Ich zeige dir, wie du das ganz einfach zu Hause machen kannst. Es ist ein tolles Projekt, das nicht nur Spaß macht, sondern dir auch bald deine eigenen Drachenfruchtpflanzen beschert!
Was du brauchst:
* Ein gesundes Drachenfrucht-Mutterpflanze: Suche nach einer Pflanze, die kräftig wächst und keine Anzeichen von Krankheiten oder Schädlingen aufweist.
* Scharfes, sauberes Messer oder Gartenschere: Hygiene ist wichtig, um Infektionen zu vermeiden. Desinfiziere dein Werkzeug vor dem Gebrauch.
* Bewurzelungshormon (optional, aber empfohlen): Beschleunigt den Bewurzelungsprozess und erhöht die Erfolgsrate.
* Töpfe: Wähle Töpfe mit guter Drainage.
* Gut durchlässige Erde: Eine Mischung aus Kakteenerde, Perlit und Kokosfaser ist ideal.
* Wasser: Zum Befeuchten der Erde.
* Sprühflasche: Zum Besprühen der Stecklinge.
* Warmer, heller Standort: Drachenfrüchte lieben Wärme und Licht.
* Geduld: Die Bewurzelung kann einige Wochen dauern.
Die Vorbereitung: Der Schlüssel zum Erfolg
Bevor wir loslegen, ist es wichtig, alles vorzubereiten. Das spart Zeit und stellt sicher, dass der Prozess reibungslos verläuft.
1. Werkzeug desinfizieren: Reinige dein Messer oder deine Gartenschere gründlich mit Alkohol oder einer anderen Desinfektionslösung. Das verhindert die Übertragung von Krankheiten auf deine Stecklinge.
2. Erde vorbereiten: Mische deine Erde gut durch. Ich verwende gerne eine Mischung aus 50% Kakteenerde, 25% Perlit und 25% Kokosfaser. Das Perlit sorgt für eine gute Drainage, während die Kokosfaser die Feuchtigkeit speichert.
3. Töpfe vorbereiten: Fülle die Töpfe mit deiner vorbereiteten Erde. Achte darauf, dass die Töpfe Löcher im Boden haben, damit überschüssiges Wasser ablaufen kann.
Stecklinge schneiden: So geht’s richtig
Das Schneiden der Stecklinge ist ein entscheidender Schritt. Hier kommt es darauf an, die richtigen Stellen zu wählen und sauber zu arbeiten.
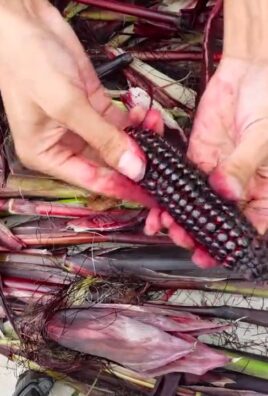
1. Mutterpflanze auswählen: Wähle eine gesunde, kräftige Drachenfruchtpflanze aus. Suche nach Trieben, die gut entwickelt sind und keine Anzeichen von Krankheiten oder Schädlingen aufweisen.
2. Stecklinge auswählen: Wähle Triebe, die mindestens 15-20 cm lang sind. Kürzere Stecklinge können schwieriger bewurzeln.
3. Stecklinge schneiden: Schneide die Triebe mit deinem desinfizierten Messer oder deiner Gartenschere ab. Mache den Schnitt sauber und schräg, direkt unterhalb eines Knotens (der Stelle, an der Blätter oder Triebe wachsen). Ein schräger Schnitt vergrößert die Oberfläche, an der die Wurzeln wachsen können.
4. Stecklinge vorbereiten: Entferne die unteren Blätter oder Dornen von den Stecklingen. Das verhindert, dass diese im Boden verrotten und Infektionen verursachen. Lass die Stecklinge 2-3 Tage an einem trockenen, schattigen Ort liegen, damit die Schnittflächen verheilen können. Dieser Schritt ist wichtig, um Fäulnis zu verhindern.
Bewurzelung: Geduld ist gefragt
Die Bewurzelung ist der spannendste Teil, aber auch der, der am meisten Geduld erfordert.
1. Bewurzelungshormon auftragen (optional): Tauche das untere Ende der Stecklinge in Bewurzelungshormon. Das Hormon fördert die Wurzelbildung und erhöht die Erfolgsrate. Klopfe überschüssiges Hormon ab.
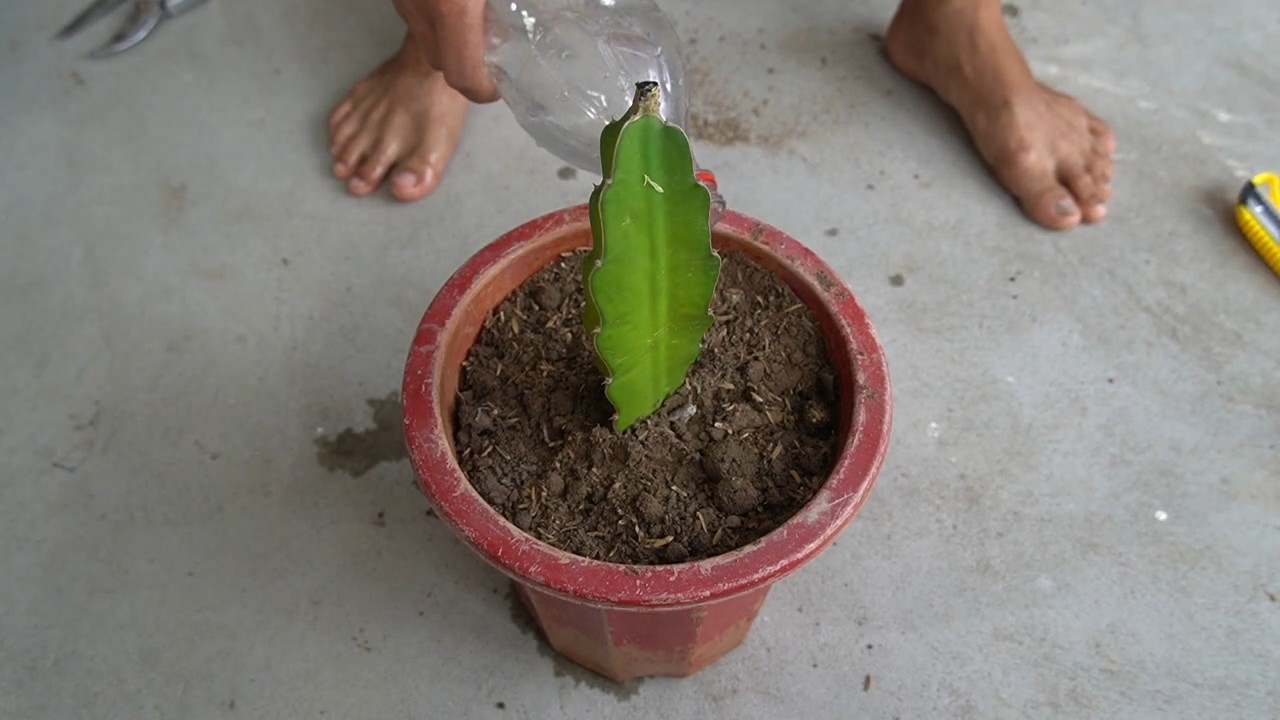
2. Stecklinge einpflanzen: Stecke die Stecklinge etwa 5-7 cm tief in die vorbereiteten Töpfe. Achte darauf, dass die Schnittfläche gut mit Erde bedeckt ist.
3. Angießen: Gieße die Stecklinge vorsichtig an, bis die Erde feucht, aber nicht nass ist. Vermeide Staunässe, da dies zu Fäulnis führen kann.
4. Standort wählen: Stelle die Töpfe an einen warmen, hellen Ort, aber vermeide direkte Sonneneinstrahlung. Ein Ost- oder Westfenster ist ideal.
5. Feuchtigkeit erhalten: Besprühe die Stecklinge regelmäßig mit Wasser, um die Luftfeuchtigkeit zu erhöhen. Du kannst auch eine Plastiktüte oder ein Mini-Gewächshaus über die Töpfe stülpen, um die Feuchtigkeit zu halten. Achte aber darauf, dass die Stecklinge ausreichend belüftet werden, um Schimmelbildung zu vermeiden.
6. Geduld haben: Die Bewurzelung kann 4-8 Wochen dauern. Überprüfe regelmäßig die Feuchtigkeit der Erde und besprühe die Stecklinge bei Bedarf. Ziehe vorsichtig an den Stecklingen, um zu prüfen, ob sie Wurzeln gebildet haben. Wenn du Widerstand spürst, haben sich Wurzeln gebildet.
Nach der Bewurzelung: Die Pflege
Sobald deine Stecklinge Wurzeln gebildet haben, ist es wichtig, sie richtig zu pflegen, damit sie zu gesunden Pflanzen heranwachsen.
1. Umtopfen: Wenn die Wurzeln den Topf durchdringen, ist es Zeit, die Pflanzen in größere Töpfe umzutopfen. Verwende eine gut durchlässige Erde, wie oben beschrieben.
2. Gießen: Gieße die Pflanzen regelmäßig, aber vermeide Staunässe. Lasse die Erde zwischen den Wassergaben leicht antrocknen.
3. Düngen: Dünge die Pflanzen während der Wachstumsperiode (Frühling und Sommer) alle 2-4 Wochen mit einem ausgewogenen Dünger für Kakteen und Sukkulenten.
4. Licht: Drachenfrüchte lieben Licht. Stelle die Pflanzen an einen sonnigen Standort, idealerweise mit mindestens 6 Stunden direkter Sonneneinstrahlung pro Tag.
5. Überwinterung: Im Winter benötigen Drachenfrüchte eine Ruheperiode. Stelle die Pflanzen an einen kühleren Ort (ca. 10-15°C) und gieße sie weniger.
6. Unterstützung: Drachenfrüchte sind Kletterpflanzen und benötigen eine Unterstützung, an der sie hochwachsen können. Du kannst einen Pfahl, ein Rankgitter oder eine andere geeignete Struktur verwenden.
Häufige Probleme und Lösungen
Auch bei der Vermehrung von Drachenfrüchten können Probleme auftreten. Hier sind einige häufige Probleme und wie du sie lösen kannst:
* Fäulnis: Fäulnis ist ein häufiges Problem bei Stecklingen. Sie wird durch zu viel Feuchtigkeit und mangelnde Belüftung verursacht. Um Fäulnis zu vermeiden, achte darauf, dass die Erde gut durchlässig ist, vermeide Staunässe und sorge für eine gute Belüftung. Wenn du Fäulnis entdeckst, entferne die betroffenen Stellen und behandle die Stecklinge mit einem Fungizid.
* Keine Wurzelbildung: Manchmal bewurzeln Stecklinge einfach nicht. Das kann verschiedene Ursachen haben, wie z.B. schlechte Qualität der Stecklinge, falsche Bedingungen oder mangelnde Geduld. Versuche es mit frischen Stecklingen, verwende Bewurzelungshormon und stelle sicher, dass die Bedingungen optimal sind.
* Schädlinge: Drachenfrüchte können von verschiedenen Schädlingen befallen werden, wie z.B. Wollläusen, Spinnmilben und Blattläusen. Kontrolliere deine Pflanzen regelmäßig auf Schädlinge und behandle sie bei Bedarf mit einem geeigneten Insektizid.
Zusätzliche Tipps für den Erfolg
* Wähle den richtigen Zeitpunkt: Der beste Zeitpunkt für die Vermehrung von Drachenfrüchten ist im Frühling oder Sommer, wenn die Pflanzen aktiv wachsen.
* Verwende saubere Werkzeuge: Hygiene ist wichtig, um Infektionen zu vermeiden. Desinfiziere dein Werkzeug vor dem Gebrauch.
* Sei geduldig: Die Bewurzelung kann einige Wochen dauern. Gib nicht auf,
Conclusion
So, there you have it! Transforming a simple dragon fruit into multiple thriving plants through cuttings is not only incredibly rewarding but also surprisingly straightforward. We’ve walked you through the entire process, from selecting the perfect cutting to nurturing it into a robust, fruit-bearing beauty. Why is this DIY trick a must-try? Because it offers a cost-effective and sustainable way to expand your dragon fruit collection, allowing you to enjoy the exotic flavors and vibrant colors of this superfood right from your own backyard. Imagine the satisfaction of harvesting your own dragon fruit, knowing you cultivated it from a single cutting!
Beyond the sheer joy of propagation, this method allows you to control the genetic lineage of your plants. If you have a particularly delicious or productive dragon fruit variety, propagating from cuttings ensures you’re replicating those desirable traits in your new plants. This is a significant advantage over growing from seed, which can result in unpredictable variations.
But the possibilities don’t stop there! Feel free to experiment with different rooting mediums. While we recommended a well-draining potting mix, some gardeners have success with perlite, vermiculite, or even straight water. Just be sure to monitor moisture levels and provide adequate drainage to prevent rot. You can also explore different cutting sizes. While our guide focused on cuttings around 6-12 inches, you might find that smaller or larger cuttings work well in your specific environment. Remember to always use clean, sterilized tools to prevent the spread of disease.
Consider the support structure you’ll use for your dragon fruit plants. These climbing cacti need a sturdy trellis or post to grow on. Get creative with your support system! You can use anything from repurposed wooden pallets to custom-built metal structures. The key is to provide ample support for the heavy, fruit-laden branches.
And don’t forget about fertilization! Dragon fruit plants are heavy feeders and benefit from regular applications of a balanced fertilizer. Look for a fertilizer specifically formulated for cacti or succulents, or use a general-purpose fertilizer diluted to half strength.
Ultimately, the best way to learn is by doing. Don’t be afraid to experiment and adapt the techniques we’ve outlined to suit your own unique growing conditions. The world of dragon fruit propagation is full of exciting possibilities, and we encourage you to dive in and discover them for yourself.
We are confident that with a little patience and care, you’ll be well on your way to creating your own dragon fruit oasis. So, grab your pruning shears, select a healthy dragon fruit stem, and embark on this exciting journey of propagation. We can’t wait to hear about your success!
We wholeheartedly encourage you to try this **dragon fruit propagation cuttings** method. Share your experiences, tips, and photos with us in the comments below. Let’s build a community of dragon fruit enthusiasts and learn from each other’s successes and challenges. Happy growing!
Frequently Asked Questions (FAQ)
What is the best time of year to propagate dragon fruit from cuttings?
The ideal time to propagate dragon fruit from cuttings is during the warmer months, typically spring or early summer. This is when the plant is actively growing and will root more readily. However, if you live in a climate with consistently warm temperatures, you can propagate dragon fruit cuttings year-round. Avoid propagating during the coldest months, as the cuttings may take longer to root or may not root at all.
How long does it take for dragon fruit cuttings to root?
Rooting time can vary depending on several factors, including the temperature, humidity, and the health of the cutting. Generally, you can expect to see roots developing within 2-4 weeks. However, it may take longer in cooler conditions. Be patient and avoid disturbing the cuttings too much during this time. You can gently tug on the cutting to check for resistance, which indicates root development.
What type of soil is best for rooting dragon fruit cuttings?
Dragon fruit cuttings need a well-draining soil mix to prevent rot. A mixture of perlite, vermiculite, and peat moss is a good option. You can also use a commercial cactus or succulent potting mix. Avoid using heavy garden soil, as it can retain too much moisture and lead to root rot. Ensure the pot you use has drainage holes to allow excess water to escape.
How often should I water dragon fruit cuttings?
Water dragon fruit cuttings sparingly, allowing the soil to dry out slightly between waterings. Overwatering is a common cause of root rot. Check the soil moisture by sticking your finger into the top inch of soil. If it feels dry, water lightly. If it feels moist, wait a few days before watering again. During the rooting process, it’s important to maintain a slightly moist but not soggy environment.
How much sunlight do dragon fruit cuttings need?
Dragon fruit cuttings need bright, indirect sunlight to root properly. Avoid placing them in direct sunlight, as this can scorch the cuttings. A location near a window with filtered sunlight is ideal. Once the cuttings have rooted and started to grow, you can gradually acclimate them to more direct sunlight.
Can I use rooting hormone to help dragon fruit cuttings root?
Yes, using rooting hormone can help to speed up the rooting process and increase the success rate. Dip the cut end of the cutting in rooting hormone powder or liquid before planting it in the rooting medium. Rooting hormone contains auxins, which are plant hormones that stimulate root growth.
What if my dragon fruit cutting starts to rot?
If your dragon fruit cutting starts to rot, it’s important to take action immediately to prevent the rot from spreading. Remove the affected portion of the cutting with a clean, sterilized knife. Allow the cut end to callous over for a few days before replanting it in fresh, well-draining soil. Avoid overwatering and ensure the cutting is in a well-ventilated area.
How do I know when my dragon fruit cutting is ready to be transplanted?
You can transplant your dragon fruit cutting once it has developed a healthy root system. This typically takes several weeks to a few months. Look for roots that are at least a few inches long and are well-branched. Gently remove the cutting from the rooting medium and transplant it into a larger pot with well-draining soil.
What kind of support structure does a dragon fruit plant need?
Dragon fruit plants are climbing cacti and need a sturdy support structure to grow on. A trellis, post, or fence are all good options. The support structure should be strong enough to support the weight of the plant and its fruit. As the plant grows, tie the stems to the support structure to encourage vertical growth.
How long does it take for a dragon fruit plant grown from a cutting to produce fruit?
Dragon fruit plants grown from cuttings typically start producing fruit within 1-3 years. This is much faster than plants grown from seed, which can take 5-7 years to fruit. The exact time will depend on the variety of dragon fruit, the growing conditions, and the overall health of the plant. Proper care, including adequate sunlight, water, and fertilization, will help to encourage fruit production.
Leave a Comment