
Fast Garlic Breeding Technique: Unleash the Power of Your Garden!
Have you ever dreamed of having an endless supply of fresh, pungent garlic right at your fingertips? Imagine never having to run to the store again for that essential ingredient that elevates every dish. Well, stop dreaming and start doing! This DIY guide will reveal a fast garlic breeding technique that will transform your garden into a garlic haven.
Garlic, a culinary staple for centuries, boasts a rich history intertwined with various cultures. From ancient Egypt, where it fueled the pyramid builders, to its prominent role in Mediterranean cuisine, garlic has always been revered for its flavor and medicinal properties. But what if you could amplify your garlic harvest, ensuring a constant supply for your culinary adventures and health needs?
That’s where this DIY trick comes in. Many gardeners struggle with the slow pace of traditional garlic propagation. It can take months, even years, to see significant results. But with this fast garlic breeding technique, I’m going to show you how to accelerate the process, maximizing your yield and minimizing your wait time. Whether you’re a seasoned gardener or just starting out, this method is designed to be simple, effective, and incredibly rewarding. Get ready to unlock the secrets to abundant garlic harvests and impress your friends and family with your gardening prowess!
Grow Garlic Like a Pro: My Foolproof Fast-Breeding Method
Hey garlic lovers! Are you tired of waiting months for your garlic to mature? I was too! That’s why I dove headfirst into researching and experimenting with different garlic growing techniques. And guess what? I’ve cracked the code! I’m going to share my super-charged, fast-breeding garlic method that will have you harvesting plump, flavorful bulbs in record time. Get ready to impress your friends (and yourself!) with your garlic-growing prowess.
What You’ll Need
Before we get started, let’s gather our supplies. This is crucial for a smooth and efficient planting process. Trust me, having everything ready beforehand will save you a ton of time and frustration.
* High-Quality Garlic Bulbs: This is the most important ingredient! Choose organic, disease-free bulbs from a reputable source. Look for large, firm bulbs with well-defined cloves. Softneck varieties are generally easier to braid, while hardneck varieties offer a bolder flavor and produce scapes (which are delicious!). I personally love using both!
* Well-Draining Soil: Garlic hates soggy feet! Amend your garden soil with compost, aged manure, or other organic matter to improve drainage and fertility. A slightly acidic to neutral pH (around 6.0-7.0) is ideal.
* Compost or Aged Manure: This is your garlic’s food! Compost provides essential nutrients and improves soil structure.
* Bone Meal (Optional): Bone meal is a great source of phosphorus, which promotes strong root development.
* All-Purpose Organic Fertilizer (Optional): A balanced fertilizer can give your garlic an extra boost.
* Mulch: Straw, wood chips, or shredded leaves will help retain moisture, suppress weeds, and regulate soil temperature.
* Gardening Gloves: Protect your hands from dirt and potential irritants.
* Trowel or Garden Shovel: For planting the cloves.
* Watering Can or Hose: To keep your garlic happy and hydrated.
* Measuring Tape or Ruler: To ensure proper spacing.
Understanding the Fast-Breeding Secret: Vernalization
The key to speeding up the garlic growing process lies in a technique called vernalization. Vernalization is essentially tricking the garlic into thinking it has already gone through a winter. Garlic needs a period of cold exposure to trigger bulb formation. By pre-chilling the cloves, we can significantly shorten the time it takes for them to mature.
Phase 1: Vernalization (Pre-Chilling)
This is where the magic happens! We’re going to give our garlic cloves a head start by simulating winter conditions.
1. Separate the Cloves: Gently separate the cloves from the bulb, being careful not to damage them. Leave the papery skin intact. Only plant the largest, healthiest cloves for the best results. Smaller cloves might not produce as robust of a bulb.
2. Prepare for Chilling: Place the cloves in a paper bag or a breathable container. Avoid using plastic bags, as they can trap moisture and cause the cloves to rot.
3. Chill Out: Store the cloves in the refrigerator (not the freezer!) at a temperature between 32°F and 50°F (0°C and 10°C) for 4-8 weeks. I’ve found that 6 weeks is the sweet spot for my climate. Make sure to label the bag with the date you started chilling them!
4. Monitor: Check the cloves periodically for any signs of mold or rot. Discard any cloves that look unhealthy.
Phase 2: Planting Your Pre-Chilled Garlic
Now that our cloves have had their winter vacation, it’s time to get them in the ground!
1. Prepare the Soil: Choose a sunny spot in your garden with well-draining soil. Amend the soil with compost or aged manure to improve fertility. If your soil is heavy clay, consider adding some sand or perlite to improve drainage. I like to work the amendments in to a depth of about 12 inches.
2. Add Bone Meal (Optional): Sprinkle bone meal into the planting holes to provide phosphorus for strong root development. Follow the instructions on the bone meal package for the correct application rate.
3. Planting Depth: Dig holes that are about 2-3 inches deep.
4. Spacing: Space the cloves about 6-8 inches apart within rows, and space the rows about 10-12 inches apart. This gives the garlic plenty of room to grow.
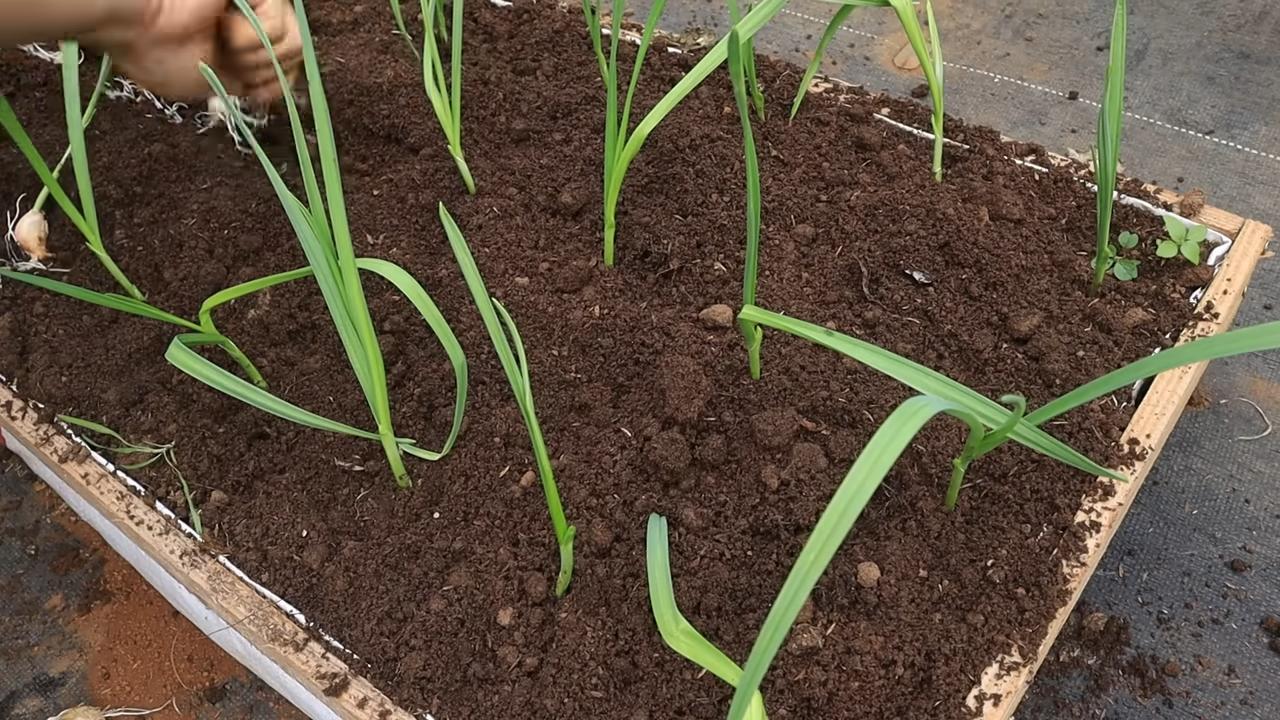
5. Orientation: Place the cloves pointy-side up. This is crucial! The pointy end is where the leaves will emerge.
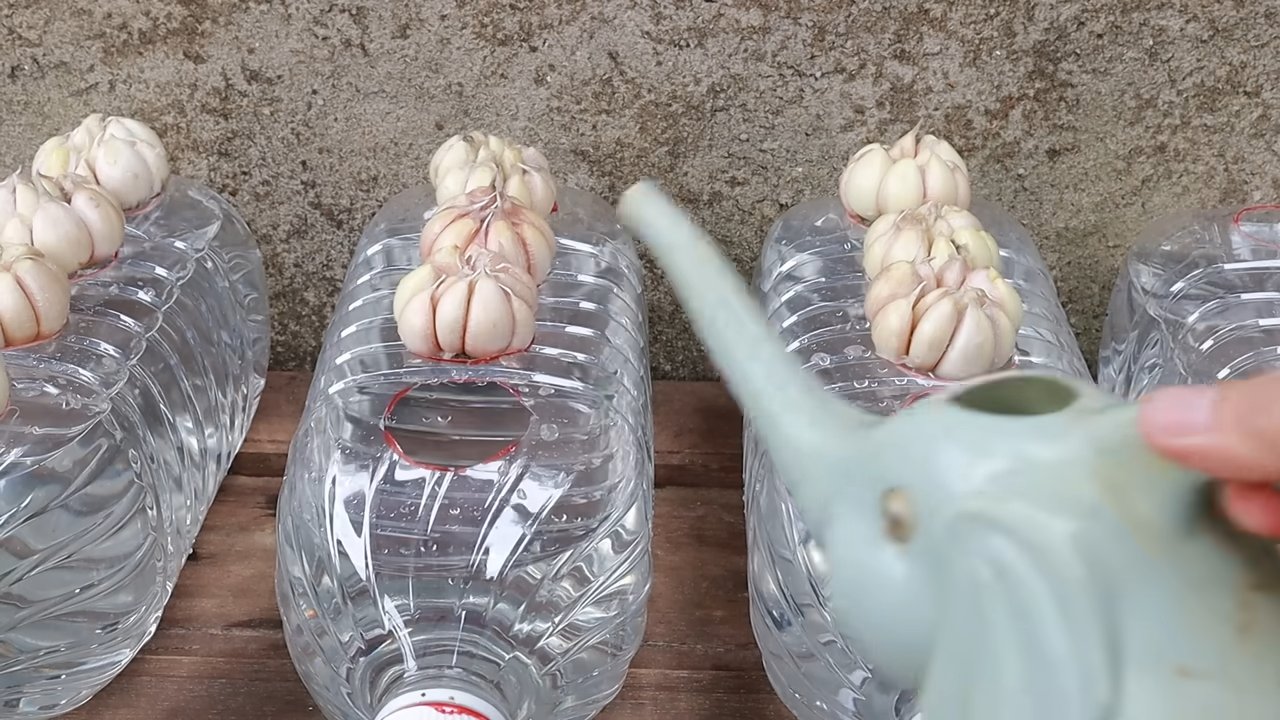
6. Cover and Water: Gently cover the cloves with soil and water thoroughly.
7. Mulch: Apply a layer of mulch (straw, wood chips, or shredded leaves) around the plants to retain moisture, suppress weeds, and regulate soil temperature.
Phase 3: Ongoing Care and Maintenance
Congratulations! You’ve planted your garlic. Now, let’s make sure they thrive.
1. Watering: Keep the soil consistently moist, but not waterlogged. Water deeply whenever the top inch of soil feels dry. Avoid overhead watering, as this can promote fungal diseases.
2. Weeding: Regularly remove any weeds that pop up around your garlic plants. Weeds compete with garlic for nutrients and water.
3. Fertilizing (Optional): If you choose to fertilize, apply a balanced organic fertilizer a few weeks after planting and again in the spring. Follow the instructions on the fertilizer package.
4. Scape Removal (Hardneck Varieties): Hardneck garlic varieties produce scapes, which are curly flower stalks. Remove the scapes when they start to curl to encourage bulb development. Scapes are delicious! You can sauté them, add them to pesto, or use them in stir-fries.
5. Pest and Disease Control: Keep an eye out for pests and diseases. Common garlic pests include aphids and thrips. Common diseases include white rot and downy mildew. Treat any problems promptly with organic pest control methods or fungicides. I personally use neem oil for pest control.
Phase 4: Harvesting Your Garlic
The moment we’ve all been waiting for! Harvesting time!
1. Timing: Garlic is typically ready to harvest in late spring or early summer, about 7-8 months after planting (but remember, we’ve sped things up!). Look for these signs:
* The lower leaves start to turn yellow and brown.
* The scapes (if you have hardneck varieties) have straightened out.
* The bulbs feel firm and plump.
2. Harvesting: Carefully loosen the soil around the bulbs with a garden fork or trowel. Gently lift the bulbs from the ground, being careful not to damage them.
3. Curing: Cure your garlic in a well-ventilated, dry place for 2-3 weeks. This allows the outer layers to dry and protects the bulbs from rot. You can hang the bulbs in bunches or spread them out on screens or racks.
4. Storing: Once the garlic is cured, trim the roots and stalks. Store the bulbs in a cool, dry, and dark place. Braided garlic can be hung in the kitchen for easy access. Properly cured and stored garlic can last for several months.
Troubleshooting
Even with the best techniques, sometimes things don’t go as planned. Here are a few common problems and how to address them:
* Small Bulbs: Possible causes include poor soil, insufficient watering, lack of nutrients, or planting small cloves. Make sure to amend your soil, water regularly, fertilize if needed, and plant only the largest, healthiest cloves.
* Rotting Cloves: This is usually caused by planting in poorly draining soil or overwatering. Improve drainage by amending the soil with compost or sand. Water only when the top inch of soil feels dry.
* Pest Infestations: Treat pests promptly with organic pest control methods, such as neem oil or insecticidal soap.
* Disease Problems: Prevent diseases by planting disease-free cloves, providing good air circulation, and avoiding overhead watering. Treat any diseases with organic fungicides.
Enjoy Your Homegrown Garlic!
There you have it! My foolproof fast-breeding garlic method. With a little planning and effort, you can enjoy a bountiful harvest of delicious, homegrown garlic in no time. I hope you found this guide helpful. Happy gardening!
Conclusion
So, there you have it! This fast garlic breeding technique isn’t just a clever gardening hack; it’s a game-changer for anyone who loves fresh garlic and wants a sustainable, readily available supply. Imagine never having to run to the store for garlic again, knowing you have a thriving patch right in your backyard, ready to deliver pungent flavor whenever you need it.
This method, focusing on planting individual cloves and nurturing them in a controlled environment, drastically reduces the time it takes to cultivate a robust garlic crop. Forget waiting months and months for a full harvest. With this accelerated approach, you’ll be enjoying homegrown garlic much sooner than you ever thought possible.
But the benefits extend beyond just speed. This technique also allows for greater control over the quality and characteristics of your garlic. You can select the largest, healthiest cloves for planting, ensuring that your future crops are equally vigorous. Plus, you’ll be able to observe and address any potential issues early on, leading to a more successful and bountiful harvest.
Why is this a must-try? Because it empowers you to become a more self-sufficient gardener, reduces your reliance on store-bought produce, and provides you with a constant supply of fresh, flavorful garlic. It’s a win-win-win!
Looking for variations? Consider experimenting with different garlic varieties to see which ones thrive best in your local climate. You can also try amending your soil with different organic materials to optimize its nutrient content and drainage. Some gardeners even use raised beds or containers to further control the growing environment. Another variation is to try planting the garlic cloves in different seasons. While fall planting is traditional, you might find success with a spring planting in certain climates, especially when using this accelerated breeding technique.
Don’t be afraid to get creative and adapt the technique to suit your specific needs and preferences. The most important thing is to get started and experience the joy of growing your own garlic.
We wholeheartedly encourage you to try this fast garlic breeding technique. It’s a rewarding and satisfying experience that will transform the way you think about garlic. And once you’ve had a chance to experiment, we’d love to hear about your results! Share your experiences, tips, and photos in the comments below. Let’s build a community of garlic growers and learn from each other. Happy gardening!
Frequently Asked Questions (FAQ)
What exactly is “fast garlic breeding technique” and how does it differ from traditional methods?
The “fast garlic breeding technique” refers to an accelerated method of growing garlic, primarily focusing on optimizing conditions for rapid growth and bulb development. Traditional methods often involve planting cloves in the fall and waiting until the following summer for harvest. This technique, however, aims to shorten that timeframe by focusing on factors like soil quality, watering, and potentially even indoor starting to give the garlic a head start. It’s not about creating new garlic varieties (which is true breeding), but rather about optimizing the growing process for a quicker harvest.
Is this technique suitable for all climates?
While this technique can be adapted for various climates, its success depends on understanding your local conditions. In colder climates, starting the cloves indoors or using a greenhouse can provide the necessary warmth and protection during the early stages of growth. In warmer climates, ensuring adequate shade and moisture is crucial to prevent the cloves from drying out or overheating. Experimentation and observation are key to determining the best approach for your specific climate.
What type of soil is best for this fast garlic breeding technique?
Garlic thrives in well-draining, fertile soil that is rich in organic matter. A loamy soil with a slightly acidic to neutral pH (around 6.0 to 7.0) is ideal. Before planting, amend the soil with compost, well-rotted manure, or other organic materials to improve its structure, drainage, and nutrient content. Avoid heavy clay soils, as they can retain too much moisture and lead to bulb rot. If you have clay soil, consider growing your garlic in raised beds or containers with a suitable potting mix.
How often should I water the garlic cloves?
Watering frequency depends on the climate, soil type, and stage of growth. Generally, garlic needs consistent moisture, especially during the early stages of growth and bulb development. Water deeply whenever the top inch of soil feels dry to the touch. Avoid overwatering, as this can lead to bulb rot. During periods of heavy rainfall, you may need to reduce watering frequency. Mulching around the plants can help retain moisture and suppress weeds.
What kind of fertilizer should I use, and how often should I fertilize?
Garlic benefits from regular fertilization, especially during the active growing season. Use a balanced fertilizer with a higher phosphorus content to promote bulb development. You can also use organic fertilizers such as compost tea, fish emulsion, or bone meal. Fertilize every 2-3 weeks, following the instructions on the fertilizer package. Avoid over-fertilizing, as this can lead to excessive foliage growth at the expense of bulb development.
How do I know when the garlic is ready to harvest?
The timing of harvest depends on the variety of garlic and the climate. Generally, garlic is ready to harvest when the lower leaves start to turn yellow or brown, but the top leaves are still green. This usually occurs in late spring or early summer. To check if the bulbs are ready, carefully dig up a few plants and examine the bulbs. The bulbs should be well-formed and have a papery skin. If the bulbs are too small or the skin is thin, wait a few more weeks before harvesting.
Can I use store-bought garlic cloves for this technique?
While you can use store-bought garlic cloves, it’s generally recommended to use garlic specifically intended for planting. Store-bought garlic may have been treated with chemicals to prevent sprouting, which can hinder its growth. Additionally, store-bought garlic may not be adapted to your local climate, which can affect its performance. If you do use store-bought garlic, choose organic varieties to avoid any potential chemical treatments.
What are some common pests and diseases that affect garlic, and how can I prevent them?
Common pests that affect garlic include aphids, thrips, and nematodes. Diseases include bulb rot, white rot, and downy mildew. To prevent these problems, practice good sanitation by removing any plant debris from the garden. Rotate your crops regularly to avoid the buildup of pests and diseases in the soil. Use disease-resistant varieties of garlic. Control weeds, as they can harbor pests and diseases. Ensure good air circulation around the plants to prevent fungal diseases. If you encounter any pests or diseases, treat them promptly with appropriate organic or chemical controls.
How do I store my harvested garlic?
After harvesting, cure the garlic by laying it out in a well-ventilated, dry place for 2-3 weeks. This allows the bulbs to dry and the skins to harden, which improves their storage life. Once the garlic is cured, trim the roots and stalks, leaving about an inch of stalk above the bulb. Store the garlic in a cool, dry, and dark place, such as a pantry or basement. Avoid storing garlic in the refrigerator, as this can cause it to sprout or mold. Properly stored garlic can last for several months.
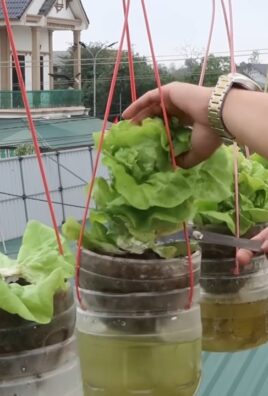
Can I use this technique to grow garlic indoors?
Yes, you can grow garlic indoors using this technique, especially if you live in a climate with harsh winters. Choose a sunny location or provide supplemental lighting with grow lights. Use a well-draining potting mix and ensure that the containers have drainage holes. Water regularly and fertilize every 2-3 weeks. Keep an eye out for pests and diseases, and treat them promptly if they occur. Indoor-grown garlic may not produce as large bulbs as outdoor-grown garlic, but it can still provide you with a fresh supply of garlic greens and small bulbs.


Leave a Comment