
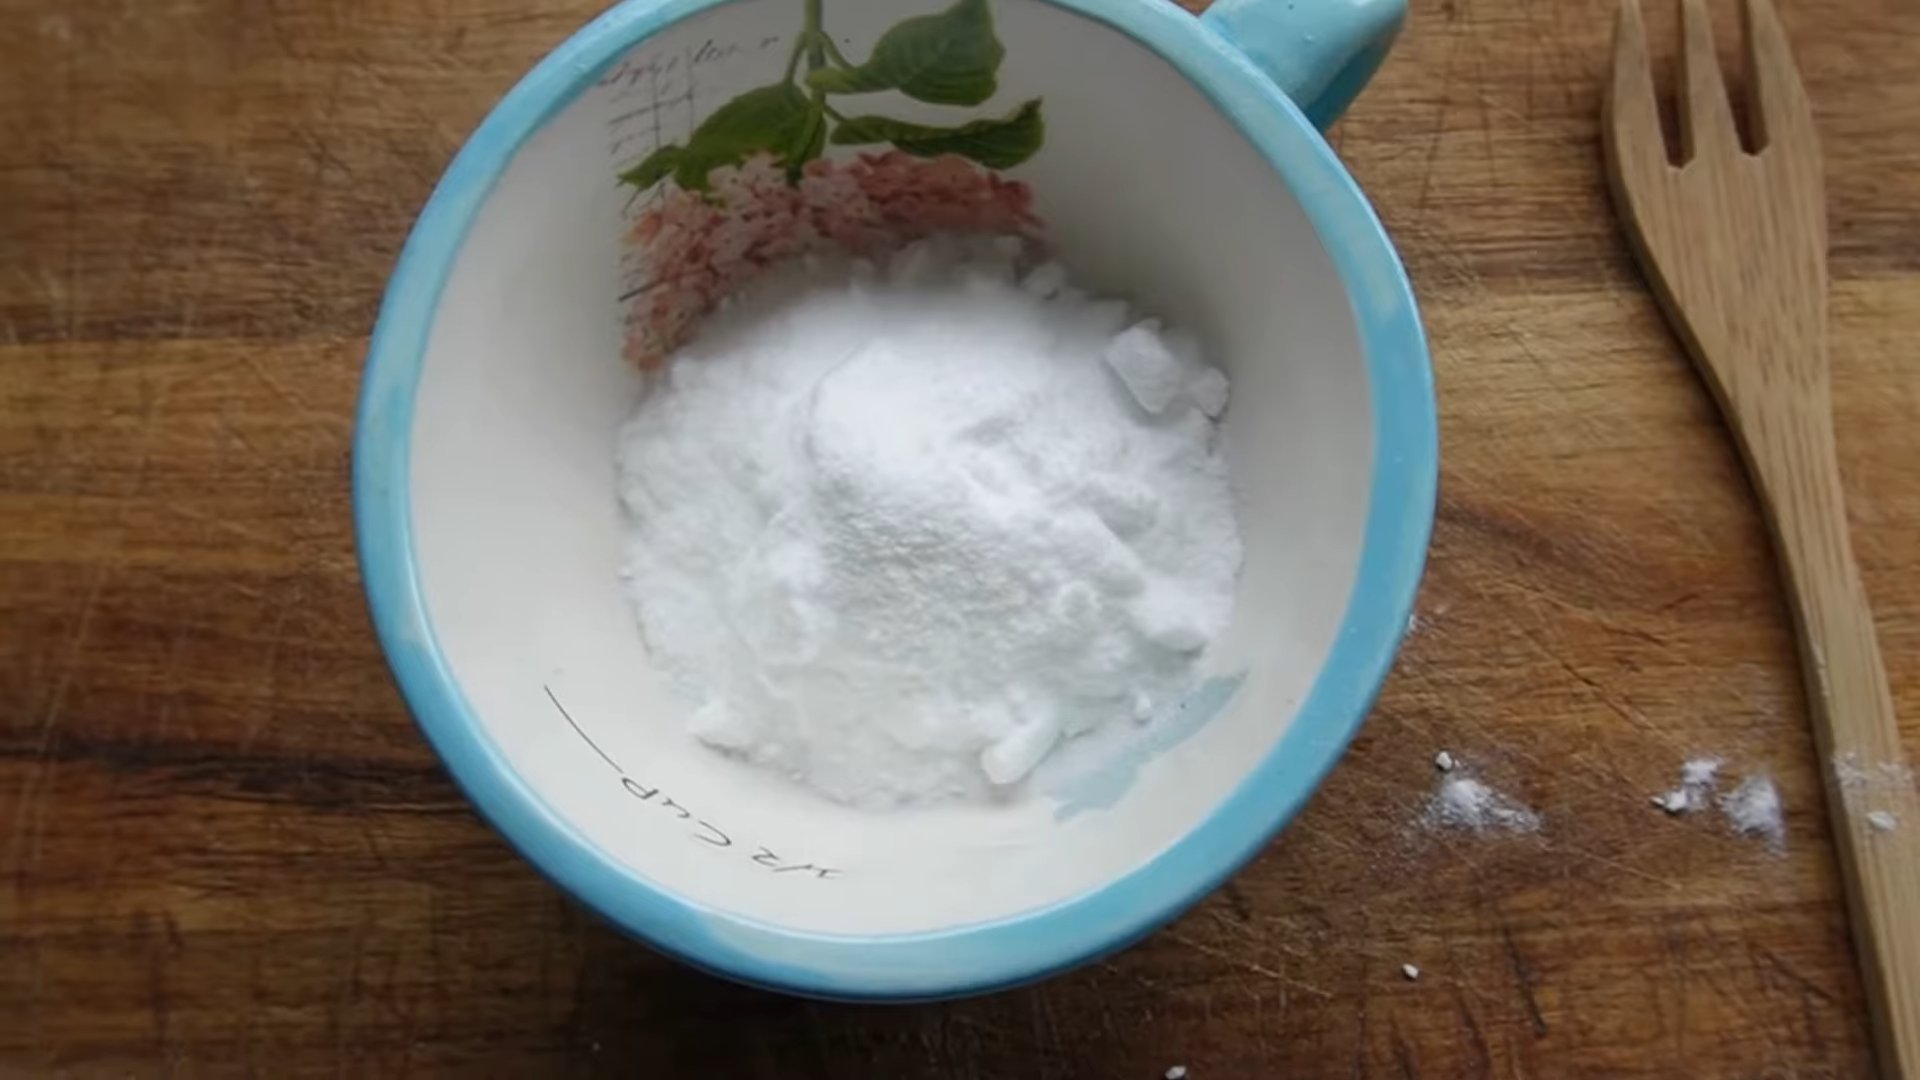
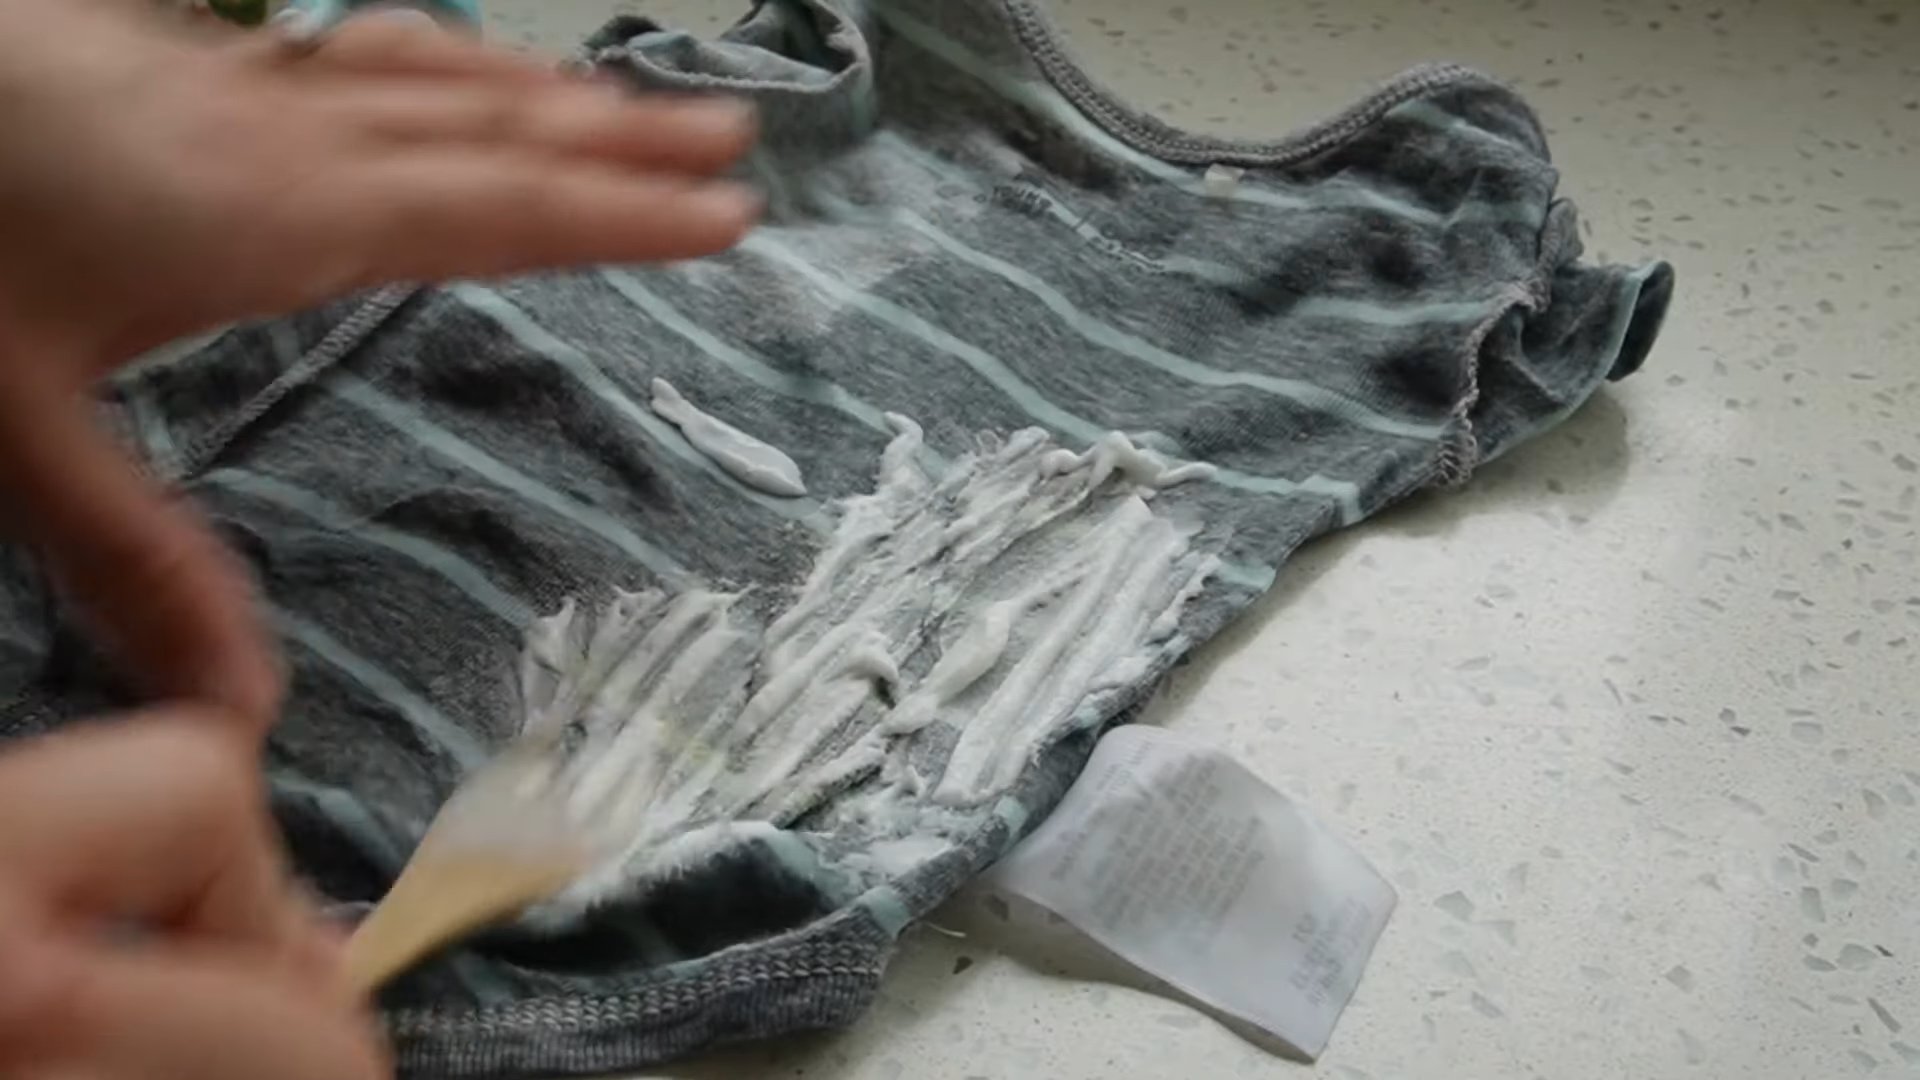
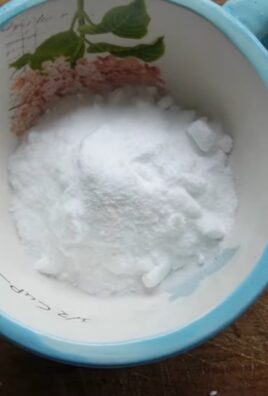
Fast stain removal hack: it’s the superhero every home needs, ready to leap into action when disaster strikes! Let’s be honest, we’ve all been there. That moment of horror when a rogue splash of coffee, a splattering of spaghetti sauce, or a rogue pen mark threatens to permanently mar our favorite clothes or cherished furniture. But fear not, because I’m here to share some game-changing DIY stain removal secrets that will banish those blemishes for good.
Throughout history, people have sought effective ways to preserve their belongings and maintain a clean and presentable appearance. From ancient remedies using natural ingredients to modern chemical solutions, the quest for perfect stain removal has been a constant. But what if I told you that many of the most effective solutions are already hiding in your pantry or bathroom cabinet?
In today’s fast-paced world, who has time to spend hours scrubbing and soaking? That’s where these fast stain removal hacks come in. I’m going to show you how to tackle common stains quickly and efficiently, saving you time, money, and the heartache of losing your favorite items. Get ready to unlock the secrets to a stain-free life – it’s easier than you think!
Waterless Tomato Growing: A DIY Guide to Self-Sufficient Tomatoes
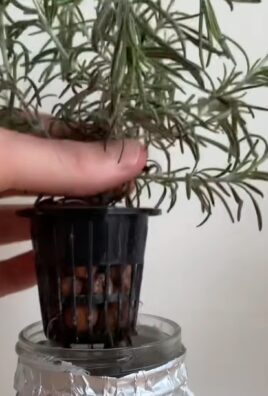
Hey there, fellow gardening enthusiasts! Are you tired of constantly watering your tomato plants, especially during those scorching summer months? Or maybe you live in an area with water restrictions? Well, I’ve got a game-changing solution for you: waterless tomato growing! This method focuses on creating a self-sufficient ecosystem for your tomatoes, minimizing the need for supplemental watering. It might sound too good to be true, but trust me, it works! I’ve been using this technique for years, and I’m always amazed at the results. Let’s dive in and learn how to grow juicy, delicious tomatoes with minimal water.
Understanding the Principles
Before we get our hands dirty, let’s understand the core principles behind waterless tomato growing. It’s all about creating a water-retentive environment and encouraging deep root growth.
* Water Retention: We’ll use materials that hold moisture for extended periods, reducing the frequency of watering.
* Deep Root Growth: By encouraging roots to grow deep into the soil, the plants can access water reserves further down, making them more drought-tolerant.
* Mulching: A thick layer of mulch acts as a blanket, preventing evaporation and keeping the soil cool.
* Soil Health: Healthy soil is crucial for water retention and nutrient availability. We’ll focus on improving soil structure and fertility.
Materials You’ll Need
Here’s a list of everything you’ll need to get started. Don’t worry, most of these items are readily available at your local garden center or hardware store.
* Tomato seedlings (choose a variety suitable for your climate)
* Large containers or raised beds (at least 18 inches deep)
* Potting mix (a well-draining mix is essential)
* Compost (lots of it!)
* Peat moss or coco coir (for water retention)
* Vermiculite or perlite (for drainage and aeration)
* Slow-release fertilizer (organic is best)
* Epsom salts (for magnesium)
* Bone meal (for phosphorus)
* Azomite (for trace minerals)
* Straw or wood chip mulch
* Water-absorbing polymers (optional, but helpful)
* Gardening gloves
* Trowel or shovel
* Watering can (for initial watering)
Preparing Your Planting Area
The foundation of waterless tomato growing is a well-prepared planting area. This is where we’ll create the water-retentive environment that will sustain your tomato plants.
1. Choose Your Location: Select a spot that receives at least 6-8 hours of direct sunlight per day. Tomatoes are sun-loving plants, so this is crucial for their growth and fruit production.
2. Prepare Your Containers or Raised Beds: If you’re using containers, make sure they have drainage holes. For raised beds, ensure the soil is well-draining and free of any large rocks or debris.
3. Create Your Super Soil Mix: This is the heart of the waterless system. We’re going to create a soil mix that’s rich in nutrients, retains moisture, and drains well. Here’s my go-to recipe:
* 50% Potting Mix: Provides a good base for drainage and aeration.
* 25% Compost: Adds essential nutrients and improves soil structure.
* 10% Peat Moss or Coco Coir: Retains moisture and helps prevent the soil from drying out.
* 5% Vermiculite or Perlite: Improves drainage and aeration, preventing the soil from becoming compacted.
* 5% Slow-Release Fertilizer: Provides a steady supply of nutrients throughout the growing season.
* 1 tbsp Epsom Salts per gallon of soil mix: Provides magnesium, which is essential for chlorophyll production and overall plant health.
* 2 tbsp Bone Meal per gallon of soil mix: Provides phosphorus, which is crucial for root development and fruit production.
* 1 tbsp Azomite per gallon of soil mix: Provides a wide range of trace minerals that are often lacking in conventional potting mixes.
* Water-absorbing polymers (follow package instructions): These polymers absorb water and release it slowly, further reducing the need for watering. (Optional)
Mix all the ingredients thoroughly in a large container or on a tarp. Make sure everything is evenly distributed.
4. Fill Your Containers or Raised Beds: Fill your containers or raised beds with the super soil mix, leaving a few inches of space at the top.
Planting Your Tomato Seedlings
Now that your planting area is ready, it’s time to plant your tomato seedlings.
1. Dig Your Planting Holes: Dig holes that are slightly larger than the root balls of your tomato seedlings. Space the holes according to the recommended spacing for your chosen tomato variety. Generally, determinate varieties (bush tomatoes) can be spaced closer together than indeterminate varieties (vining tomatoes).
2. Add a Handful of Compost to Each Hole: This will give your seedlings a boost of nutrients as they settle in.
3. Gently Remove the Seedlings from Their Containers: Be careful not to damage the roots. If the roots are tightly bound, gently loosen them with your fingers.
4. Plant the Seedlings: Place the seedlings in the holes and backfill with the super soil mix. Make sure the top of the root ball is level with the surrounding soil. For leggy seedlings, you can bury the stem up to the first set of leaves. This will encourage the plant to develop more roots along the buried stem.
5. Water Thoroughly: This is the only time you’ll need to water deeply. Water the seedlings until the soil is thoroughly saturated. This will help the roots establish themselves in the new soil.
Mulching for Moisture Retention
Mulching is a critical step in waterless tomato growing. It helps to retain moisture, suppress weeds, and regulate soil temperature.
1. Choose Your Mulch: Straw and wood chips are excellent choices for mulching tomatoes. They decompose slowly, providing a long-lasting layer of protection.
2. Apply a Thick Layer of Mulch: Spread a 3-4 inch layer of mulch around the base of your tomato plants, leaving a small gap around the stem to prevent rot. Make sure the mulch covers the entire surface of the soil.
Ongoing Care and Maintenance
While waterless tomato growing minimizes the need for watering, it’s still important to provide some ongoing care and maintenance.
1. Monitor Soil Moisture: Check the soil moisture regularly by sticking your finger into the soil. If the top inch or two feels dry, it’s time to water lightly. However, avoid overwatering, as this can lead to root rot.
2. Fertilize Regularly: Even with the slow-release fertilizer in the soil mix, it’s a good idea to supplement with a liquid fertilizer every few weeks. Choose an organic fertilizer that’s specifically formulated for tomatoes.
3. Prune Your Tomato Plants: Pruning helps to improve air circulation and sunlight penetration, which can reduce the risk of disease. Remove any suckers (the small shoots that grow between the main stem and the branches) to encourage the plant to focus its energy on fruit production.
4. Provide Support: As your tomato plants grow, they’ll need support to prevent them from falling over. Use stakes, cages, or trellises to support the plants and keep the fruit off the ground.
5. Pest and Disease Control: Keep an eye out for pests and diseases. If you notice any problems, take action immediately. There are many organic pest and disease control options available.
6. Harvest Your Tomatoes: Harvest your tomatoes when they’re fully ripe and have reached their peak flavor. Gently twist the tomatoes off the vine.
Troubleshooting
Even with the best planning, you might encounter some challenges along the way. Here are a few common problems and how to address them:
* Yellowing Leaves: This could be a sign of nutrient deficiency, overwatering, or underwatering. Check the soil moisture and fertilize if necessary.
* Blossom End Rot: This is caused by a calcium deficiency. Add bone meal to the soil or spray the plants with a calcium solution.
* Pests: Common tomato pests include aphids, whiteflies, and tomato hornworms. Use insecticidal soap or neem oil to control these pests.
* Diseases: Common tomato diseases include early blight, late blight, and septoria leaf spot. Use a copper fungicide to prevent and control these diseases.
Tips for Success
Here are a few extra tips to help you succeed with waterless tomato growing:
* Choose the Right Tomato Variety: Some tomato varieties are more drought-tolerant than others. Look for varieties that are known for their ability to withstand dry conditions.
* Start with Healthy Seedlings: Choose healthy, vigorous seedlings from a reputable nursery.
* Amend Your Soil Regularly: Add compost to your soil each year to improve its
Conclusion
So there you have it! This simple, yet incredibly effective, fast stain removal hack is a game-changer for anyone who’s ever despaired over a stubborn stain. Forget harsh chemicals and expensive stain removers that promise the world but often fall short. This DIY solution, using ingredients you likely already have in your pantry, offers a gentle yet powerful way to tackle those everyday spills and mishaps.
Why is this a must-try? Because it’s fast, effective, affordable, and environmentally friendly. It saves you time, money, and the frustration of dealing with lingering stains. Imagine the peace of mind knowing you have a reliable solution at your fingertips, ready to combat everything from coffee spills to grass stains.
But the beauty of this fast stain removal hack lies not only in its simplicity but also in its adaptability. Feel free to experiment with variations to suit your specific needs and the type of stain you’re dealing with. For instance, for particularly stubborn stains on white fabrics, you might consider adding a small amount of hydrogen peroxide to the mixture. Always test this in an inconspicuous area first to ensure it doesn’t discolor the fabric. For delicate fabrics, dilute the solution further with water and use a gentler blotting motion.
Consider these variations:
* **For grease stains:** Add a pinch of baking soda to the mixture to help absorb the grease.
* **For ink stains:** Pre-treat the stain with rubbing alcohol before applying the DIY solution.
* **For blood stains:** Use cold water only, as hot water can set the stain.
Ultimately, the key to successful stain removal is to act quickly. The sooner you treat the stain, the better your chances of removing it completely. Keep this fast stain removal hack in your arsenal, and you’ll be prepared for whatever life throws your way.
We’re confident that this DIY trick will become your go-to solution for stain emergencies. But don’t just take our word for it! We encourage you to try it out for yourself and see the amazing results firsthand. Share your experiences with us in the comments below. Let us know what types of stains you’ve tackled, what variations you’ve tried, and any tips or tricks you’ve discovered along the way. Your feedback will not only help us improve this guide but also provide valuable insights for other readers. Together, we can conquer even the most challenging stains and keep our clothes looking their best. So go ahead, give it a try, and let us know what you think!
Frequently Asked Questions (FAQ)
What types of stains does this fast stain removal hack work best on?
This DIY stain remover is effective on a wide range of common stains, including coffee, tea, juice, wine, grass, mud, and food spills. It’s particularly good for fresh stains, but it can also work on older stains with repeated applications. However, it may not be as effective on very stubborn stains like permanent marker or set-in grease stains. For those types of stains, you might need to use a specialized stain remover or consult a professional cleaner. Remember to always test the solution on an inconspicuous area of the fabric first to ensure it doesn’t cause any discoloration or damage.
Can I use this fast stain removal hack on all types of fabrics?
While this DIY solution is generally safe for most fabrics, it’s always best to exercise caution, especially with delicate materials like silk, wool, or linen. Before applying the solution to the entire stain, test it on a hidden area of the fabric, such as an inside seam or hem. If you notice any adverse reactions, such as color fading or fabric damage, discontinue use immediately. For delicate fabrics, you may want to dilute the solution further with water or use a gentler blotting motion instead of rubbing.
How long should I leave the solution on the stain?
The amount of time you leave the solution on the stain will depend on the severity of the stain and the type of fabric. For fresh, light stains, a few minutes may be sufficient. For older, more stubborn stains, you may need to leave the solution on for up to 30 minutes. Check the stain periodically to see if it’s lifting. If the stain is still visible after 30 minutes, you can reapply the solution and let it sit for another 30 minutes. However, avoid leaving the solution on for extended periods, as this could potentially damage the fabric.
What if the stain doesn’t come out completely after the first application?
Don’t be discouraged if the stain doesn’t disappear completely after the first application. Sometimes, stubborn stains require multiple treatments. Simply repeat the process, reapplying the solution and blotting the stain until it fades. You can also try gently scrubbing the stain with a soft-bristled brush or toothbrush to help loosen the stain fibers. If the stain persists after several attempts, you may need to consider using a stronger stain remover or consulting a professional cleaner.
Can I use this fast stain removal hack on carpets and upholstery?
Yes, this DIY solution can also be used on carpets and upholstery. However, it’s important to test the solution on a hidden area first to ensure it doesn’t cause any discoloration or damage. When applying the solution to carpets or upholstery, avoid saturating the fabric. Instead, use a spray bottle to lightly mist the stained area. Blot the area with a clean cloth until the stain is lifted. You may need to repeat the process several times to remove the stain completely. Once the stain is gone, blot the area with a clean, damp cloth to remove any residue from the solution.
What are the best ingredients to use for this fast stain removal hack?
The best ingredients to use for this DIY stain remover are those that are gentle yet effective at breaking down stains. White vinegar is a great option because it’s acidic and helps to dissolve many types of stains. Baking soda is a mild abrasive that can help to lift stains from fabric. Dish soap is a surfactant that helps to break down grease and oil. When combining these ingredients, be sure to use a mild dish soap that doesn’t contain any harsh chemicals or dyes.
Is this fast stain removal hack safe for colored fabrics?
While this DIY solution is generally safe for colored fabrics, it’s always a good idea to test it on an inconspicuous area first to ensure it doesn’t cause any color fading. If you’re concerned about color fading, you can dilute the solution further with water or use a gentler blotting motion instead of rubbing. Avoid using this solution on fabrics that are labeled as “dry clean only,” as it could potentially damage the fabric.
How should I store the leftover solution?
It’s best to make a fresh batch of the DIY stain removal solution each time you need it, as the ingredients may lose their effectiveness over time. However, if you have leftover solution, you can store it in an airtight container in a cool, dark place for up to a week. Be sure to label the container clearly so you don’t accidentally use it for something else. Before using the stored solution, give it a good shake to ensure the ingredients are properly mixed.

Leave a Comment