
Growing Asparagus on Terrace gardens might seem like a dream reserved for sprawling country estates, but I’m here to tell you it’s absolutely achievable, even if your “garden” is a sunny spot on your terrace! For centuries, asparagus has been prized for its delicate flavor and nutritional benefits. The ancient Romans even considered it a delicacy, and its cultivation has evolved over time to become more accessible to home gardeners like you and me.
But why bother with the effort of growing your own asparagus? Well, store-bought asparagus often lacks the fresh, vibrant taste of homegrown varieties. Plus, growing asparagus on terrace spaces offers a unique opportunity to connect with nature, even in the heart of the city. Imagine stepping outside and harvesting your own delicious spears for a gourmet meal!
This DIY guide is packed with simple, effective tricks and hacks to help you successfully cultivate asparagus in containers or raised beds on your terrace. I’ll walk you through everything from choosing the right varieties and preparing the soil to providing proper care and harvesting your bountiful crop. Get ready to transform your terrace into a thriving asparagus patch!
DIY Home Hack: Transforming Old T-Shirts into Reusable Shopping Bags
Okay, friends, let’s dive into a super practical and eco-friendly DIY project! We’re going to turn those old t-shirts languishing in your drawers into sturdy, reusable shopping bags. Not only will you be reducing waste, but you’ll also have a unique and personalized bag to carry your groceries or library books. Trust me, it’s easier than you think!
What You’ll Need
Before we get started, let’s gather our supplies. Here’s what you’ll need:
* An old t-shirt (preferably cotton or a cotton blend – the thicker the better for durability!)
* Sharp scissors
* A ruler or measuring tape
* A marker or fabric chalk
* Sewing machine (optional, but recommended for a stronger bag)
* Thread (matching or contrasting, depending on your preference)
* Pins (if sewing)
* Iron and ironing board (optional, but helpful for crisp edges)
* A large bowl or plate (for tracing a curved neckline, optional)
Choosing Your T-Shirt
The key to a successful t-shirt bag is choosing the right t-shirt! Here are a few things to consider:
* Fabric: Cotton or cotton blends are ideal because they’re strong and easy to work with. Avoid very thin or stretchy fabrics, as they won’t hold up well.
* Size: A larger t-shirt will obviously result in a larger bag. Consider what you’ll primarily be using the bag for when choosing your shirt.
* Design: This is where you can get creative! Choose a t-shirt with a cool graphic, a fun pattern, or a sentimental design. Remember, the design will be visible on your finished bag.
* Condition: Minor stains or small holes near the collar or sleeves aren’t a problem, as we’ll be cutting those areas away. However, avoid shirts with large rips or significant damage in the main body.
Step-by-Step Instructions: No-Sew Method
If you don’t have a sewing machine or simply prefer a no-sew option, this method is for you! It relies on tying knots to create a secure bottom for your bag. While not as durable as a sewn bag, it’s a quick and easy solution.
1. Prepare the T-Shirt: Lay your t-shirt flat on a clean surface. Smooth out any wrinkles. If you want, iron the shirt for a neater finish.
2. Cut Off the Sleeves: Using your scissors, carefully cut off both sleeves of the t-shirt. Cut along the seam, or slightly inside the seam for a cleaner look. Try to make the cuts as even as possible.
3. Widen the Neckline (Optional): If you want a wider opening for your bag, you can widen the neckline. Place a large bowl or plate on the neckline and trace around it with a marker or fabric chalk. Then, carefully cut along the traced line. This step is optional, but it can make it easier to load and unload items from your bag.
4. Create the Fringe: This is where the magic happens! Along the bottom edge of the t-shirt, cut strips of fabric that are approximately 3-4 inches long and about 1 inch wide. Make sure you’re cutting through both the front and back layers of the shirt. The more strips you cut, the stronger your knotted base will be. Try to keep the strips as even as possible.
5. Tie the Knots: Now comes the knot-tying! Take one strip from the front of the shirt and one corresponding strip from the back of the shirt. Tie them together in a tight, secure knot. Repeat this process for all the strips along the bottom edge of the shirt.
6. Second Row of Knots (Optional, but Recommended): For extra security, tie a second row of knots. Take one strand from one knot and tie it to the strand from the knot next to it. This will create a more secure and durable bottom for your bag.
7. Reinforce the Handles (Optional): If you’re concerned about the handles stretching or breaking, you can reinforce them by braiding the fabric. Cut a few strips of fabric from the leftover sleeves and braid them together. Then, tie or glue the braid to the inside of the handles for added strength.
8. Trim Any Uneven Edges: Once you’ve finished tying all the knots, take a look at the bottom of your bag. If there are any uneven edges or stray pieces of fabric, trim them with your scissors.
Step-by-Step Instructions: Sewing Method
For a more durable and professional-looking bag, I highly recommend using a sewing machine. It’s a bit more involved, but the results are worth it!
1. Prepare the T-Shirt: Just like with the no-sew method, start by laying your t-shirt flat on a clean surface and smoothing out any wrinkles. Ironing is a good idea here for a cleaner finish.
2. Cut Off the Sleeves: Carefully cut off both sleeves of the t-shirt, following the seam or cutting slightly inside it. Aim for even cuts.
3. Widen the Neckline (Optional): If desired, widen the neckline using the bowl-tracing method described above.
4. Turn Inside Out: Turn the t-shirt inside out. This will hide the seams on the inside of the bag.
5. Pin the Bottom Edge: Fold the bottom edge of the t-shirt together, aligning the front and back layers. Use pins to secure the layers together, about an inch from the bottom edge. This will prevent the fabric from shifting while you sew.
6. Sew the Bottom Seam: Using your sewing machine, sew a straight seam along the pinned bottom edge of the t-shirt. Use a sturdy stitch, such as a straight stitch with a short stitch length, for added durability. Backstitch at the beginning and end of the seam to secure the threads.
7. Reinforce the Seam (Optional): For extra strength, you can sew a second seam parallel to the first one, about 1/4 inch away. This will further reinforce the bottom of the bag.
8. Create a Boxed Bottom (Optional): A boxed bottom will give your bag more structure and allow it to stand up on its own. To create a boxed bottom, flatten one of the bottom corners of the bag so that the side seam and the bottom seam are aligned. Measure a few inches from the corner (the exact measurement will depend on how wide you want the boxed bottom to be) and draw a line perpendicular to the seams. Sew along this line. Repeat on the other corner. Trim off the excess fabric from the corners, leaving about 1/2 inch seam allowance.
9. Turn Right Side Out: Turn the bag right side out.
10. Reinforce the Handles (Optional): As with the no-sew method, you can reinforce the handles by braiding strips of fabric from the leftover sleeves and attaching them to the inside of the handles. You can sew the braids in place for a secure hold.
11. Topstitch the Opening (Optional): For a more polished look, you can topstitch around the opening of the bag. Fold the raw edge of the neckline inward by about 1/2 inch and iron it in place. Then, sew a straight stitch close to the folded edge. This will create a clean and finished look.
Adding Personal Touches
Now that you’ve created your basic t-shirt bag, it’s time to personalize it! Here are a few ideas:
* Fabric Paint: Use fabric paint to add designs, quotes, or your name to the bag.
* Appliqués: Sew on fabric scraps, patches, or other embellishments to create a unique look.
* Embroidery: Embroider designs or patterns onto the bag for a more intricate and personalized touch.
* Buttons and Beads: Sew on buttons, beads, or other decorative elements to add texture and visual interest.
* Tie-Dye: Tie-dye your t-shirt before turning it into a bag for a colorful and groovy effect.
Tips and Tricks for Success
* Use Sharp Scissors: Sharp scissors will make it easier to cut the fabric cleanly and accurately.
* Take Your Time: Don’t rush the process. Take your time and pay attention to detail for the best results.
* Practice on Scrap Fabric: If you’re new to sewing, practice on scrap fabric before working on your t-shirt bag.
* Use a Walking Foot (If Available): A walking foot on your sewing machine will help to feed the fabric evenly, preventing it from puckering or stretching.
* Choose the Right Thread: Use a thread that is appropriate for the fabric you’re using. Cotton thread is a good choice for cotton t-shirts.
* Iron as You Go: Ironing the fabric as
Conclusion
So, there you have it! This simple yet incredibly effective DIY trick for creating your own natural cleaning solution is a game-changer for anyone looking to simplify their home cleaning routine, save money, and reduce their environmental impact. We’ve walked you through the process, highlighting the ease and accessibility of using readily available ingredients to craft a powerful cleaner that rivals store-bought alternatives.
But why is this DIY cleaning solution a must-try? Beyond the cost savings and eco-friendliness, it’s about taking control of what you bring into your home. You know exactly what’s in your cleaner – no hidden chemicals, no harsh fragrances, just pure, effective cleaning power. This is particularly beneficial for those with sensitivities or allergies, or for families with young children and pets. You can rest assured that you’re creating a safer, healthier environment for everyone.
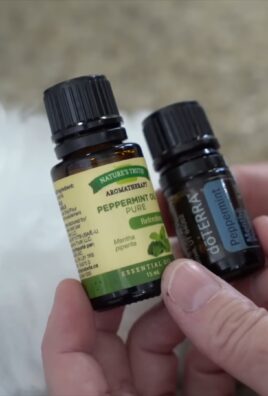
The beauty of this DIY approach also lies in its adaptability. Feel free to experiment with different essential oils to create your own signature scent. Lavender, lemon, tea tree, and eucalyptus are all excellent choices, each offering unique cleaning and aromatherapy benefits. For tougher stains, consider adding a bit more vinegar or a small amount of washing soda to the mix. Remember to always test your solution on an inconspicuous area first, especially on delicate surfaces.
This DIY cleaning solution is more than just a recipe; it’s a gateway to a more sustainable and conscious lifestyle. It’s about making small changes that have a big impact, both on your wallet and on the planet. It’s about embracing the power of simple, natural ingredients to create a cleaner, healthier home.
We wholeheartedly encourage you to give this DIY cleaning solution a try. You’ll be amazed at how easy it is to make and how effective it is at cleaning. And once you’ve experienced the benefits for yourself, we’d love to hear about it! Share your experiences, your variations, and your cleaning triumphs in the comments below. Let’s build a community of DIY enthusiasts who are passionate about creating a cleaner, greener world, one homemade cleaning solution at a time. Let us know what other home life hacks you have tried and what worked for you.
Frequently Asked Questions (FAQs)
Q: What are the benefits of using a DIY cleaning solution compared to store-bought cleaners?
A: There are several key advantages to making your own cleaning solution. First and foremost, you have complete control over the ingredients. This allows you to avoid harsh chemicals, artificial fragrances, and other potentially harmful substances commonly found in commercial cleaners. This is especially important for individuals with allergies, sensitivities, or young children and pets. Secondly, DIY cleaning solutions are often significantly cheaper than their store-bought counterparts. The ingredients are typically readily available and inexpensive, resulting in substantial cost savings over time. Finally, making your own cleaning solution is an environmentally friendly choice. By reducing your reliance on commercially produced cleaners, you’re minimizing your contribution to plastic waste and the release of harmful chemicals into the environment.
Q: What ingredients are typically used in a DIY cleaning solution, and why?
A: Common ingredients include white vinegar, baking soda, essential oils, and water. White vinegar is a natural disinfectant and deodorizer, effective at cutting through grease and grime. Baking soda is a mild abrasive that helps to scrub away dirt and stains. Essential oils not only add a pleasant scent but also offer additional cleaning and antibacterial properties. Water acts as a solvent, diluting the other ingredients and making the solution easier to apply. Some recipes may also include castile soap for added cleaning power.
Q: Can I use this DIY cleaning solution on all surfaces in my home?
A: While this DIY cleaning solution is generally safe for most surfaces, it’s always a good idea to test it on an inconspicuous area first, especially on delicate materials like marble, granite, or wood. Vinegar, in particular, can be acidic and may damage certain surfaces over time. Avoid using it on natural stone countertops or unsealed wood. For these surfaces, a milder solution of water and castile soap is often a better choice.
Q: How long does a DIY cleaning solution typically last?
A: The shelf life of a DIY cleaning solution depends on the ingredients used. Solutions containing water are best used within a few weeks to prevent bacterial growth. Adding a preservative, such as grapefruit seed extract, can help to extend the shelf life. Solutions made with vinegar and essential oils tend to last longer, typically several months. It’s always a good idea to label your cleaning solution with the date it was made and to discard it if you notice any changes in color, odor, or consistency.
Q: What essential oils are best to use in a DIY cleaning solution?
A: The best essential oils to use depend on your personal preferences and the desired cleaning properties. Lavender is known for its calming scent and antibacterial properties. Lemon is a powerful degreaser and disinfectant. Tea tree oil is a potent antiseptic and antifungal agent. Eucalyptus oil has a refreshing scent and is effective at killing germs. Other popular choices include peppermint, rosemary, and orange essential oils. Experiment with different combinations to find your favorite scent and cleaning power.
Q: How do I store my DIY cleaning solution?
A: Store your DIY cleaning solution in a clean, airtight container, preferably a glass spray bottle. Label the bottle clearly with the name of the solution and the date it was made. Keep the bottle out of direct sunlight and away from heat sources. Store it in a cool, dry place, such as a cabinet or pantry.
Q: Can I use this DIY cleaning solution to clean my bathroom?
A: Yes, this DIY cleaning solution is excellent for cleaning bathrooms. The vinegar helps to remove soap scum and hard water stains, while the essential oils provide a fresh, clean scent. Use it to clean sinks, toilets, showers, and bathtubs. For tougher stains, you can create a paste of baking soda and water and apply it to the affected area before spraying with the cleaning solution.
Q: Is this DIY cleaning solution safe for septic systems?
A: Yes, this DIY cleaning solution is generally safe for septic systems. The ingredients are biodegradable and do not contain harsh chemicals that can harm the beneficial bacteria in your septic tank. However, it’s always a good idea to use cleaning products sparingly, regardless of whether they are store-bought or homemade.
Q: What are some other creative uses for this DIY cleaning solution?
A: Beyond general cleaning, this DIY solution can be used for a variety of other purposes. It can be used as a natural air freshener, a fabric refresher, or even a weed killer. Simply spray it on the affected area and let it work its magic. You can also use it to clean your microwave, refrigerator, or dishwasher. The possibilities are endless!
Q: What if I don’t have all the ingredients listed in the recipe?
A: Don’t worry if you’re missing an ingredient or two. The beauty of DIY is that you can often substitute ingredients based on what you have on hand. For example, if you don’t have white vinegar, you can use apple cider vinegar instead. If you don’t have essential oils, you can simply omit them or use a different type of essential oil. The key is to experiment and find what works best for you.
Q: Can I add dish soap to this cleaning solution?
A: Yes, you can add a small amount of dish soap to this cleaning solution for extra cleaning power, especially for greasy messes. However, be careful not to add too much, as it can create excessive suds. A teaspoon or two of dish soap per batch of cleaning solution is usually sufficient.
Q: How can I make a larger batch of this cleaning solution?
A: Simply multiply the ingredient quantities by the desired factor. For example, if you want to make a double batch, double the amount of each ingredient. Be sure to store the larger batch in a suitable container.
Q: What are some other easy home life hacks that I can try?
A: There are countless other easy home life hacks you can try! Consider using dryer sheets to dust furniture, using coffee filters to clean windows, or using lemon juice to remove stains from clothing. The internet is full of creative and helpful tips for simplifying your life and making your home a more comfortable and efficient space.
Leave a Comment