
Free chili garden on a budget? Yes, you read that right! Imagine fiery red, green, and yellow chilies bursting from your own backyard, ready to spice up your meals, all without breaking the bank. For centuries, chilies have been more than just a culinary ingredient; they’ve been symbols of prosperity, good health, and even protection in various cultures around the world. From ancient Mesoamerica, where they were first cultivated, to the bustling markets of Asia, chilies have always held a special place.
But let’s be honest, setting up a garden can feel daunting, especially when you’re watching your pennies. That’s where this DIY guide comes in! I’m going to share some clever, cost-effective tricks and hacks that will help you create your very own free chili garden on a budget. We’ll explore everything from repurposing household items as planters to propagating chili plants from scraps.
Why spend a fortune on store-bought chilies when you can grow your own, organically and sustainably? Not only will you save money, but you’ll also enjoy the satisfaction of nurturing your own food from seed to table. Plus, homegrown chilies often taste even better! So, grab your gardening gloves, and let’s get started on this exciting journey to a spicier, more affordable life!
Dein eigener Chili-Garten für kleines Geld: So geht’s!
Hey Chili-Liebhaber! Du träumst von einer reichen Chili-Ernte, ohne dein Budget zu sprengen? Dann bist du hier genau richtig! Ich zeige dir, wie du mit einfachen Mitteln und ein bisschen Kreativität deinen eigenen Chili-Garten anlegen kannst. Keine Angst, es ist einfacher als du denkst!
Was du brauchst: Die Materialliste
Bevor wir loslegen, lass uns sicherstellen, dass du alles griffbereit hast. Das meiste davon hast du vielleicht schon zu Hause!
* Chilisamen: Hier kannst du deiner Fantasie freien Lauf lassen! Ob mild, scharf oder super-scharf – wähle deine Lieblingssorten. Du kannst Samen online bestellen, im Gartencenter kaufen oder sogar aus getrockneten Chilis gewinnen.
* Anzuchterde: Spezielle Anzuchterde ist nährstoffarm und locker, ideal für die empfindlichen Keimlinge.
* Anzuchtgefäße: Kleine Töpfe, Joghurtbecher, Eierkartons – alles, was Löcher für den Wasserabzug hat, ist geeignet.
* Mini-Gewächshaus (optional): Ein Mini-Gewächshaus sorgt für ein ideales Klima für die Keimung. Du kannst aber auch einfach eine durchsichtige Plastiktüte oder Frischhaltefolie verwenden.
* Pflanztöpfe oder Kübel: Wenn die Chilis größer werden, brauchen sie mehr Platz. Wähle Töpfe oder Kübel mit ausreichend Volumen (mindestens 10 Liter pro Pflanze).
* Blumenerde: Hochwertige Blumenerde versorgt deine Chilis mit den nötigen Nährstoffen.
* Dünger: Spezieller Chili-Dünger oder Tomatendünger ist perfekt für eine reiche Ernte.
* Gießkanne oder Sprühflasche: Zum sanften Bewässern der Pflanzen.
* Pflanzstäbe (optional): Für Sorten, die stark wachsen und Unterstützung brauchen.
* Gartenschere oder Messer: Zum Umtopfen und Ernten.
* Etiketten und Stift: Damit du den Überblick über deine verschiedenen Chilisorten behältst.
* Handschuhe: Zum Schutz deiner Hände.
Phase 1: Die Anzucht – So bringst du deine Chilis zum Keimen
Chilis brauchen etwas länger zum Keimen als andere Gemüsesorten. Deshalb beginnen wir am besten schon im Februar oder März mit der Anzucht.
1. Vorbereitung der Anzuchtgefäße: Fülle deine Anzuchtgefäße mit Anzuchterde. Drücke die Erde leicht an und befeuchte sie mit einer Sprühflasche. Die Erde sollte feucht, aber nicht nass sein.
2. Aussaat der Chilisamen: Lege pro Gefäß 1-2 Chilisamen auf die Erde. Bedecke die Samen mit einer dünnen Schicht Anzuchterde (ca. 0,5 cm).
3. Befeuchten und Abdecken: Befeuchte die Erde erneut mit der Sprühflasche. Decke die Gefäße mit einem Mini-Gewächshaus, einer Plastiktüte oder Frischhaltefolie ab. Das sorgt für ein feuchtwarmes Klima, das die Keimung fördert.
4. Der richtige Standort: Stelle die Anzuchtgefäße an einen warmen und hellen Ort. Ideal sind Temperaturen zwischen 22 und 28 Grad Celsius. Eine Fensterbank über der Heizung ist perfekt.
5. Geduld ist gefragt: Jetzt heißt es warten! Die Keimung kann je nach Sorte und Temperatur 1-3 Wochen dauern. Lüfte die Abdeckung täglich kurz, um Schimmelbildung zu vermeiden. Halte die Erde feucht, aber nicht nass.
6. Die ersten Keimlinge: Sobald die ersten Keimlinge zu sehen sind, entferne die Abdeckung. Stelle die Pflanzen an einen helleren Ort, aber vermeide direkte Sonneneinstrahlung.
Phase 2: Pikieren – Den kleinen Chilis mehr Raum geben
Sobald die Chilis ihre ersten richtigen Blätter (nach den Keimblättern) entwickelt haben, ist es Zeit zum Pikieren. Das bedeutet, dass du die kleinen Pflanzen in größere Töpfe umpflanzt, damit sie mehr Platz zum Wachsen haben.
1. Vorbereitung der Töpfe: Fülle kleine Töpfe (ca. 8-10 cm Durchmesser) mit Blumenerde.
2. Die Chilis vorsichtig ausheben: Lockere die Erde um die Chilis vorsichtig mit einem Pikierstab oder einem Löffel. Hebe die Pflanzen vorsichtig aus der Anzuchterde, ohne die Wurzeln zu beschädigen.
3. Einpflanzen in die neuen Töpfe: Mache ein kleines Loch in die Blumenerde und setze die Chili-Pflanze hinein. Achte darauf, dass die Wurzeln nicht geknickt werden. Fülle das Loch mit Erde auf und drücke sie leicht an.
4. Angießen: Gieße die Chilis vorsichtig an.
5. Der richtige Standort: Stelle die pikierten Chilis an einen hellen und warmen Ort. Vermeide direkte Sonneneinstrahlung in den ersten Tagen.
Phase 3: Abhärten – Die Chilis auf das Leben im Freien vorbereiten
Bevor du deine Chilis ins Freie pflanzt, musst du sie langsam an die neuen Bedingungen gewöhnen. Dieser Prozess nennt sich Abhärten.
1. Langsame Gewöhnung: Stelle die Chilis tagsüber für ein paar Stunden ins Freie. Beginne mit einem schattigen Platz und steigere die Sonneneinstrahlung langsam.
2. Schutz vor Wind und Wetter: Schütze die Chilis vor starkem Wind und Regen.
3. Nachts wieder reinholen: Hole die Chilis nachts wieder ins Haus, solange die Temperaturen noch unter 10 Grad Celsius fallen.
4. Dauer: Das Abhärten sollte etwa 1-2 Wochen dauern.
Phase 4: Auspflanzen – Endlich raus in den Garten!
Nach den Eisheiligen (Mitte Mai) ist es endlich so weit: Deine Chilis dürfen ins Freie!
1. Der richtige Standort: Chilis lieben die Sonne! Wähle einen sonnigen und windgeschützten Standort für deine Pflanzen.
2. Vorbereitung der Töpfe oder des Beets: Fülle die Pflanztöpfe oder das Beet mit hochwertiger Blumenerde. Lockere die Erde gut auf.
3. Das Auspflanzen: Hebe die Chilis vorsichtig aus ihren Töpfen. Setze die Pflanzen in die Erde und fülle die Löcher mit Erde auf. Drücke die Erde leicht an.
4. Angießen: Gieße die Chilis gründlich an.
5. Pflanzabstand: Achte auf einen ausreichenden Pflanzabstand (ca. 40-50 cm), damit die Pflanzen genügend Platz zum Wachsen haben.
6. Stütze (optional): Bei hochwachsenden Sorten kann es sinnvoll sein, die Pflanzen mit Pflanzstäben zu stützen.
Phase 5: Pflege – So bleiben deine Chilis gesund und ertragreich
Damit deine Chilis prächtig gedeihen und eine reiche Ernte bringen, ist die richtige Pflege entscheidend.
1. Gießen: Gieße deine Chilis regelmäßig, besonders an heißen Tagen. Die Erde sollte immer leicht feucht sein, aber nicht nass. Vermeide Staunässe.
2. Düngen: Dünge deine Chilis regelmäßig mit speziellem Chili-Dünger oder Tomatendünger. Beginne etwa 2-3 Wochen nach dem Auspflanzen. Beachte die Dosierungsanleitung auf der Verpackung.
3. Ausgeizen (optional): Bei einigen Chilisorten kann es sinnvoll sein, die Seitentriebe (Geiztriebe) auszugeizen. Das fördert das Wachstum der Haupttriebe und die Fruchtbildung.
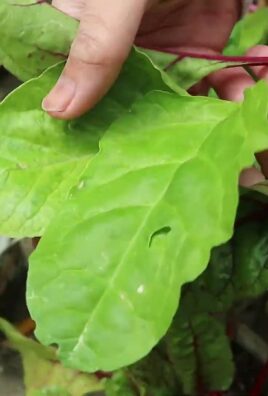
4. Schutz vor Schädlingen: Kontrolliere deine Chilis regelmäßig auf Schädlinge wie Blattläuse oder Spinnmilben. Bei Befall kannst du natürliche Schädlingsbekämpfungsmittel einsetzen.
5. Schutz vor Krankheiten: Achte auf Anzeichen von Krankheiten wie Pilzbefall. Entferne befallene Blätter oder Früchte sofort.
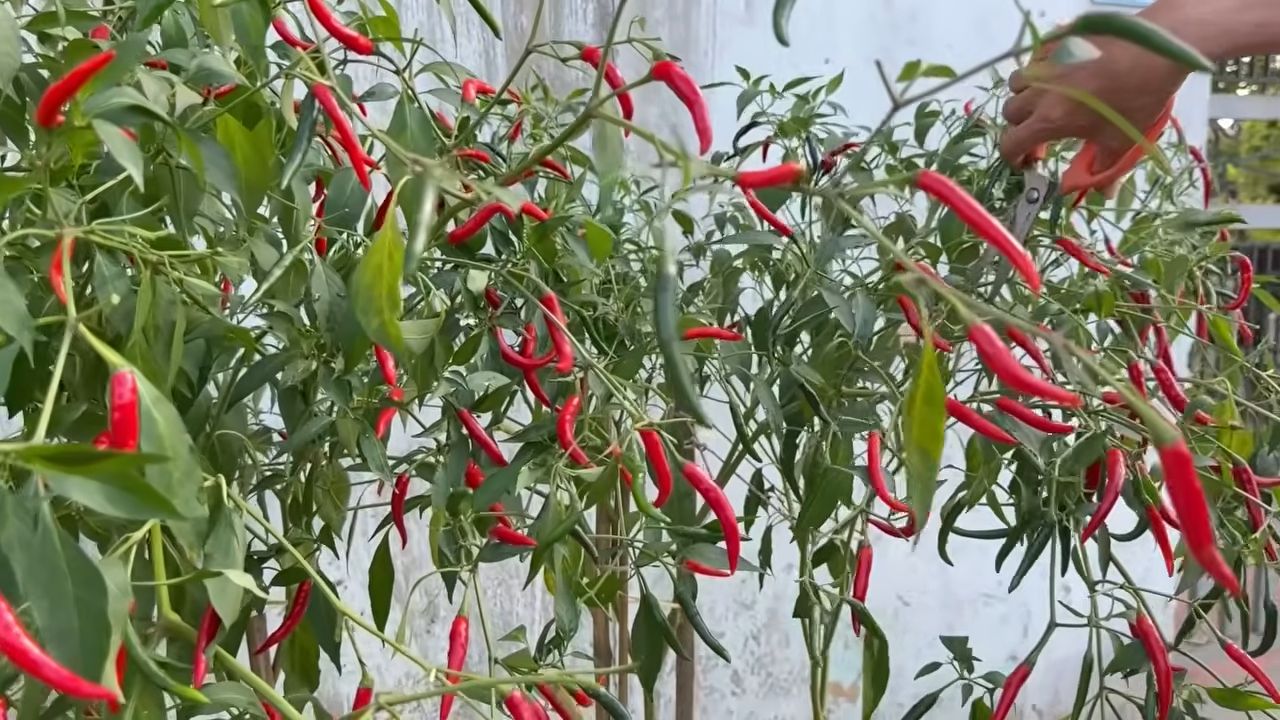
6. Ernte: Die Erntezeit beginnt je nach Sorte und Witterung im Sommer oder Herbst. Ernte die Chilis
Conclusion
So, there you have it! Creating your own free chili garden on a budget isn’t just a pipe dream; it’s an achievable and incredibly rewarding project. We’ve walked through the simple steps, highlighting how to leverage readily available resources and clever techniques to cultivate a thriving chili pepper patch without breaking the bank.
Why is this DIY trick a must-try? Because it empowers you to take control of your food source, enjoy the freshest, most flavorful chilies imaginable, and significantly reduce your grocery bill. Imagine the satisfaction of harvesting your own fiery peppers, knowing you nurtured them from seed (or even a discarded pepper!) to vibrant maturity. Beyond the economic benefits, gardening is therapeutic, connecting you with nature and providing a sense of accomplishment that’s hard to replicate.
But the beauty of this method lies in its adaptability. Feel free to experiment with different chili varieties. From the mild Anaheim to the scorching Scotch Bonnet, the possibilities are endless. Consider companion planting to maximize space and deter pests. Marigolds, basil, and garlic are excellent choices for a chili garden. You can also adjust the container sizes based on your available space and the specific needs of your chosen chili peppers. If you’re short on sunlight, consider investing in a grow light to supplement natural light.
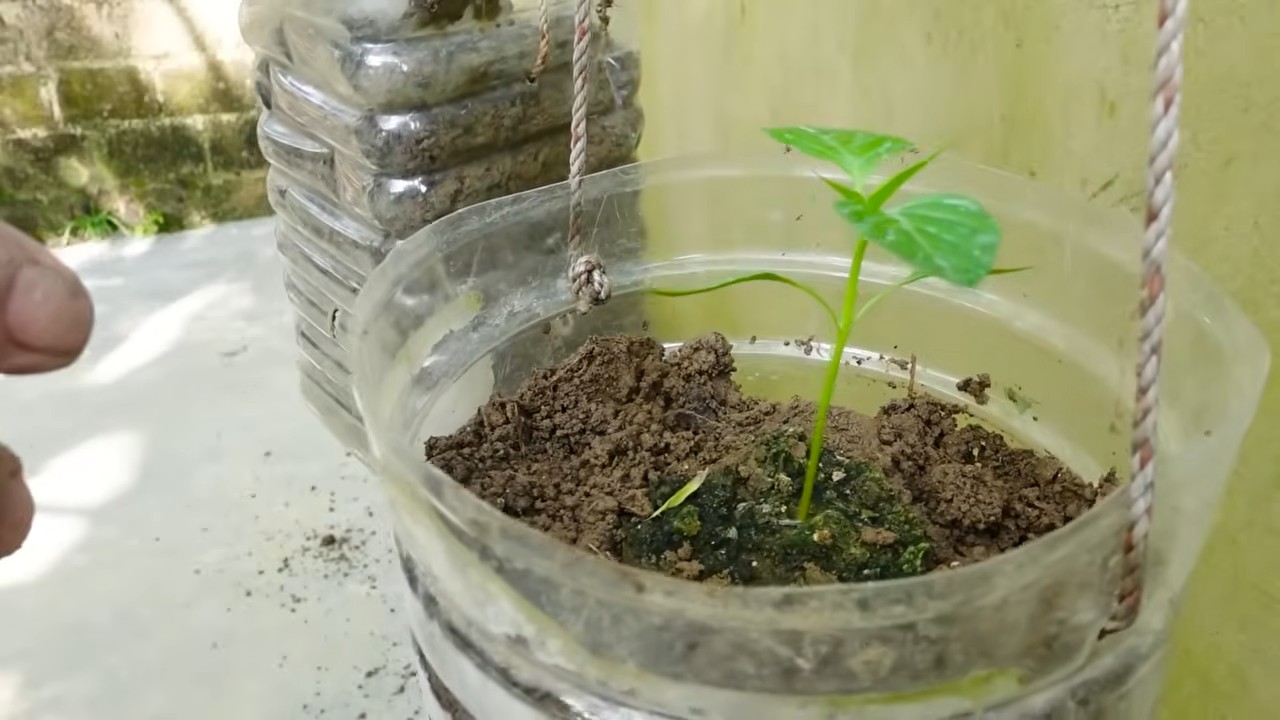
Don’t be afraid to get creative with your “free” resources. Instead of traditional pots, repurpose old tires, buckets, or even plastic bottles. Just ensure they have adequate drainage. Compost is your best friend! Start a compost bin using kitchen scraps and yard waste to create nutrient-rich soil for your chili plants.
We’re confident that with a little effort and ingenuity, you can create a bountiful free chili garden on a budget. It’s a sustainable, cost-effective, and incredibly satisfying way to enjoy fresh, flavorful chilies all season long.
Now, it’s your turn! We encourage you to embrace this DIY project and experience the joy of growing your own chilies. Share your experiences, successes, and challenges in the comments below. We’d love to hear about your favorite chili varieties, your clever repurposing ideas, and any tips you’ve discovered along the way. Let’s build a community of chili-growing enthusiasts and inspire others to embark on this rewarding journey. Happy gardening!
Frequently Asked Questions (FAQ)
What are the best chili pepper varieties to grow for beginners?
For beginners, milder varieties like Anaheim, Poblano, and Jalapeño are excellent choices. They are relatively easy to grow and offer a good balance of flavor and heat. As you gain experience, you can experiment with hotter varieties like Serrano or Cayenne. Remember to research the specific needs of each variety, as some may require more sunlight or water than others. Also, consider your local climate and choose varieties that are well-suited to your growing conditions.
How do I start chili plants from seeds saved from store-bought peppers?
Saving seeds from store-bought peppers can be a fun experiment, but keep in mind that the resulting plants may not be identical to the parent pepper due to cross-pollination. To start, carefully remove the seeds from a ripe pepper and allow them to dry completely on a paper towel for several days. Once dry, store them in an airtight container in a cool, dark place until you’re ready to plant. When planting, sow the seeds indoors 6-8 weeks before the last expected frost. Use a seed-starting mix and keep the soil consistently moist. Once the seedlings have developed a few sets of true leaves, you can transplant them into larger pots or directly into your garden.
What kind of soil is best for growing chili peppers?
Chili peppers thrive in well-draining, fertile soil with a slightly acidic to neutral pH (around 6.0-7.0). A good potting mix or garden soil amended with compost or other organic matter is ideal. Avoid heavy clay soils, as they can retain too much water and lead to root rot. If you’re using containers, ensure they have adequate drainage holes. You can also add perlite or vermiculite to improve drainage and aeration. Regularly fertilize your chili plants with a balanced fertilizer to provide them with the nutrients they need to grow and produce peppers.
How much sunlight do chili peppers need?
Chili peppers need at least 6-8 hours of direct sunlight per day to thrive. Choose a sunny location in your garden or on your patio for your chili plants. If you live in a particularly hot climate, some afternoon shade may be beneficial to prevent the peppers from scorching. If you’re growing chili peppers indoors, supplement natural light with a grow light to ensure they receive adequate light. Insufficient sunlight can lead to leggy growth, reduced flowering, and smaller peppers.
How often should I water my chili plants?
Water your chili plants regularly, especially during hot, dry weather. The soil should be kept consistently moist, but not waterlogged. Water deeply when the top inch of soil feels dry to the touch. Avoid overhead watering, as this can promote fungal diseases. Instead, water at the base of the plant. Mulching around the base of the plants can help retain moisture and suppress weeds. Adjust your watering schedule based on the weather conditions and the specific needs of your chili pepper variety.
What are some common pests and diseases that affect chili peppers, and how can I prevent them?
Common pests that affect chili peppers include aphids, spider mites, and whiteflies. These pests can be controlled with insecticidal soap, neem oil, or by introducing beneficial insects like ladybugs. Diseases that can affect chili peppers include fungal diseases like powdery mildew and blossom end rot. Prevent these diseases by providing good air circulation, avoiding overhead watering, and ensuring the soil is well-draining. Blossom end rot is often caused by calcium deficiency, so amend the soil with calcium-rich amendments like bone meal or eggshells. Regularly inspect your plants for signs of pests or diseases and take action promptly to prevent them from spreading.
How do I know when my chili peppers are ripe?
The color of the chili pepper is the best indicator of ripeness. Most chili peppers will turn from green to red, yellow, orange, or brown when they are ripe, depending on the variety. The peppers should also feel firm and slightly waxy to the touch. You can harvest chili peppers at any stage of ripeness, but the flavor and heat will be more intense when they are fully ripe. Use pruning shears or scissors to cut the peppers from the plant, leaving a small stem attached.
Can I grow chili peppers in containers?
Yes, chili peppers are well-suited to container gardening. Choose containers that are at least 12 inches in diameter and have adequate drainage holes. Use a good quality potting mix and fertilize regularly. Container-grown chili peppers may need to be watered more frequently than those grown in the ground, especially during hot weather. Place the containers in a sunny location and provide support for the plants if necessary. Container gardening allows you to easily move your chili plants to protect them from frost or extreme weather conditions.
How can I increase the heat of my chili peppers?
Several factors can influence the heat of chili peppers, including genetics, growing conditions, and stress. To increase the heat of your chili peppers, ensure they receive plenty of sunlight and water. Avoid over-fertilizing, as this can reduce the heat. Stressing the plants slightly by withholding water for a short period before harvesting can also increase the heat. Some gardeners believe that adding Epsom salts to the soil can also increase the heat of chili peppers. Remember that the heat of chili peppers is subjective, so experiment with different varieties and growing techniques to find what works best for you.
How do I store harvested chili peppers?
There are several ways to store harvested chili peppers. You can dry them by stringing them together and hanging them in a well-ventilated area. You can also dehydrate them using a food dehydrator or oven. Dried chili peppers can be stored in airtight containers for several months. Another option is to freeze chili peppers. Simply wash and dry the peppers, then place them in freezer bags. Frozen chili peppers can be used in cooking without thawing. You can also pickle chili peppers in vinegar or brine for longer-term storage.
Leave a Comment