
Garlic Water Culture DIY: Unlock the secrets to effortlessly growing garlic right in your kitchen! Have you ever dreamed of having a constant supply of fresh garlic greens without the hassle of traditional gardening? Well, dream no more! This simple, yet ingenious, DIY project will show you how to cultivate delicious garlic shoots using just water and a few cloves.
For centuries, cultures around the world have recognized the potent health benefits and culinary versatility of garlic. From ancient Egyptians using it for medicinal purposes to its prominent role in Mediterranean cuisine, garlic has always been a staple. Now, you can bring this time-honored tradition into your home with a modern twist.
Why should you try this Garlic Water Culture DIY? Because it’s incredibly easy, space-saving, and provides a continuous harvest of flavorful garlic greens. Imagine adding a zesty kick to your salads, soups, and stir-fries with freshly grown garlic shoots, all without ever stepping foot in a garden! Plus, it’s a fantastic way to reduce food waste by utilizing those sprouting garlic cloves you might otherwise toss. I’m excited to share this simple method with you, so let’s get started and transform your kitchen into a mini garlic farm!
Growing Garlic Indoors with Water Culture: A Beginner’s Guide
Hey there, fellow plant enthusiasts! Ever thought about growing garlic indoors, without any soil? It’s totally doable and surprisingly easy with water culture! I’m going to walk you through the whole process, step-by-step, so you can enjoy fresh garlic greens right from your kitchen. This method is perfect if you’re short on space, want to avoid messy soil, or just want a fun and unique gardening project.
What is Water Culture?
Water culture, also known as hydroponics, is a method of growing plants without soil, using water enriched with nutrients. The roots are submerged in the nutrient solution, allowing the plant to absorb everything it needs to thrive. It’s a fantastic way to grow herbs and vegetables indoors, and garlic is no exception!
Why Grow Garlic in Water?
* Clean and Simple: No soil means no mess! It’s a clean and easy way to grow garlic indoors.
* Space-Saving: Perfect for small apartments or homes with limited outdoor space.
* Fast Growth: Garlic greens tend to grow faster in water culture than in soil.
* Year-Round Harvest: You can enjoy fresh garlic greens any time of the year, regardless of the weather outside.
* Fun and Educational: It’s a great project for kids and adults alike, teaching about plant growth and hydroponics.
Materials You’ll Need
Before we get started, let’s gather all the necessary materials. Don’t worry, you probably already have most of these lying around!
* Garlic Cloves: Choose organic garlic cloves from your local grocery store or farmer’s market. Look for firm, healthy cloves with no signs of mold or damage. I prefer using organic garlic because it’s less likely to be treated with chemicals that could inhibit growth.
* Shallow Container: A small bowl, a plastic container, or even a recycled yogurt container will work perfectly. Just make sure it’s clean and wide enough to hold several garlic cloves.
* Water: Tap water is fine, but letting it sit out for 24 hours to allow chlorine to evaporate is even better.
* Toothpicks (Optional): These are helpful for suspending the garlic cloves above the water, but not essential.
* Nutrient Solution (Optional): While not strictly necessary, adding a diluted hydroponic nutrient solution can boost growth. I use a balanced liquid fertilizer diluted to about 1/4 strength.
* Spray Bottle (Optional): For misting the garlic greens.
* Grow Light (Optional): If you don’t have a sunny windowsill, a grow light can provide the necessary light for healthy growth.
Step-by-Step Instructions
Alright, let’s get our hands dirty (or rather, wet!) and start growing some garlic!
1. Prepare the Garlic Cloves: Gently separate the cloves from the garlic bulb. Be careful not to damage the cloves. Leave the papery skin on, as it helps protect the clove and prevent it from rotting.
2. Prepare the Container: Clean your container thoroughly with soap and water. Rinse it well to remove any soap residue.
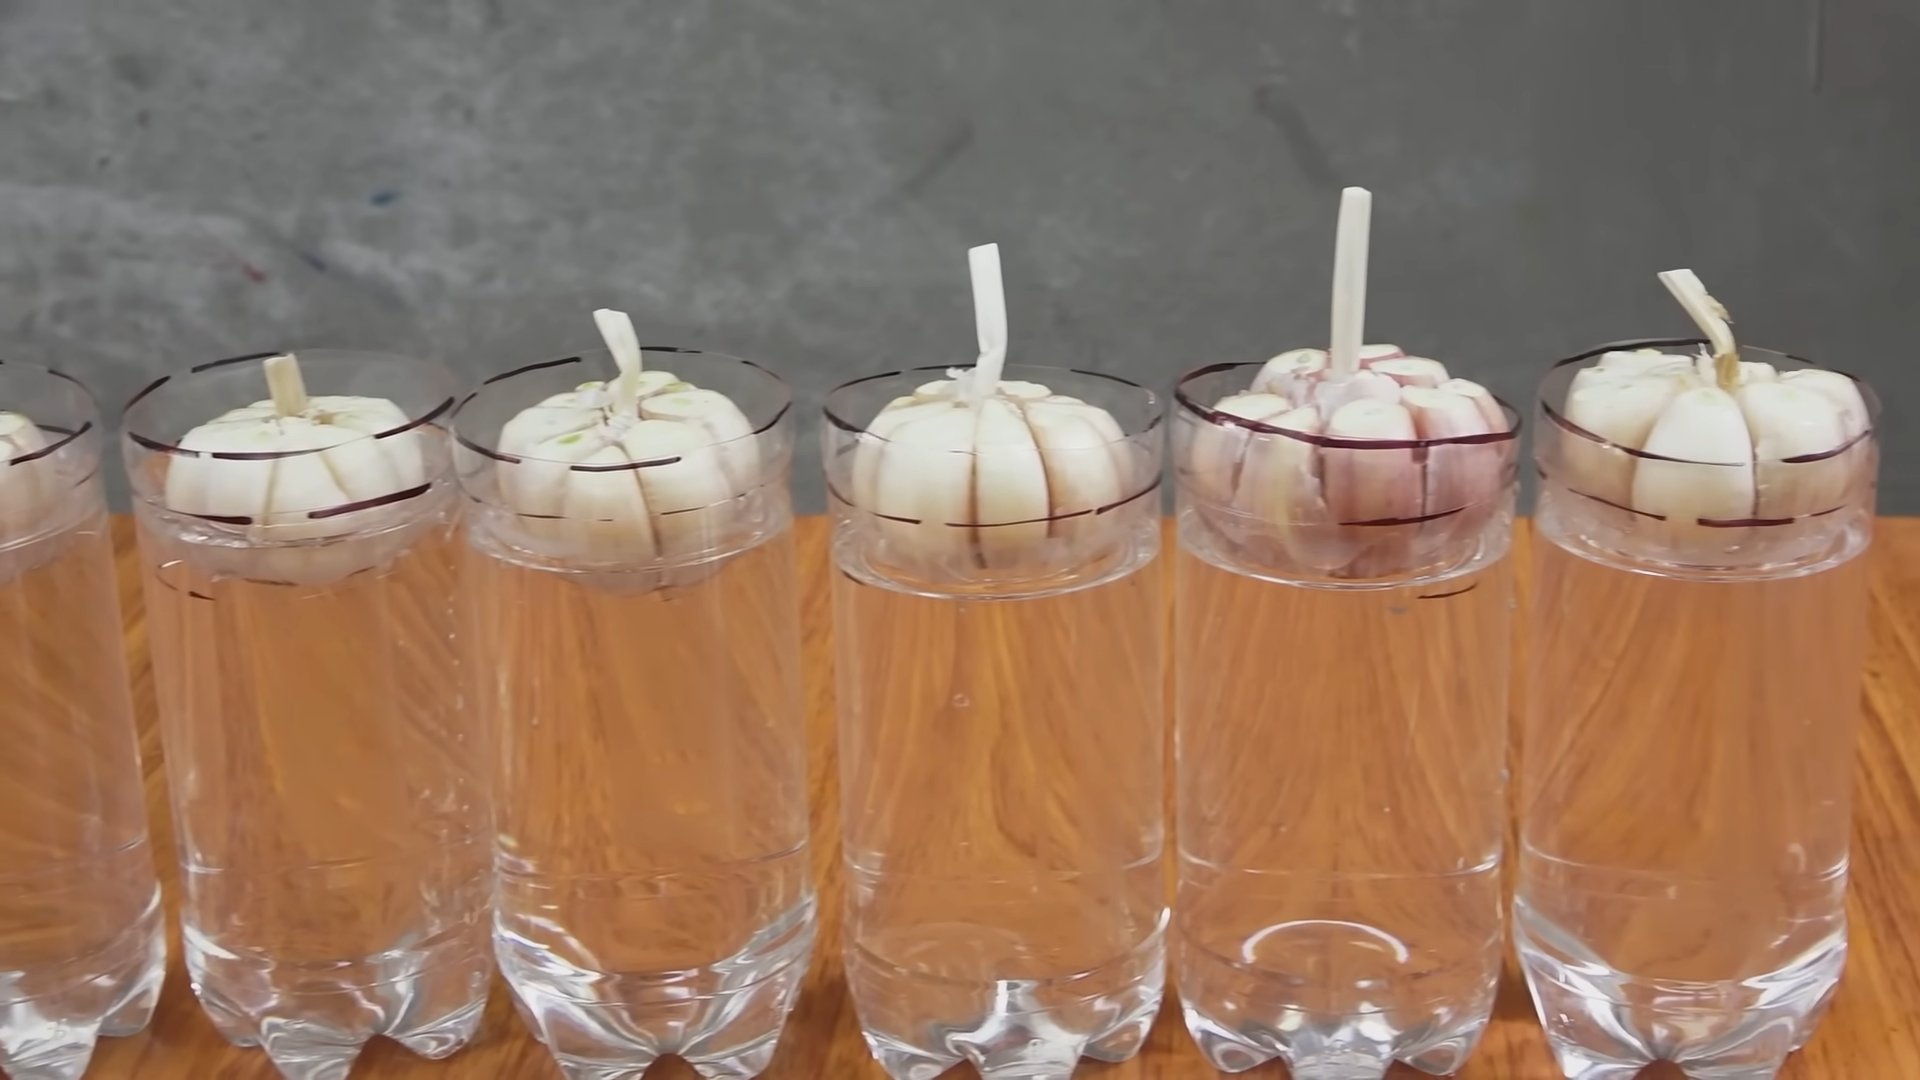
3. Add Water: Fill the container with enough water to reach about halfway up the garlic cloves. You don’t want the entire clove submerged, as this can lead to rot.
4. Position the Garlic Cloves: Place the garlic cloves in the container, with the pointed end facing up. The flat, root end should be submerged in the water.
* Using Toothpicks (Optional): If you want to suspend the cloves above the water, insert three or four toothpicks around the middle of each clove, creating a “platform” that rests on the rim of the container. This will keep the bottom of the clove just above the water level, encouraging root growth without causing rot.
5. Add Nutrient Solution (Optional): If you’re using a nutrient solution, add it to the water according to the instructions on the bottle. Remember to dilute it to about 1/4 strength to avoid burning the roots.
6. Find a Sunny Spot: Place the container in a bright, sunny location, such as a windowsill. Garlic needs at least 6 hours of sunlight per day to thrive. If you don’t have a sunny spot, you can use a grow light.
7. Maintain the Water Level: Check the water level daily and add more water as needed to keep the bottom of the cloves submerged. Change the water completely every few days to prevent algae growth and keep the water fresh. If you’re using a nutrient solution, add it to the fresh water each time you change it.
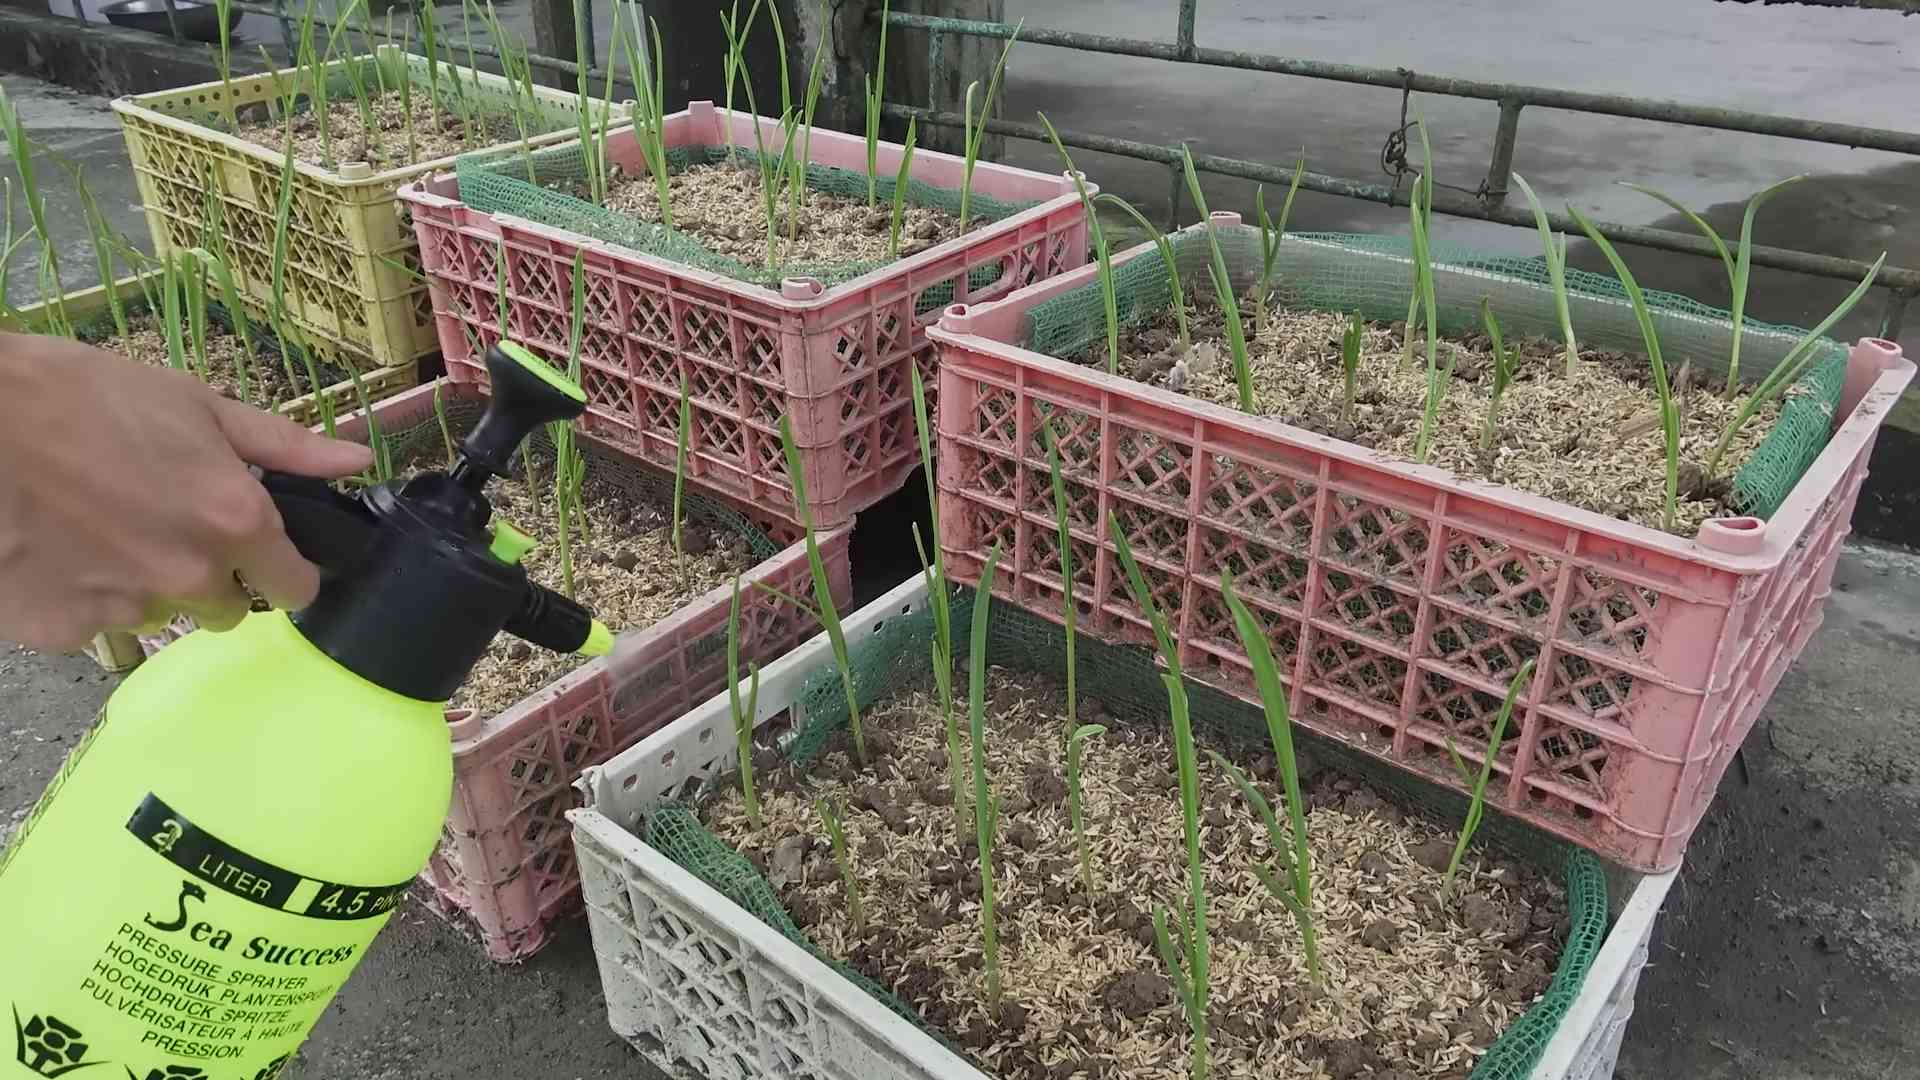
8. Mist the Greens (Optional): Mist the garlic greens with water every day or two to keep them hydrated and prevent them from drying out.
9. Observe and Enjoy: Within a few days, you should start to see roots emerging from the bottom of the cloves and green shoots sprouting from the top. Watch your garlic grow and enjoy the process!
Harvesting Your Garlic Greens
Once the garlic greens are about 6-8 inches tall, you can start harvesting them. Simply snip off the greens with scissors, leaving about an inch or two of growth. The garlic will continue to produce new greens, so you can harvest them multiple times.
* How to Use Garlic Greens: Garlic greens have a mild garlic flavor and can be used in a variety of dishes. I love adding them to salads, soups, stir-fries, and omelets. You can also use them as a garnish or chop them up and mix them with butter or cream cheese for a delicious spread.
Troubleshooting
Even with the best intentions, sometimes things don’t go exactly as planned. Here are a few common problems you might encounter and how to fix them:
* Garlic Cloves Rotting: This is usually caused by overwatering or poor ventilation. Make sure the bottom of the cloves is only partially submerged in water and change the water frequently. You can also try using the toothpick method to suspend the cloves above the water.
* Slow Growth: This could be due to insufficient light, lack of nutrients, or poor water quality. Make sure your garlic is getting enough sunlight or use a grow light. Add a diluted nutrient solution to the water and change the water regularly.
* Yellowing Leaves: This can be a sign of nutrient deficiency or overwatering. Adjust the nutrient solution and water level accordingly.
* Algae Growth: Algae can grow in the water if it’s exposed to too much light. Change the water frequently and consider using an opaque container to block out light.
Tips for Success
* Choose Healthy Garlic: Start with firm, healthy garlic cloves from a reputable source.
* Use Clean Water: Use filtered or dechlorinated water to avoid damaging the roots.
* Provide Adequate Light: Garlic needs plenty of light to grow, so place it in a sunny spot or use a grow light.
* Change the Water Regularly: This will prevent algae growth and keep the water fresh.
* Don’t Overwater: Make sure the bottom of the cloves is only partially submerged in water to prevent rot.
* Be Patient: Garlic greens take time to grow, so don’t get discouraged if you don’t see results immediately.
Experiment and Have Fun!
Growing garlic in water culture is a fun and rewarding experience. Don’t be afraid to experiment with different containers, nutrient solutions, and growing locations. The most important thing is to have fun and enjoy the process! I hope this guide has helped you get started. Happy growing!
Conclusion
So, there you have it! Transforming those seemingly useless garlic cloves into a thriving source of fresh, flavorful greens is not only incredibly simple, but also deeply satisfying. This Garlic Water Culture DIY project is more than just a fun experiment; it’s a sustainable way to reduce food waste, add a burst of freshness to your meals, and connect with the natural world, even if you only have a windowsill to spare.
Why is this a must-try? Because it’s a win-win-win! You’re rescuing garlic cloves that might otherwise end up in the trash, you’re growing your own delicious and nutritious greens, and you’re doing it all with minimal effort and resources. Imagine the possibilities: snipping fresh garlic greens to garnish your pasta dishes, adding a subtle garlicky bite to your salads, or blending them into vibrant pesto. The flavor is milder than a raw garlic clove, offering a delicate, herbaceous note that complements a wide range of cuisines.
Don’t be afraid to experiment with variations! Try using different types of garlic – softneck or hardneck – to see if you notice any differences in flavor or growth rate. You can also experiment with different containers. While a simple glass of water works perfectly well, you could also use a shallow dish filled with pebbles to provide extra support for the growing roots. Consider adding a diluted liquid fertilizer to the water every few weeks to boost growth, especially if you’re aiming for a larger harvest. Just remember to use a fertilizer specifically formulated for leafy greens and follow the instructions carefully to avoid over-fertilizing.
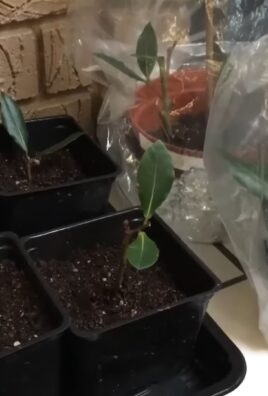
Another fun variation is to plant the sprouted garlic cloves in soil after they’ve developed a good root system in water. This will allow them to develop into full garlic plants, potentially producing garlic bulbs in the future. This is a longer-term project, but it’s a great way to extend the life cycle of your garlic and potentially harvest your own homegrown garlic.
We wholeheartedly encourage you to give this Garlic Water Culture DIY a try. It’s a fantastic project for beginners and experienced gardeners alike. It’s also a wonderful way to introduce children to the wonders of plant growth and the importance of reducing food waste.
Once you’ve embarked on your garlic-growing adventure, we’d love to hear about your experience! Share your photos, tips, and any variations you’ve tried in the comments below. Let’s build a community of garlic-growing enthusiasts and inspire others to embrace this simple and rewarding DIY project. What worked for you? What challenges did you face? What delicious dishes did you create with your homegrown garlic greens? Your insights will be invaluable to others who are just starting out. So, grab those garlic cloves, fill a glass with water, and get ready to witness the magic of nature unfold right before your eyes! Happy growing!
Frequently Asked Questions (FAQ)
What kind of garlic works best for water culture?
While almost any garlic clove can be used for water culture, some varieties tend to sprout more readily than others. Softneck garlic, which is commonly found in grocery stores, generally works well. Hardneck garlic, often favored by home gardeners for its flavorful scapes, can also be used. Experiment with different types to see which ones thrive best in your environment. Older garlic cloves that have already started to sprout are often the most successful. Avoid using garlic that is soft, mushy, or shows signs of mold.
How long does it take for garlic to sprout in water?
The time it takes for garlic to sprout in water can vary depending on several factors, including the variety of garlic, the temperature of the environment, and the age of the cloves. Generally, you can expect to see sprouts emerging within a few days to a week. Roots will typically develop shortly after the sprouts appear. Be patient, and make sure the base of the garlic clove is consistently submerged in water. If you don’t see any signs of growth after two weeks, try using a different garlic clove or adjusting the temperature and light conditions.
How much light does garlic water culture need?
Garlic greens need adequate light to thrive. Place your garlic water culture in a location that receives bright, indirect sunlight. A windowsill facing east or west is often ideal. Avoid placing it in direct sunlight, which can scorch the leaves. If you don’t have access to sufficient natural light, you can supplement with a grow light. Position the grow light a few inches above the garlic greens and provide 12-16 hours of light per day.
How often should I change the water?
So, there you have it! Transforming those seemingly useless garlic cloves into a thriving source of fresh, flavorful greens is not only incredibly simple, but also deeply satisfying. This Garlic Water Culture DIY project is more than just a fun experiment; it’s a sustainable way to reduce food waste, add a burst of freshness to your meals, and connect with the natural world, even if you only have a windowsill to spare.
Why is this a must-try? Because it’s a win-win-win! You’re rescuing garlic cloves that might otherwise end up in the trash, you’re growing your own delicious and nutritious greens, and you’re doing it all with minimal effort and resources. Imagine the possibilities: snipping fresh garlic greens to garnish your pasta dishes, adding a subtle garlicky bite to your salads, or blending them into vibrant pesto. The flavor is milder than a raw garlic clove, offering a delicate, herbaceous note that complements a wide range of cuisines.
Don’t be afraid to experiment with variations! Try using different types of garlic – softneck or hardneck – to see if you notice any differences in flavor or growth rate. You can also experiment with different containers. While a simple glass of water works perfectly well, you could also use a shallow dish filled with pebbles to provide extra support for the growing roots. Consider adding a diluted liquid fertilizer to the water every few weeks to boost growth, especially if you’re aiming for a larger harvest. Just remember to use a fertilizer specifically formulated for leafy greens and follow the instructions carefully to avoid over-fertilizing.
Another fun variation is to plant the sprouted garlic cloves in soil after they’ve developed a good root system in water. This will allow them to develop into full garlic plants, potentially producing garlic bulbs in the future. This is a longer-term project, but it’s a great way to extend the life cycle of your garlic and potentially harvest your own homegrown garlic.
We wholeheartedly encourage you to give this Garlic Water Culture DIY a try. It’s a fantastic project for beginners and experienced gardeners alike. It’s also a wonderful way to introduce children to the wonders of plant growth and the importance of reducing food waste.
Once you’ve embarked on your garlic-growing adventure, we’d love to hear about your experience! Share your photos, tips, and any variations you’ve tried in the comments below. Let’s build a community of garlic-growing enthusiasts and inspire others to embrace this simple and rewarding DIY project. What worked for you? What challenges did you face? What delicious dishes did you create with your homegrown garlic greens? Your insights will be invaluable to others who are just starting out. So, grab those garlic cloves, fill a glass with water, and get ready to witness the magic of nature unfold right before your eyes! Happy growing!
Frequently Asked Questions (FAQ)
What kind of garlic works best for water culture?
While almost any garlic clove can be used for water culture, some varieties tend to sprout more readily than others. Softneck garlic, which is commonly found in grocery stores, generally works well. Hardneck garlic, often favored by home gardeners for its flavorful scapes, can also be used. Experiment with different types to see which ones thrive best in your environment. Older garlic cloves that have already started to sprout are often the most successful. Avoid using garlic that is soft, mushy, or shows signs of mold.
How long does it take for garlic to sprout in water?
The time it takes for garlic to sprout in water can vary depending on several factors, including the variety of garlic, the temperature of the environment, and the age of the cloves. Generally, you can expect to see sprouts emerging within a few days to a week. Roots will typically develop shortly after the sprouts appear. Be patient, and make sure the base of the garlic clove is consistently submerged in water. If you don’t see any signs of growth after two weeks, try using a different garlic clove or adjusting the temperature and light conditions.
How much light does garlic water culture need?
Garlic greens need adequate light to thrive. Place your garlic water culture in a location that receives bright, indirect sunlight. A windowsill facing east or west is often ideal. Avoid placing it in direct sunlight, which can scorch the leaves. If you don’t have access to sufficient natural light, you can supplement with a grow light. Position the grow light a few inches above the garlic greens and provide 12-16 hours of light per day.
How often should I change the water?
It’s important to change the water regularly to prevent the growth of bacteria and algae. Change the water every 2-3 days, or more frequently if it appears cloudy or discolored. When changing the water, gently rinse the garlic cloves to remove any debris or slime. This will help to keep the water clean and promote healthy growth.
Can I eat the garlic bulb after growing the greens?
While it’s technically possible to plant the sprouted garlic clove in soil after harvesting the greens, the resulting bulb may not be as large or flavorful as a bulb grown from a clove that hasn’t been sprouted. The garlic clove has already expended some of its energy in producing the greens, so it may not have enough reserves to develop a full-sized bulb. However, it’s still worth a try if you’re interested in experimenting with growing your own garlic.
Are garlic greens as nutritious as garlic cloves?
Garlic greens are a good source of vitamins and minerals, including vitamin C, vitamin A, and antioxidants. While they don’t have the same concentrated levels of allicin (the compound responsible for garlic’s pungent flavor and health benefits) as garlic cloves, they still offer a range of nutritional benefits. They are also lower in calories and have a milder flavor, making them a versatile addition to a variety of dishes.
Can I use tap water for garlic water culture?
While tap water can be used for garlic water culture, it’s best to use filtered or dechlorinated water. Tap water often contains chlorine and other chemicals that can inhibit plant growth. If you’re using tap water, let it sit out for 24 hours to allow the chlorine to evaporate before using it for your garlic water culture.
How do I harvest the garlic greens?
Harvest the garlic greens when they are several inches tall. Use scissors or kitchen shears to snip off the greens near the base of the plant, leaving about an inch or two of growth. This will allow the greens to regrow, providing you with multiple harvests. Avoid cutting off all of the greens at once, as this can weaken the plant.
What can I do with the garlic greens?
Garlic greens can be used in a variety of dishes. They can be chopped and added to salads, soups, stews, and stir-fries. They can also be used as a garnish for pasta dishes, omelets, and other savory dishes. Garlic greens have a milder flavor than garlic cloves, so they can be used more liberally. They can also be blended into pesto or used to make garlic-infused oil.
My garlic greens are turning yellow. What’s wrong?
Yellowing garlic greens can be a sign of several problems, including overwatering, underwatering, lack of nutrients, or insufficient light. Make sure the base of the garlic clove is consistently submerged in water, but avoid letting the greens sit in water. Change the water regularly to prevent the growth of bacteria and algae. If the greens are yellowing due to a lack of nutrients, try adding a diluted liquid fertilizer to the water every few weeks. Ensure the garlic greens are receiving adequate light. If the problem persists, try using a different garlic clove or adjusting the environmental conditions.
Leave a Comment