
Grow baby carrots at home? Absolutely! Forget those pre-packaged, often bland baby carrots from the store. I’m going to show you how to cultivate your own sweet, crunchy, and oh-so-satisfying miniature carrots right in your backyard (or even on your balcony!).
For centuries, carrots have been a staple in diets worldwide, with their vibrant color and nutritional punch. While the perfectly uniform baby carrots we see in supermarkets are a relatively recent invention, the desire for smaller, tender vegetables is nothing new. Think of it as a modern twist on a classic favorite!
But why bother with DIY baby carrots? Well, for starters, the flavor is unmatched. Homegrown vegetables always taste better, and baby carrots are no exception. Plus, you have complete control over the growing process, ensuring they’re free from unwanted chemicals. More importantly, growing your own food is incredibly rewarding and therapeutic. Imagine the joy of harvesting a handful of these little orange gems, knowing you nurtured them from seed to table. This DIY project is perfect for beginner gardeners, families looking for a fun activity, or anyone who wants to enjoy the freshest, most delicious baby carrots imaginable. So, let’s dive in and discover the secrets to successfully grow baby carrots at home!
Grow Your Own Sweet and Crunchy Baby Carrots: A DIY Guide
Hey there, fellow gardening enthusiasts! Ever dreamt of popping perfectly petite, homegrown baby carrots straight from your garden into your salad or snacking on them right then and there? Well, dream no more! Growing your own baby carrots is surprisingly easy and incredibly rewarding. I’m going to walk you through the entire process, from seed to harvest, so you can enjoy these little orange delights in no time.
Choosing the Right Carrot Variety
Not all carrots are created equal, especially when it comes to baby carrots. While you *can* harvest any carrot variety early for a smaller size, some are specifically bred to be naturally short and sweet. Here are a few of my favorite varieties that work wonders for baby carrots:
* ‘Thumbelina’: These are round, almost golf-ball shaped carrots, perfect for containers and super cute!
* ‘Paris Market’: Similar to Thumbelina, these are also round and mature quickly.
* ‘Little Finger’: As the name suggests, these are small and slender, ideal for snacking.
* ‘Amsterdam Forcing’: These are longer than the others but still mature relatively quickly and have a lovely sweet flavor.
Preparing the Soil: The Key to Success
Carrots are notoriously picky about their soil. They need loose, well-drained soil that’s free of rocks and clumps. Rocky soil can cause the carrots to fork or become misshapen, and compacted soil will hinder their growth. Here’s how I prepare my carrot beds:
* Choose the Right Location: Carrots need at least 6 hours of sunlight per day.
* Test Your Soil: A soil test will tell you the pH level and nutrient content of your soil. Carrots prefer a slightly acidic soil with a pH between 6.0 and 6.8. You can buy a soil testing kit at most garden centers.
* Amend the Soil: This is the most important step!
* Remove Rocks and Debris: Carefully remove any rocks, stones, or large clumps of soil.
* Add Organic Matter: Incorporate plenty of compost, well-rotted manure, or peat moss to improve drainage and add nutrients. I usually add a 2-3 inch layer and work it into the top 6-8 inches of soil.
* Loosen the Soil: Use a garden fork or tiller to loosen the soil to a depth of at least 12 inches. This will allow the carrot roots to grow freely.
* Create Raised Beds (Optional): If your soil is heavy clay or poorly drained, consider creating raised beds. This will improve drainage and warm the soil faster in the spring.
Sowing the Seeds: Precision is Key
Carrot seeds are tiny, which can make sowing them a bit tricky. Here’s my method for getting the best germination rate:
1. Timing is Everything: Sow carrot seeds directly into the garden 2-3 weeks before the last expected frost in spring. You can also sow them in late summer for a fall harvest. Check your local frost dates to determine the best time to plant.
2. Create Shallow Furrows: Use a hoe or your finger to create shallow furrows about 1/4 to 1/2 inch deep and 1-2 inches apart.
3. Sow the Seeds Sparsely: This is where the precision comes in. Carrot seeds are small, so it’s easy to sow them too thickly. Try to space the seeds about 1/2 inch apart. You can use a seed dispenser or simply pinch the seeds between your fingers and gently drop them into the furrows.
4. Cover the Seeds Lightly: Gently cover the seeds with a thin layer of soil or vermiculite.
5. Water Gently: Use a watering can with a gentle rose or a hose with a spray nozzle to water the seeds thoroughly. Be careful not to wash the seeds away.
6. Keep the Soil Moist: Carrot seeds need consistent moisture to germinate. Keep the soil moist but not soggy until the seedlings emerge, which usually takes 7-21 days. I often cover the seedbed with burlap or a piece of cardboard to help retain moisture. Just remember to remove it once the seedlings start to emerge.
Thinning the Seedlings: Crucial for Carrot Development
This is probably the most important step for growing good-sized baby carrots. If you don’t thin your seedlings, they’ll be overcrowded and won’t have enough room to develop.
1. When to Thin: Thin the seedlings when they are about 1-2 inches tall and have their first true leaves (the leaves that look like miniature carrot leaves).
2. How to Thin: Gently pull out the weaker seedlings, leaving the strongest ones spaced about 1-2 inches apart. Be careful not to disturb the roots of the remaining seedlings. I find it helpful to use small scissors to snip the seedlings at the soil line rather than pulling them out, which can damage the roots of the neighboring plants.
3. Second Thinning (Optional): If you want even larger baby carrots, you can thin the seedlings again when they are about 3-4 inches tall, spacing them about 2-3 inches apart.
Caring for Your Carrot Patch: Watering, Weeding, and Feeding
Once your carrots are thinned, it’s time to focus on providing them with the care they need to thrive.
* Watering: Carrots need consistent moisture, especially during hot, dry weather. Water deeply once or twice a week, providing about 1 inch of water per week. Avoid overhead watering, which can promote fungal diseases. Soaker hoses or drip irrigation are ideal.
* Weeding: Weeds can compete with carrots for nutrients and water, so it’s important to keep your carrot patch weed-free. Hand-pull weeds carefully, being careful not to disturb the carrot roots. Mulching around the plants with straw or shredded leaves can help suppress weed growth.
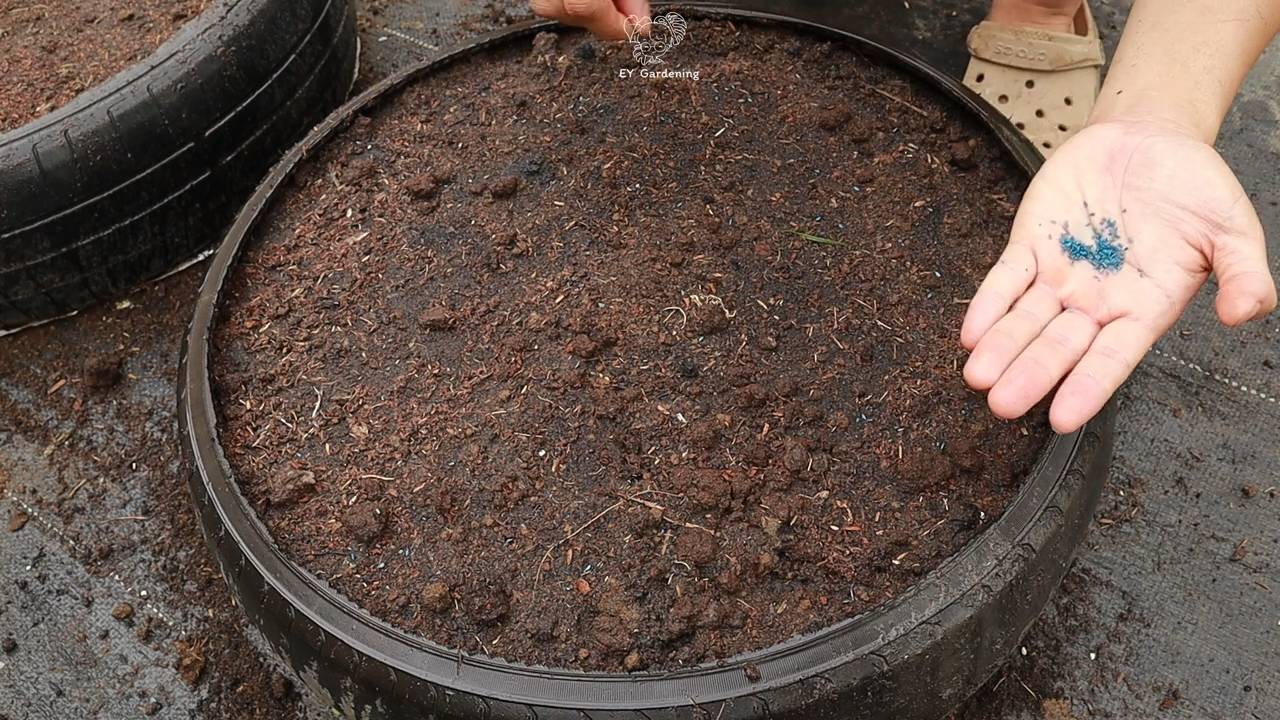
* Fertilizing: Carrots are not heavy feeders, but they do benefit from a light feeding of fertilizer. Use a balanced fertilizer with equal amounts of nitrogen, phosphorus, and potassium. Avoid fertilizers that are high in nitrogen, as this can promote leafy growth at the expense of root development. I like to use a liquid seaweed fertilizer diluted according to the package directions. Apply the fertilizer every 2-3 weeks.
Protecting Your Carrots from Pests and Diseases
Carrots are generally pest-resistant, but there are a few common problems to watch out for:
* Carrot Rust Flies: These flies lay their eggs near the base of carrot plants, and the larvae burrow into the roots, causing them to become riddled with tunnels. To prevent carrot rust flies, cover your carrot patch with floating row covers.
* Nematodes: These microscopic worms can damage carrot roots, causing them to become stunted and misshapen. To prevent nematodes, rotate your crops and amend your soil with organic matter.
* Leaf Spot Diseases: These fungal diseases can cause spots on the leaves of carrot plants. To prevent leaf spot diseases, avoid overhead watering and provide good air circulation.
Harvesting Your Baby Carrots: The Sweet Reward
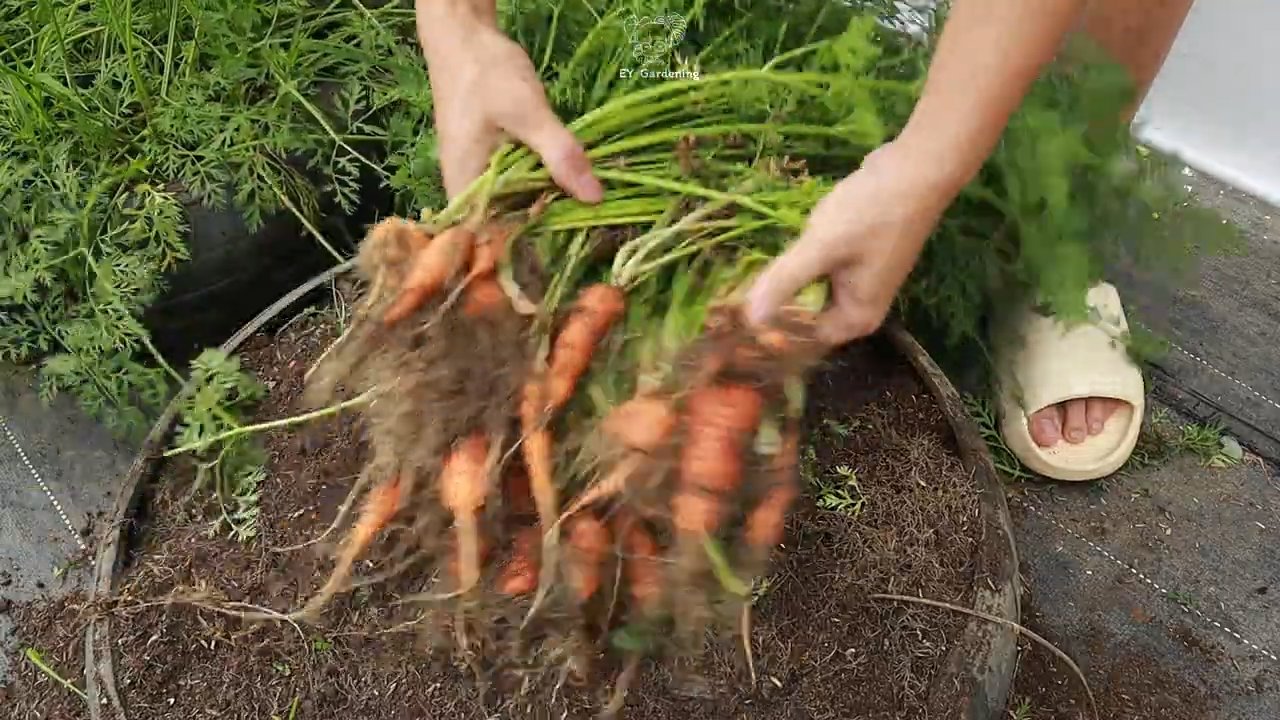
The best part of growing your own baby carrots is, of course, harvesting them!
1. When to Harvest: Baby carrots are typically ready to harvest 50-60 days after planting, depending on the variety. You can harvest them when they are about 3-4 inches long and 1/2 inch in diameter.
2. How to Harvest: Gently loosen the soil around the carrots with a garden fork or trowel. Then, grasp the tops of the carrots and pull them straight out of the ground.
3. Washing and Storing: Wash the carrots thoroughly with water and remove any excess soil. Store them in the refrigerator in a plastic bag or container. They will keep for several weeks.
Troubleshooting: Common Problems and Solutions
Even with the best care, you might encounter a few problems along the way. Here are some common issues and how to fix them:
* Poor Germination: If your carrot seeds aren’t germinating, make sure the soil is consistently moist and that the soil temperature is between 55 and 75 degrees Fahrenheit. You can also try pre-sprouting the seeds by placing them in a damp paper towel for a few days before planting.
* Forked or Misshapen Carrots: This is usually caused by rocky or compacted soil. Make sure to remove any rocks and debris from the soil and amend it with plenty of organic matter.
* Slow Growth: Slow growth can be caused by a lack of nutrients or water. Make sure to fertilize your carrots regularly and water them deeply during dry weather.
* Pest or Disease Problems: Identify the pest or disease and take appropriate action, such as using row covers or applying an organic pesticide or fungicide.
Growing your own baby carrots is a fun and rewarding experience. With a little bit of planning and effort, you can enjoy a bountiful harvest of sweet and crunchy carrots
Conclusion
So, there you have it! Growing baby carrots at home is not only achievable, but it’s also a rewarding and surprisingly simple process. Forget those pre-packaged, often bland, store-bought baby carrots. Imagine biting into a sweet, crisp, and perfectly sized carrot that you nurtured from seed to table. The difference in flavor and texture is truly remarkable, and the satisfaction of harvesting your own produce is unparalleled.
This DIY trick is a must-try for several compelling reasons. First and foremost, you have complete control over the growing process. You can choose organic seeds, avoid harmful pesticides, and ensure your carrots are grown in the healthiest possible environment. This is especially important if you’re concerned about the quality and safety of your food. Secondly, growing baby carrots at home is incredibly cost-effective. A packet of carrot seeds is inexpensive, and you can harvest a substantial amount of carrots from a relatively small space. Finally, it’s a fantastic way to connect with nature, learn about gardening, and enjoy the fruits (or rather, vegetables) of your labor.
Don’t be afraid to experiment with different varieties of carrots to find your favorite flavor and texture. Nantes carrots are known for their sweetness and cylindrical shape, making them ideal for baby carrots. Chantenay carrots are shorter and sturdier, perfect for heavier soils. You can also try rainbow carrot mixes for a vibrant and colorful harvest. Consider adding companion plants like marigolds or onions to deter pests and improve the overall health of your carrot patch.
For a spicier kick, try adding a pinch of cayenne pepper to the soil before planting. This won’t make the carrots unbearably hot, but it will add a subtle warmth that complements their sweetness. You can also experiment with different soil amendments to improve drainage and nutrient content. Adding compost or well-rotted manure will provide your carrots with the essential nutrients they need to thrive.
We strongly encourage you to give this DIY trick a try. Whether you have a sprawling garden or a small balcony, you can successfully grow baby carrots at home. It’s a fun, educational, and delicious experience that the whole family can enjoy. Once you’ve harvested your first batch of homegrown baby carrots, we’d love to hear about your experience! Share your tips, tricks, and photos in the comments below. Let’s create a community of passionate home gardeners and inspire others to grow their own food. Embrace the joy of gardening and discover the deliciousness of homegrown baby carrots. Happy growing!
Frequently Asked Questions (FAQ)
1. What is the best time of year to plant baby carrots?
The best time to plant baby carrots is typically in early spring or late summer. Carrots prefer cooler temperatures and can tolerate light frost. For a spring crop, sow seeds as soon as the soil can be worked, usually a few weeks before the last expected frost. For a fall crop, sow seeds about 2-3 months before the first expected frost. This will give the carrots enough time to mature before the weather turns too cold. In warmer climates, you can often grow carrots year-round, but avoid planting during the hottest months of summer.
2. What kind of soil is best for growing baby carrots?
Carrots thrive in loose, well-drained soil that is rich in organic matter. Avoid heavy clay soils, as they can restrict root growth and result in misshapen carrots. Amend your soil with compost, well-rotted manure, or other organic materials to improve drainage and fertility. The ideal soil pH for carrots is between 6.0 and 6.8. Before planting, remove any rocks, stones, or debris from the soil, as these can also hinder root development.
3. How much sunlight do baby carrots need?
Baby carrots need at least 6 hours of sunlight per day to grow properly. Choose a location in your garden that receives full sun for the majority of the day. If you live in a particularly hot climate, some afternoon shade may be beneficial to prevent the soil from drying out too quickly.
4. How often should I water my baby carrots?
Carrots need consistent moisture to thrive, especially during germination and early growth. Water deeply and regularly, keeping the soil consistently moist but not waterlogged. Avoid overhead watering, as this can promote fungal diseases. Instead, use a soaker hose or drip irrigation system to water the soil directly. As the carrots mature, you can reduce the frequency of watering, but be sure to check the soil moisture regularly and water when the top inch feels dry.
5. How do I prevent pests and diseases from affecting my baby carrots?
Several pests and diseases can affect carrots, including carrot rust flies, aphids, and fungal diseases. To prevent these problems, practice good garden hygiene. Remove any weeds or debris from the garden regularly, and avoid overcrowding the plants. Companion planting can also help deter pests. Marigolds, onions, and garlic are all known to repel carrot rust flies. If you notice any signs of pests or diseases, treat them promptly with organic pesticides or fungicides. Crop rotation can also help prevent soilborne diseases from building up.
6. How do I know when my baby carrots are ready to harvest?
Baby carrots are typically ready to harvest about 50-60 days after planting, depending on the variety and growing conditions. You can harvest them when they are about 陆 to 戮 inch in diameter. Gently loosen the soil around the carrots and pull them up by the greens. If the soil is dry, water it thoroughly before harvesting to make it easier to pull the carrots.
7. Can I grow baby carrots in containers?
Yes, you can successfully grow baby carrots in containers. Choose a container that is at least 6-8 inches deep and has drainage holes. Fill the container with a well-draining potting mix that is rich in organic matter. Sow the seeds directly into the container and water regularly. Place the container in a sunny location that receives at least 6 hours of sunlight per day.
8. What are some common problems when growing baby carrots and how can I fix them?
Some common problems include poor germination, stunted growth, and misshapen carrots. Poor germination can be caused by old seeds, dry soil, or cold temperatures. To improve germination, use fresh seeds, keep the soil consistently moist, and wait until the soil has warmed up before planting. Stunted growth can be caused by nutrient deficiencies, pests, or diseases. To fix this, fertilize the carrots with a balanced fertilizer, control pests and diseases, and ensure the soil is well-drained. Misshapen carrots can be caused by rocky soil, compacted soil, or overcrowding. To prevent this, remove any rocks or stones from the soil, amend the soil with organic matter, and thin the seedlings to the proper spacing.
9. Can I save carrot seeds for future planting?
Saving carrot seeds is a bit more involved than saving seeds from some other vegetables, as carrots are biennials. This means they typically don’t produce seeds until their second year of growth. To save carrot seeds, you’ll need to overwinter some of your best carrot plants. In the spring, they will flower and produce seeds. Allow the seed heads to dry completely on the plant before harvesting them. Once dry, rub the seed heads between your hands to release the seeds. Store the seeds in a cool, dry place. Be aware that if you grow multiple varieties of carrots, they can cross-pollinate, so the seeds you save may not produce true-to-type carrots.
10. Are there any benefits to eating homegrown baby carrots compared to store-bought ones?
Absolutely! Homegrown baby carrots offer several advantages over store-bought ones. They are often sweeter and more flavorful because they are harvested at their peak ripeness. You also have complete control over the growing process, so you can avoid harmful pesticides and ensure they are grown in healthy soil. Homegrown carrots are also fresher and more nutritious, as they haven’t been sitting in storage for weeks. Plus, there’s the added satisfaction of knowing you grew them yourself!
Leave a Comment