
Growing Okra in Pots might seem like a challenge, but trust me, it’s totally achievable, even if you don’t have a sprawling backyard! Have you ever dreamt of plucking fresh, vibrant okra right from your patio? Imagine the satisfaction of serving up a delicious, homegrown gumbo made with okra you nurtured yourself. This isn’t just about gardening; it’s about connecting with nature and enjoying the fruits (or rather, vegetables!) of your labor.
Okra, with its origins tracing back to Africa and a rich history in Southern cuisine, has long been a staple in gardens. But what if you’re short on space? That’s where the magic of container gardening comes in! Many people think they need acres of land to grow their own food, but that’s simply not true. With a few simple tricks and a little know-how, you can successfully cultivate growing okra in pots, bringing a touch of Southern charm and fresh flavor to your home, no matter how small your space is.
This DIY guide is your key to unlocking the secrets of successful container okra gardening. I’m going to share my favorite tips and tricks, from choosing the right pot and soil to ensuring your okra plants get the sunlight and nutrients they need to thrive. Get ready to roll up your sleeves and discover how easy and rewarding it can be to grow your own okra, even in the most limited of spaces!
Growing Okra in Pots: A Complete DIY Guide
Okra, also known as lady’s fingers, is a warm-season vegetable that’s surprisingly easy to grow in containers. I’ve had great success growing okra in pots, even with limited garden space. This guide will walk you through everything you need to know, from choosing the right pot to harvesting your delicious okra pods.
Choosing the Right Pot and Soil
The foundation of any successful container garden is the right pot and soil. Here’s what I recommend:
* Pot Size: Okra plants need room for their roots to grow. I suggest using a pot that’s at least 12 inches in diameter and 12 inches deep. A 5-gallon bucket works perfectly, or even larger if you want to grow multiple plants in one container. Bigger is generally better!
* Material: Plastic, terracotta, or even fabric pots are all suitable. Just make sure the pot has drainage holes. Good drainage is crucial to prevent root rot.
* Soil: Okra thrives in well-draining, fertile soil. I always use a good quality potting mix specifically designed for vegetables. Avoid using garden soil directly in your pots, as it can compact and doesn’t drain well. You can also amend your potting mix with compost for added nutrients.
Planting Okra Seeds
Getting your okra seeds started is a simple process. Here’s how I do it:
1. Soaking the Seeds: To speed up germination, I like to soak my okra seeds in warm water for 12-24 hours before planting. This softens the seed coat and helps them sprout faster.
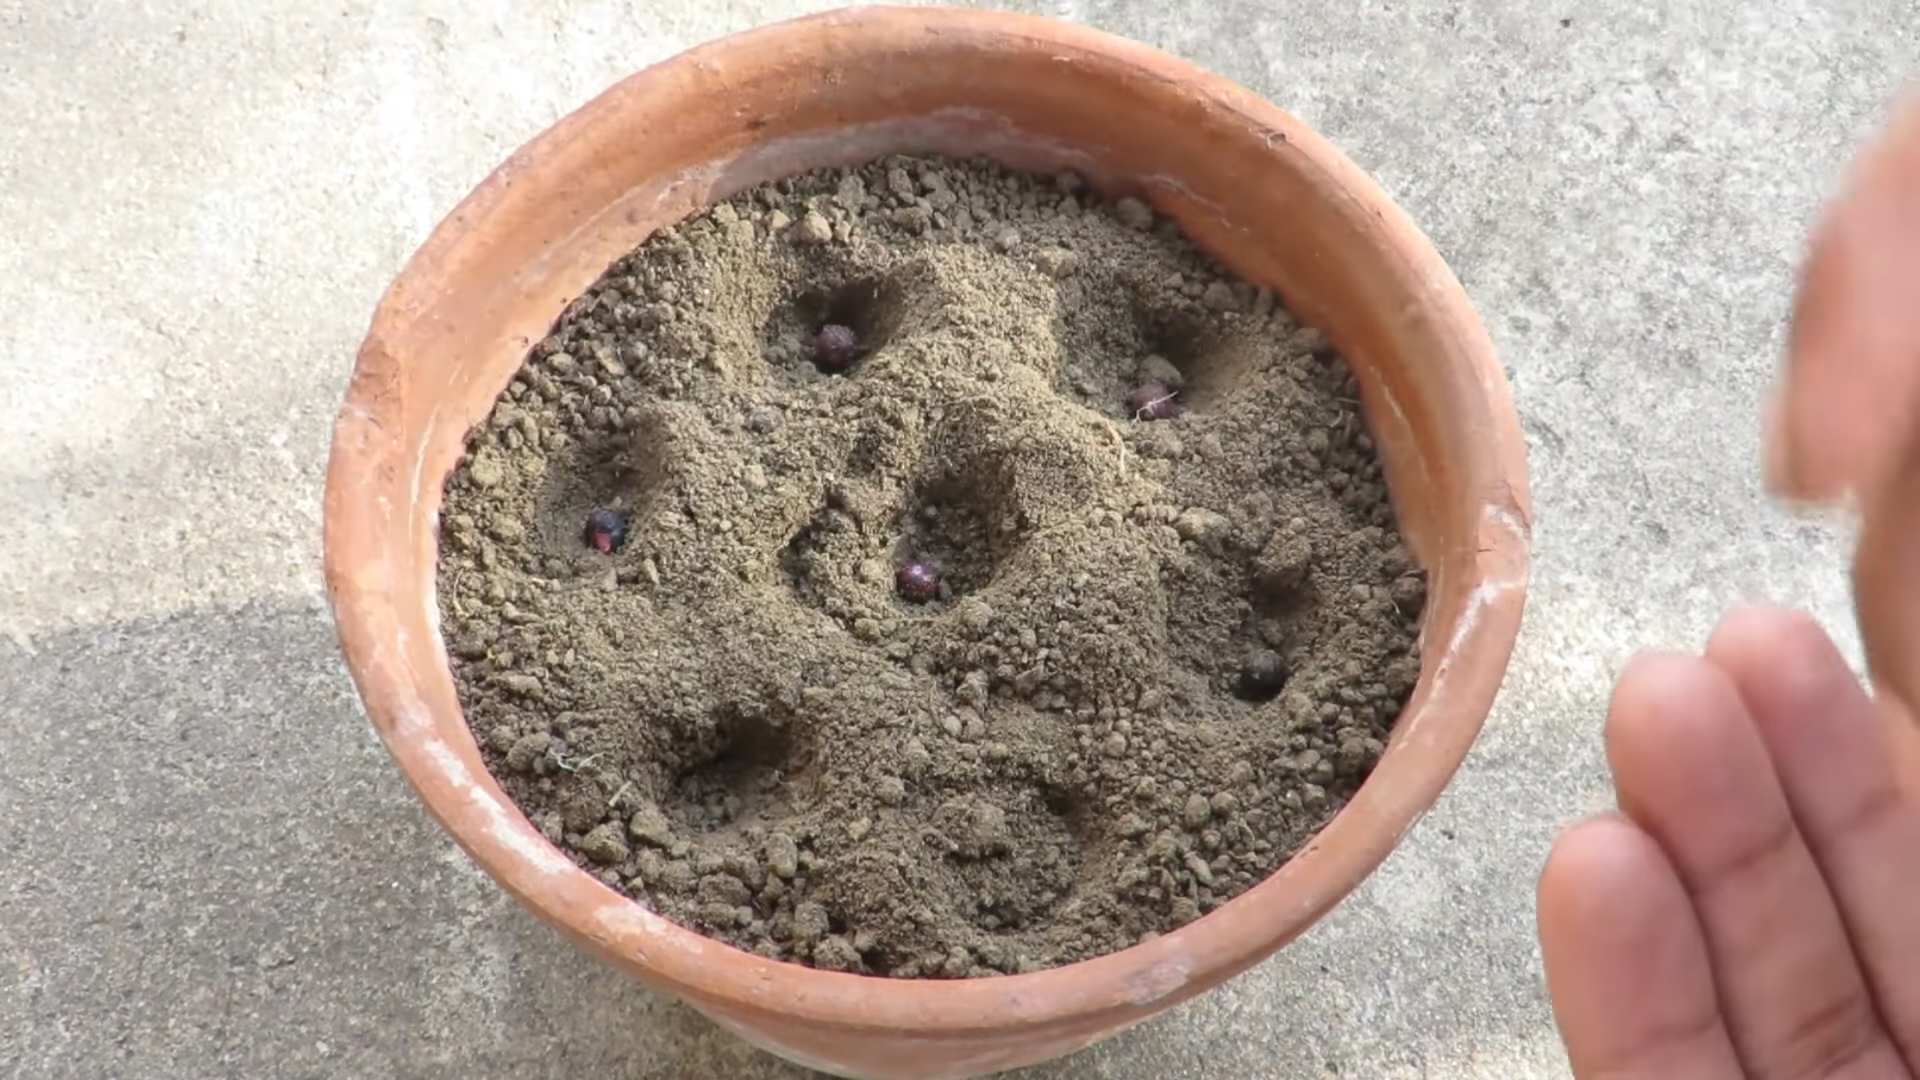
2. Planting Depth: Plant the seeds about ½ inch deep in your prepared potting mix.
3. Spacing: If you’re planting multiple seeds in one pot (which I sometimes do, then thin later), space them about 4-6 inches apart.
4. Watering: Gently water the soil after planting, making sure it’s evenly moist but not waterlogged.
5. Location: Place the pot in a warm, sunny location. Okra needs at least 6-8 hours of direct sunlight per day.
6. Germination: Okra seeds typically germinate in 5-14 days, depending on the temperature. Keep the soil consistently moist during this time.
Caring for Your Okra Plants
Once your okra seedlings emerge, it’s important to provide them with the right care to ensure healthy growth and abundant harvests.
1. Watering: Okra plants need consistent watering, especially during hot weather. I usually water deeply whenever the top inch of soil feels dry to the touch. Avoid overwatering, as this can lead to root rot.
2. Fertilizing: Okra is a heavy feeder, so regular fertilization is essential. I like to use a balanced liquid fertilizer (like a 10-10-10) every 2-3 weeks. You can also amend the soil with compost tea for a natural boost.
3. Sunlight: As mentioned before, okra needs plenty of sunlight. Make sure your plants are getting at least 6-8 hours of direct sun each day. If you live in a particularly hot climate, you might consider providing some afternoon shade to prevent the plants from getting stressed.
4. Mulching: Adding a layer of mulch around the base of the plants can help retain moisture, suppress weeds, and regulate soil temperature. I often use straw or wood chips as mulch.
5. Pruning: While okra doesn’t require extensive pruning, you can remove any yellowing or dead leaves to improve air circulation and prevent disease.
6. Pest Control: Keep an eye out for common pests like aphids, spider mites, and okra worms. I prefer to use organic pest control methods, such as insecticidal soap or neem oil. You can also handpick pests off the plants.
Dealing with Common Okra Problems
Even with the best care, you might encounter some problems while growing okra. Here are a few common issues and how to address them:
* Yellowing Leaves: This can be caused by overwatering, nutrient deficiencies, or pests. Check the soil moisture, fertilize if necessary, and inspect the plants for pests.
* Lack of Pod Production: This could be due to insufficient sunlight, poor pollination, or nutrient deficiencies. Make sure your plants are getting enough sun, consider hand-pollinating the flowers, and fertilize regularly.
* Root Rot: This is usually caused by overwatering or poor drainage. Make sure your pot has drainage holes and avoid overwatering. If you suspect root rot, you might need to repot the plant in fresh soil.
Harvesting Your Okra
Harvesting okra at the right time is crucial for getting tender and delicious pods.
1. Timing: Okra pods are typically ready to harvest about 50-60 days after planting.
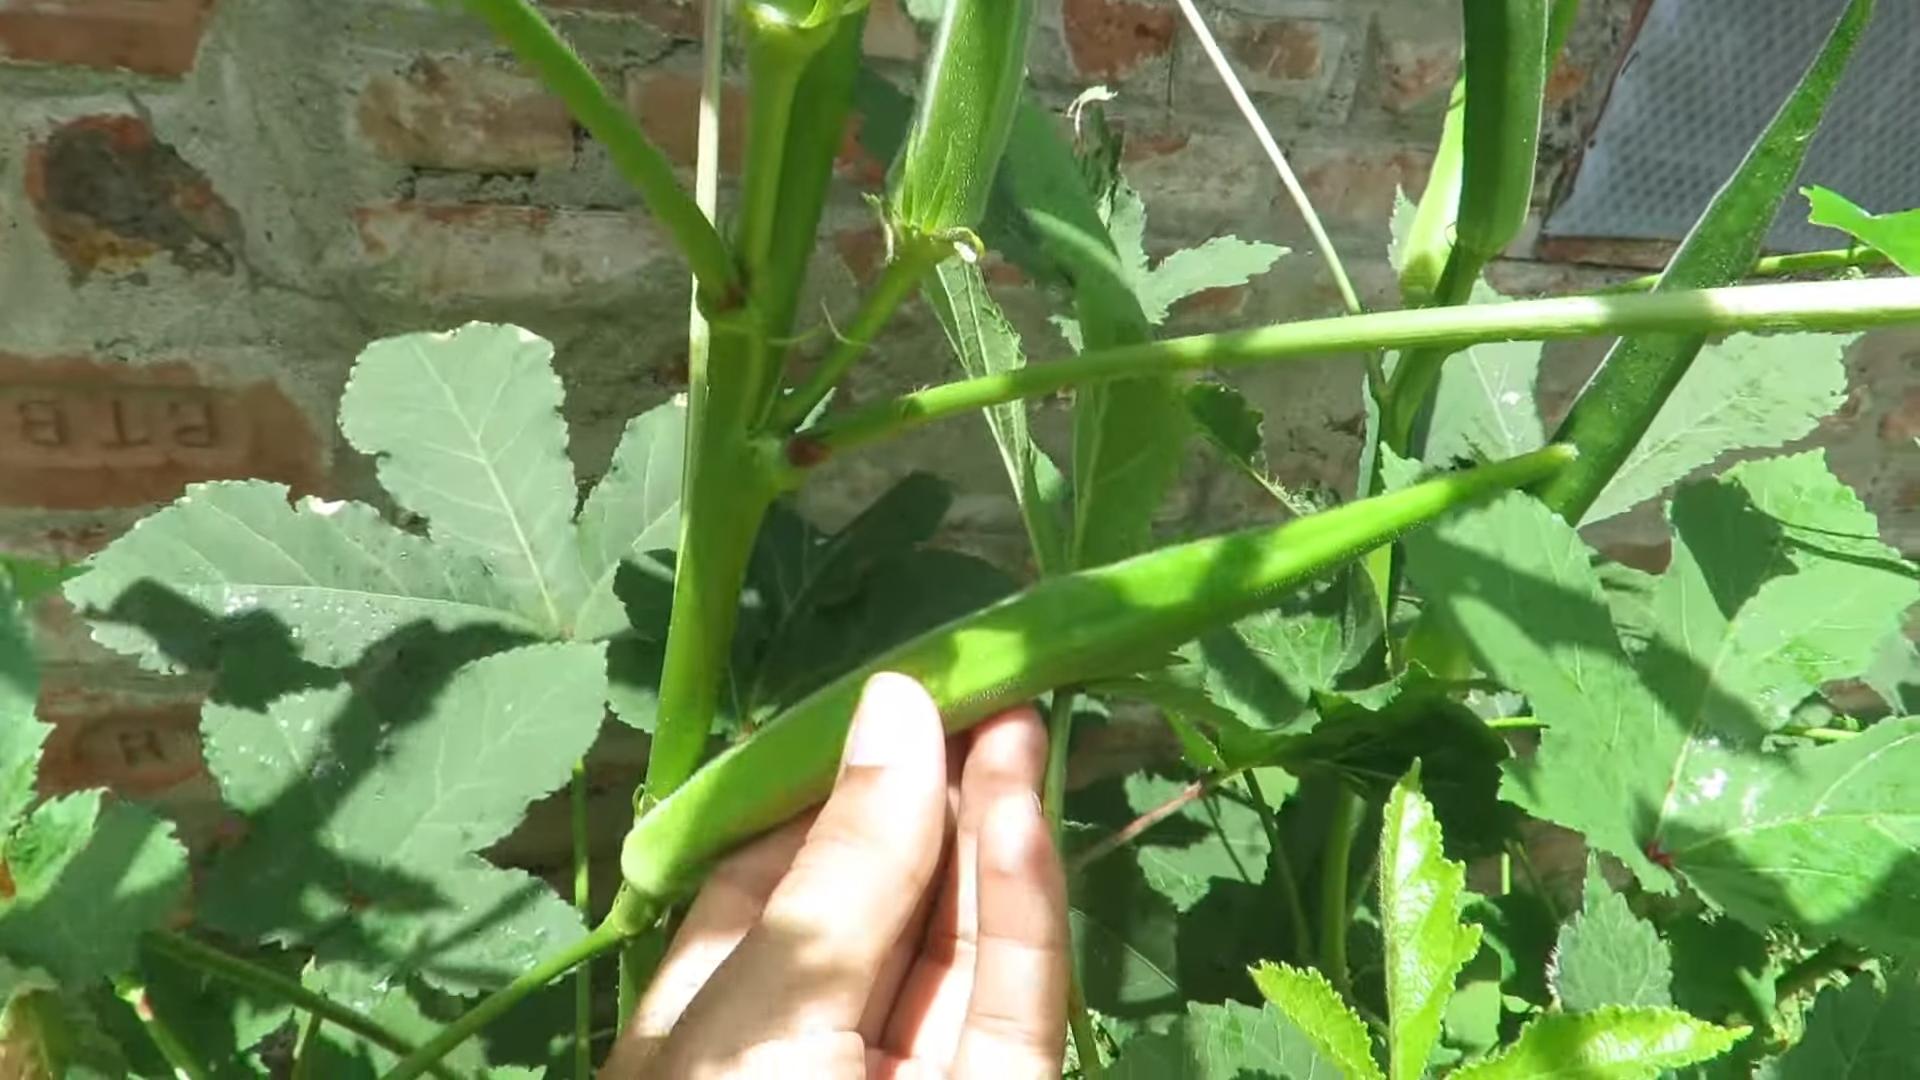
2. Size: Harvest the pods when they are 2-4 inches long. If you let them grow too large, they will become tough and fibrous.
3. Method: Use a sharp knife or pruning shears to cut the pods from the plant. Be careful not to damage the plant.
4. Frequency: Okra plants produce pods continuously throughout the growing season. Harvest regularly (every 1-2 days) to encourage more production.
5. Handling: Okra pods can be prickly, so I recommend wearing gloves when harvesting.
Extending the Harvest
To keep your okra plants producing throughout the season, here are a few tips:
* Regular Harvesting: As mentioned earlier, regular harvesting encourages more pod production.
* Fertilizing: Continue fertilizing your plants every 2-3 weeks to provide them with the nutrients they need.
* Watering: Maintain consistent watering, especially during hot weather.
* Succession Planting: Plant new okra seeds every few weeks to ensure a continuous supply of pods.
Choosing Okra Varieties for Pots
While most okra varieties can be grown in pots, some are better suited for container gardening than others. Here are a few of my favorites:
* ‘Dwarf Green Long Pod’: This variety is compact and well-suited for smaller pots.
* ‘Clemson Spineless’: This is a popular variety that produces tender, spineless pods.
* ‘Burgundy’: This variety has beautiful red pods and is also relatively compact.
* ‘Baby Bubba’: A very compact variety, perfect for smaller spaces.
Step-by-Step Instructions: From Seed to Harvest
Let’s break down the entire process into easy-to-follow steps:
1. Gather Your Supplies: You’ll need okra seeds, a pot (at least 12 inches in diameter and depth), potting mix, fertilizer, and a watering can.
2. Soak the Seeds: Soak the okra seeds in warm water for 12-24 hours.
3. Fill the Pot: Fill the pot with potting mix, leaving about an inch of space at the top.
4. Plant the Seeds: Plant the seeds about ½ inch deep and 4-6 inches apart.
5. Water the Soil: Gently water the soil until it’s evenly moist.
6. Place in a Sunny Location: Place the pot in a warm, sunny location that gets at least 6-8 hours of direct sunlight per day.
7. Water Regularly: Water deeply whenever the top inch of soil feels dry.
8. Fertilize Every 2-3 Weeks: Use a balanced liquid fertilizer or compost tea.
9. Monitor for Pests: Inspect the plants regularly for pests and take action if necessary.
10. Harvest Regularly: Harvest the pods when they are 2-4 inches long, using a sharp knife or pruning shears.
Troubleshooting: Common Issues and Solutions
Here’s a quick reference guide for common problems:
* Problem: Yellowing leaves
* Possible Cause: Overwatering, nutrient deficiencies, pests
* Solution: Check soil moisture, fertilize, inspect for pests
* Problem: Lack of pod production
* Possible Cause: Insufficient sunlight, poor pollination, nutrient deficiencies
* Solution: Provide more sunlight, hand-pollinate, fertilize
* Problem: Root rot
* Possible Cause: Overwatering, poor drainage
* Solution: Improve drainage, avoid overwatering, repot if necessary
* Problem: Pests (aphids, spider mites, okra worms)
* Possible Cause: Infestation
* Solution: Use insecticidal soap, neem oil, or handpick pests
Enjoying Your Harvest
Once you’ve harvested your okra, there are countless ways to enjoy it! You can fry it, grill it, add it to soups
Conclusion
So, there you have it! Growing okra in pots is not only achievable, but it’s also a deeply rewarding experience. We’ve walked through the essential steps, from selecting the right pot and soil to nurturing your plants and harvesting those delicious pods. But why should you bother with this DIY project?
Simply put, growing okra in pots offers a level of control and convenience that in-ground gardening often lacks. Whether you’re limited by space, have challenging soil conditions, or simply want to keep a closer eye on your plants, container gardening provides the perfect solution. Imagine stepping onto your balcony or patio and harvesting fresh, vibrant okra for your favorite gumbo or stir-fry. That’s the power of this simple, yet effective, technique.
Beyond the convenience, growing your own okra allows you to ensure the quality and freshness of your produce. You know exactly what goes into your plants – no harmful pesticides or questionable fertilizers. You’re in charge of creating the perfect environment for your okra to thrive, resulting in healthier, tastier pods.
But the benefits don’t stop there. Growing okra in pots is also a fantastic way to connect with nature and learn about the growing process. It’s a therapeutic activity that can reduce stress and improve your overall well-being. Plus, it’s a great way to get kids involved in gardening and teach them about where their food comes from.
Ready to take your okra growing to the next level? Consider experimenting with different varieties of okra. Clemson Spineless is a classic choice, but there are also red okra varieties like Burgundy and dwarf varieties like Baby Bubba that are perfect for smaller pots. You can also try companion planting. Marigolds can help deter pests, while basil can improve the flavor of your okra.
Another variation to consider is vertical gardening. If you’re really short on space, you can use a trellis or other support structure to train your okra plants to grow upwards. This will not only save space but also create a beautiful and productive green wall.
Don’t be afraid to experiment with different soil mixes and fertilizers to find what works best for your plants. Remember to monitor your okra plants regularly for signs of pests or diseases and take action promptly.
The key to success is consistency and observation. Pay attention to your plants’ needs and adjust your care accordingly. With a little bit of effort and attention, you’ll be harvesting a bountiful crop of okra in no time.
We encourage you to give this DIY trick a try and experience the joy of growing your own okra. It’s a simple, rewarding, and delicious way to connect with nature and enjoy fresh, homegrown produce.
And most importantly, we want to hear about your experience! Share your tips, tricks, and photos with us in the comments below. Let’s create a community of okra growers and learn from each other. Happy gardening!
Frequently Asked Questions (FAQ)
What is the best size pot for growing okra?
The ideal pot size for growing okra is at least 5 gallons, but a 10-gallon pot is even better. Okra plants have deep taproots, and a larger pot provides ample space for the roots to grow and develop. This will result in a healthier, more productive plant. If you’re growing a dwarf variety, a 5-gallon pot may suffice, but for most okra varieties, bigger is better. Make sure the pot has drainage holes to prevent waterlogging.
What type of soil should I use for growing okra in pots?
Okra thrives in well-draining, fertile soil. A good potting mix for okra should be a blend of compost, peat moss, perlite, and vermiculite. This combination provides the necessary nutrients, drainage, and aeration for healthy root growth. Avoid using garden soil in pots, as it can become compacted and doesn’t drain well. You can also amend your potting mix with slow-release fertilizer to provide a steady supply of nutrients throughout the growing season. A slightly acidic to neutral pH (around 6.0 to 7.0) is ideal for okra.
How often should I water my okra plants in pots?
Okra plants need consistent moisture, especially during hot weather. Water your okra plants deeply whenever the top inch of soil feels dry to the touch. This may be every day or every other day, depending on the weather and the size of your pot. Avoid overwatering, as this can lead to root rot. Check the drainage holes to ensure that excess water is draining properly. In general, water in the morning to allow the foliage to dry before nightfall, which can help prevent fungal diseases.
How much sunlight do okra plants need?
Okra plants need at least 6-8 hours of direct sunlight per day to thrive. Choose a location for your pots that receives plenty of sunlight throughout the day. If you live in a particularly hot climate, you may need to provide some afternoon shade to prevent the plants from getting scorched. If you’re growing okra indoors, use grow lights to supplement natural sunlight. Insufficient sunlight can lead to leggy growth and reduced pod production.
When should I fertilize my okra plants?
Okra plants are heavy feeders and benefit from regular fertilization. Start fertilizing your okra plants about two weeks after they emerge. Use a balanced fertilizer (e.g., 10-10-10) or a fertilizer specifically formulated for vegetables. Follow the instructions on the fertilizer package for application rates. You can also use organic fertilizers like compost tea or fish emulsion. Fertilize every 2-3 weeks throughout the growing season. Avoid over-fertilizing, as this can lead to excessive foliage growth at the expense of pod production.
How do I harvest okra pods?
Okra pods are ready to harvest about 50-60 days after planting. Harvest the pods when they are 2-4 inches long and still tender. Use a sharp knife or pruning shears to cut the pods from the plant. Wear gloves when harvesting okra, as the pods can be prickly and irritating to the skin. Harvest okra pods regularly, every 1-2 days, to encourage continued production. If you allow the pods to grow too large, they will become tough and fibrous.
What are some common pests and diseases that affect okra plants?
Common pests that affect okra plants include aphids, spider mites, and okra stink bugs. You can control these pests with insecticidal soap, neem oil, or by handpicking them off the plants. Common diseases that affect okra plants include powdery mildew and root rot. Prevent powdery mildew by providing good air circulation and avoiding overhead watering. Prevent root rot by ensuring that your soil is well-draining and avoiding overwatering.
Can I grow okra indoors?
Yes, you can grow okra indoors, but it requires a bit more effort. You’ll need to provide plenty of light, either through a sunny window or with grow lights. You’ll also need to ensure that your plants have adequate air circulation and humidity. Choose a dwarf variety of okra that is well-suited for container gardening. Pollinate the flowers by hand using a small brush. With proper care, you can successfully grow okra indoors and enjoy fresh pods year-round.
How do I save okra seeds for next year?
To save okra seeds, allow some of the pods to mature fully on the plant. The pods will become dry and brown. Once the pods are completely dry, harvest them and remove the seeds. Spread the seeds out on a tray to dry completely for a few days. Store the dried seeds in an airtight container in a cool, dark, and dry place. Okra seeds can remain viable for several years if stored properly.
Leave a Comment