
Grow Bigger Cauliflower Heads: Dreaming of a bountiful harvest bursting with colossal cauliflower? I know I am! For generations, gardeners have strived to cultivate the perfect, plump cauliflower, a testament to their green thumbs and dedication. From ancient Roman gardens to modern-day allotments, the pursuit of impressive cauliflower heads has been a constant, reflecting the vegetable’s versatility and nutritional value.
But let’s be honest, achieving those prize-winning, dinner-plate-sized cauliflowers can feel like a Herculean task. We’ve all been there – diligently watering, fertilizing, and warding off pests, only to end up with disappointingly small, almost miniature, cauliflower heads. That’s where these DIY tricks and hacks come in!
This article is your secret weapon to finally grow bigger cauliflower heads than you ever thought possible. I’m going to share simple, yet effective, techniques that will transform your cauliflower growing game. Forget complicated gardening jargon; we’re focusing on practical, easy-to-implement solutions that will have you harvesting impressive, healthy cauliflowers in no time. Get ready to impress your friends, family, and maybe even yourself with your newfound cauliflower-growing prowess!
How to Grow Giant Cauliflower Heads: My Secret DIY Hack
Okay, cauliflower lovers, listen up! I’m about to share my tried-and-true method for growing cauliflower heads so big, they’ll be the envy of the neighborhood. Forget those puny, store-bought heads – we’re talking cauliflower that could feed a small army! This isn’t just about planting and hoping for the best; it’s about actively nurturing your cauliflower plants to reach their full potential. Get ready to roll up your sleeves and get your hands dirty!
Understanding Cauliflower Needs
Before we dive into the hack itself, it’s crucial to understand what cauliflower craves. Think of it as understanding your plant’s love language. Cauliflower is a bit of a diva, demanding specific conditions to thrive.
* Sunlight: Cauliflower needs at least 6 hours of direct sunlight per day. More is always better!
* Soil: Well-draining soil that’s rich in organic matter is essential. Cauliflower is a heavy feeder, so the soil needs to be packed with nutrients.
* Water: Consistent moisture is key. Cauliflower hates drying out, especially when the head is forming.
* Temperature: Cauliflower prefers cool weather. The ideal temperature range is between 60°F and 70°F. Hot weather can cause the head to become loose and bitter.
* Nutrients: As I mentioned, cauliflower is a heavy feeder. It needs a steady supply of nitrogen, phosphorus, and potassium, as well as micronutrients like boron and molybdenum.
The Secret Hack: Epsom Salt and Borax Boost
Now for the good stuff! My secret weapon for growing giant cauliflower heads involves a simple, yet powerful, combination of Epsom salt and borax. These two ingredients provide essential micronutrients that cauliflower often lacks, leading to bigger, healthier heads.
* Epsom Salt (Magnesium Sulfate): Magnesium is crucial for chlorophyll production, which is essential for photosynthesis. It also helps the plant absorb other nutrients more efficiently.
* Borax (Sodium Borate): Boron is vital for cell development and calcium utilization. A boron deficiency can lead to hollow stems and small, misshapen heads.
Step-by-Step Guide: From Seedling to Super-Sized Cauliflower
Alright, let’s get down to the nitty-gritty. Here’s my step-by-step guide to growing those impressive cauliflower heads:
Phase 1: Starting Your Cauliflower
1. Start Seeds Indoors (Optional, but Recommended): I prefer to start my cauliflower seeds indoors about 4-6 weeks before the last expected frost. This gives them a head start and protects them from early-season pests. Use seed-starting trays or small pots filled with a seed-starting mix. Sow the seeds about ¼ inch deep and keep the soil consistently moist.
2. Harden Off Seedlings: Before transplanting your seedlings outdoors, you need to “harden them off.” This gradually acclimates them to the outdoor environment. Start by placing them outside for an hour or two each day, gradually increasing the time over a week or two. Protect them from direct sunlight and strong winds during this process.
3. Direct Sowing (Alternative): If you prefer, you can direct sow cauliflower seeds outdoors after the last frost. However, keep in mind that direct-sown plants may take longer to mature and may be more susceptible to pests.
Phase 2: Planting and Initial Care
1. Prepare the Soil: This is the most important step! Cauliflower needs rich, well-draining soil. Amend your soil with plenty of compost or well-rotted manure. I also like to add a slow-release organic fertilizer at this stage. Aim for a soil pH between 6.0 and 7.0.
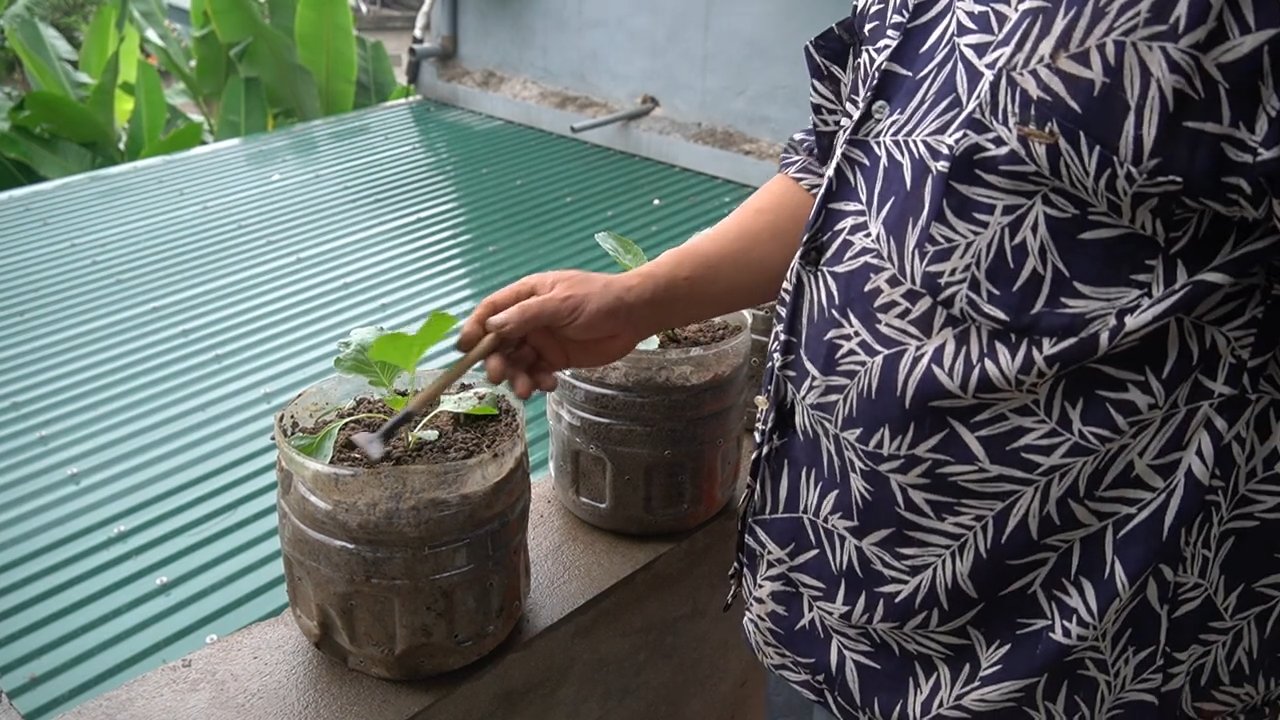
2. Transplant Seedlings (or Thin Direct-Sown Plants): Once your seedlings are hardened off (or your direct-sown plants have a few true leaves), it’s time to transplant them into the garden. Space the plants about 18-24 inches apart in rows that are 24-36 inches apart.
3. Water Thoroughly: After transplanting, water the plants thoroughly. This helps them settle in and encourages root growth.
4. Apply Epsom Salt Solution (First Application): This is where the magic begins! Mix 1 tablespoon of Epsom salt per gallon of water. Water each cauliflower plant with about 1 cup of this solution. This will give them an initial boost of magnesium.
5. Mulch Around the Plants: Mulching helps retain moisture, suppress weeds, and regulate soil temperature. I like to use straw or shredded leaves as mulch.
Phase 3: Ongoing Care and Nutrient Boost
1. Water Regularly: Cauliflower needs consistent moisture, especially during head formation. Water deeply whenever the top inch of soil feels dry. Avoid overhead watering, as this can lead to fungal diseases.
2. Fertilize Regularly: Cauliflower is a heavy feeder, so you’ll need to fertilize it regularly. I recommend using a balanced organic fertilizer every 2-3 weeks. You can also side-dress with compost or well-rotted manure.
3. Apply Epsom Salt Solution (Second Application): About 3-4 weeks after the first application, repeat the Epsom salt solution treatment (1 tablespoon per gallon of water, 1 cup per plant).
4. Introduce Borax Solution: This is the key to unlocking those giant heads! When the cauliflower head starts to form (about the size of a golf ball), mix 1/4 teaspoon of borax per gallon of water. Water each plant with about 1 cup of this solution. Be very careful not to overdo it with the borax, as too much can be toxic to plants.
5. Monitor for Pests and Diseases: Cauliflower is susceptible to several pests and diseases, including cabbage worms, aphids, and clubroot. Inspect your plants regularly and take action promptly if you notice any problems. I prefer to use organic pest control methods, such as insecticidal soap or neem oil.
6. Blanching (Optional): Some cauliflower varieties benefit from blanching, which involves covering the head to protect it from sunlight. This helps keep the head white and prevents it from developing a bitter flavor. To blanch, simply tie the outer leaves together over the head when it’s about 2-3 inches in diameter.
Phase 4: Harvesting Your Giant Cauliflower
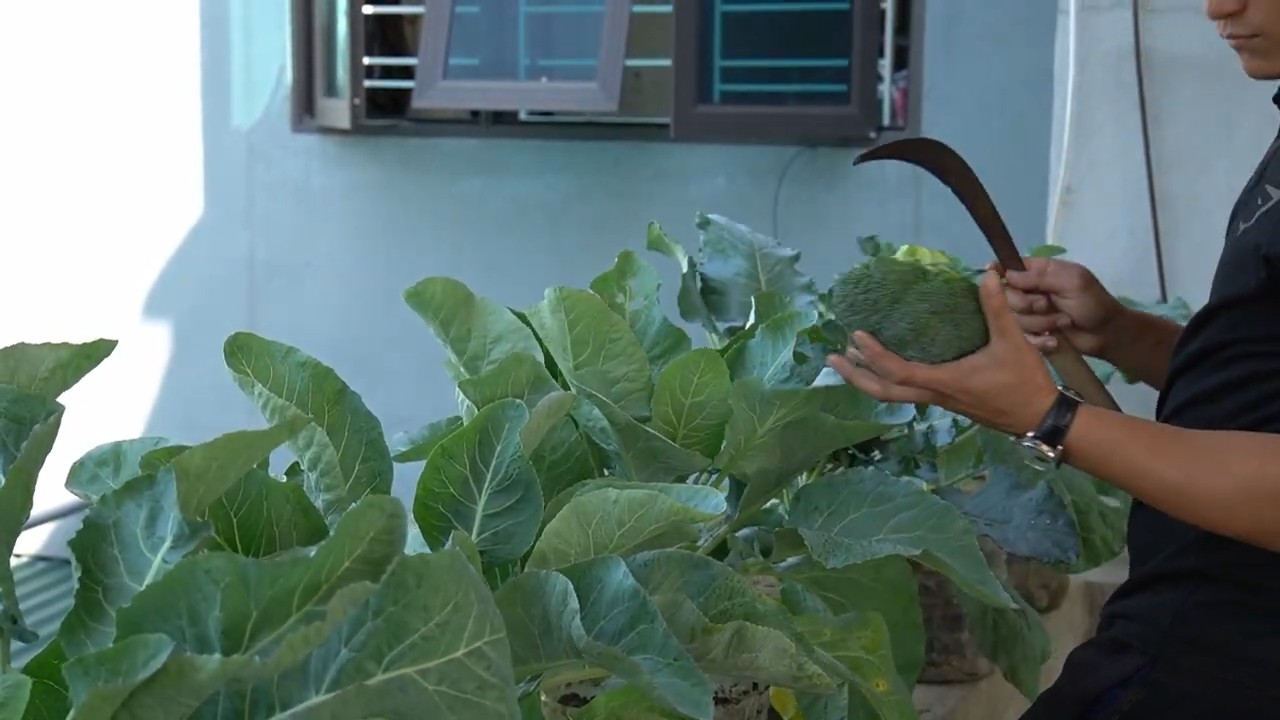
1. Harvest When Ready: Cauliflower is ready to harvest when the head is firm, compact, and about 6-8 inches in diameter (or larger, if you’ve followed my hack!). The exact size will depend on the variety.
2. Cut the Head: Use a sharp knife to cut the head from the plant, leaving a few leaves attached to protect it.
3. Enjoy Your Bounty! Now it’s time to enjoy the fruits (or vegetables!) of your labor. Cauliflower can be eaten raw, steamed, roasted, or used in a variety of dishes.
Troubleshooting Tips
* Small Heads: If your cauliflower heads are small, it could be due to a lack of nutrients, water, or sunlight. Make sure you’re providing your plants with everything they need.
* Loose Heads: Loose heads can be caused by hot weather or inconsistent watering. Try to provide shade during the hottest part of the day and water regularly.
* Bitter Flavor: Bitter flavor can be caused by hot weather or exposure to sunlight. Blanching can help prevent this.
* Pest Problems: If you’re having trouble with pests, try using organic pest control methods or covering your plants with row covers.
Important Considerations
* Soil Testing: Before planting, it’s always a good idea to get your soil tested. This will help you determine if your soil is lacking any essential nutrients.
* Variety Selection: Choose cauliflower varieties that are well-suited to your climate. Some varieties are more heat-tolerant than others.
* Boron Toxicity: As I mentioned earlier, be very careful not to overdo it with the borax. Too much boron can be toxic to plants. Always follow the recommended dosage.
Final Thoughts
Growing giant cauliflower heads takes a little extra effort, but it’s definitely worth it! With the right care and my secret Epsom salt and borax boost, you’ll be amazed at the size and quality of your cauliflower. So, get out there and start planting! Happy gardening!
Conclusion
So, there you have it! Unlocking the potential for truly impressive cauliflower heads doesn’t require expensive fertilizers or complicated techniques. This simple, yet effective DIY trick, focusing on consistent watering and strategic leaf pruning, is a game-changer for any home gardener looking to maximize their cauliflower harvest.
Why is this a must-try? Because it’s accessible, affordable, and yields noticeable results. Imagine the satisfaction of harvesting cauliflower heads that are not only larger but also denser and more flavorful than anything you’ve grown before. This isn’t just about size; it’s about quality. By providing your cauliflower plants with the optimal conditions for growth, you’re ensuring a superior culinary experience.
But don’t just take our word for it. We encourage you to experiment with this DIY method and see the difference for yourself. Remember, consistency is key. Regular watering, especially during dry spells, is crucial for developing those impressive heads. And don’t be afraid to get your hands dirty and prune those outer leaves to allow sunlight to reach the developing cauliflower.
Variations and Suggestions:
* Companion Planting: Consider planting companion plants like marigolds or nasturtiums around your cauliflower to deter pests naturally. This can further enhance the health and vigor of your plants.
* Soil Enrichment: While this DIY trick focuses on watering and pruning, don’t neglect the importance of healthy soil. Amend your soil with compost or well-rotted manure before planting to provide your cauliflower with the nutrients it needs to thrive.
* Timing is Everything: Pay close attention to the maturity date of your chosen cauliflower variety. Starting your seeds or transplants at the right time will ensure that your cauliflower heads develop during optimal weather conditions.
* Mulching Magic: Apply a layer of mulch around your cauliflower plants to help retain moisture in the soil and suppress weed growth. This will reduce the need for frequent watering and weeding, saving you time and effort.
We’re confident that this DIY trick will help you achieve cauliflower growing success. We’re eager to hear about your experiences! Share your photos and stories with us in the comments below. Let’s build a community of cauliflower enthusiasts and learn from each other’s successes and challenges. Let’s all grow bigger cauliflower heads together!
Frequently Asked Questions (FAQ)
Q: How often should I water my cauliflower plants?
A: Watering frequency depends on your climate and soil type. Generally, cauliflower needs consistent moisture, especially during head formation. Aim for about 1-2 inches of water per week. Check the soil moisture regularly by sticking your finger about an inch deep. If the soil feels dry, it’s time to water. During hot, dry periods, you may need to water more frequently. Using a soaker hose or drip irrigation can help deliver water directly to the roots, minimizing water loss through evaporation. Remember, consistent moisture is crucial for developing large, healthy cauliflower heads.
Q: When should I start pruning the outer leaves of my cauliflower plants?
A: Start pruning when the cauliflower head begins to form, typically when it’s about the size of a golf ball. Remove any large, yellowing, or damaged outer leaves that are shading the developing head. Be careful not to remove too many leaves at once, as the leaves are essential for photosynthesis and providing the plant with energy. The goal is to allow sunlight to reach the head, promoting its growth and preventing discoloration. Regular, gentle pruning is more effective than removing a large number of leaves all at once.
Q: What kind of soil is best for growing cauliflower?
A: Cauliflower thrives in well-drained, fertile soil that is rich in organic matter. The ideal soil pH is between 6.0 and 7.0. Before planting, amend your soil with compost, well-rotted manure, or other organic materials to improve its fertility and drainage. If your soil is heavy clay, consider adding sand or perlite to improve drainage. A soil test can help you determine the pH and nutrient levels of your soil and guide you in making necessary amendments.
Q: How do I protect my cauliflower plants from pests and diseases?
A: Several pests and diseases can affect cauliflower plants, including cabbage worms, aphids, and clubroot. To prevent pest problems, consider using row covers to protect your plants from insects. Regularly inspect your plants for signs of pests and diseases, and take action promptly if you notice any problems. Organic pest control methods, such as insecticidal soap or neem oil, can be effective against many common pests. To prevent diseases like clubroot, ensure your soil is well-drained and avoid planting cauliflower in the same location year after year. Crop rotation can help break the disease cycle.
Q: How long does it take for cauliflower to mature?
A: The time it takes for cauliflower to mature depends on the variety and growing conditions. Generally, cauliflower takes between 50 and 100 days to mature from transplanting. Check the seed packet or plant label for the specific maturity date of your chosen variety. Monitor your plants closely as they approach maturity, and harvest the cauliflower head when it is firm, compact, and has reached the desired size.
Q: Can I grow cauliflower in containers?
A: Yes, you can grow cauliflower in containers, but you’ll need to choose a large container that is at least 18 inches in diameter and 12 inches deep. Use a high-quality potting mix that is well-draining and rich in organic matter. Water your container-grown cauliflower plants regularly, as they will dry out more quickly than plants grown in the ground. Fertilize your plants regularly with a balanced fertilizer to provide them with the nutrients they need to thrive. Choose a sunny location for your container-grown cauliflower plants, as they need at least 6 hours of sunlight per day.
Q: What are some common problems when growing cauliflower, and how can I fix them?
A: Some common problems include buttoning (small heads), bolting (premature flowering), and pest infestations. Buttoning can be caused by nutrient deficiencies or stress, so ensure your plants are getting adequate water and fertilizer. Bolting can be caused by temperature fluctuations, so try to protect your plants from extreme heat or cold. Pest infestations can be controlled with organic pest control methods. Regularly inspect your plants for signs of problems and take action promptly to prevent them from escalating.
Q: How do I know when my cauliflower is ready to harvest?
A: The best time to harvest cauliflower is when the head is firm, compact, and has reached the desired size. The curds (the small, tightly packed florets that make up the head) should be white or creamy white, depending on the variety. If the curds start to separate or the head becomes loose, it’s time to harvest. Use a sharp knife to cut the cauliflower head from the plant, leaving a few leaves attached to protect the head.
Q: What can I do if my cauliflower head turns yellow or purple?
A: Yellowing or purpling of the cauliflower head can be caused by sun exposure. To prevent this, you can blanch the head by tying the outer leaves together over the developing head. This will protect the head from direct sunlight and keep it white. Some cauliflower varieties are naturally purple or orange, so the color change may not be a problem. However, if the head turns yellow or purple due to sun exposure, it may have a slightly bitter taste.


Leave a Comment