
Grow bigger onions, and watch your culinary creations reach a whole new level of deliciousness! Have you ever dreamt of harvesting onions so large they practically burst with flavor? I know I have! For centuries, onions have been a staple in cuisines worldwide, from the humble French onion soup to the vibrant curries of India. Their pungent aroma and versatile flavor profile have earned them a place of honor in our kitchens and gardens.
But let’s be honest, sometimes our onion harvests can be a little… underwhelming. Those tiny, almost-there onions can be frustrating, especially when you’re envisioning juicy, flavorful slices in your next meal. That’s where these DIY tricks and hacks come in! I’m going to share some simple yet effective techniques that will help you grow bigger onions than you ever thought possible.
These aren’t just random tips; they’re tried-and-true methods that I’ve personally used to boost my onion yields. Whether you’re a seasoned gardener or just starting out, these easy-to-follow steps will empower you to cultivate impressive onions that will be the envy of your neighbors. Get ready to transform your garden and your cooking with these amazing onion-growing secrets!
DIY: Unleash Giant Onions from Your Garden!
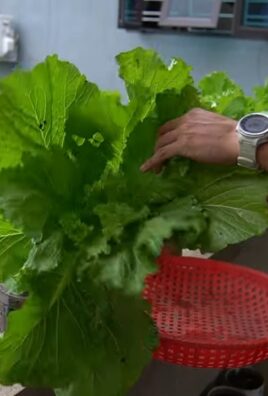
Okay, onion lovers, let’s talk about growing some seriously impressive onions. I’m not talking about those little guys you find at the grocery store. I’m talking about onions so big, you’ll need both hands to hold them! This guide is all about maximizing your onion yield and getting those jumbo bulbs you’ve always dreamed of. It’s a bit of a process, but trust me, the results are worth it.
Choosing the Right Onion Variety
First things first, not all onions are created equal. Some varieties are just genetically predisposed to be smaller. So, if you’re aiming for giants, you need to start with the right seeds or sets.
* Long-Day Onions: These are your best bet if you live in northern regions (think above the 36th parallel). They need 14-16 hours of daylight to start bulbing. Popular varieties include Walla Walla Sweet, Yellow Spanish, and Red Zeppelin.
* Short-Day Onions: These are ideal for southern regions (below the 36th parallel) and need only 10-12 hours of daylight. Examples include Texas Sweet White, Georgia Sweet, and Red Creole.
* Intermediate-Day Onions: These are more adaptable and can grow in a wider range of latitudes. They need around 12-14 hours of daylight.
Important Tip: Check your local climate and growing zone to determine which type of onion will thrive in your area. Your local nursery or agricultural extension office can be a great resource for this!
Starting Your Onions: Seeds vs. Sets vs. Transplants
You have three main options for starting your onions: seeds, sets, or transplants. Each has its pros and cons.
* Seeds: Starting from seed gives you the widest variety selection and is generally the most economical option. However, it requires more time and effort, as you’ll need to start them indoors 8-10 weeks before your last frost.
* Sets: These are small, immature onion bulbs that are already partially grown. They’re easier to plant than seeds and will mature faster. However, the variety selection is limited, and they can sometimes be more prone to bolting (going to seed prematurely).
* Transplants: These are young onion plants that have already been started for you. They offer a good balance of convenience and variety selection. You’ll find them at most garden centers in the spring.
My Recommendation: I personally prefer starting from seeds indoors. It gives me the most control over the process and allows me to choose the exact varieties I want. Plus, it’s just really satisfying to watch them grow from tiny seeds into big, beautiful onions!
Preparing the Soil: The Foundation for Giant Onions
Onions are heavy feeders, meaning they need a lot of nutrients to grow big. They also prefer well-drained soil that’s rich in organic matter.
1. Soil Testing: Before you do anything, get your soil tested! This will tell you the pH level and nutrient content of your soil. Onions prefer a slightly acidic to neutral pH (around 6.0-7.0).
2. Amending the Soil: Based on your soil test results, amend your soil accordingly.
* Compost: Add plenty of compost to improve soil structure, drainage, and nutrient content. I like to use well-rotted compost from my own compost bin, but you can also buy it at garden centers.
* Manure: Aged manure is another great amendment. It’s rich in nitrogen, which onions need for leafy growth. Be sure to use aged manure, as fresh manure can burn the roots.
* Fertilizer: Incorporate a balanced fertilizer (e.g., 10-10-10) into the soil before planting. Follow the instructions on the fertilizer package.
* Bone Meal: Bone meal is a good source of phosphorus, which promotes root development.
3. Tilling or Digging: Till or dig the soil to a depth of at least 12 inches to loosen it up and improve drainage. Remove any rocks, weeds, or debris.
4. Creating Raised Beds (Optional): Consider creating raised beds if your soil is poorly drained. Raised beds will help to improve drainage and warm the soil faster in the spring.
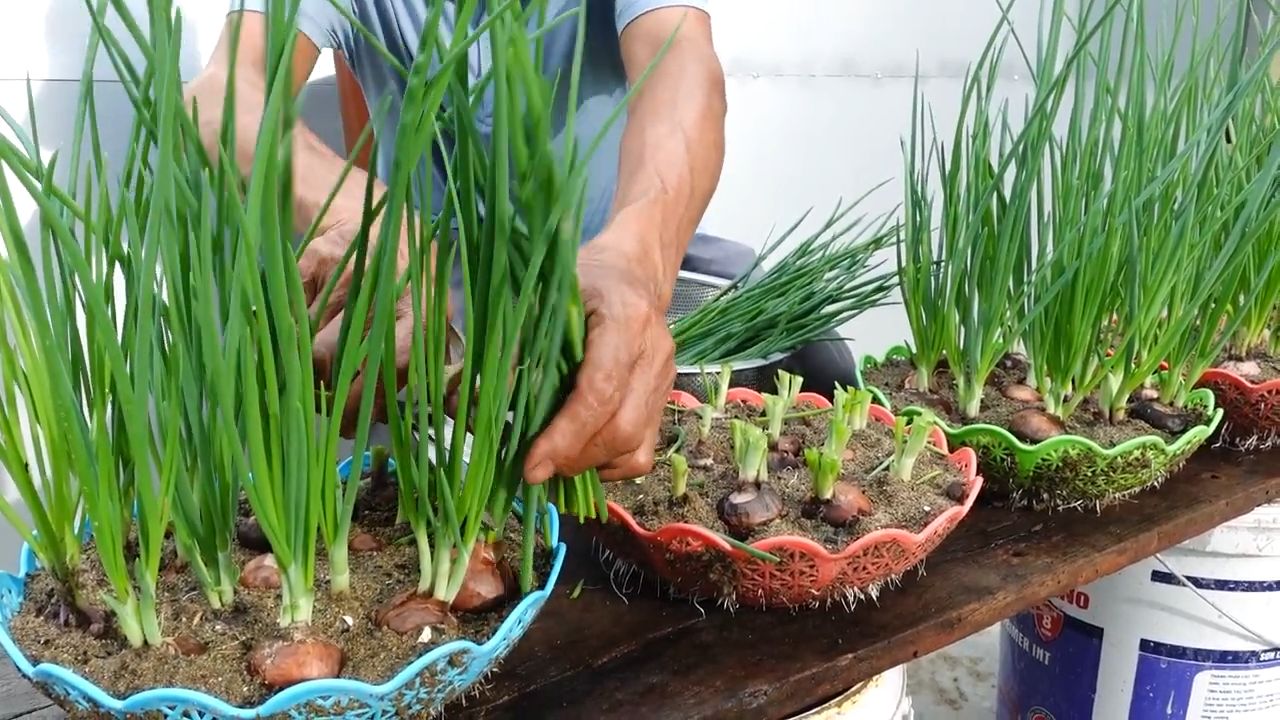
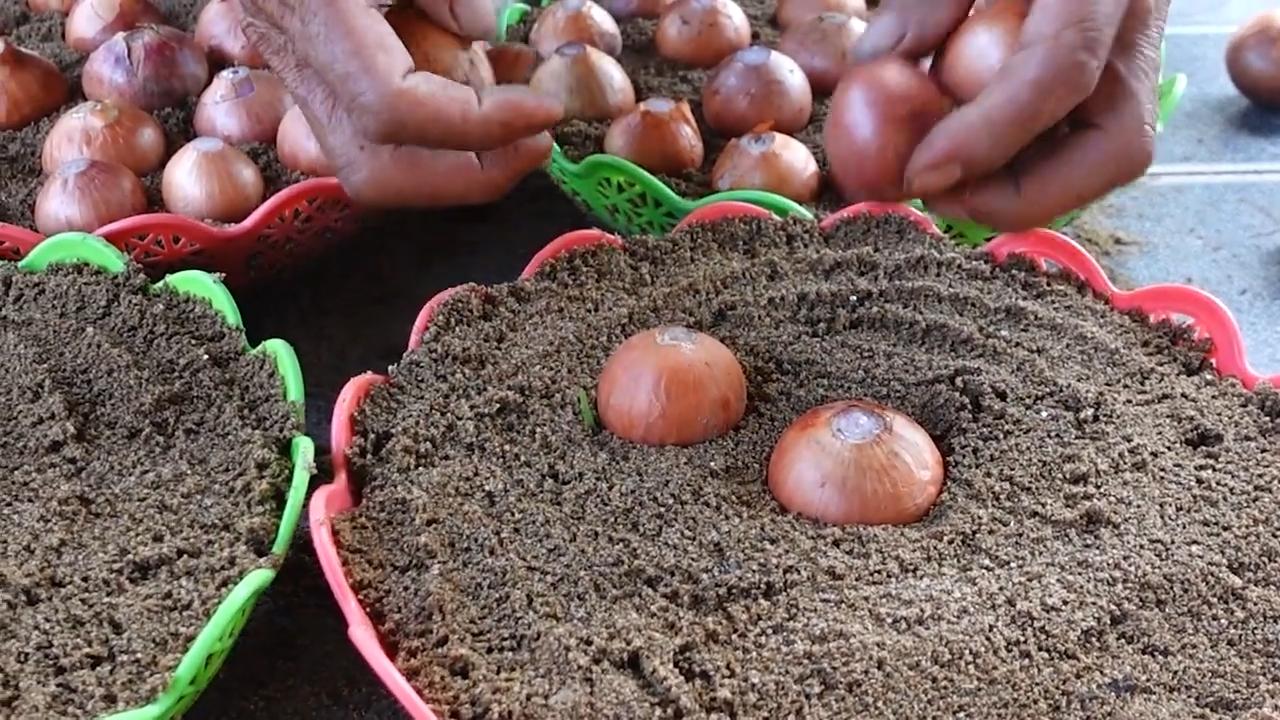
Planting Your Onions: Giving Them the Best Start
Whether you’re planting seeds, sets, or transplants, proper spacing is crucial for growing big onions.
1. Timing: Plant your onions as soon as the ground can be worked in the spring. For seeds started indoors, harden them off for a week or two before transplanting them outdoors.
2. Spacing: Space your onions 4-6 inches apart in rows that are 12-18 inches apart. This will give them enough room to grow without competing for resources.
3. Planting Depth:
* Seeds: Sow seeds about 1/4 inch deep.
* Sets: Plant sets about 1 inch deep, with the pointed end facing up.
* Transplants: Plant transplants at the same depth they were growing in their containers.
4. Watering: Water thoroughly after planting.
Caring for Your Onions: The Key to Jumbo Bulbs
Consistent care is essential for growing big onions. This includes watering, fertilizing, weeding, and pest control.
1. Watering: Onions need consistent moisture, especially during bulb formation. Water deeply and regularly, aiming for about 1 inch of water per week. Avoid overhead watering, as this can promote fungal diseases. Drip irrigation is ideal.
2. Fertilizing: Onions are heavy feeders, so you’ll need to fertilize them regularly.
* Nitrogen: Apply a nitrogen-rich fertilizer every 2-3 weeks during the early stages of growth to promote leafy growth. Examples include blood meal or fish emulsion.
* Phosphorus and Potassium: Once the bulbs start to form, switch to a fertilizer that’s higher in phosphorus and potassium to promote bulb development.
3. Weeding: Keep your onion patch free of weeds. Weeds compete with onions for water, nutrients, and sunlight. Hand-pull weeds carefully to avoid disturbing the onion roots. Mulching can also help to suppress weeds.
4. Pest Control: Onions can be susceptible to pests such as onion maggots, thrips, and aphids.
* Onion Maggots: These are small, white larvae that feed on the roots of onions. Use row covers to prevent onion flies from laying eggs near your onions.
* Thrips: These are tiny, slender insects that suck the sap from onion leaves. Spray with insecticidal soap or neem oil.
* Aphids: These are small, soft-bodied insects that also suck the sap from onion leaves. Spray with insecticidal soap or neem oil.
5. Bolting Prevention: Bolting is when an onion prematurely sends up a flower stalk. This can happen if the onion experiences a period of cold weather followed by warm weather. To prevent bolting, choose bolt-resistant varieties and avoid planting sets that are too large. If an onion does bolt, remove the flower stalk as soon as you see it.
Harvesting and Curing Your Onions: The Final Step
Knowing when to harvest and how to cure your onions is crucial for long-term storage.
1. Harvesting: Onions are ready to harvest when the tops start to fall over and turn brown. This usually happens in late summer or early fall.
2. Digging: Gently dig up the onions with a garden fork, being careful not to damage the bulbs.
3. Curing: Curing is the process of drying the onions to prevent them from rotting during storage.
* Lay them out: Lay the onions out in a single layer in a warm, dry, well-ventilated place.
* Let them dry: Allow them to dry for 2-3 weeks, or until the necks are completely dry and the outer skins are papery.
4. Storing: Once the onions are cured, store them in a cool, dry, dark place. Braiding the tops together and hanging them is a traditional method of storage. You can also store them in mesh bags or crates.
Troubleshooting Common Onion Problems
Even with the best care, you might encounter some problems along the way. Here are a few common issues and how to address them:
* Small Bulbs: This could be due to a number of factors, including poor soil, insufficient watering, overcrowding, or lack of fertilizer. Make sure your soil is well-amended, water regularly, space your onions properly, and fertilize them regularly.
* Bolting: As mentioned earlier, bolting can be caused by cold weather followed by warm weather. Choose bolt-resistant varieties and avoid planting sets that
Conclusion
So, there you have it! This simple yet effective DIY trick to grow bigger onions is a game-changer for any gardener, whether you’re a seasoned pro or just starting out. We’ve walked you through the process, highlighting the science behind why it works and offering practical tips to ensure your success. But why is this method a must-try?
Firstly, it’s incredibly cost-effective. You’re likely already discarding the “secret ingredient” – coffee grounds – making this a virtually free way to boost your onion yield. Secondly, it’s environmentally friendly. Instead of relying solely on synthetic fertilizers, you’re utilizing a natural resource, reducing waste, and enriching your soil organically. Thirdly, and perhaps most importantly, it works! The nitrogen boost from the coffee grounds, combined with their ability to improve soil structure and suppress weeds, creates the perfect environment for your onions to thrive and reach their full potential.
But don’t just take our word for it. We encourage you to experiment and adapt this technique to your specific growing conditions. Consider these variations:
* Compost Tea Infusion: Instead of directly incorporating the coffee grounds into the soil, brew a “coffee grounds tea” by steeping them in water for a few days. This liquid fertilizer can be applied directly to the onion plants, providing a readily available nutrient boost.
* Companion Planting: Pair your onions with other plants that benefit from acidic soil, such as blueberries or azaleas. The coffee grounds will help create a favorable environment for both.
* Soil Testing: Before applying coffee grounds, it’s always a good idea to test your soil’s pH level. While coffee grounds are generally acidic, excessive acidity can hinder plant growth. Adjust your application accordingly.
* Different Onion Varieties: Experiment with different onion varieties to see which ones respond best to this method. Some varieties may be more nitrogen-hungry than others.
* Timing is Everything: Consider the timing of your coffee ground application. Applying them early in the growing season, when the onions are actively developing their bulbs, can be particularly beneficial.
Ultimately, the best way to discover the full potential of this DIY trick is to try it yourself. We’re confident that you’ll be amazed by the results. Imagine harvesting onions that are not only larger but also more flavorful and nutrient-rich. It’s a rewarding experience that connects you to the natural world and allows you to enjoy the fruits (or rather, vegetables) of your labor.
So, grab your coffee grounds, head out to your garden, and get ready to grow bigger onions than you ever thought possible. And don’t forget to share your experiences with us! We’d love to hear about your successes, challenges, and any variations you’ve tried. Let’s learn and grow together! Share your photos and stories on our social media pages using #BiggerOnionsDIY. We can’t wait to see what you create!
Frequently Asked Questions (FAQ)
1. How exactly do coffee grounds help onions grow bigger?
Coffee grounds are a fantastic source of nitrogen, an essential nutrient for plant growth, particularly for leafy vegetables like onions. Nitrogen promotes healthy foliage development, which in turn fuels bulb growth. Additionally, coffee grounds improve soil structure by increasing aeration and water retention. They also act as a natural weed suppressant, reducing competition for nutrients and resources. The slightly acidic nature of coffee grounds can also benefit onions, as they prefer a slightly acidic soil pH (around 6.0 to 6.8).
2. How often should I apply coffee grounds to my onion plants?
The frequency of application depends on several factors, including the type of soil, the age of the onion plants, and the amount of rainfall. As a general guideline, you can apply a thin layer of coffee grounds around your onion plants every 2-3 weeks during the growing season. Avoid piling the grounds directly against the stems, as this can lead to rot. If you’re using a coffee grounds tea, you can apply it more frequently, perhaps once a week, as it’s a more diluted form of fertilizer. Monitor your plants closely for any signs of nutrient deficiency or excess and adjust your application accordingly.
3. Are all types of coffee grounds suitable for onions?
Yes, both used and unused coffee grounds can be beneficial for onions. However, used coffee grounds are preferable because they are less acidic. Unused coffee grounds can be quite acidic, which could potentially harm your plants if applied in large quantities. If you’re using unused coffee grounds, it’s best to compost them first to reduce their acidity. Also, avoid using coffee grounds that have been treated with artificial sweeteners or flavorings, as these additives could be harmful to your plants.
4. Can I use too many coffee grounds? What are the signs of over-application?
Yes, it’s possible to overdo it with coffee grounds. While they are beneficial, excessive application can lead to soil acidification, which can hinder nutrient uptake and harm your onion plants. Signs of over-application include yellowing leaves, stunted growth, and a general decline in plant health. If you suspect you’ve applied too many coffee grounds, you can try amending the soil with lime to raise the pH level. It’s always best to err on the side of caution and start with small amounts, gradually increasing the application as needed.
5. Will this DIY trick work for all onion varieties?
While this trick can benefit most onion varieties, some may respond better than others. Generally, varieties that are known for their large bulb size, such as Walla Walla Sweets or Spanish onions, may show the most significant improvement. However, even smaller varieties like shallots or scallions can benefit from the added nutrients and improved soil conditions. Experiment with different varieties to see which ones thrive best in your garden.
6. What other organic materials can I combine with coffee grounds to enhance onion growth?
Coffee grounds work well in combination with other organic materials to create a nutrient-rich and healthy soil environment for your onions. Consider adding compost, well-rotted manure, or leaf mold to your soil. These materials provide a balanced blend of nutrients and improve soil structure. You can also add bone meal, which is a good source of phosphorus, another essential nutrient for root development.
7. My onions are already planted. Can I still use this trick?
Absolutely! You can apply coffee grounds to onions that are already planted. Simply sprinkle a thin layer around the base of the plants, being careful not to pile them directly against the stems. You can also brew a coffee grounds tea and use it to water your onions. This is a great way to provide a quick nutrient boost to established plants.
8. How long does it take to see results from using coffee grounds on my onions?
The time it takes to see results can vary depending on several factors, including the age of the plants, the growing conditions, and the frequency of application. In general, you should start to see noticeable improvements in foliage growth within a few weeks of applying coffee grounds. Bulb development may take longer, but you should see a significant difference in size and yield by the end of the growing season.
9. Can I use coffee grounds to deter pests from my onion plants?
While coffee grounds are not a guaranteed pest repellent, they can help deter some common garden pests, such as slugs and snails. The rough texture of the grounds can make it difficult for these pests to move around, and the caffeine content may also be toxic to them. However, it’s important to note that coffee grounds are not a substitute for other pest control methods, such as hand-picking or using organic insecticides.
10. I don’t drink coffee. Where can I get coffee grounds?
If you don’t drink coffee, you can still easily obtain coffee grounds. Many coffee shops are happy to give away their used coffee grounds for free. Simply ask your local barista if they have any available. You can also check with friends, neighbors, or family members who drink coffee. Another option is to purchase coffee grounds from a grocery store or online retailer. Even decaffeinated coffee grounds will work.
Leave a Comment