
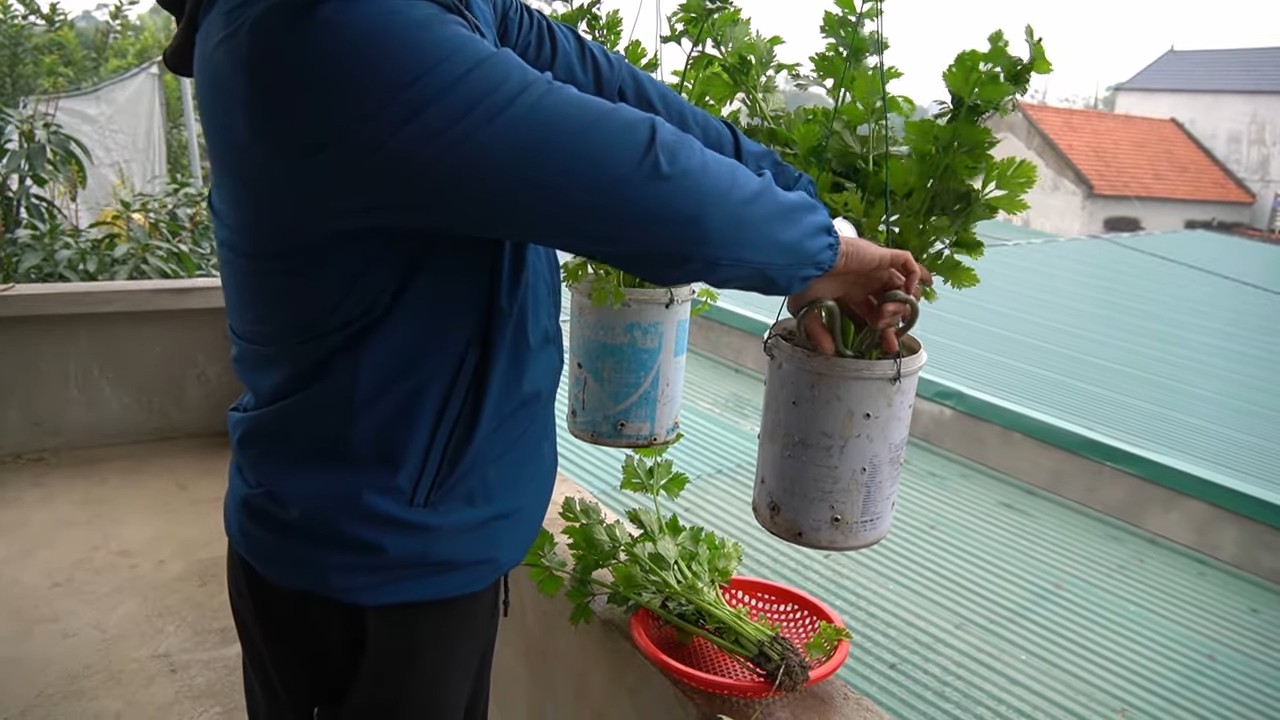
Grow Celery at Home, even if you think you don’t have a green thumb! Have you ever tossed the base of a celery stalk, thinking it was just kitchen waste? Well, get ready to rethink that habit because I’m about to share a super simple, almost magical, DIY trick that will have you harvesting fresh, crunchy celery from your own kitchen in no time.
Celery, with its crisp stalks and refreshing flavor, has been enjoyed for centuries. Originating in the Mediterranean, it was initially valued more for its medicinal properties than its culinary uses. Over time, it evolved into the crunchy vegetable we know and love, a staple in soups, salads, and as a healthy snack. But what if I told you that you could bypass the grocery store and grow celery at home with minimal effort?
In today’s world, where we’re all looking for ways to be more sustainable and save a few bucks, this DIY celery-growing hack is a game-changer. Not only will you reduce food waste, but you’ll also have access to fresh, organic celery whenever you need it. Plus, it’s incredibly rewarding to watch something you nurtured from a discarded base flourish into a vibrant plant. So, ditch the store-bought celery and let’s get growing! I’m excited to show you how easy it is.
Grow Your Own Celery: A Beginner’s Guide
Hey there, fellow gardening enthusiasts! Ever thought about growing your own celery? It’s surprisingly easy and rewarding, plus you’ll have fresh, crisp celery right at your fingertips. I’m going to walk you through the whole process, from starting with a store-bought stalk to harvesting your very own homegrown celery. Let’s get started!
Choosing Your Celery and Preparing for Regrowth
Before we dive into the nitty-gritty, let’s talk about selecting the right celery and getting it ready for its second life.
* Choosing the Right Celery: Look for a celery stalk that’s firm, with a healthy-looking base. Avoid stalks that are wilted, discolored, or have any signs of mold. The fresher the celery, the better the chances of successful regrowth.
* Preparing the Base: This is crucial! We’re going to use the base of the celery stalk to regrow it.
Step-by-Step Instructions: Regrowing Celery from a Stalk
Here’s the fun part – actually regrowing the celery!
1. Cut the Celery: Using a sharp knife, cut off the celery stalks about 2 inches from the base. You’ll be left with the bottom portion of the celery, which is what we’ll use to regrow it. Don’t throw away the stalks you cut off! You can use them for cooking, snacking, or juicing.
2. Place in Water: Find a shallow dish or glass. Place the celery base in the dish, cut-side up. Add enough water to cover the bottom inch or so of the base. Be careful not to submerge the entire base, as this can lead to rot.
3. Sunlight and Water Changes: Place the dish in a sunny windowsill or another location that receives plenty of indirect sunlight. Change the water every day or two to keep it fresh and prevent bacterial growth. This is really important! Stagnant water is a breeding ground for nasties.
4. Observe and Wait: Over the next few days, you should start to see small roots emerging from the bottom of the celery base and new green shoots sprouting from the top. This is a sign that your celery is successfully regrowing! It’s so exciting to watch!
5. Transplant to Soil: Once the roots are about 1-2 inches long and the new green shoots are a few inches tall, it’s time to transplant your celery to soil. This usually takes about a week or two.
Planting Your Celery in Soil
Now that your celery has sprouted roots, it’s time to give it a proper home in some soil.
* Choosing the Right Pot: Select a pot that’s at least 6-8 inches in diameter and depth. Celery needs room for its roots to grow. Make sure the pot has drainage holes to prevent waterlogging.
* Preparing the Soil: Celery prefers rich, well-draining soil. You can use a good quality potting mix or create your own by mixing equal parts of potting soil, compost, and perlite or vermiculite. The compost will provide nutrients, and the perlite or vermiculite will improve drainage.
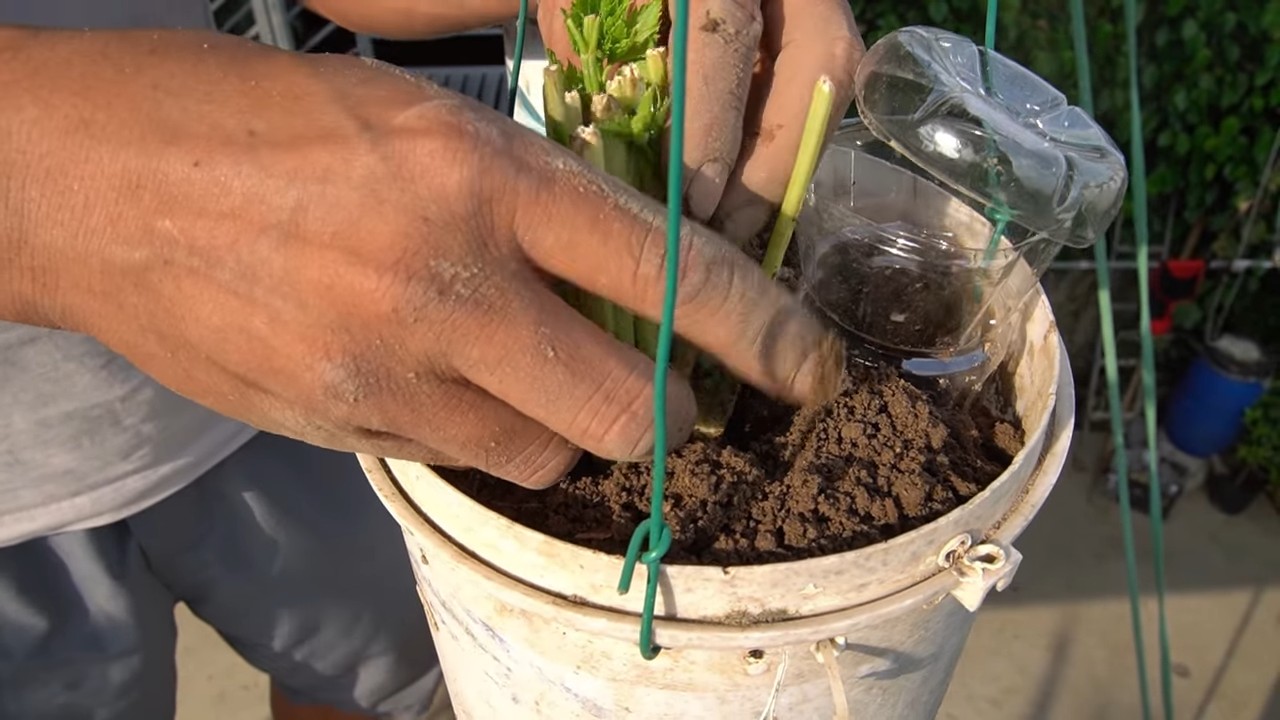
* Planting the Celery: Gently remove the celery base from the water. Dig a hole in the soil that’s large enough to accommodate the roots. Place the celery base in the hole, making sure the top of the base is level with the soil surface. Backfill the hole with soil and gently pat it down.
* Watering: Water the newly planted celery thoroughly until the water drains out of the bottom of the pot. Keep the soil consistently moist, but not waterlogged. Celery needs plenty of water to thrive.
Caring for Your Growing Celery
Once your celery is planted, it’s important to provide it with the right care to ensure healthy growth.
* Sunlight: Celery needs at least 6 hours of sunlight per day. Place your pot in a sunny location, such as a windowsill or balcony. If you don’t have enough natural sunlight, you can supplement with a grow light.
* Watering: As I mentioned before, celery needs consistent moisture. Water your celery regularly, especially during hot, dry weather. Check the soil moisture by sticking your finger into the soil. If the top inch feels dry, it’s time to water.
* Fertilizing: Celery is a heavy feeder, so it benefits from regular fertilization. Use a balanced liquid fertilizer every 2-3 weeks. Follow the instructions on the fertilizer label. You can also add compost to the soil every few weeks to provide additional nutrients.
* Pest Control: Keep an eye out for pests such as aphids, slugs, and snails. If you notice any pests, you can try spraying your celery with insecticidal soap or neem oil. You can also handpick pests off the plants.
* Blanching (Optional): Blanching celery stalks makes them more tender and less bitter. About two weeks before you plan to harvest, you can blanch the stalks by wrapping them with newspaper or cardboard. This will block sunlight and prevent the stalks from turning green.
Harvesting Your Homegrown Celery
The moment we’ve all been waiting for – harvesting your very own celery!
* When to Harvest: You can start harvesting celery stalks when they are about 6-8 inches tall. The exact time will depend on the variety of celery and your growing conditions.
* How to Harvest: To harvest, simply cut the outer stalks of the celery plant with a sharp knife. Leave the inner stalks to continue growing. You can harvest celery stalks as needed.
* Enjoy Your Harvest: Now you can enjoy your fresh, homegrown celery! Use it in salads, soups, stews, or as a healthy snack.
Troubleshooting Common Celery Growing Problems
Even with the best care, you might encounter some problems while growing celery. Here are a few common issues and how to address them:
* Yellowing Leaves: This can be caused by a number of factors, including overwatering, underwatering, nutrient deficiencies, or pests. Check the soil moisture and adjust your watering accordingly. Fertilize your celery with a balanced fertilizer. Inspect the plants for pests and treat them as needed.
* Stunted Growth: This can be caused by insufficient sunlight, poor soil, or pests. Make sure your celery is getting enough sunlight. Improve the soil by adding compost or other organic matter. Check the plants for pests and treat them as needed.
* Bolting: Bolting is when the celery plant prematurely produces flowers and seeds. This can be caused by stress, such as hot weather or inconsistent watering. To prevent bolting, keep your celery well-watered and provide shade during hot weather.
Tips for Success
Here are a few extra tips to help you succeed in growing your own celery:
* Start with a Healthy Stalk: As I mentioned earlier, choosing a healthy celery stalk is crucial for successful regrowth.
* Provide Consistent Moisture: Celery needs consistent moisture to thrive. Water your celery regularly, especially during hot, dry weather.
* Fertilize Regularly: Celery is a heavy feeder, so it benefits from regular fertilization.
* Protect from Pests: Keep an eye out for pests and treat them as needed.
* Be Patient: Growing celery takes time and patience. Don’t get discouraged if you don’t see results immediately.
Expanding Your Celery Growing Adventures
Once you’ve mastered regrowing celery from a stalk, you can try growing celery from seeds. This will give you more control over the variety of celery you grow. You can also experiment with different growing methods, such as hydroponics.
Growing your own celery is a fun and rewarding experience. With a little bit of effort, you can enjoy fresh, homegrown celery all season long. Happy gardening!
Conclusion
So, there you have it! Growing celery at home from kitchen scraps is not just a fun experiment; it’s a rewarding way to reduce food waste, enjoy fresh, flavorful celery, and connect with the natural world, even in a small way. This simple DIY trick transforms what would otherwise be tossed into the compost bin into a vibrant, thriving plant, offering a continuous supply of this versatile vegetable.
Why is this a must-try? Because it’s incredibly easy, cost-effective, and environmentally friendly. You don’t need a green thumb or extensive gardening knowledge to succeed. With just a celery base, some water, and a little patience, you can witness the magic of regeneration firsthand. Imagine the satisfaction of harvesting your own celery stalks, knowing you nurtured them from humble beginnings.
Beyond the basic method, there are several exciting variations you can explore. Try experimenting with different types of celery, such as Pascal celery or Chinese celery, to discover your favorite flavor profiles. Once your celery plant is established in soil, consider companion planting with herbs like parsley or basil to enhance its growth and flavor. You can also try succession planting, starting new celery bases every few weeks, to ensure a continuous harvest throughout the growing season.
For those seeking a more advanced challenge, consider transplanting your celery plant into a larger container or even directly into your garden bed. This will allow it to reach its full potential and produce larger, more robust stalks. Remember to provide adequate sunlight, water, and nutrients to support its growth.
We wholeheartedly encourage you to give this DIY trick a try. It’s a fantastic project for individuals, families, and classrooms alike. It’s a great way to teach children about plant life cycles, sustainability, and the importance of reducing food waste. Plus, it’s just plain fun to watch your celery regrow!
Don’t be afraid to experiment and adapt the method to suit your own environment and preferences. The beauty of this project lies in its simplicity and adaptability. Whether you have a sprawling garden or a small windowsill, you can successfully grow celery at home.
Once you’ve embarked on your celery-growing adventure, we’d love to hear about your experience! Share your photos, tips, and stories with us in the comments below. Let’s create a community of home gardeners who are passionate about reducing food waste and enjoying the fruits (or vegetables!) of their labor. Your insights and experiences can inspire others to try this rewarding DIY trick and discover the joys of growing their own food. Let us know if this **grow celery at home** guide was helpful.
Frequently Asked Questions (FAQ)
How long does it take for celery to regrow from the base?
Typically, you’ll start to see new growth within a few days to a week after placing the celery base in water. Small leaves will emerge from the center of the base. It usually takes about 2-3 weeks for the celery to develop enough roots and foliage to be transplanted into soil. However, the exact timeframe can vary depending on factors such as temperature, sunlight, and water quality.
What kind of water should I use?
Tap water is generally fine, but if your tap water is heavily chlorinated, it’s best to let it sit out for 24 hours before using it to allow the chlorine to dissipate. Alternatively, you can use filtered water or rainwater. Avoid using distilled water, as it lacks the minerals that plants need to thrive. Change the water every 1-2 days to prevent bacterial growth and keep the celery base healthy.
How much sunlight does the celery base need?
While the celery base is in water, it doesn’t need direct sunlight. Indirect sunlight or a bright, well-lit area is sufficient. Once you transplant the celery into soil, it will need more sunlight. Aim for at least 6 hours of sunlight per day. If you don’t have enough natural sunlight, you can supplement with a grow light.
When should I transplant the celery into soil?
You should transplant the celery into soil when it has developed a good root system and several new leaves. This usually takes about 2-3 weeks. Choose a pot that is at least 6 inches in diameter and fill it with well-draining potting mix. Gently remove the celery base from the water and plant it in the pot, burying the roots and the bottom part of the base. Water thoroughly after transplanting.
What kind of soil should I use?
Celery prefers rich, well-draining soil. A good potting mix will work well. You can also amend your soil with compost or other organic matter to improve its fertility and drainage. Avoid using heavy clay soil, as it can become waterlogged and prevent the celery from growing properly.
How often should I water the celery after transplanting?
Celery needs consistent moisture to thrive. Water the plant regularly, keeping the soil moist but not soggy. Check the soil moisture level daily and water when the top inch of soil feels dry to the touch. Avoid overwatering, as this can lead to root rot.
What if my celery base starts to rot?
If your celery base starts to rot, it’s likely due to bacterial growth or overwatering. Remove any rotten parts of the base and change the water more frequently. Make sure the celery base is not sitting in stagnant water. If the rot persists, it’s best to start with a fresh celery base.
Can I grow celery indoors year-round?
Yes, you can grow celery indoors year-round, provided you provide it with adequate sunlight, water, and nutrients. Use a grow light to supplement natural sunlight during the winter months. Keep the plant in a warm, well-ventilated area.
How do I harvest the celery?
You can harvest the celery stalks as needed once they have reached a desirable size. Simply cut the stalks off at the base of the plant. The plant will continue to produce new stalks. You can also harvest the entire plant at once by cutting it off at the base.
What can I do with the celery I grow?
The celery you grow can be used in a variety of dishes, such as salads, soups, stews, and stir-fries. You can also use it as a healthy snack or juice it for a refreshing beverage. The leaves of the celery are also edible and can be used to add flavor to salads and other dishes.
Can I grow celery from seed instead of a base?
Yes, you can grow celery from seed. However, growing celery from seed is more challenging and time-consuming than growing it from a base. Celery seeds are very small and require specific conditions to germinate. It can take several months for celery plants to mature from seed.
Is growing celery at home organic?
Growing celery at home can be organic if you use organic potting mix, organic fertilizers, and avoid using pesticides or herbicides. This allows you to control what goes into your food and ensures that you are consuming healthy, chemical-free celery.

Leave a Comment