
Grow Gourds at Home – ever dreamt of transforming your backyard into a whimsical wonderland, bursting with unique shapes and textures? I know I have! Gourds, with their fascinating history and incredible versatility, offer a fantastic opportunity to add a touch of magic to your garden. For centuries, gourds have been more than just decorative items; they’ve been essential tools, musical instruments, and even food sources in various cultures around the world.
From the ancient civilizations of Africa and Asia to the indigenous peoples of the Americas, gourds have played a vital role in daily life. Think of the iconic maracas, crafted from dried gourds, or the intricate water vessels used for centuries. Now, you can bring this rich history and practical beauty to your own home!
But why should you learn to grow gourds at home? Well, besides the sheer joy of nurturing these fascinating plants, you’ll gain access to a sustainable source of unique crafting materials. Imagine creating your own birdhouses, bowls, or even personalized gifts! Plus, growing gourds is a rewarding experience that connects you with nature and provides a sense of accomplishment. In this article, I’m going to share some simple yet effective DIY tricks and hacks to help you cultivate a thriving gourd garden, even if you’re a complete beginner. Let’s get started!

Growing Gourds: A Comprehensive DIY Guide
Hey there, fellow gardening enthusiasts! Ever dreamt of growing your own quirky, unique gourds? Well, you’ve come to the right place! I’m going to walk you through the entire process, from seed to stunning decorative piece. Get ready to get your hands dirty and create some gourd-geous art!
Choosing Your Gourd Variety
First things first, let’s talk gourds! There’s a whole world of gourd varieties out there, each with its own shape, size, and purpose. Here are a few popular choices:
* Bottle Gourds: These are the classic, bulbous gourds perfect for crafting birdhouses, dippers, and other functional items.
* Ornamental Gourds: These come in a rainbow of colors and bizarre shapes. They’re ideal for fall decorations and adding a touch of whimsy to your home. Think warty gourds, apple gourds, and pear gourds.
* Luffa Gourds: Yes, the same luffa you use in the shower! Growing your own luffa is surprisingly easy and rewarding.
* Snake Gourds: These long, slender gourds are a real conversation starter. They can grow several feet long!
Consider your climate, available space, and desired end product when making your selection. I personally love growing a mix of bottle gourds and ornamental gourds for maximum variety.
Getting Started: Planting Your Gourd Seeds
Gourds need a long growing season (typically 100-180 days), so starting them indoors is often the best approach, especially if you live in a cooler climate.
1. Soaking the Seeds: To help with germination, soak your gourd seeds in warm water for 24-48 hours before planting. This softens the hard outer shell and encourages sprouting. I usually put them in a small bowl on a sunny windowsill.
2. Preparing the Seed Starting Mix: Use a well-draining seed starting mix. You can buy this at any garden center, or make your own by mixing equal parts peat moss, perlite, and vermiculite.
3. Planting the Seeds: Fill small pots or seed trays with the seed starting mix. Plant the seeds about 1 inch deep. I usually plant two seeds per pot, just in case one doesn’t germinate.
4. Watering and Warmth: Gently water the soil until it’s moist but not soggy. Cover the pots with plastic wrap or a humidity dome to create a greenhouse effect. Place the pots in a warm location, ideally around 70-80°F (21-27°C). A heat mat can be helpful if your home is cooler.
5. Waiting for Germination: Be patient! Gourd seeds can take anywhere from 7 to 21 days to germinate. Once the seedlings emerge, remove the plastic wrap and provide them with plenty of light. A sunny windowsill or grow light will work well.
Transplanting Your Gourd Seedlings
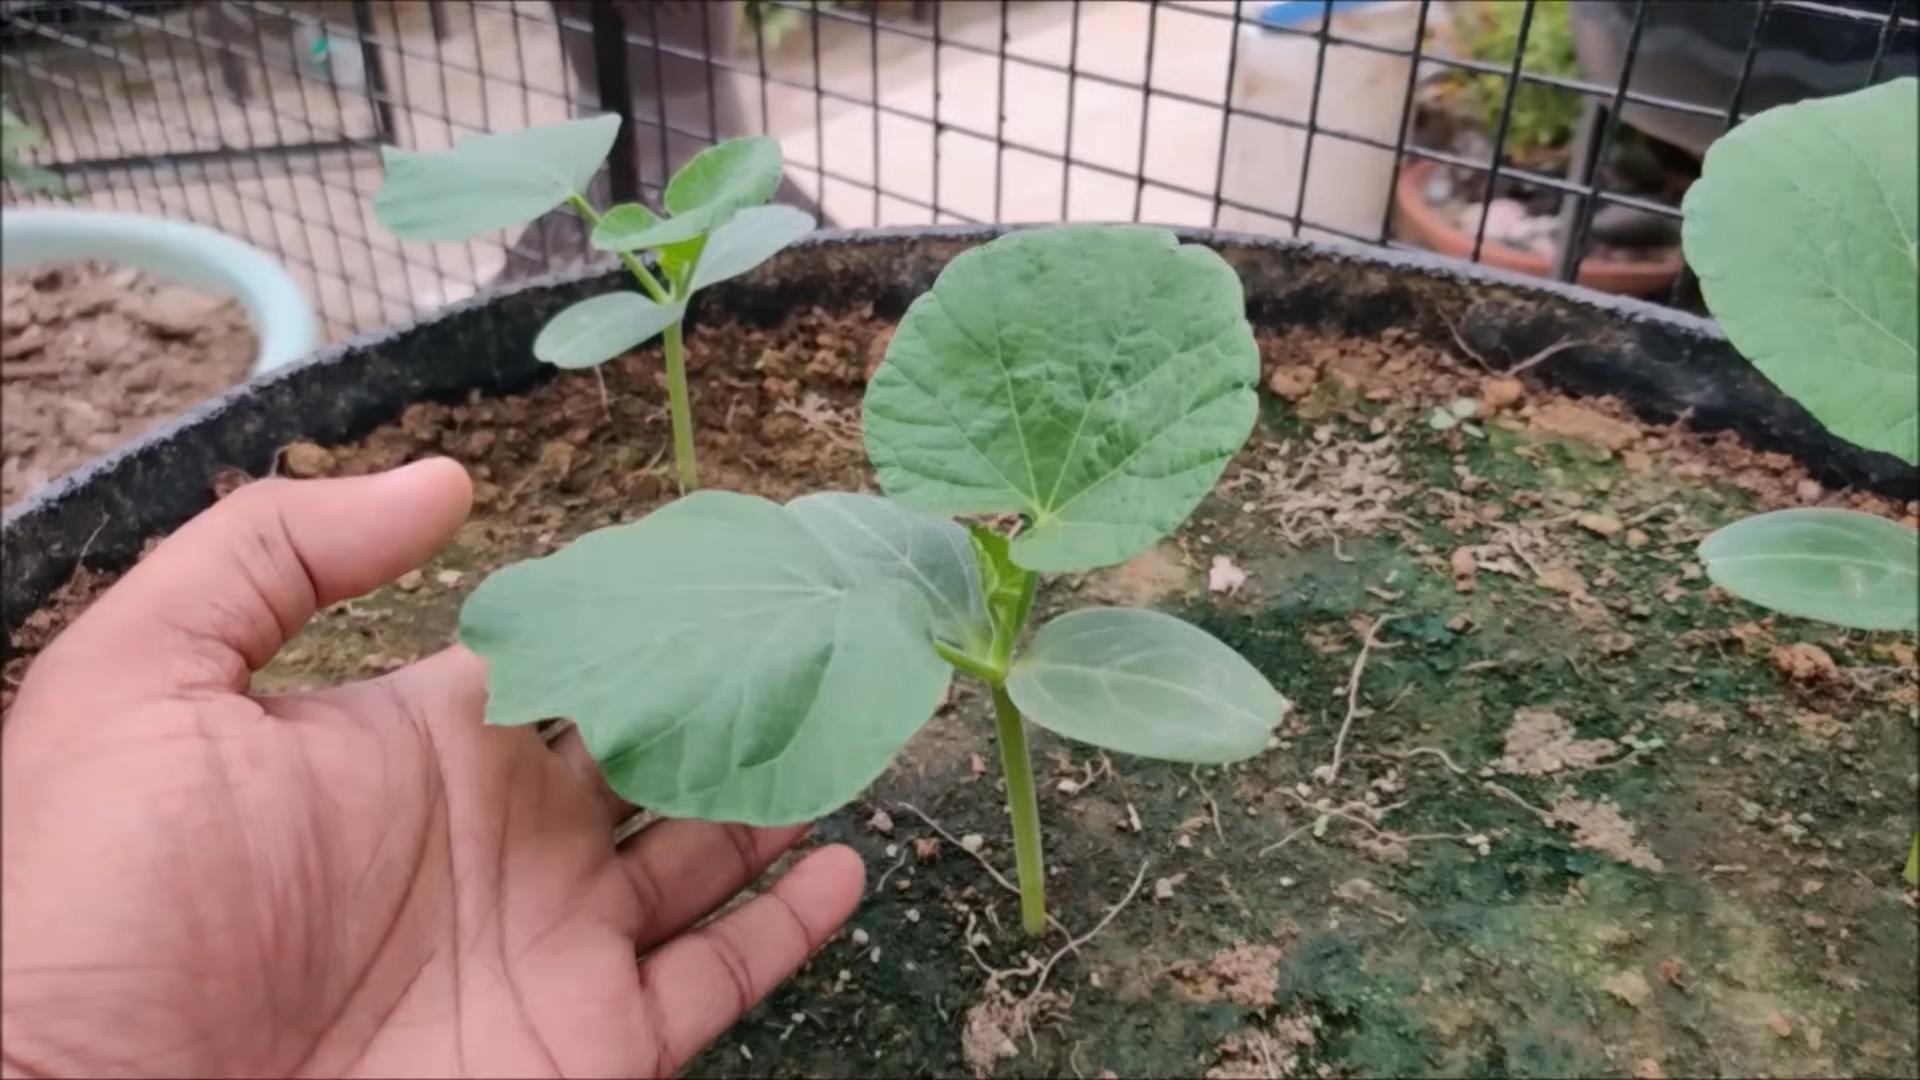
Once your seedlings have developed a few sets of true leaves (the leaves that look like miniature versions of the adult leaves), it’s time to transplant them outdoors.
1. Hardening Off: Before transplanting, you need to “harden off” the seedlings. This means gradually acclimating them to outdoor conditions. Start by placing the seedlings outdoors in a sheltered location for a few hours each day, gradually increasing the amount of time they spend outside over the course of a week. This helps them adjust to the sun, wind, and temperature changes.
2. Choosing the Right Location: Gourds need plenty of sunshine (at least 6-8 hours per day) and well-drained soil. They also need a lot of space to grow, as the vines can spread quite a bit.
3. Preparing the Soil: Amend the soil with compost or well-rotted manure to improve drainage and fertility. Gourds are heavy feeders, so rich soil is essential.
4. Transplanting: Dig a hole that’s slightly larger than the root ball of the seedling. Gently remove the seedling from the pot and place it in the hole. Backfill with soil and water thoroughly. Space the plants at least 3-4 feet apart.
5. Providing Support: Gourds are vines, so they need something to climb on. A trellis, fence, or even a sturdy tree branch will work well. I’ve even seen people use old ladders as gourd supports!
Caring for Your Growing Gourds
Now that your gourds are planted, it’s time to provide them with the care they need to thrive.
1. Watering: Water regularly, especially during dry spells. Gourds need consistent moisture to develop properly. Aim for about 1 inch of water per week.
2. Fertilizing: Fertilize every few weeks with a balanced fertilizer. Look for a fertilizer with equal parts nitrogen, phosphorus, and potassium (e.g., 10-10-10).
3. Weeding: Keep the area around your gourd plants free of weeds. Weeds compete with the gourds for water and nutrients.
4. Pest Control: Keep an eye out for pests like squash bugs, squash vine borers, and aphids. Hand-picking pests, using insecticidal soap, or applying neem oil can help control infestations.
5. Pollination: Gourds have separate male and female flowers. The female flowers need to be pollinated in order to produce fruit. If you’re not seeing many gourds developing, you may need to hand-pollinate the flowers. To do this, use a small paintbrush to transfer pollen from the male flowers to the female flowers. You can identify female flowers by the small gourd-like swelling at the base of the flower.
Harvesting Your Gourds
Harvesting time is the most exciting part! But it’s important to harvest your gourds at the right time to ensure they dry properly.
1. Waiting for Maturity: Gourds are ready to harvest when the stems have turned brown and dry. The gourd itself should feel hard and lightweight.
2. Cutting the Gourds: Use a sharp knife or pruning shears to cut the gourds from the vine, leaving a few inches of stem attached. This helps prevent rot.
3. Washing the Gourds: Gently wash the gourds with soapy water to remove any dirt or debris.
Drying Your Gourds: The Key to Longevity
Drying is crucial for preserving your gourds and preventing them from rotting. This process can take several weeks or even months, so patience is key.
1. Choosing a Drying Location: Find a well-ventilated, dry, and dark location to dry your gourds. A shed, garage, or attic works well. Avoid direct sunlight, as it can cause the gourds to crack.
2. Preparing the Gourds: Place the gourds on a wire rack or hang them from the ceiling using string or twine. Make sure the gourds are not touching each other to allow for good air circulation.
3. Monitoring the Drying Process: Check the gourds regularly for signs of rot or mold. If you see any, remove the affected gourd immediately to prevent it from spreading to the others.
4. The Waiting Game: The drying process can take anywhere from 1 to 6 months, depending on the size and thickness of the gourd. You’ll know the gourds are dry when they feel lightweight and you can hear the seeds rattling inside.
Cleaning Your Dried Gourds
Once your gourds are completely dry, it’s time to clean them up and prepare them for crafting.
1. Removing the Outer Skin: The outer skin of the gourd will likely be covered in mold and mildew. Don’t worry, this is normal! You can remove the skin by scrubbing the gourd with a scouring pad or steel wool. You can also use a bleach solution (1 part bleach to 10 parts water) to help remove stubborn mold.
2. Cleaning the Inside: To remove the seeds and pulp from the inside of the gourd, you’ll need to create a hole. Use a drill or a saw to cut a hole in the gourd. Then, use a long-handled spoon or a wire hanger to scrape out the inside. Be sure to wear a dust mask, as the dried pulp can be irritating to your lungs.
3. Sanding: Once the gourd is clean and dry, you can sand it smooth with sandpaper. Start with a coarse grit sandpaper and gradually work your way up to a finer grit.
Crafting with Your Gourds: Unleash Your Creativity!
Now for the fun part! Your gourds are clean, dry, and ready to be transformed into works of art. Here are a few ideas to get you started:
* Birdhouses: Bottle gourds make excellent birdhouses. Simply cut a hole for the entrance, add a perch, and hang it from a tree.
* Dippers: Cut a bottle gourd in half and attach a handle to create a rustic dipper.
Conclusion
So, there you have it! Growing gourds at home is not only achievable, but it’s also incredibly rewarding. From the initial thrill of planting the seeds to the satisfaction of harvesting your own unique creations, this DIY project offers a connection to nature and a creative outlet unlike any other. We’ve walked you through the essential steps, from selecting the right gourd varieties and preparing your garden to nurturing your plants and ensuring a bountiful harvest.
But why is this DIY trick a must-try? Beyond the sheer enjoyment of gardening, growing your own gourds allows you to cultivate varieties that might be difficult or impossible to find in stores. You gain complete control over the growing process, ensuring that your gourds are free from harmful chemicals and pesticides. Plus, the decorative possibilities are endless! Imagine crafting your own birdhouses, bowls, lanterns, or even musical instruments from gourds you’ve grown yourself. The possibilities are truly limited only by your imagination.
Variations and Suggestions:
Don’t be afraid to experiment! Try different gourd varieties to discover your favorites. Some popular choices include birdhouse gourds, bottle gourds, and ornamental gourds. You can also explore different growing techniques, such as vertical gardening or companion planting, to maximize your yield and create a more visually appealing garden.
Consider adding a trellis or support system for your gourd vines. This will help them climb and spread, preventing the gourds from sitting directly on the ground and potentially rotting. You can also try hand-pollinating your gourds to ensure a higher success rate, especially if you live in an area with limited pollinator activity.
For a unique twist, try painting or decorating your gourds while they are still growing on the vine. This will allow the colors and patterns to become permanently embedded in the gourd’s skin. Just be sure to use non-toxic paints and materials that won’t harm the plant.
Finally, remember that patience is key. Growing gourds takes time and effort, but the results are well worth it. Don’t get discouraged if you encounter challenges along the way. Learn from your mistakes and keep experimenting until you find what works best for you.
We wholeheartedly encourage you to embark on this exciting journey of growing gourds at home. It’s a fantastic way to connect with nature, unleash your creativity, and add a touch of rustic charm to your home and garden.
Now, we want to hear from you! Have you tried growing gourds before? What are your favorite varieties and techniques? Share your experiences, tips, and photos in the comments below. We can’t wait to see what you create! Let’s build a community of gourd-growing enthusiasts and inspire others to discover the joys of this rewarding DIY project. So get out there, get your hands dirty, and start growing your own gourds today!
Frequently Asked Questions (FAQ)
What is the best time to plant gourd seeds?
The ideal time to plant gourd seeds is after the last frost, when the soil has warmed up to at least 65 degrees Fahrenheit (around 18 degrees Celsius). Gourds require a long growing season, typically 100-120 days, so starting them indoors 4-6 weeks before the last frost can give them a head start. If you live in a warmer climate with a longer growing season, you can direct sow the seeds directly into the ground.
How much space do gourds need to grow?
Gourds are vigorous vines that require plenty of space to spread. Allow at least 6-8 feet between plants and rows. If you’re growing them on a trellis, make sure the trellis is sturdy enough to support the weight of the mature vines and gourds. Consider the mature size of the specific gourd variety you’re growing, as some can be significantly larger than others.
What kind of soil is best for growing gourds?
Gourds thrive in well-drained, fertile soil that is rich in organic matter. Amend your soil with compost or aged manure before planting to improve its fertility and drainage. A slightly acidic to neutral soil pH (6.0-7.0) is ideal. Perform a soil test to determine your soil’s pH and nutrient levels, and adjust accordingly.
How often should I water my gourd plants?
Gourds need consistent moisture, especially during hot, dry weather. Water deeply and regularly, aiming to keep the soil consistently moist but not waterlogged. Avoid overhead watering, as this can promote fungal diseases. Mulching around the plants can help retain moisture and suppress weeds.
Do gourds need fertilizer?
Yes, gourds benefit from regular fertilization. Apply a balanced fertilizer (e.g., 10-10-10) at planting time and then again every 4-6 weeks throughout the growing season. You can also supplement with compost tea or other organic fertilizers. Avoid over-fertilizing, as this can lead to excessive vine growth and reduced fruit production.
How do I prevent pests and diseases from affecting my gourds?
To prevent pests and diseases, practice good garden hygiene. Remove any dead or diseased leaves and vines promptly. Rotate your crops each year to avoid soilborne diseases. Monitor your plants regularly for signs of pests, such as squash bugs, squash vine borers, and aphids. Use organic pest control methods, such as insecticidal soap or neem oil, to control infestations. Ensure good air circulation around the plants to prevent fungal diseases.
When is the best time to harvest gourds?
Gourds are typically harvested in the fall, after the vines have died back and the gourds have fully matured. The gourds should be hard and dry to the touch, and the stems should be brown and dry. Leave a few inches of stem attached to the gourd when harvesting.
How do I cure gourds after harvesting?
Curing is essential for preserving gourds and preventing them from rotting. Clean the gourds with a mild soap and water solution and then dry them thoroughly. Place them in a well-ventilated area, such as a garage or shed, away from direct sunlight and moisture. Allow them to dry for several weeks or even months, until they are completely dry and hard. Shake the gourds periodically to check for loose seeds, which indicates that they are fully cured.
Can I eat gourds?
While some gourds are edible when young, most ornamental gourds are not suitable for consumption. Even edible gourds can be bitter or unpalatable if not harvested at the right stage of maturity. It’s best to research the specific gourd variety you’re growing to determine its edibility.
How can I decorate my gourds?
The possibilities for decorating gourds are endless! You can paint them, carve them, wood burn them, or even decoupage them. Use non-toxic paints and materials to ensure the safety of your creations. Get creative and experiment with different techniques to create unique and personalized gourd art. Remember to seal your finished gourds with a clear coat of varnish or sealant to protect them from moisture and damage.

Leave a Comment