
Grow Malabar Spinach Quickly and effortlessly? Absolutely! Imagine harvesting vibrant, leafy greens from your own backyard just weeks after planting. Sounds like a dream, right? Well, it doesn’t have to be! This DIY guide is packed with simple yet effective tricks to help you cultivate a thriving Malabar spinach patch, even if you’re a complete beginner.
Malabar spinach, also known as Basella alba, isn’t actually a true spinach, but its mild flavor and impressive nutritional profile have made it a beloved vegetable in Asian and African cuisines for centuries. It’s a climbing vine, adding a beautiful vertical element to your garden while providing a continuous supply of delicious leaves. But let’s be honest, sometimes getting it to grow Malabar Spinach Quickly can feel like a challenge. That’s where these DIY hacks come in!
I know how frustrating it can be to wait seemingly forever for your plants to mature. That’s why I’ve compiled these tried-and-true methods to accelerate growth and maximize your yield. Whether you’re short on space, time, or gardening experience, these tips will empower you to enjoy fresh, homegrown Malabar spinach in no time. So, grab your gardening gloves, and let’s get started!
Malabar Spinat Schnell Anbauen: Dein DIY-Guide für eine üppige Ernte
Ich liebe Malabar Spinat! Er ist nicht nur super gesund, sondern auch unglaublich vielseitig in der Küche. Und das Beste: Er ist relativ einfach anzubauen, besonders wenn man ein paar Tricks kennt. In diesem Artikel zeige ich dir, wie du deinen Malabar Spinat so richtig zum Wachsen bringst, damit du schon bald eine reiche Ernte einfahren kannst.
Was du für den schnellen Anbau von Malabar Spinat brauchst
Bevor wir loslegen, hier eine Liste mit allem, was du benötigst:
* Malabar Spinat Samen oder Stecklinge: Samen sind leichter zu bekommen, aber Stecklinge können den Prozess beschleunigen.
* Anzuchttöpfe oder -schalen: Für die Voranzucht der Samen.
* Anzuchterde: Spezielle Erde für die Anzucht, die nährstoffarm und locker ist.
* Gartenerde: Hochwertige Gartenerde für das Beet oder den Topf, in dem der Spinat später wachsen soll.
* Kompost oder organischer Dünger: Um den Boden mit Nährstoffen anzureichern.
* Pflanzgefäß oder Beet: Ein sonniger Standort mit guter Drainage.
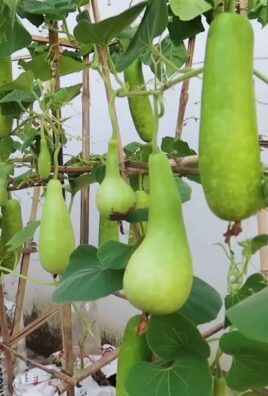
* Rankhilfe: Malabar Spinat ist ein Kletterer, also braucht er etwas, woran er sich festhalten kann.
* Gießkanne oder Gartenschlauch: Für die Bewässerung.
* Gartenschere: Zum Ernten und Beschneiden.
* Geduld und Liebe: Das Wichtigste überhaupt!
Phase 1: Die Vorbereitung – Der Grundstein für schnelles Wachstum
Eine gute Vorbereitung ist das A und O für einen erfolgreichen Anbau. Hier zeige ich dir, wie du den Grundstein für schnelles Wachstum legst.
1. Die Samen vorbereiten (optional, aber empfehlenswert)
Malabar Spinat Samen haben eine relativ harte Schale, was die Keimung verzögern kann. Um den Prozess zu beschleunigen, kannst du die Samen vorquellen lassen.
1. Lege die Samen für 24 Stunden in lauwarmes Wasser. Das Wasser sollte nicht zu heiß sein, da dies die Samen beschädigen kann.
2. Nach 24 Stunden kannst du die Samen direkt in die Anzuchterde säen.
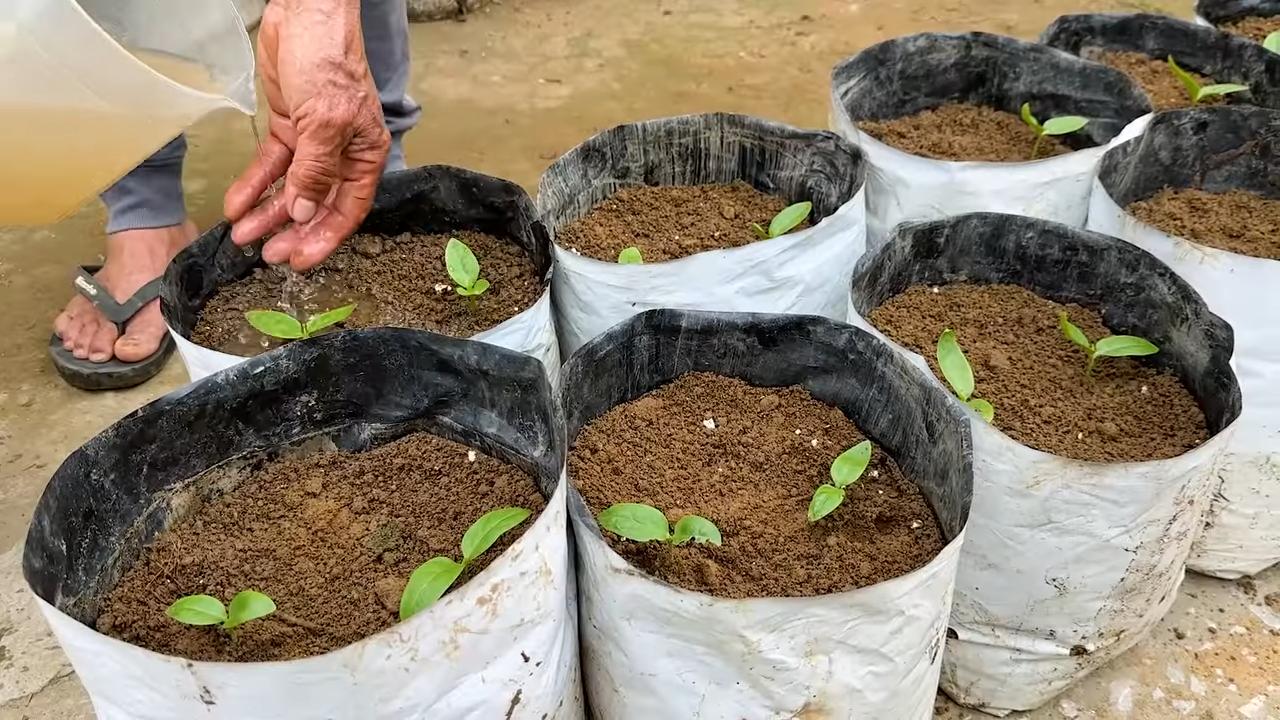
2. Die Anzucht (wenn du mit Samen startest)
Die Anzucht im Haus oder Gewächshaus gibt deinen Malabar Spinat Pflanzen einen Vorsprung.
1. Fülle die Anzuchttöpfe oder -schalen mit Anzuchterde.
2. Säe die Samen etwa 1 cm tief in die Erde.
3. Bedecke die Samen leicht mit Erde und gieße sie vorsichtig an.
4. Stelle die Anzuchttöpfe an einen warmen, hellen Ort. Eine Temperatur von 20-25°C ist ideal.
5. Halte die Erde feucht, aber nicht nass. Vermeide Staunässe, da dies zu Schimmelbildung führen kann.
6. Nach etwa 1-2 Wochen sollten die ersten Keimlinge erscheinen.
3. Den Standort vorbereiten
Malabar Spinat liebt die Sonne! Wähle einen Standort, der mindestens 6 Stunden Sonne pro Tag bekommt.
1. Lockere die Erde im Beet oder Topf gründlich auf.
2. Mische Kompost oder organischen Dünger unter die Erde, um sie mit Nährstoffen anzureichern.
3. Achte auf eine gute Drainage. Malabar Spinat mag keine Staunässe. Wenn du in einem Topf anbaust, stelle sicher, dass er Abzugslöcher hat.
Phase 2: Das Einpflanzen – Der Umzug ins neue Zuhause
Sobald die kleinen Pflänzchen stark genug sind, können sie ins Freie umziehen.
1. Den richtigen Zeitpunkt wählen
Warte, bis die Eisheiligen (Mitte Mai) vorbei sind, bevor du die Pflanzen ins Freie setzt. Malabar Spinat ist frostempfindlich. Wenn du in einem Gewächshaus anbaust, kannst du natürlich früher beginnen.
2. Das Einpflanzen
1. Hebe ein Loch aus, das groß genug ist, um den Wurzelballen der Pflanze aufzunehmen.
2. Setze die Pflanze vorsichtig in das Loch und fülle es mit Erde auf.
3. Drücke die Erde leicht an und gieße die Pflanze gründlich an.
4. Wenn du mehrere Pflanzen setzt, achte auf einen Abstand von etwa 30-40 cm zwischen den Pflanzen.
3. Die Rankhilfe installieren
Malabar Spinat ist ein Kletterer und braucht eine Rankhilfe, um sich daran festzuhalten.
1. Installiere eine Rankhilfe in der Nähe der Pflanze. Das kann ein Spalier, ein Zaun oder ein einfacher Bambusstab sein.
2. Leite die Pflanze vorsichtig an der Rankhilfe entlang.
Phase 3: Die Pflege – Damit dein Malabar Spinat so richtig aufblüht
Die richtige Pflege ist entscheidend für eine reiche Ernte.
1. Bewässerung
Malabar Spinat braucht regelmäßige Bewässerung, besonders während trockener Perioden.
1. Gieße die Pflanzen regelmäßig, aber vermeide Staunässe.
2. Am besten gießt du am Morgen, damit die Blätter über den Tag abtrocknen können. Das reduziert das Risiko von Pilzkrankheiten.
2. Düngung
Malabar Spinat ist ein Starkzehrer und braucht regelmäßige Düngung.
1. Dünge die Pflanzen alle 2-3 Wochen mit einem organischen Dünger oder Komposttee.
2. Vermeide Überdüngung, da dies zu einem übermäßigen Wachstum der Blätter und einer geringeren Ernte führen kann.
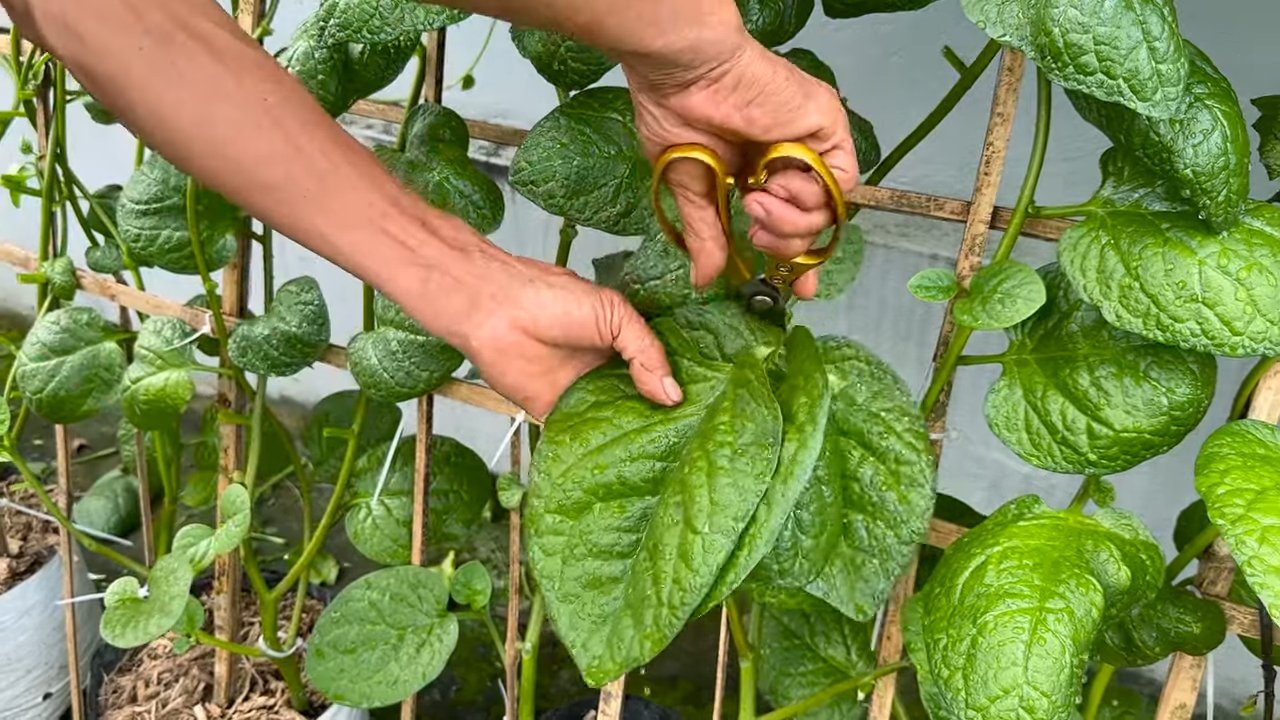
3. Beschneiden
Regelmäßiges Beschneiden fördert das Wachstum und die Verzweigung der Pflanze.
1. Schneide die Triebspitzen regelmäßig ab, um die Verzweigung zu fördern.
2. Entferne gelbe oder beschädigte Blätter.
4. Schädlingsbekämpfung
Malabar Spinat ist relativ resistent gegen Schädlinge, aber gelegentlich können Blattläuse oder Schnecken auftreten.
1. Kontrolliere die Pflanzen regelmäßig auf Schädlinge.
2. Bei einem Befall kannst du natürliche Schädlingsbekämpfungsmittel wie Neemöl oder Brennnesseljauche verwenden.
3. Schnecken kannst du mit Schneckenkorn oder Bierfallen bekämpfen.
Phase 4: Die Ernte – Der Lohn deiner Mühe
Endlich ist es soweit! Du kannst deinen selbst angebauten Malabar Spinat ernten.
1. Den richtigen Zeitpunkt wählen
Du kannst die Blätter und Triebe des Malabar Spinats ernten, sobald sie groß genug sind.
1. Ernte die Blätter am besten am Morgen, wenn sie noch frisch und knackig sind.
2. Schneide die Triebe mit einer Gartenschere ab.
2. Die Erntetechnik
1. Ernte immer nur die äußeren Blätter und Triebe, damit die Pflanze weiterwachsen kann.
2. Schneide die Triebe knapp über einem Blattknoten ab, um die Verzweigung zu fördern.
3. Die Lagerung
Malabar Spinat ist nicht lange haltbar.
1. Lagere die Blätter im Kühlschrank in einem feuchten Tuch oder einer Plastiktüte.
2. Am besten verarbeitest du den Spinat so schnell wie möglich.
Zusätzliche Tipps für schnelles Wachstum
* Mulchen: Eine Mulchschicht aus Stroh oder Rasenschnitt hilft, die Feuchtigkeit im Boden zu halten und Unkraut zu unterdrücken.
* Windschutz: Malabar Spinat mag keinen starken Wind. Schütze die Pflanzen vor Wind, indem du sie an einem geschützten Standort pflanzt oder einen Windschutz aufstellst.
* Regelmäßige Kontrolle: Kontrolliere die Pflanzen regelmäßig auf Schädlinge und Krankheiten. Je früher du ein Problem erkennst, desto einfacher ist es, es zu beheben.
* Geduld: Auch wenn du alle Tipps befolgst, braucht es Zeit, bis dein Malabar Spinat richtig wächst. Sei geduldig und gib nicht auf!
Ich hoffe, dieser Guide hilft dir dabei, deinen Malabar Spinat schnell und erfolgreich anzubauen. Mit ein wenig Geduld und Liebe wirst du schon bald eine reiche Ernte einfahren können. Viel Spaß beim Gärtnern!
Conclusion
So, there you have it! Growing Malabar spinach quickly isn’t just a gardener’s dream; it’s an achievable reality with these simple yet effective DIY tricks. We’ve explored the importance of seed scarification, optimal soil conditions, strategic watering, and the power of providing a sturdy trellis system. Each of these elements plays a crucial role in accelerating the growth of your Malabar spinach, transforming your garden into a lush, vibrant source of this nutritious and delicious leafy green.
But why is this DIY approach a must-try? Beyond the satisfaction of nurturing your own food, growing Malabar spinach quickly offers several compelling advantages. Firstly, you gain access to a continuous supply of fresh, organic greens, free from the pesticides and herbicides often found in commercially grown produce. Secondly, you’ll save money in the long run, as you won’t need to purchase Malabar spinach from the store regularly. And thirdly, you’ll contribute to a more sustainable lifestyle by reducing your carbon footprint and supporting local food production.
Don’t be afraid to experiment with variations to these techniques to suit your specific climate and growing conditions. For instance, if you live in a particularly hot and dry region, consider providing your Malabar spinach with some afternoon shade to prevent leaf scorch. Alternatively, if you have limited space, you can grow Malabar spinach in containers, ensuring they have adequate drainage and support for climbing. You can also try different types of organic fertilizers to see which one yields the best results for your plants. Some gardeners swear by compost tea, while others prefer worm castings.
Remember, the key to success lies in observation and adaptation. Pay close attention to your plants’ needs and adjust your approach accordingly. Are the leaves turning yellow? Perhaps they need more nitrogen. Are they wilting despite regular watering? Check for pests or diseases. By becoming a keen observer, you’ll be able to troubleshoot any problems that arise and ensure your Malabar spinach thrives.
We are confident that by implementing these DIY tricks, you’ll be amazed at how quickly your Malabar spinach grows. Imagine harvesting basketfuls of tender, succulent leaves, ready to be used in your favorite recipes. From stir-fries and soups to salads and smoothies, the culinary possibilities are endless.
So, what are you waiting for? Grab your seeds, gather your supplies, and get ready to embark on a rewarding gardening adventure. We encourage you to try these DIY tricks for growing Malabar spinach quickly and share your experiences with us. Let us know what worked best for you, what challenges you encountered, and any tips you have to offer. Together, we can create a community of passionate gardeners who are dedicated to growing their own healthy and delicious food. Share your photos and stories on social media using #GrowMalabarSpinachQuickly and inspire others to join the movement! Happy gardening!
Frequently Asked Questions (FAQ)
1. How long does it typically take for Malabar spinach to germinate?
Typically, Malabar spinach seeds can take anywhere from 7 to 21 days to germinate under optimal conditions. However, without scarification, germination can be quite erratic and take even longer. Scarifying the seeds, as mentioned in the article, significantly improves germination rates and reduces the time it takes for seedlings to emerge. Maintaining consistent moisture and warmth in the soil is also crucial for successful germination. If you’re still experiencing slow germination, consider soaking the seeds in warm water for 24 hours before planting to further soften the seed coat.
2. What kind of soil is best for growing Malabar spinach?
Malabar spinach thrives in well-draining, fertile soil that is rich in organic matter. A slightly acidic to neutral pH (around 6.5 to 7.0) is ideal. Before planting, amend your soil with compost, well-rotted manure, or other organic amendments to improve its structure, fertility, and water-holding capacity. Avoid heavy clay soils, as they can become waterlogged and inhibit root growth. If you have clay soil, consider adding sand or perlite to improve drainage. A good soil mix for container-grown Malabar spinach would be a combination of potting soil, compost, and perlite or vermiculite.
3. How often should I water my Malabar spinach plants?
Malabar spinach requires consistent moisture, especially during hot and dry weather. Water deeply and regularly, ensuring the soil remains consistently moist but not waterlogged. The frequency of watering will depend on your climate, soil type, and the size of your plants. As a general rule, water when the top inch of soil feels dry to the touch. Avoid overhead watering, as this can increase the risk of fungal diseases. Instead, water at the base of the plants, using a soaker hose or drip irrigation system. Mulching around the plants can also help to retain moisture in the soil.
4. What kind of trellis or support system is best for Malabar spinach?
Malabar spinach is a vining plant that needs a sturdy trellis or support system to climb on. A trellis made of wood, bamboo, or metal will work well. You can also use a fence, arbor, or even a sturdy tomato cage. The trellis should be at least 6 feet tall to accommodate the plant’s vigorous growth. Ensure the trellis is securely anchored to the ground to prevent it from toppling over in strong winds. As the plant grows, gently guide the vines onto the trellis and tie them loosely with twine or plant clips. Regular pruning can also help to keep the plant manageable and encourage branching.
5. What are some common pests and diseases that affect Malabar spinach?
While Malabar spinach is relatively pest-resistant, it can occasionally be affected by aphids, spider mites, and leaf miners. These pests can be controlled with insecticidal soap, neem oil, or by handpicking them off the plants. Fungal diseases, such as leaf spot and powdery mildew, can also occur, especially in humid conditions. To prevent these diseases, ensure good air circulation around the plants, avoid overhead watering, and remove any infected leaves promptly. You can also apply a fungicide if necessary. Regularly inspect your plants for any signs of pests or diseases and take action promptly to prevent them from spreading.
6. How do I harvest Malabar spinach?
You can start harvesting Malabar spinach leaves as soon as the plant is established and has reached a reasonable size. Simply snip off the leaves and stems as needed, using scissors or pruning shears. Avoid removing more than one-third of the plant at a time, as this can stress the plant and reduce its productivity. Regular harvesting will encourage the plant to produce more leaves. The younger, more tender leaves are generally preferred for eating, but the older leaves are also edible. You can also harvest the seeds once they have matured and turned black.
7. Can I grow Malabar spinach in containers?
Yes, Malabar spinach can be successfully grown in containers, making it a great option for gardeners with limited space. Choose a large container that is at least 12 inches in diameter and has good drainage holes. Use a well-draining potting mix that is rich in organic matter. Provide a trellis or support system for the plant to climb on. Water regularly and fertilize every few weeks with a balanced fertilizer. Place the container in a sunny location that receives at least 6 hours of sunlight per day.
8. Is Malabar spinach heat tolerant?
Yes, Malabar spinach is known for its excellent heat tolerance, making it an ideal crop for hot summer climates. It thrives in warm temperatures and can withstand high humidity. In fact, it often performs better in hot weather than other leafy greens, such as spinach and lettuce, which tend to bolt (go to seed) in the heat. However, it’s still important to provide adequate water and some afternoon shade in extremely hot and dry conditions to prevent leaf scorch.
9. How can I save seeds from my Malabar spinach plants?
Saving seeds from Malabar spinach is relatively easy. Allow the seed pods to mature on the plant until they turn black and dry. Once they are completely dry, harvest the seed pods and remove the seeds. Spread the seeds out on a tray to dry completely for a few days. Store the dried seeds in an airtight container in a cool, dark, and dry place. Properly stored seeds can remain viable for several years.
10. What are some ways to use Malabar spinach in cooking?
Malabar spinach is a versatile leafy green that can be used in a variety of dishes. It can be eaten raw in salads, although some people prefer the taste when cooked. It’s commonly used in stir-fries, soups, stews, and curries. The leaves have a slightly mucilaginous texture, similar to okra, which can help to thicken sauces. Malabar spinach is also a good source of vitamins A and C, iron, and calcium. Some popular recipes include Malabar spinach stir-fry with garlic and ginger, Malabar spinach dal, and Malabar spinach and coconut curry.
Leave a Comment