
Grow peanuts in foam box? Absolutely! Imagine harvesting a bounty of fresh, homegrown peanuts right from your own backyard, or even your balcony! It sounds like a dream, right? But trust me, it’s totally achievable, and this DIY guide will show you exactly how to make it happen using a simple foam box.
Peanuts, also known as groundnuts, have a rich history, dating back thousands of years to South America. They’ve become a staple in cuisines worldwide, from peanut butter sandwiches to savory Asian dishes. But beyond their delicious flavor, growing your own peanuts offers a unique connection to nature and a rewarding sense of accomplishment.
Why should you try this DIY trick? Well, for starters, it’s incredibly space-saving. If you’re like me and have limited garden space, using a foam box is a fantastic way to grow peanuts in foam box without needing a large plot of land. Plus, it’s a great project for beginners, as it’s relatively low-maintenance and easy to manage. You’ll also have complete control over the soil quality and growing conditions, ensuring your peanuts are healthy and delicious. So, ditch the store-bought peanuts and get ready to embark on a fun and fulfilling gardening adventure!
Erdnüsse im Styroporbehälter anbauen: Eine DIY-Anleitung
Hallo liebe Gartenfreunde! Habt ihr schon mal darüber nachgedacht, eure eigenen Erdnüsse anzubauen? Es ist einfacher als ihr denkt, und mit einem Styroporbehälter könnt ihr sogar auf dem Balkon oder der Terrasse eine kleine Erdnussfarm starten. Ich zeige euch, wie es geht!
Was ihr braucht:
* Einen Styroporbehälter (Größe je nach gewünschter Erntemenge, aber mindestens 30 cm tief)
* Erde (am besten eine Mischung aus Gartenerde, Kompost und Sand)
* Erdnüsse (roh, ungesalzen und ungeröstet – am besten aus dem Bioladen oder Gartencenter)
* Wasser
* Einen sonnigen Standort
* Optional: Dünger (organisch oder mineralisch)
* Optional: Stroh oder Mulch
Warum ein Styroporbehälter?
Styroporbehälter haben einige Vorteile für den Erdnussanbau:
* Isolierung: Sie halten die Erde warm, was besonders in kühleren Regionen wichtig ist.
* Leichtgewicht: Sie sind leicht zu transportieren, auch wenn sie mit Erde gefüllt sind.
* Drainage: Man kann leicht Löcher für die Drainage bohren.
* Wiederverwendung: Sie sind oft kostenlos erhältlich (z.B. von Fischhändlern oder Supermärkten).
Schritt-für-Schritt-Anleitung:
1. Den Styroporbehälter vorbereiten:
* Zuerst solltet ihr den Behälter gründlich reinigen, um eventuelle Rückstände zu entfernen.
* Bohrt dann einige Löcher in den Boden des Behälters, um eine gute Drainage zu gewährleisten. Achtet darauf, dass die Löcher nicht zu groß sind, damit die Erde nicht herausgespült wird. Ich empfehle etwa 5-6 Löcher pro Behälter, je nach Größe.
* Optional: Wenn ihr den Behälter optisch aufwerten möchtet, könnt ihr ihn von außen bemalen oder mit Folie bekleben. Achtet aber darauf, dass die Farbe oder Folie ungiftig ist.
2. Die Erde vorbereiten:
* Erdnüsse bevorzugen einen lockeren, gut durchlässigen Boden. Mischt daher Gartenerde mit Kompost und Sand. Das Verhältnis sollte etwa 1:1:1 sein. Der Kompost sorgt für Nährstoffe, der Sand für eine gute Drainage.
* Füllt den Behälter mit der Erdmischung. Lasst etwa 5-10 cm Platz bis zum Rand.
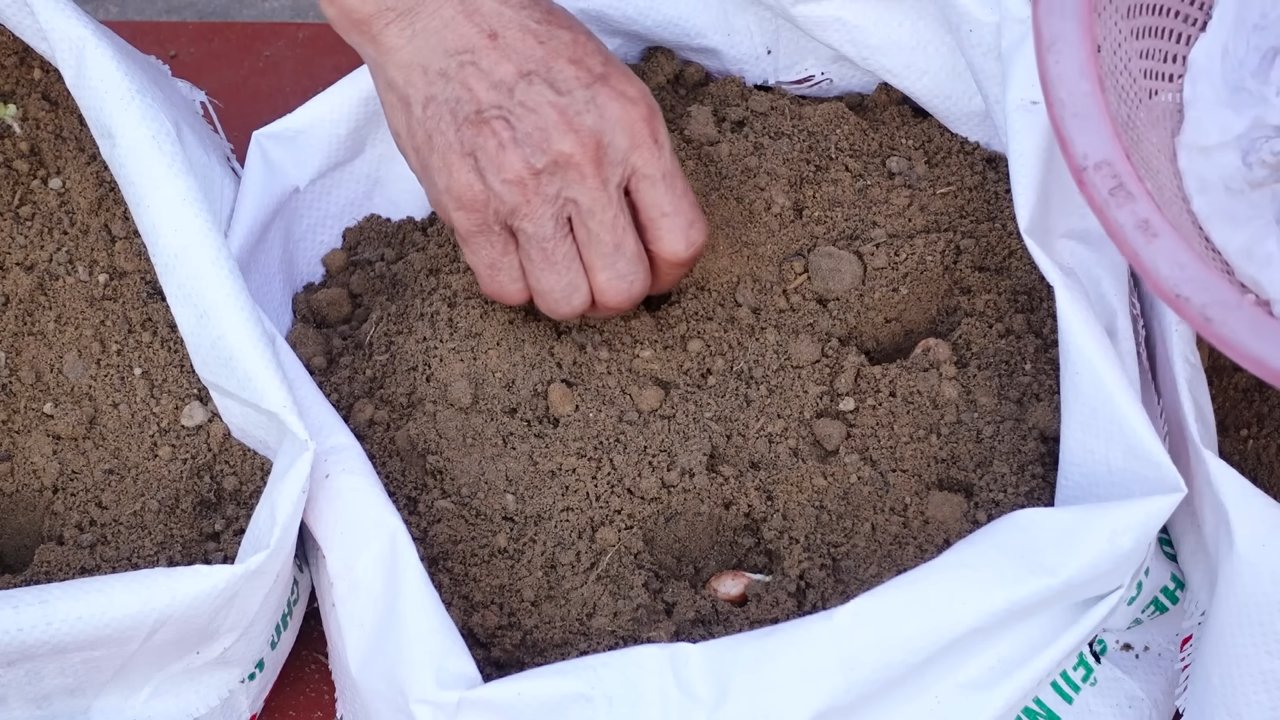
3. Die Erdnüsse aussäen:
* Nehmt eure rohen Erdnüsse und drückt sie etwa 2-3 cm tief in die Erde. Achtet darauf, dass die Erdnüsse nicht zu dicht beieinander liegen. Ich empfehle einen Abstand von etwa 10-15 cm zwischen den einzelnen Erdnüssen.
* Pro Behälter könnt ihr je nach Größe 5-10 Erdnüsse aussäen.
* Bedeckt die Erdnüsse mit Erde und drückt sie leicht an.
4. Gießen und Standort wählen:
* Gießt die Erde vorsichtig an, sodass sie gut durchfeuchtet ist. Vermeidet Staunässe, da dies zu Fäulnis führen kann.
* Stellt den Behälter an einen sonnigen Standort. Erdnüsse lieben die Sonne und brauchen mindestens 6 Stunden Sonnenlicht pro Tag. Ein Südbalkon oder eine Terrasse ist ideal.
5. Pflege während des Wachstums:
* Gießen: Haltet die Erde feucht, aber nicht nass. Gießt regelmäßig, besonders an heißen Tagen.
* Düngen: Nach etwa 4-6 Wochen könnt ihr mit dem Düngen beginnen. Verwendet einen organischen oder mineralischen Dünger, der für Gemüse geeignet ist. Achtet auf die Dosierungsanleitung auf der Verpackung. Ich persönlich bevorzuge organischen Dünger, da er die Umwelt schont.
* Unkraut entfernen: Entfernt regelmäßig Unkraut, das im Behälter wächst.
* Mulchen: Eine Schicht Stroh oder Mulch um die Pflanzen herum hilft, die Feuchtigkeit im Boden zu halten und Unkraut zu unterdrücken.
6. Die Blütezeit:
* Nach etwa 2-3 Monaten beginnen die Erdnusspflanzen zu blühen. Die Blüten sind klein und gelb.
* Das Besondere an Erdnüssen: Nach der Befruchtung biegen sich die Blütenstiele nach unten und bohren sich in die Erde. Dort entwickeln sich dann die Erdnüsse. Dieser Prozess ist entscheidend für den Ernteerfolg.
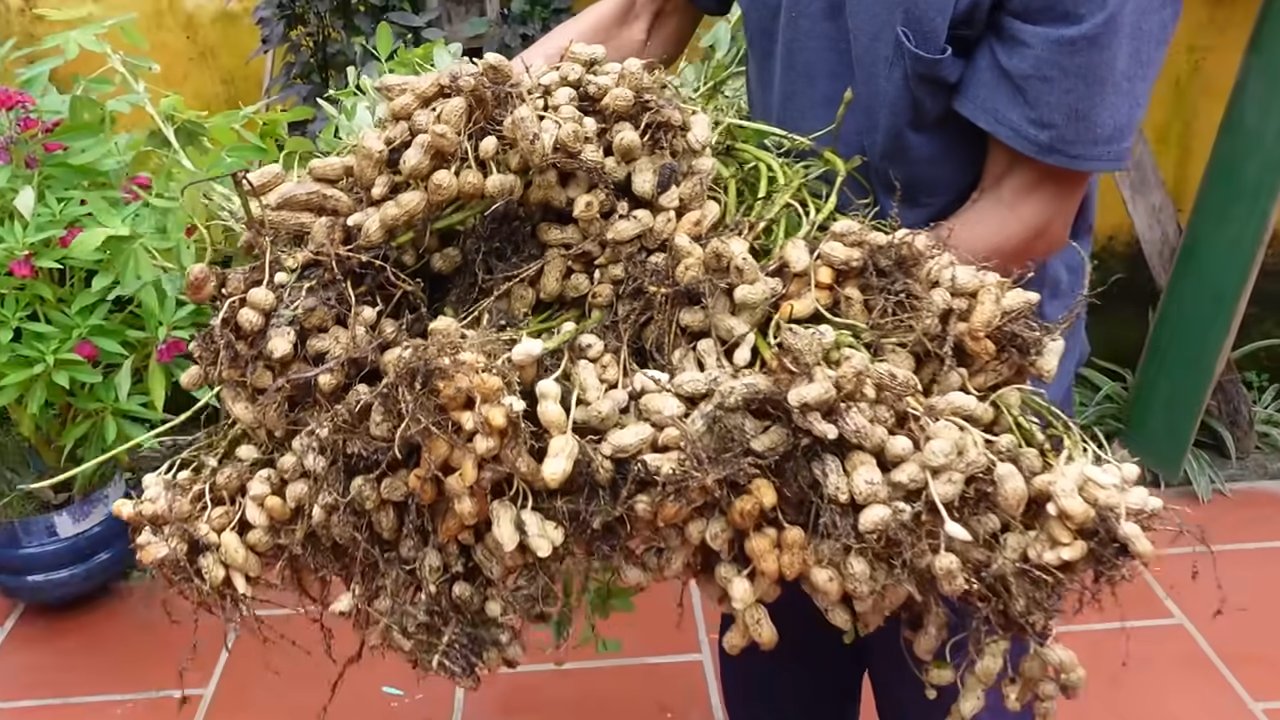
7. Die Ernte:
* Die Erntezeit ist gekommen, wenn die Blätter der Erdnusspflanzen gelb werden und absterben. Das ist in der Regel nach etwa 4-5 Monaten der Fall.
* Zieht die Pflanzen vorsichtig aus der Erde. Die Erdnüsse sollten an den Wurzeln hängen.
* Schüttelt die Erde von den Erdnüssen ab und lasst sie an einem trockenen, luftigen Ort trocknen. Das kann einige Tage dauern.
* Nach dem Trocknen könnt ihr die Erdnüsse von den Pflanzen trennen und lagern.
Häufige Probleme und Lösungen:
* Gelbe Blätter: Können ein Zeichen für Nährstoffmangel sein. Düngt die Pflanzen.
* Faule Erdnüsse: Können durch Staunässe verursacht werden. Achtet auf eine gute Drainage und gießt weniger.
* Schädlinge: Erdnusspflanzen können von Blattläusen oder anderen Schädlingen befallen werden. Bekämpft die Schädlinge mit natürlichen Mitteln, z.B. mit einer Seifenlösung.
Zusätzliche Tipps:
* Vorziehen: In kühleren Regionen könnt ihr die Erdnüsse im Haus vorziehen, bevor ihr sie in den Styroporbehälter pflanzt.
* Sortenwahl: Es gibt verschiedene Erdnusssorten. Informiert euch, welche Sorte für eure Region am besten geeignet ist.
* Kombination mit anderen Pflanzen: Erdnüsse lassen sich gut mit anderen Pflanzen kombinieren, z.B. mit Ringelblumen oder Kapuzinerkresse.
Noch ein paar persönliche Anmerkungen:
Ich habe selbst schon mehrmals Erdnüsse im Styroporbehälter angebaut und war immer wieder begeistert vom Ergebnis. Es ist wirklich ein tolles Gefühl, seine eigenen Erdnüsse zu ernten und zu wissen, wo sie herkommen. Außerdem ist es eine tolle Möglichkeit, Kinder an das Gärtnern heranzuführen.
Wichtig: Geduld ist der Schlüssel! Es dauert eine Weile, bis die Erdnüsse reif sind. Aber es lohnt sich!
Ich hoffe, diese Anleitung hilft euch dabei, eure eigenen Erdnüsse im Styroporbehälter anzubauen. Viel Erfolg und viel Spaß beim Gärtnern! Lasst mich wissen, wie es bei euch läuft!
Conclusion
So, there you have it! Growing peanuts in a foam box is not just a quirky gardening experiment; it’s a surprisingly effective and rewarding way to cultivate your own delicious, homegrown snacks. We’ve walked you through the process, from preparing your foam box to harvesting your bounty, and hopefully, you’re now feeling confident and excited to give it a try.
Why is this DIY trick a must-try? Because it offers a unique blend of convenience, control, and sustainability. Unlike traditional in-ground peanut cultivation, using a foam box allows you to manage soil conditions, temperature, and moisture levels with greater precision. This is particularly beneficial if you live in an area with less-than-ideal soil or a shorter growing season. Plus, the portability of the foam box means you can easily move your peanut plants to chase the sun or protect them from unexpected frost.
But the real magic lies in the sheer joy of watching those tiny peanut plants sprout, flourish, and eventually yield a harvest of fresh, flavorful peanuts. There’s something incredibly satisfying about nurturing your own food from seed to table, and this method makes it accessible to even the most novice gardeners.
Variations and Suggestions:
Don’t be afraid to experiment! Once you’ve mastered the basic technique, you can explore different peanut varieties to find your favorite flavor profile. Virginia peanuts, known for their large size and mild flavor, are a popular choice, but you could also try Spanish peanuts for a sweeter, nuttier taste, or Runner peanuts for their uniform size and excellent roasting qualities.
Consider adding companion plants to your foam box to enhance growth and deter pests. Marigolds, for example, are known to repel nematodes, which can damage peanut roots. Basil and rosemary can also help to keep unwanted insects away.
Another variation is to experiment with different soil amendments. While a well-draining potting mix is essential, you can also add compost, aged manure, or bone meal to provide your peanut plants with extra nutrients. Just be sure to avoid over-fertilizing, as this can lead to excessive foliage growth at the expense of peanut production.
And if you’re feeling particularly adventurous, you could even try growing peanuts indoors using a grow light. This would allow you to extend your growing season and enjoy fresh peanuts year-round.
Ultimately, the key to success is to be patient, observant, and willing to learn from your mistakes. Gardening is a journey, not a destination, and there will inevitably be challenges along the way. But with a little bit of effort and attention, you’ll be rewarded with a bountiful harvest of delicious, homegrown peanuts.
So, what are you waiting for? Grab a foam box, some peanut seeds, and get ready to embark on a fun and rewarding gardening adventure. We’re confident that you’ll be amazed by the results. And when you do, be sure to share your experience with us! We’d love to hear about your successes, your challenges, and any tips or tricks you’ve discovered along the way. Share your photos and stories on social media using [Your Hashtag Here], and let’s inspire others to discover the joy of growing their own peanuts in a foam box. This method of **growing peanuts** is a game changer for small space gardening.
Frequently Asked Questions (FAQ)
1. What size foam box is best for growing peanuts?
The ideal size for a foam box depends on how many peanut plants you want to grow. A good starting point is a box that’s at least 12 inches deep, 18 inches wide, and 24 inches long. This will provide enough space for several plants to develop healthy root systems. If you’re planning to grow a larger number of plants, you’ll need a bigger box. Remember that the deeper the box, the better the drainage and the more room for root development.
2. What type of soil should I use?
Peanuts thrive in well-draining, sandy loam soil. Avoid heavy clay soils, as they can become waterlogged and inhibit peanut development. A good quality potting mix amended with perlite or vermiculite will provide the necessary drainage and aeration. You can also add compost or aged manure to enrich the soil with nutrients. The pH level should be slightly acidic to neutral, around 6.0 to 7.0.
3. How often should I water my peanut plants in a foam box?
Watering frequency depends on the weather and the drainage of your soil. Generally, you should water your peanut plants when the top inch of soil feels dry to the touch. Avoid overwatering, as this can lead to root rot. During hot, dry weather, you may need to water daily. In cooler, wetter weather, you may only need to water every few days. Ensure the foam box has drainage holes to prevent water from accumulating at the bottom.
4. How much sunlight do peanut plants need?
Peanut plants need at least 6-8 hours of direct sunlight per day to thrive. Choose a location for your foam box that receives plenty of sunlight throughout the day. If you’re growing peanuts indoors, you’ll need to supplement with a grow light. Rotate the box regularly to ensure that all sides of the plants receive equal exposure to sunlight.
5. When is the best time to plant peanuts?
The best time to plant peanuts is after the last frost, when the soil has warmed up to at least 65°F (18°C). In most regions, this is typically in late spring or early summer. You can start peanut seeds indoors 4-6 weeks before the last frost to get a head start on the growing season.
6. How long does it take for peanuts to mature?
Peanuts typically take 120-150 days to mature, depending on the variety and growing conditions. You’ll know your peanuts are ready to harvest when the foliage starts to turn yellow and the pods feel plump and full.
7. How do I harvest peanuts from a foam box?
To harvest peanuts, gently pull the entire plant out of the foam box. Shake off any excess soil and then carefully remove the peanuts from the roots. Wash the peanuts thoroughly and then dry them in the sun for several days.
8. Can I reuse the foam box for growing other plants?
Yes, you can reuse the foam box for growing other plants, but it’s important to clean it thoroughly first. Remove any remaining soil and debris and then wash the box with soap and water. You can also disinfect the box with a solution of bleach and water to kill any pathogens.
9. What are some common pests and diseases that affect peanut plants?
Common pests that affect peanut plants include aphids, spider mites, and nematodes. Diseases include leaf spot, root rot, and peanut rust. You can prevent these problems by using good cultural practices, such as providing adequate drainage, avoiding overwatering, and rotating crops. If you do encounter pests or diseases, you can treat them with organic pesticides or fungicides.
10. Can I grow peanuts in a foam box in a cold climate?
Yes, you can grow peanuts in a foam box in a cold climate, but you’ll need to take some extra precautions. Start your peanut seeds indoors 4-6 weeks before the last frost and then transplant them into the foam box after the weather has warmed up. You may also need to provide supplemental heat and light to extend the growing season. Consider using a greenhouse or cold frame to protect your peanut plants from frost. The foam box itself provides some insulation, helping to maintain a more consistent soil temperature.
Leave a Comment