
Grow potatoes easily, even if you think you don’t have a green thumb! Have you ever dreamed of harvesting your own homegrown potatoes, bursting with flavor and freshness, right from your backyard? Imagine the satisfaction of digging into the earth and unearthing a treasure trove of these versatile vegetables, ready to be transformed into crispy fries, creamy mashed potatoes, or hearty stews. This isn’t just a pipe dream; it’s an achievable reality with a few clever DIY tricks and hacks!
For centuries, potatoes have been a staple food in cultures around the globe, from the Andes Mountains where they originated to the far reaches of Europe and beyond. They’ve sustained populations through famines and fueled culinary innovation. Now, you can tap into that rich history and bring the bounty of the potato harvest to your own table.
But why bother with the effort of growing your own potatoes? Well, store-bought potatoes often lack the vibrant flavor and nutritional value of homegrown varieties. Plus, you have complete control over the growing process, ensuring that your potatoes are free from harmful pesticides and chemicals. And let’s be honest, there’s something incredibly rewarding about nurturing a plant from seed (or in this case, a seed potato!) to harvest. I’m going to show you how to grow potatoes easily with some simple, budget-friendly DIY methods that will have you enjoying a delicious and abundant potato harvest in no time. Get ready to get your hands dirty and discover the joy of homegrown goodness!
Kartoffeln anbauen leicht gemacht: Dein DIY-Guide für eine reiche Ernte
Hey Gartenfreunde! Habt ihr Lust, eure eigenen Kartoffeln anzubauen? Es ist einfacher als ihr denkt und das Ergebnis ist unschlagbar: frisch geerntete, aromatische Kartoffeln direkt aus eurem Garten oder sogar vom Balkon! Ich zeige euch, wie ihr mit einfachen Mitteln und ein paar Tricks eine reiche Ernte erzielen könnt. Los geht’s!
Was du brauchst: Die Materialliste
Bevor wir loslegen, hier eine Liste mit allem, was du für dein Kartoffelprojekt benötigst:
* Saatkartoffeln: Wähle eine Sorte, die dir schmeckt und für deine Region geeignet ist. Frühkartoffeln sind besonders gut für den Anbau im Topf geeignet.
* Große Pflanzgefäße oder Säcke: Je größer, desto besser! Ideal sind Gefäße mit mindestens 30 Litern Fassungsvermögen. Alte Eimer, Mörtelkübel oder sogar Jutesäcke funktionieren prima.
* Gute Pflanzerde: Verwende hochwertige Pflanzerde, die gut durchlässig ist. Du kannst auch Kompost untermischen, um die Nährstoffversorgung zu verbessern.
* Kompost oder organischer Dünger: Für eine optimale Nährstoffversorgung während des Wachstums.
* Gießkanne oder Schlauch: Zum regelmäßigen Gießen.
* Schaufel oder Kelle: Zum Befüllen der Pflanzgefäße.
* Mulchmaterial (optional): Stroh, Heu oder Rasenschnitt helfen, die Feuchtigkeit im Boden zu halten und Unkraut zu unterdrücken.
* Geduld und Freude am Gärtnern!
Schritt-für-Schritt-Anleitung: So pflanzt du deine Kartoffeln
1. Saatkartoffeln vorbereiten:
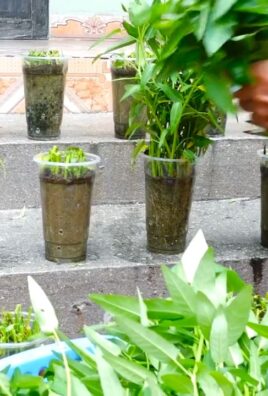
* Etwa 4-6 Wochen vor dem eigentlichen Pflanztermin solltest du die Saatkartoffeln vorkeimen lassen. Das beschleunigt das Wachstum und sorgt für eine frühere Ernte.
* Lege die Kartoffeln an einen hellen, kühlen Ort (ca. 10-15°C). Ein Kellerfenster oder ein kühler Raum sind ideal.
* Die Kartoffeln sollten “Augen” bilden, aus denen später die Triebe wachsen. Wenn die Augen noch nicht aktiv sind, kannst du die Kartoffeln leicht anfeuchten, um den Prozess anzuregen.
* Große Saatkartoffeln kannst du vor dem Pflanzen in Stücke schneiden. Achte darauf, dass jedes Stück mindestens 2-3 Augen hat. Lasse die Schnittflächen vor dem Pflanzen ein paar Tage antrocknen, um Fäulnis zu vermeiden.
2. Pflanzgefäße vorbereiten:
* Sorge dafür, dass deine Pflanzgefäße Abzugslöcher haben, damit überschüssiges Wasser ablaufen kann. Staunässe ist Gift für Kartoffeln!
* Fülle die Gefäße mit einer Schicht Pflanzerde (ca. 10-15 cm).
3. Kartoffeln pflanzen:
* Lege die vorgekeimten Saatkartoffeln (oder die Kartoffelstücke) mit den Augen nach oben auf die Erdschicht.
* Achte darauf, dass zwischen den Kartoffeln genügend Platz ist (ca. 20-30 cm).
* Bedecke die Kartoffeln mit einer weiteren Schicht Erde (ca. 5-10 cm).
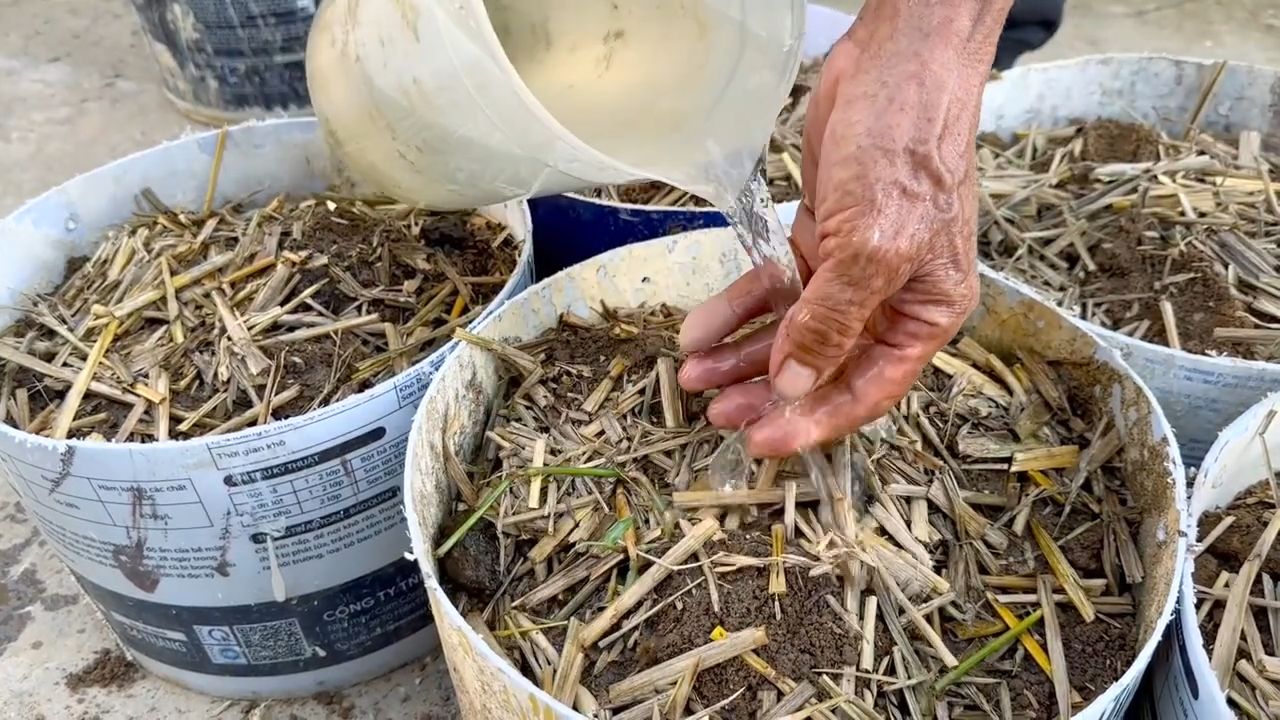
4. Angießen:
* Gieße die Erde vorsichtig an, sodass sie gut durchfeuchtet ist. Vermeide Staunässe.
Die Pflege: So bleiben deine Kartoffeln glücklich
1. Gießen:
* Kartoffeln brauchen regelmäßige Bewässerung, besonders während der Blütezeit und der Knollenbildung.
* Achte darauf, dass die Erde immer leicht feucht ist, aber nicht nass.
* Gieße am besten morgens oder abends, um Verdunstung zu vermeiden.
2. Anhäufeln:
* Das Anhäufeln ist ein wichtiger Schritt für eine reiche Kartoffelernte. Sobald die Triebe etwa 20 cm hoch sind, häufelst du Erde um die Stängel an.
* Wiederhole diesen Vorgang mehrmals im Laufe der Wachstumsperiode. Das Anhäufeln fördert die Bildung neuer Knollen und schützt sie vor Sonnenlicht, das sie grün werden lässt. Grüne Kartoffeln enthalten Solanin und sind ungenießbar.
3. Düngen:
* Kartoffeln sind Starkzehrer und benötigen ausreichend Nährstoffe.
* Dünge deine Kartoffeln regelmäßig mit Kompost oder organischem Dünger.
* Beginne mit dem Düngen etwa 4-6 Wochen nach dem Pflanzen und wiederhole es alle 2-3 Wochen.
4. Schutz vor Schädlingen und Krankheiten:
* Achte auf Anzeichen von Schädlingen wie Kartoffelkäfer oder Blattläuse.
* Sammle Kartoffelkäfer und ihre Larven ab oder verwende biologische Schädlingsbekämpfungsmittel.
* Vorbeugend kannst du deine Kartoffeln mit Brennnesseljauche stärken.
* Die Krautfäule ist eine häufige Krankheit bei Kartoffeln. Achte auf braune Flecken auf den Blättern und entferne befallene Blätter sofort. Sorge für eine gute Belüftung der Pflanzen, um die Ausbreitung der Krankheit zu verhindern.
5. Mulchen (optional):
* Eine Mulchschicht aus Stroh, Heu oder Rasenschnitt hilft, die Feuchtigkeit im Boden zu halten, Unkraut zu unterdrücken und das Bodenleben zu fördern.
Die Ernte: Der Lohn deiner Mühe
1. Erntezeitpunkt:
* Der Erntezeitpunkt hängt von der Kartoffelsorte ab. Frühkartoffeln können bereits nach 8-10 Wochen geerntet werden, während späte Sorten länger brauchen.
* Ein Zeichen für die Reife ist das Absterben des Krauts.
* Du kannst auch eine “Probeernte” machen, um zu sehen, ob die Kartoffeln schon groß genug sind.
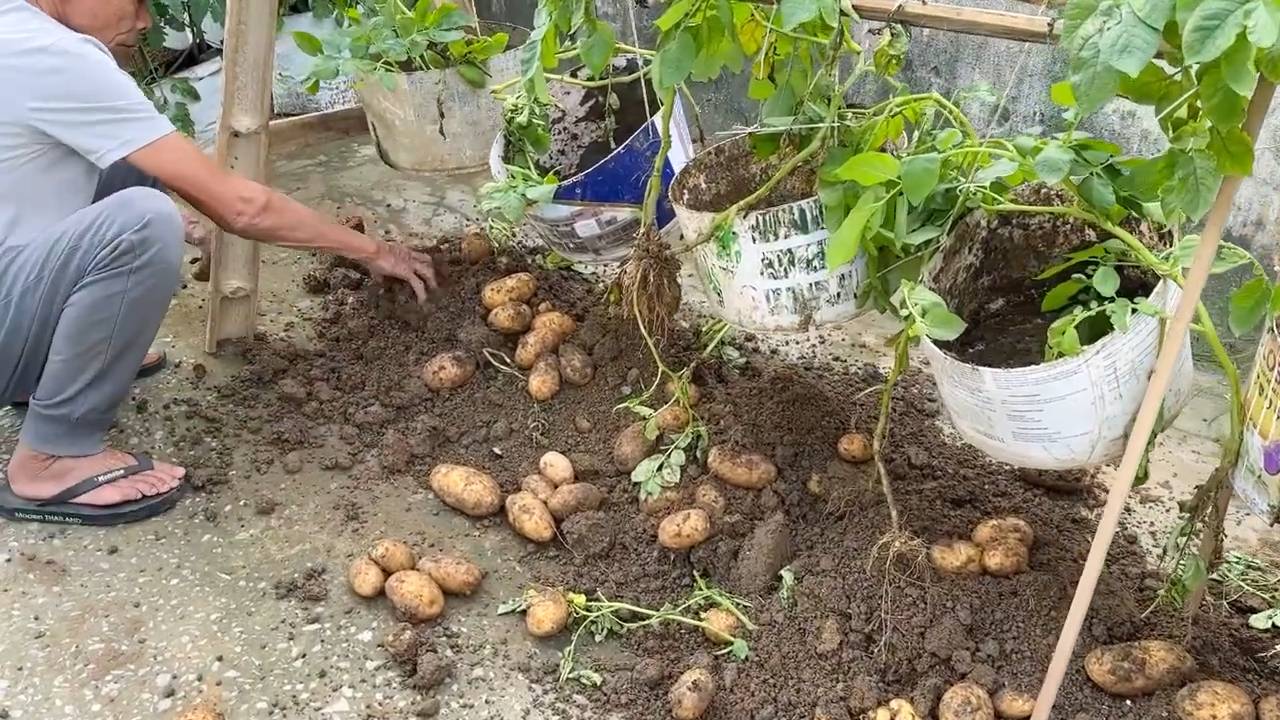
2. Ernten:
* Grabe die Kartoffeln vorsichtig mit einer Grabegabel oder einem Spaten aus.
* Achte darauf, die Knollen nicht zu beschädigen.
* Lass die Kartoffeln nach der Ernte ein paar Stunden an der Luft trocknen.
3. Lagern:
* Lagere die Kartoffeln an einem kühlen, dunklen und trockenen Ort. Ein Keller oder eine Speisekammer sind ideal.
* Entferne beschädigte oder kranke Kartoffeln, um die Ausbreitung von Fäulnis zu verhindern.
* Kartoffeln sollten nicht zusammen mit Äpfeln gelagert werden, da diese Ethylen abgeben, was die Keimung der Kartoffeln fördert.
Extra-Tipp: Kartoffeln im Eimer anbauen
Wenn du wenig Platz hast, ist der Anbau von Kartoffeln im Eimer eine tolle Alternative. Du kannst die Eimer sogar auf dem Balkon oder der Terrasse aufstellen.
1. Wähle einen großen Eimer: Ein Eimer mit mindestens 30 Litern Fassungsvermögen ist ideal.
2. Befülle den Eimer mit Erde: Beginne mit einer Schicht von ca. 15 cm Erde.
3. Pflanze die Saatkartoffeln: Lege 2-3 Saatkartoffeln auf die Erde und bedecke sie mit weiteren 5-10 cm Erde.
4. Gieße regelmäßig: Achte darauf, dass die Erde immer leicht feucht ist.
5. Anhäufeln: Sobald die Triebe etwa 20 cm hoch sind, häufelst du Erde um die Stängel an. Wiederhole diesen Vorgang mehrmals im Laufe der Wachstumsperiode.
6. Ernten: Wenn das Kraut abstirbt, kannst du den Eimer einfach umkippen und die Kartoffeln heraussammeln.
Ich hoffe, diese Anleitung hilft dir dabei, deine eigenen Kartoffeln anzubauen. Es ist ein tolles Gefühl, die Früchte seiner Arbeit zu ernten und zu wissen, woher das Essen kommt. Viel Spaß beim Gärtnern!
Conclusion
So, there you have it! Growing potatoes easily at home is not just a pipe dream; it’s an achievable reality with this simple and effective DIY trick. We’ve walked you through the process, highlighting the ease and accessibility of this method. Forget back-breaking digging and endless weeding. This technique minimizes the effort while maximizing your yield, allowing you to enjoy the satisfaction of harvesting your own homegrown potatoes.
But why should you bother? Beyond the sheer joy of gardening, growing your own potatoes offers a multitude of benefits. You control the entire process, ensuring your potatoes are free from harmful pesticides and herbicides. You get to savor the unparalleled flavor of freshly harvested potatoes, a taste that far surpasses anything you can find in a supermarket. And, let’s be honest, there’s a certain pride that comes with serving a meal made with ingredients you nurtured from seed (or in this case, seed potatoes) to table.
This DIY potato growing method is a game-changer for both seasoned gardeners and complete beginners. It’s adaptable to various spaces, from sprawling gardens to small patios and even balconies. The container-based approach makes it ideal for urban dwellers who lack traditional garden space.
Ready to take your potato growing to the next level? Consider these variations:
* Experiment with different potato varieties: From Yukon Gold to Russet to fingerling potatoes, each variety offers a unique flavor and texture. Try growing a few different types to find your favorites.
* Add companion plants: Marigolds, basil, and nasturtiums can help deter pests and attract beneficial insects to your potato plants.
* Use different containers: While we’ve focused on using grow bags, you can also use large plastic bins, barrels, or even repurposed tires. Just make sure your chosen container has adequate drainage.
* Try vertical gardening: Stack tires or create a tiered container system to maximize your growing space.
This isn’t just about growing potatoes; it’s about connecting with nature, learning new skills, and enjoying the fruits (or rather, tubers) of your labor. It’s about embracing a more sustainable lifestyle and reducing your reliance on commercially grown produce. It’s about experiencing the simple pleasure of digging into the earth and unearthing a bounty of delicious, homegrown potatoes.
We are confident that this DIY trick will revolutionize your potato growing experience. It’s simple, effective, and incredibly rewarding. So, grab your seed potatoes, gather your supplies, and get ready to embark on a potato-growing adventure.
Don’t just take our word for it. We encourage you to try this DIY trick for growing potatoes easily and share your experiences with us. Post pictures of your potato plants, tell us about your harvest, and let us know what variations you tried. We’re eager to hear your success stories and learn from your experiences. Let’s build a community of potato-growing enthusiasts!
Frequently Asked Questions (FAQ)
What kind of potatoes can I grow using this method?
You can grow virtually any type of potato using this method! The key is to start with certified seed potatoes, which are potatoes specifically grown for planting. These are disease-free and will give you the best results. Popular varieties include Yukon Gold (known for its buttery flavor), Russet (ideal for baking and frying), Red Pontiac (great for boiling and salads), and fingerling potatoes (which have a unique shape and nutty flavor). Experiment with different varieties to find your favorites! Just be sure to choose varieties that are well-suited to your climate and growing season.
How much sunlight do potato plants need?
Potato plants need at least six hours of direct sunlight per day to thrive. Choose a location that receives plenty of sunlight throughout the growing season. If you’re growing potatoes in containers, you can move them around to ensure they get enough sun. If you live in a particularly hot climate, some afternoon shade may be beneficial to prevent the plants from overheating.
How often should I water my potato plants?
Potato plants need consistent moisture, especially during tuber formation. Water deeply whenever the top inch of soil feels dry to the touch. Avoid overwatering, as this can lead to root rot. The frequency of watering will depend on the weather, the type of soil you’re using, and the size of your container. As a general rule, water more frequently during hot, dry periods and less frequently during cool, wet periods. Check the soil moisture regularly to ensure your plants are getting the right amount of water.
When is the best time to plant potatoes?
The best time to plant potatoes is in early spring, about two to three weeks before the last expected frost. The soil temperature should be at least 45 degrees Fahrenheit. In warmer climates, you can plant potatoes in the fall for a winter harvest. Check your local planting calendar for specific dates for your region.
How do I know when my potatoes are ready to harvest?
Potatoes are typically ready to harvest when the plants begin to flower. You can harvest “new potatoes” (small, immature potatoes) about two to three weeks after flowering. For larger, more mature potatoes, wait until the plants have completely died back. This usually takes about three to four months. To harvest, gently dig around the base of the plant and lift the potatoes out of the soil.
What kind of soil should I use for growing potatoes?
Potatoes prefer well-drained, slightly acidic soil with a pH of 6.0 to 6.5. A good potting mix amended with compost or other organic matter is ideal. Avoid heavy clay soils, as they can become waterlogged and prevent proper tuber development.
Can I grow potatoes in a small space?
Yes! This DIY trick is perfect for growing potatoes in small spaces, such as patios, balconies, and even indoors. The container-based approach allows you to grow potatoes in a limited area without the need for a traditional garden.
What are some common potato pests and diseases?
Common potato pests include potato beetles, aphids, and flea beetles. Common diseases include early blight, late blight, and potato scab. To prevent pests and diseases, choose disease-resistant varieties, practice crop rotation, and keep your plants healthy and well-nourished. You can also use organic pest control methods, such as insecticidal soap or neem oil.
Can I reuse the soil from my potato container?
It’s generally not recommended to reuse the soil from your potato container for growing potatoes again in the same container the following year. This is because potato plants can deplete the soil of nutrients and leave behind disease organisms. However, you can reuse the soil for other plants that are not susceptible to the same diseases. Alternatively, you can amend the soil with compost and other organic matter to replenish its nutrients.
How do I store my harvested potatoes?
Store your harvested potatoes in a cool, dark, and dry place. A root cellar is ideal, but a basement or garage will also work. Avoid storing potatoes in the refrigerator, as this can cause them to develop a sweet taste. Properly stored potatoes can last for several months.

Leave a Comment