
Grow Strawberries Indoors? Absolutely! Imagine plucking juicy, red strawberries right from your own home, even when the snow is falling outside. It sounds like a dream, but with a few clever tricks and a little DIY spirit, it’s totally achievable. For centuries, humans have cultivated plants indoors, from ancient Egyptians growing herbs in containers to Victorian-era orangeries showcasing exotic fruits. This tradition continues today, fueled by our desire for fresh, healthy food and a connection to nature, regardless of our living space.
Let’s face it, not everyone has a sprawling garden. Apartment dwellers, city residents, and those with limited outdoor space often miss out on the joy of growing their own food. But that doesn’t have to be the case! This article is packed with easy-to-follow DIY hacks and tips that will empower you to grow strawberries indoors successfully. I’ll guide you through everything from choosing the right varieties and containers to providing the perfect lighting and watering schedule.
Why should you bother with this DIY project? Because fresh, homegrown strawberries taste infinitely better than store-bought ones! Plus, it’s incredibly rewarding to nurture a plant from seedling to fruit. So, grab your gardening gloves, and let’s embark on this exciting journey to bring the sweet taste of summer indoors!
Growing Strawberries Indoors: A Berry Good DIY Project!
Hey there, fellow plant enthusiasts! Ever dreamt of plucking fresh, juicy strawberries right from your kitchen counter, even in the dead of winter? Well, dream no more! I’m going to walk you through a super fun and rewarding DIY project: growing strawberries indoors. It’s easier than you think, and the taste of homegrown berries is simply unbeatable. Let’s get started!
What You’ll Need: The Strawberry Starter Pack
Before we dive in, let’s gather our supplies. Here’s what you’ll need to create your indoor strawberry paradise:
* Strawberry Plants: You have a few options here. You can buy bare-root strawberry plants (usually available in early spring), established strawberry plants from a nursery, or even try propagating runners from an existing outdoor strawberry plant. Day-neutral or everbearing varieties are best for indoor growing as they produce fruit throughout the season, regardless of day length. Some popular choices are ‘Seascape’, ‘Albion’, and ‘Tristar’.
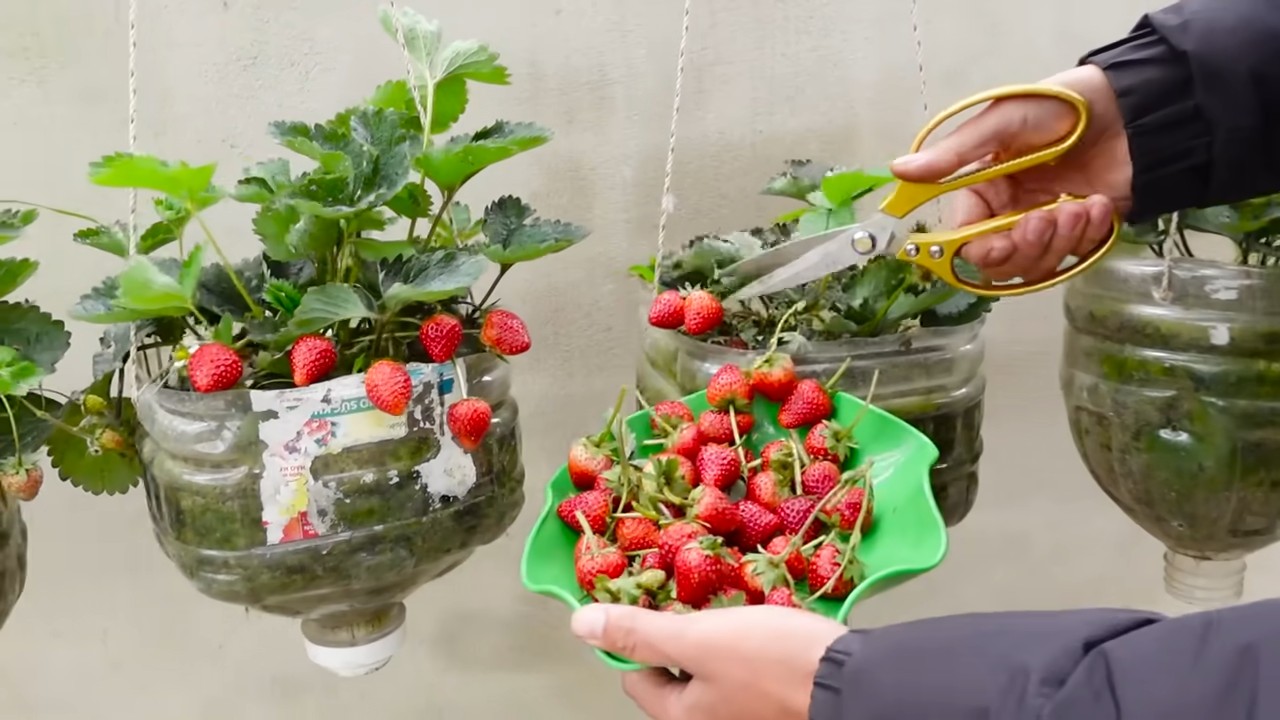
* Containers: Choose pots that are at least 6-8 inches in diameter. You can use individual pots for each plant, or a larger container to house several. Hanging baskets also work great and add a decorative touch! Make sure your containers have drainage holes.
* Potting Mix: Use a high-quality, well-draining potting mix. Avoid using garden soil, as it can compact and not provide adequate drainage. A mix specifically formulated for fruits and vegetables is ideal.
* Grow Lights: Strawberries need a lot of light to produce fruit. If you don’t have a sunny south-facing window, you’ll need to invest in grow lights. LED grow lights are energy-efficient and work well.
* Fertilizer: A balanced liquid fertilizer, such as a 10-10-10 or a fertilizer specifically formulated for strawberries, will provide your plants with the nutrients they need.
* Watering Can or Spray Bottle: For watering your plants.
* Small Paintbrush: For hand-pollinating your strawberry flowers (more on that later!).
* Optional: Pebble tray to increase humidity.
Step-by-Step: Planting Your Strawberry Plants
Okay, now that we have everything we need, let’s get our hands dirty!
1. Prepare Your Containers: If you’re using new pots, give them a quick rinse. Fill each pot with your chosen potting mix, leaving about an inch of space at the top.
2. Plant Your Strawberries:
* Bare-Root Plants: Soak the roots in water for about an hour before planting. Create a small mound of soil in the center of the pot. Gently spread the roots over the mound and position the plant so that the crown (the point where the roots meet the stem) is just above the soil line. Cover the roots with soil and gently firm it down.
* Established Plants: Carefully remove the plant from its nursery container. Gently loosen the roots if they are tightly bound. Place the plant in the center of your prepared pot, ensuring that the top of the root ball is level with the surrounding soil. Fill in around the root ball with potting mix and gently firm it down.
3. Water Thoroughly: After planting, water your strawberry plants thoroughly until water drains out of the drainage holes. This helps settle the soil and ensures that the roots are well-hydrated.
4. Placement: Place your newly planted strawberries in a location where they will receive at least 6-8 hours of direct sunlight per day. If you’re using grow lights, position them about 6-12 inches above the plants.
Light It Up: Providing Adequate Light
Strawberries are sun-loving plants, and they need plenty of light to thrive and produce fruit. This is where grow lights come in handy, especially if you don’t have a super sunny window.
1. Choosing the Right Grow Lights: LED grow lights are a great option because they are energy-efficient and don’t produce excessive heat. Look for lights that provide a full spectrum of light, which means they emit light across the entire color spectrum, mimicking natural sunlight.
2. Setting Up Your Grow Lights: Position your grow lights about 6-12 inches above your strawberry plants. You can use adjustable stands or hanging fixtures to easily adjust the height as your plants grow.
3. Light Schedule: Aim for 12-16 hours of light per day. You can use a timer to automatically turn the lights on and off.
Watering and Feeding: Keeping Your Strawberries Happy
Proper watering and fertilization are crucial for healthy strawberry plants and abundant fruit production.
1. Watering: Water your strawberry plants when the top inch of soil feels dry to the touch. Avoid overwatering, as this can lead to root rot. Water thoroughly, ensuring that the water drains out of the drainage holes.
2. Fertilizing: Feed your strawberry plants every 2-3 weeks with a balanced liquid fertilizer. Follow the instructions on the fertilizer label for proper dilution rates. During the flowering and fruiting stages, you can switch to a fertilizer that is higher in phosphorus and potassium to promote fruit development.
3. Humidity: Strawberries prefer a slightly humid environment. If your indoor air is dry, you can increase humidity by placing a pebble tray filled with water near your plants. As the water evaporates, it will increase the humidity around the plants.
Hand-Pollination: Helping Your Strawberries Make Babies (Berries!)
Indoor strawberries often need a little help with pollination, as there are no bees or other insects to do the job. Don’t worry, it’s super easy!
1. The Pollination Process: Use a small, soft paintbrush to gently transfer pollen from one flower to another. Brush the paintbrush inside each flower, collecting pollen from the stamen (the male part of the flower) and then transferring it to the pistil (the female part of the flower).
2. Timing is Key: Pollinate your strawberry flowers when they are fully open and the pollen is visible. Do this every day or every other day for best results.
3. Signs of Successful Pollination: If pollination is successful, the base of the flower (the part that will become the strawberry) will start to swell and develop into a small green berry.
Dealing with Runners: To Cut or Not to Cut?
Strawberry plants naturally produce runners, which are long stems that grow horizontally and develop new plantlets at the nodes.
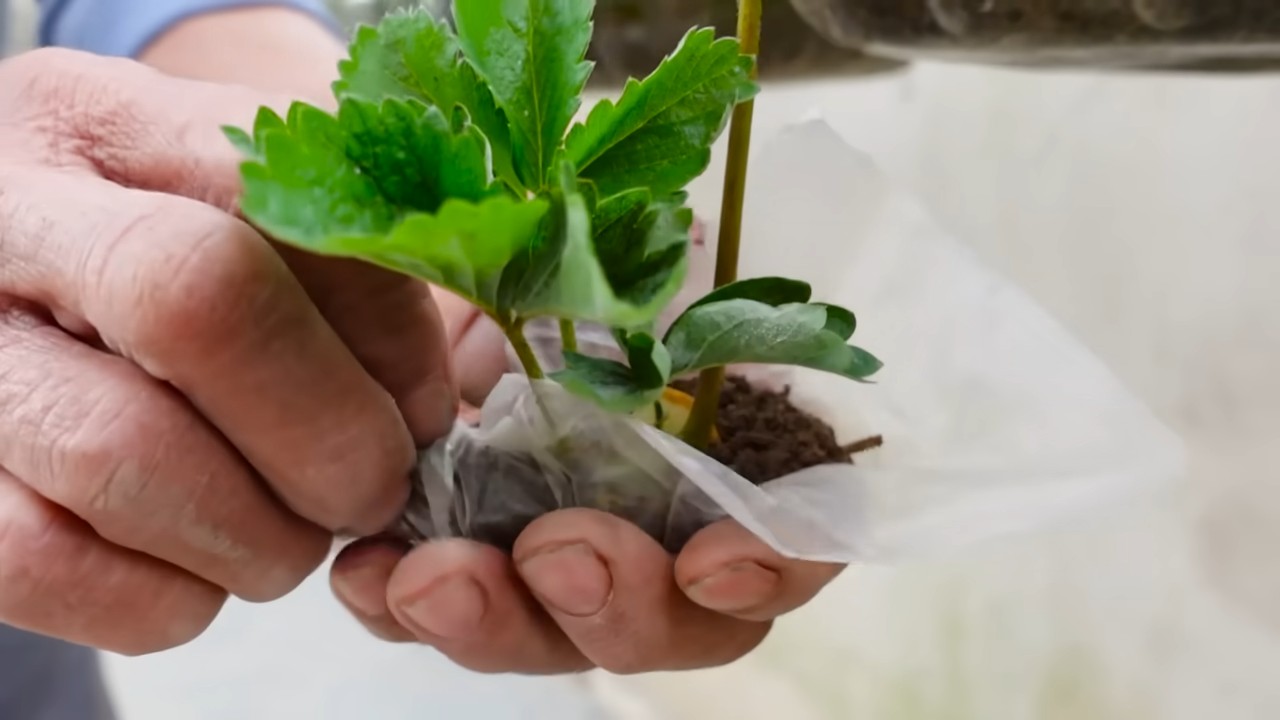
1. Runner Management: You have a couple of options when it comes to runners. You can either cut them off to encourage the mother plant to focus its energy on fruit production, or you can allow them to root and create new strawberry plants.
2. Rooting Runners: If you want to propagate new plants, simply place the runner in a small pot filled with potting mix. Secure the runner to the soil with a paperclip or hairpin. Keep the soil moist, and the runner will eventually develop roots. Once the new plant has established itself, you can cut it from the mother plant.
Pest and Disease Control: Keeping Your Strawberries Healthy
Indoor strawberry plants are generally less susceptible to pests and diseases than outdoor plants, but it’s still important to be vigilant.
1. Common Pests: Keep an eye out for common pests like aphids, spider mites, and whiteflies. If you spot any pests, you can try washing them off with a strong stream of water or using an insecticidal soap.
2. Disease Prevention: To prevent fungal diseases, avoid overwatering and ensure good air circulation around your plants. If you notice any signs of disease, such as spots on the leaves, remove the affected leaves immediately.
3. Neem Oil: Neem oil is a natural insecticide and fungicide that can be used to control a variety of pests and diseases. Apply neem oil according to the instructions on the label.
Harvesting Your Strawberries: The Sweet Reward!
After all your hard work, the moment you’ve been waiting for has finally arrived: harvesting your homegrown strawberries!
1. When to Harvest: Strawberries are ready to harvest when they are fully red and slightly soft to the touch. The berries should also detach easily from the plant.
2. How to Harvest: Gently grasp the strawberry near the stem and twist it off the plant. Avoid pulling on the berry, as this can damage the plant.
3. Enjoy Your Harvest: Eat your strawberries fresh, use them in desserts, or make jam. The possibilities are endless!
Troubleshooting: Common Issues and Solutions
Even with the best care, you might encounter some challenges along the way. Here are some common issues and how to fix them:
* Yellowing Leaves: This could be a sign of overwatering, underwatering, or nutrient deficiency. Check the soil moisture and adjust your watering accordingly. If the soil is consistently moist, reduce watering. If the soil is dry, water more frequently. You may also need to fertilize your plants.
* No Flowers or Fruit: This
Conclusion
So, there you have it! Growing strawberries indoors might seem like a whimsical dream, but with a little know-how and dedication, it can become a delicious reality. We’ve walked you through the essential steps, from selecting the right variety and providing adequate light to ensuring proper pollination and pest control. But why should you even bother with this DIY project?
The answer is simple: fresh, juicy strawberries, bursting with flavor, available at your fingertips year-round. Imagine the delight of plucking a sun-ripened (well, grow-light-ripened!) strawberry in the dead of winter, a taste of summer amidst the snow. Beyond the sheer deliciousness, growing your own strawberries offers a sense of accomplishment and connection to nature, even within the confines of your home. You control the growing environment, ensuring your berries are free from harmful pesticides and chemicals. Plus, it’s a fantastic way to teach children about the life cycle of plants and the importance of sustainable food practices.
This isn’t just about having strawberries; it’s about creating an experience. It’s about the joy of nurturing a plant from seedling to fruit, the satisfaction of harvesting your own bounty, and the pride of sharing your homegrown strawberries with friends and family.
But don’t stop there! Experiment with different strawberry varieties to discover your personal favorites. Try alpine strawberries for their intense flavor and continuous fruiting, or everbearing varieties for a prolonged harvest. Consider adding companion plants like basil or thyme to your strawberry containers to deter pests and enhance the flavor of your berries. You can also explore different growing mediums, such as coco coir or perlite, to optimize drainage and aeration.
And if you’re feeling adventurous, why not try hydroponic strawberry cultivation? This soilless method can be incredibly efficient and productive, allowing you to grow a large number of strawberries in a small space.
Ultimately, the key to successful indoor strawberry growing is patience, observation, and a willingness to learn. Pay close attention to your plants’ needs, adjust your growing conditions as necessary, and don’t be afraid to experiment.
We wholeheartedly encourage you to embark on this rewarding journey of growing strawberries indoors. It’s a fun, educational, and delicious experience that will bring a touch of nature into your home.
Now, we want to hear from you! Have you tried growing strawberries indoors before? What challenges did you face, and what successes did you achieve? Share your tips, tricks, and experiences in the comments below. Let’s create a community of indoor strawberry enthusiasts and learn from each other. Don’t forget to share photos of your homegrown strawberries – we can’t wait to see your beautiful creations! Let’s all learn how to grow strawberries indoors together.
Frequently Asked Questions (FAQ)
What are the best strawberry varieties to grow indoors?
Choosing the right variety is crucial for indoor success. Day-neutral or everbearing varieties are generally recommended because they don’t rely on specific day lengths to produce fruit, making them well-suited for indoor environments with artificial lighting. Some popular choices include:
* Seascape: Known for its large, flavorful berries and consistent production.
* Albion: Another excellent everbearing variety with good disease resistance.
* Tristan: A beautiful ornamental variety with pink flowers and delicious berries.
* Alpine Strawberries: These small, intensely flavored berries are a great option for smaller spaces and offer continuous fruiting.
How much light do indoor strawberries need?
Strawberries require at least 6-8 hours of direct sunlight per day to thrive. If you don’t have a sunny window, you’ll need to supplement with artificial grow lights. LED grow lights are a popular choice because they are energy-efficient and provide the full spectrum of light that plants need. Position the lights about 6-12 inches above the plants and adjust as needed to prevent burning. A timer can automate the light cycle.
How do I pollinate my indoor strawberry plants?
Indoor strawberries often require hand-pollination because there are no bees or other insects to do the job. You can use a small, soft paintbrush or a cotton swab to gently transfer pollen from the stamen (the male part of the flower) to the pistil (the female part of the flower). Repeat this process every day or two when the flowers are open. Alternatively, you can use a small fan to gently blow air around the plants, which can help to distribute the pollen.
What kind of soil should I use for indoor strawberries?
Strawberries prefer well-draining soil that is rich in organic matter. A good potting mix for indoor strawberries would consist of a combination of peat moss, perlite, and vermiculite. You can also add compost or other organic amendments to improve the soil’s fertility and drainage. Avoid using garden soil, as it can be too heavy and may contain pests or diseases.
How often should I water my indoor strawberry plants?
Water your strawberry plants regularly, keeping the soil consistently moist but not waterlogged. Check the soil moisture by sticking your finger about an inch into the soil. If it feels dry, it’s time to water. Water deeply, allowing the excess water to drain out of the bottom of the pot. Avoid overhead watering, as this can promote fungal diseases.
How do I fertilize my indoor strawberry plants?
Strawberries are heavy feeders and benefit from regular fertilization. Use a balanced fertilizer specifically formulated for fruits and vegetables. Follow the instructions on the fertilizer label for application rates and frequency. You can also use organic fertilizers, such as compost tea or fish emulsion. Fertilize your plants every 2-4 weeks during the growing season.
How do I deal with pests and diseases on my indoor strawberry plants?
Indoor strawberries are generally less susceptible to pests and diseases than outdoor plants, but they can still be affected. Common pests include aphids, spider mites, and whiteflies. You can control these pests by spraying your plants with insecticidal soap or neem oil. Fungal diseases, such as powdery mildew and gray mold, can also be a problem. Prevent these diseases by providing good air circulation and avoiding overhead watering. If you notice any signs of disease, remove the affected leaves or fruit immediately.
How long does it take for indoor strawberries to produce fruit?
The time it takes for indoor strawberries to produce fruit depends on the variety, growing conditions, and the age of the plant. Generally, you can expect to harvest your first strawberries within 2-3 months of planting. Day-neutral and everbearing varieties will continue to produce fruit throughout the growing season, while June-bearing varieties will produce a single, large crop.
Can I grow strawberries indoors from seed?
Yes, you can grow strawberries indoors from seed, but it can be a slow and challenging process. Strawberry seeds require a period of cold stratification before they will germinate. To stratify the seeds, place them in a damp paper towel inside a plastic bag and refrigerate them for 4-6 weeks. After stratification, sow the seeds in a seed-starting mix and keep them moist and warm. Germination can take several weeks. Once the seedlings are large enough to handle, transplant them into individual pots.
How do I overwinter my indoor strawberry plants?
If you live in a cold climate, you can overwinter your indoor strawberry plants to ensure they produce fruit again the following year. To overwinter your plants, reduce watering and fertilization and move them to a cool, dark location, such as a basement or garage. Allow the plants to go dormant for several months. In the spring, gradually reintroduce them to light and warmth and resume regular watering and fertilization.


Leave a Comment