
Grow Sweet Potatoes Beginners, and watch your garden transform into a source of delicious, nutritious, and vibrant produce! Have you ever dreamed of harvesting your own sweet potatoes, those earthy treasures that add a touch of sweetness to any meal? Well, dream no more! This DIY guide is your passport to a successful sweet potato harvest, even if you’re a complete gardening novice.
Sweet potatoes have a rich history, dating back thousands of years in Central and South America. They were a staple food for ancient civilizations and have since spread across the globe, becoming a beloved ingredient in countless cuisines. But beyond their culinary appeal, growing your own sweet potatoes offers a unique connection to the earth and a sense of accomplishment that’s hard to beat.
Why should you embark on this sweet potato adventure? Because store-bought sweet potatoes simply can’t compare to the flavor and freshness of homegrown ones. Plus, you’ll have complete control over the growing process, ensuring that your sweet potatoes are free from harmful chemicals and pesticides. I’m here to show you that with a few simple tricks and a little bit of patience, anyone can grow sweet potatoes beginners can be proud of. Let’s get started and unlock the secrets to a bountiful sweet potato harvest!
Growing Sweet Potatoes: A Beginner’s Guide to Bountiful Harvests
Hey there, fellow gardening enthusiasts! I’m so excited to share my experience with growing sweet potatoes. They’re not only delicious and nutritious but also surprisingly easy to cultivate, even if you’re a complete beginner. This guide will walk you through every step, from preparing your slips to harvesting your sweet potato bounty. Let’s get started!
Preparing Your Sweet Potato Slips
Sweet potatoes are grown from “slips,” which are sprouts that grow from the sweet potato itself. You can buy slips from a nursery, but it’s much more rewarding (and cheaper!) to grow your own. Here’s how:
* Choosing Your Sweet Potato: Select a healthy, organic sweet potato from your local grocery store or farmer’s market. Organic is important to avoid any growth inhibitors that might have been used. Look for one that’s firm and free from blemishes.
* The Water Method: This is the most common and, in my opinion, the easiest method.
* The Soil Method: This method involves planting the sweet potato in soil. It takes a bit longer, but some gardeners swear by it for stronger slips.
Step-by-Step Instructions for the Water Method
1. Gather Your Supplies: You’ll need your sweet potato, a wide-mouthed jar or glass, toothpicks, and water.
2. Insert Toothpicks: Insert 3-4 toothpicks around the middle of the sweet potato, spacing them evenly. These will act as supports to suspend the potato in the jar.
3. Suspend the Potato: Fill the jar with water, making sure the bottom half of the sweet potato is submerged. The toothpicks should rest on the rim of the jar, holding the potato in place.
4. Find a Sunny Spot: Place the jar in a warm, sunny location. A windowsill is perfect.
5. Maintain Water Level: Keep an eye on the water level and replenish it as needed to ensure the bottom of the sweet potato remains submerged.
6. Wait for Sprouts: Be patient! It can take several weeks for sprouts (slips) to emerge from the sweet potato. You’ll start to see small roots growing from the bottom and leafy shoots appearing on top.
7. Harvesting the Slips: Once the slips are about 6-8 inches long, they’re ready to be harvested. Gently twist or cut them off the sweet potato, being careful not to damage the roots.
8. Rooting the Slips: Place the harvested slips in a glass of water, ensuring the bottom inch or two is submerged. Change the water every day or two. Within a few days, you’ll see roots starting to grow.
9. Planting the Rooted Slips: Once the roots are about an inch long, your slips are ready to be planted in the garden!
Step-by-Step Instructions for the Soil Method
1. Gather Your Supplies: You’ll need your sweet potato, a container (like a seedling tray or a pot), and well-draining potting mix.
2. Prepare the Container: Fill the container with potting mix, leaving about an inch of space at the top.
3. Plant the Potato: Lay the sweet potato horizontally on top of the soil.
4. Cover Lightly: Cover the sweet potato with a thin layer of potting mix, just enough to partially bury it.
5. Water Gently: Water the soil gently, making sure it’s moist but not soggy.
6. Find a Warm Spot: Place the container in a warm location.
7. Keep Soil Moist: Keep the soil consistently moist, watering as needed.
8. Wait for Sprouts: It will take a few weeks for slips to emerge from the soil.
9. Harvesting the Slips: Once the slips are about 6-8 inches long, carefully dig them up, trying to get as much of the root system as possible.
10. Planting the Slips: Plant the slips directly into your garden bed.
Preparing Your Garden Bed
Sweet potatoes thrive in warm weather and well-drained soil. Here’s how to prepare your garden bed for a successful sweet potato harvest:
* Sunlight: Choose a location that receives at least 6-8 hours of direct sunlight per day.
* Soil: Sweet potatoes prefer loose, sandy loam soil. If your soil is heavy clay, amend it with compost, sand, and other organic matter to improve drainage.
* Soil pH: The ideal soil pH for sweet potatoes is between 5.5 and 6.5. You can test your soil pH with a soil testing kit and amend it accordingly.
* Fertilizing: Sweet potatoes don’t need a lot of fertilizer. In fact, too much nitrogen can lead to excessive vine growth and smaller potatoes. Before planting, you can amend the soil with a small amount of compost or a balanced fertilizer.
* Creating Mounds or Ridges: Sweet potatoes grow best in raised mounds or ridges. This helps with drainage and allows the potatoes to expand easily. Create mounds or ridges that are about 8-12 inches high and 12-18 inches wide.
Step-by-Step Instructions for Preparing Your Garden Bed
1. Clear the Area: Remove any weeds, rocks, or debris from the area where you’ll be planting your sweet potatoes.
2. Till the Soil: Till the soil to a depth of at least 12 inches to loosen it up.
3. Amend the Soil: Add compost, sand, or other organic matter to improve drainage and fertility.
4. Test Soil pH: Test the soil pH and amend it if necessary.
5. Create Mounds or Ridges: Create mounds or ridges that are about 8-12 inches high and 12-18 inches wide, spacing them about 3-4 feet apart.
6. Water the Soil: Water the soil thoroughly before planting.
Planting Your Sweet Potato Slips
Now comes the fun part – planting your sweet potato slips!
* Timing: Plant your slips after the last frost, when the soil has warmed up to at least 60°F (15°C).
* Spacing: Space the slips about 12-18 inches apart on the mounds or ridges.
* Planting Depth: Plant the slips deep enough so that the roots are covered with soil, but the leaves are above the surface.
Step-by-Step Instructions for Planting Your Slips
1. Dig a Hole: Dig a small hole in the top of the mound or ridge, deep enough to accommodate the roots of the slip.
2. Plant the Slip: Gently place the slip in the hole, making sure the roots are spread out.
3. Cover with Soil: Cover the roots with soil and gently firm the soil around the base of the slip.
4. Water Thoroughly: Water the newly planted slip thoroughly.
5. Protect from Pests: If you’re concerned about pests, you can cover the newly planted slips with row covers for the first few weeks.
Caring for Your Sweet Potato Plants
Once your sweet potato slips are planted, it’s important to provide them with proper care to ensure a healthy and productive harvest.
* Watering: Water your sweet potato plants regularly, especially during dry periods. Aim for about 1 inch of water per week.
* Weeding: Keep the garden bed free of weeds, as they can compete with the sweet potato plants for nutrients and water.
* Fertilizing: Sweet potatoes generally don’t need a lot of fertilizer, but you can side-dress them with a small amount of compost or a balanced fertilizer a few weeks after planting.
* Vine Management: Sweet potato vines can grow quite long and spread out. You can prune them back if they’re taking over your garden, but be careful not to remove too much foliage, as this can reduce your yield.
* Pest and Disease Control: Sweet potatoes are generally resistant to pests and diseases, but keep an eye out for common garden pests like aphids and flea beetles. If you notice any problems, treat them promptly with an appropriate insecticide or fungicide.
Step-by-Step Instructions for Caring for Your Plants
1. Water Regularly: Water your sweet potato plants regularly, especially during dry periods.
2. Weed Regularly: Keep the garden bed free of weeds.
3. Fertilize Sparingly: Side-dress with compost or balanced fertilizer a few weeks after planting, if needed.
4. Manage Vines: Prune vines if they become too unruly.
5. Monitor for Pests and Diseases: Inspect plants regularly and treat any problems promptly.
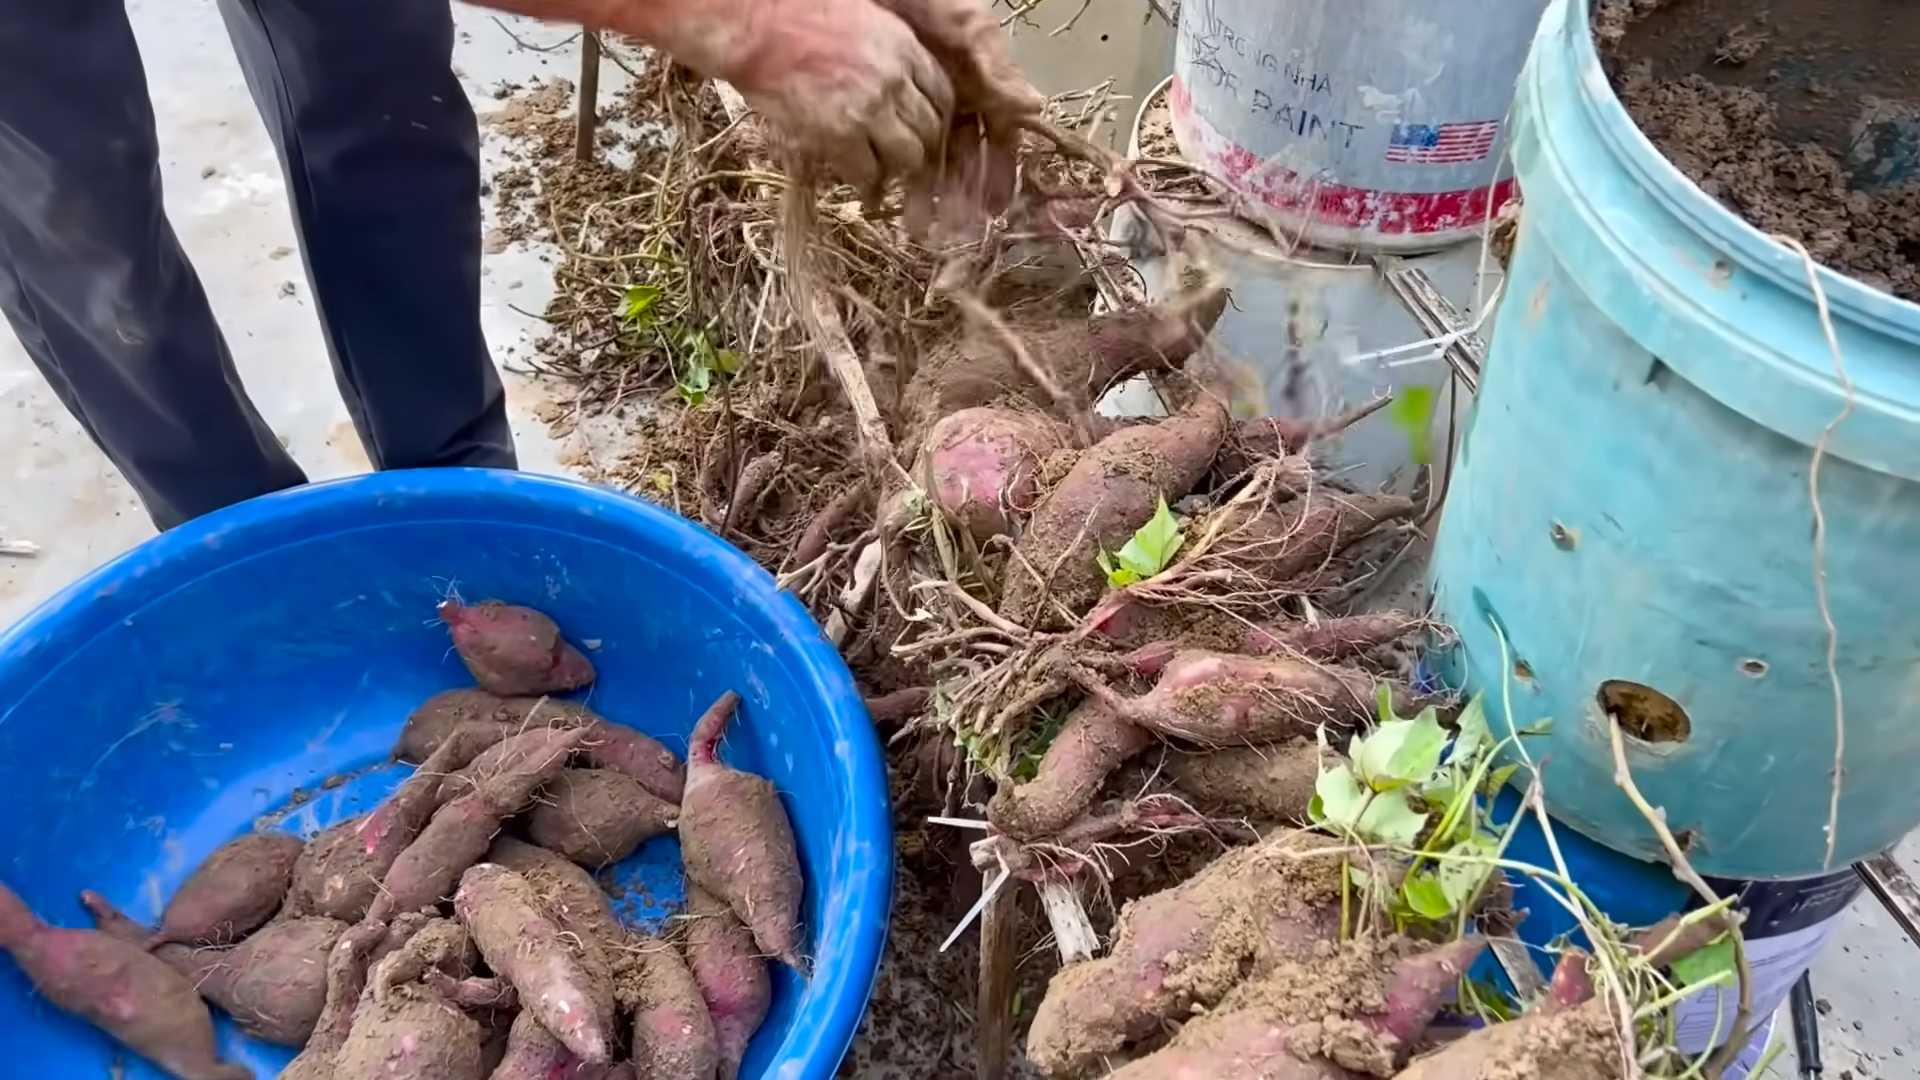
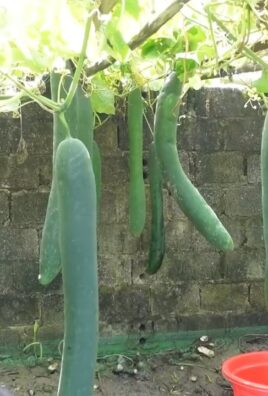
Harvesting Your Sweet Potatoes
The
Conclusion
So, there you have it! Growing sweet potatoes, even for beginners, doesn’t have to be an intimidating endeavor. This DIY trick, focusing on starting slips indoors, offers a significant advantage, especially if you live in a region with a shorter growing season. It allows you to get a head start, ensuring a more bountiful harvest of those delicious, nutrient-packed tubers.
Why is this a must-try? Because it dramatically increases your chances of success. Instead of relying solely on direct planting, which can be risky with unpredictable weather and soil conditions, you’re nurturing strong, healthy slips that are ready to thrive once transplanted. Think of it as giving your sweet potatoes the VIP treatment from the very beginning!
But the beauty of gardening lies in experimentation. Feel free to explore variations on this method. For instance, if you’re short on space, consider growing your sweet potatoes in large containers. Choose a container at least 20 gallons in size and fill it with a well-draining potting mix. This is a fantastic option for patios or balconies. Another variation is to experiment with different sweet potato varieties. Beauregard is a classic choice, but there are also varieties like Japanese sweet potatoes, which have a drier, starchier texture, or purple sweet potatoes, which are packed with antioxidants. Each variety offers a unique flavor profile and culinary application.
Don’t be afraid to get your hands dirty and embrace the learning process. Gardening is all about trial and error, and even if you encounter a few hiccups along the way, the reward of harvesting your own homegrown sweet potatoes is well worth the effort. The taste of a freshly dug sweet potato, roasted to perfection and drizzled with a touch of honey, is simply unparalleled.
We wholeheartedly encourage you to try this DIY trick for growing sweet potatoes. It’s a rewarding experience that connects you with nature and provides you with a delicious and healthy food source. And most importantly, don’t keep your success (or even your challenges!) to yourself. Share your experiences with us! Post photos of your sweet potato slips, tell us about your favorite varieties, and let us know what worked (or didn’t work) for you. Your insights can help other beginners embark on their own sweet potato growing journey. Let’s build a community of sweet potato enthusiasts, sharing tips and celebrating the joys of homegrown goodness. So, grab a sweet potato, some water, and get ready to witness the magic of propagation! Happy growing!
Frequently Asked Questions (FAQ)
Q: What kind of sweet potato should I use to start slips?
A: You can use any sweet potato you find at the grocery store, but organic sweet potatoes are generally recommended. Non-organic sweet potatoes may be treated with a sprout inhibitor, which can prevent them from producing slips. If you’re unsure, look for sweet potatoes that are already starting to sprout – these are a good sign that they’re viable. You can also use sweet potatoes from a previous harvest if you’ve saved some.
Q: How long does it take for sweet potato slips to grow?
A: It typically takes 4-8 weeks for sweet potato slips to grow large enough to transplant. The exact timeframe will depend on factors such as temperature, light, and the variety of sweet potato. Be patient and provide the slips with optimal conditions for growth.
Q: What kind of light do sweet potato slips need?
A: Sweet potato slips need plenty of bright, indirect light. A sunny windowsill is a good option, but be sure to protect the slips from direct sunlight, which can scorch the leaves. If you don’t have a sunny windowsill, you can use a grow light to provide supplemental lighting.
Q: How often should I change the water when growing sweet potato slips?
A: You should change the water every 2-3 days to prevent the growth of algae and bacteria. Use fresh, clean water each time. This will also help to provide the slips with the oxygen they need to grow.
Q: When is the best time to transplant sweet potato slips into the garden?
A: The best time to transplant sweet potato slips is after the last frost, when the soil has warmed up to at least 60°F (15°C). Sweet potatoes are sensitive to cold temperatures, so it’s important to wait until the weather is consistently warm before transplanting.
Q: How far apart should I plant sweet potato slips?
A: Plant sweet potato slips 12-18 inches apart in rows that are 3-4 feet apart. This will give the plants enough space to grow and spread.
Q: What kind of soil do sweet potatoes need?
A: Sweet potatoes prefer well-drained, sandy loam soil. They don’t need particularly rich soil, and in fact, too much nitrogen can lead to excessive vine growth at the expense of tuber production. Amend heavy clay soils with compost or other organic matter to improve drainage.
Q: How often should I water sweet potatoes?
A: Water sweet potatoes regularly, especially during dry periods. Aim to keep the soil consistently moist, but not waterlogged. Once the plants are established, they are relatively drought-tolerant.
Q: Do sweet potatoes need fertilizer?
A: Sweet potatoes don’t need a lot of fertilizer. A side dressing of compost or a balanced fertilizer (10-10-10) can be applied a few weeks after transplanting. Avoid using fertilizers that are high in nitrogen, as this can promote vine growth at the expense of tuber production.
Q: How do I know when sweet potatoes are ready to harvest?
A: Sweet potatoes are typically ready to harvest 90-120 days after transplanting. The leaves will start to turn yellow and the vines will begin to die back. You can also dig up a test potato to check for size and maturity.
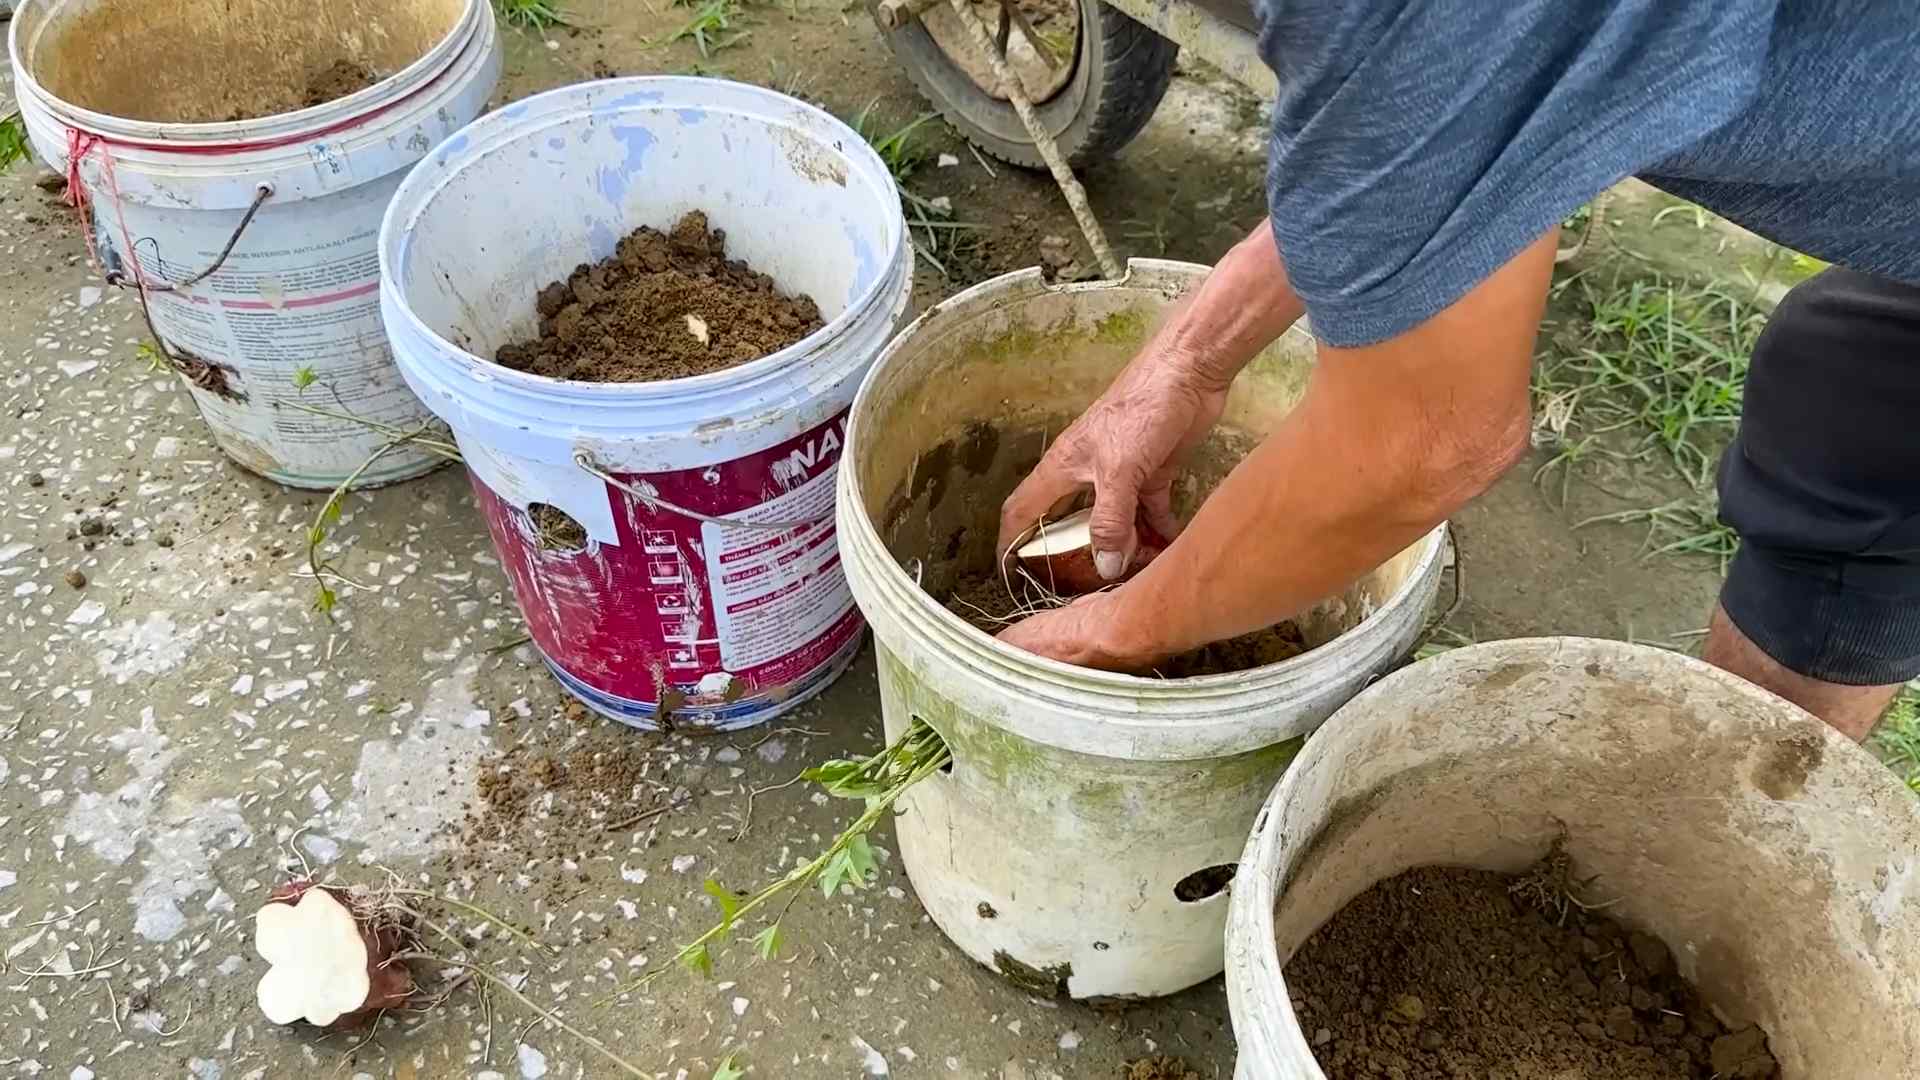
Q: How should I cure sweet potatoes after harvesting?
A: Curing sweet potatoes is essential for improving their flavor and storage life. After harvesting, gently brush off any excess soil and place the sweet potatoes in a warm, humid place (80-85°F or 27-29°C) for 7-10 days. This will allow the skins to harden and the starches to convert to sugars.
Q: How should I store sweet potatoes?
A: Store cured sweet potatoes in a cool, dry, and dark place (55-60°F or 13-16°C). Avoid storing them in the refrigerator, as this can cause them to develop a hard core. Properly cured and stored sweet potatoes can last for several months.
Q: Can I grow sweet potatoes in containers?
A: Yes, you can grow sweet potatoes in containers. Choose a large container (at least 20 gallons) with good drainage. Fill the container with a well-draining potting mix and plant the sweet potato slips as you would in the garden.
Q: What are some common pests and diseases of sweet potatoes?
A: Common pests of sweet potatoes include sweet potato weevils, flea beetles, and aphids. Common diseases include stem rot, scurf, and black rot. Practice good garden hygiene and use organic pest control methods to prevent and manage these problems.
Q: Can I eat the leaves of sweet potato plants?
A: Yes, the leaves of sweet potato plants are edible and nutritious. They can be eaten raw in salads or cooked like spinach. Choose young, tender leaves for the best flavor.
Q: What are some different varieties of sweet potatoes I can grow?
A: There are many different varieties of sweet potatoes to choose from, each with its own unique flavor and texture. Some popular varieties include Beauregard, Covington, Japanese sweet potato, and purple sweet potato. Experiment with different varieties to find your favorites.
Q: My sweet potato slips are growing long and leggy. What should I do?
A: Long and leggy slips are often a sign that they are not getting enough light. Move them to a brighter location or provide supplemental lighting with a grow light. You can also pinch back the tips of the slips to encourage bushier growth.
Q: My sweet potato slips are turning yellow. What should I do?
A: Yellowing leaves can be a sign of several problems, including overwatering, underwatering, or nutrient deficiencies. Check the soil moisture and adjust your watering accordingly. You can also try fertilizing the slips with a balanced fertilizer.
Q: Can I reuse sweet potato slips from a previous year?
A: Yes, you can save sweet potatoes from a previous harvest and use them to grow slips the following year. Store the sweet potatoes in a cool, dry place over the winter and start the slip-growing process again in the spring.
Leave a Comment