
Grow Sweet Potatoes Home, and unlock a world of delicious possibilities right in your backyard! Imagine harvesting your own vibrant, nutrient-rich sweet potatoes, knowing exactly where they came from and how they were grown. Forget those bland, store-bought spuds – we’re talking about homegrown sweetness bursting with flavor!
For centuries, sweet potatoes have been a staple in diets around the globe, from the Americas to Asia, symbolizing abundance and nourishment. Their versatility is legendary; they can be baked, mashed, fried, or even used in desserts. But did you know that growing them yourself is surprisingly easy and rewarding?
In today’s world, where we’re increasingly conscious of food miles and the quality of what we eat, learning to grow sweet potatoes home offers a fantastic solution. Not only will you have access to fresh, organic produce, but you’ll also experience the joy and satisfaction of nurturing something from seed (or slip!) to harvest. Plus, it’s a fantastic way to connect with nature and get your hands dirty (literally!).
This DIY guide is packed with simple, effective tricks and hacks to help you cultivate a thriving sweet potato patch, even if you’re a complete beginner. We’ll cover everything from choosing the right varieties to preparing your soil and protecting your precious plants from pests. Get ready to embark on a sweet potato adventure – your taste buds (and your garden) will thank you!
Growing Sweet Potatoes at Home: A Beginner’s Guide
Hey there, fellow gardening enthusiasts! I’m so excited to share my experience with growing sweet potatoes at home. It’s surprisingly easy and incredibly rewarding. Nothing beats the taste of homegrown sweet potatoes, and the process is a lot of fun. Let’s dive in!
Choosing Your Sweet Potato Variety
Before we get started, it’s important to choose the right sweet potato variety for your climate and growing space. Some varieties are better suited for shorter growing seasons, while others thrive in warmer climates. Here are a few popular options:
* Beauregard: A classic choice, known for its orange flesh and sweet flavor. It’s a reliable producer and matures relatively quickly.
* Georgia Jet: Another popular variety with reddish-purple skin and orange flesh. It’s known for its early maturity, making it a good option for cooler climates.
* Jewel: This variety has copper-colored skin and deep orange flesh. It’s known for its excellent flavor and storage capabilities.
* Okinawan Purple: If you’re feeling adventurous, try this variety with purple skin and purple flesh. It’s packed with antioxidants and has a slightly nutty flavor.
Once you’ve chosen your variety, you’ll need to get your hands on a sweet potato to start the “slip” growing process. You can usually find sweet potatoes at your local grocery store or farmers market.
Growing Sweet Potato Slips
Sweet potato slips are the sprouts that grow from a sweet potato, and they’re what you’ll plant in your garden. Here’s how to grow them:
Materials You’ll Need:
* A sweet potato (organic is best)
* A glass jar or container
* Toothpicks
* Water
Step-by-Step Instructions:
1. Prepare the Sweet Potato: Thoroughly wash your sweet potato to remove any dirt or debris. This will help prevent mold growth.
2. Insert Toothpicks: Insert three or four toothpicks around the middle of the sweet potato. These will act as supports to suspend the sweet potato in the jar.
3. Fill the Jar with Water: Fill the glass jar with water, leaving about an inch of space at the top.
4. Suspend the Sweet Potato: Carefully place the sweet potato in the jar, using the toothpicks to suspend the bottom half in the water. Make sure the bottom of the sweet potato is submerged.
5. Find a Sunny Spot: Place the jar in a warm, sunny location. A windowsill is ideal.
6. Change the Water Regularly: Change the water every few days to prevent algae growth and keep the water fresh.
7. Wait for Slips to Grow: Be patient! It can take several weeks for slips to start growing. You’ll see small sprouts emerging from the sweet potato.
8. Harvesting the Slips: Once the slips are about 6-8 inches long, they’re ready to be harvested. Gently twist or cut them off the sweet potato.
9. Rooting the Slips: Place the harvested slips in a glass of water, making sure the bottom inch or two is submerged. Within a few days, you should see roots starting to grow.
Preparing Your Garden Bed
Sweet potatoes need plenty of sunshine and well-drained soil to thrive. Here’s how to prepare your garden bed:
Choosing the Right Location:
* Sunlight: Sweet potatoes need at least 6-8 hours of direct sunlight per day. Choose a location that gets plenty of sun.
* Soil: Sweet potatoes prefer well-drained, sandy loam soil. Avoid heavy clay soil, as it can lead to rot.
* Space: Sweet potato vines can spread quite a bit, so give them plenty of room to grow. Allow at least 12-18 inches between plants.
Soil Preparation:
1. Clear the Area: Remove any weeds, rocks, or debris from the garden bed.
2. Amend the Soil: If your soil is heavy or compacted, amend it with compost, aged manure, or other organic matter. This will improve drainage and fertility.
3. Till or Dig the Soil: Till or dig the soil to a depth of at least 12 inches. This will loosen the soil and make it easier for the sweet potato roots to grow.
4. Create Ridges or Mounds: Sweet potatoes grow best in raised ridges or mounds. This helps with drainage and allows the roots to expand. Create ridges or mounds that are about 6-8 inches high and 12 inches wide.
Planting Your Sweet Potato Slips
Now that your slips are rooted and your garden bed is prepared, it’s time to plant your sweet potatoes!
When to Plant:
* Timing: Plant your sweet potato slips after the last frost, when the soil has warmed up to at least 60°F (15°C).
* Climate: In warmer climates, you can plant sweet potatoes in the spring or early summer. In cooler climates, you may need to wait until late spring or early summer.
Planting Instructions:
1. Water the Slips: Before planting, water the rooted slips thoroughly.
2. Dig a Hole: Dig a hole in the ridge or mound that is deep enough to accommodate the roots of the slip.
3. Plant the Slip: Gently place the slip in the hole, making sure the roots are spread out. Cover the roots with soil, leaving the top leaves exposed.
4. Water Thoroughly: Water the newly planted slips thoroughly.
5. Space the Plants: Space the plants 12-18 inches apart in rows that are 3-4 feet apart.
Caring for Your Sweet Potato Plants
Sweet potatoes are relatively low-maintenance plants, but they do need some care to thrive.
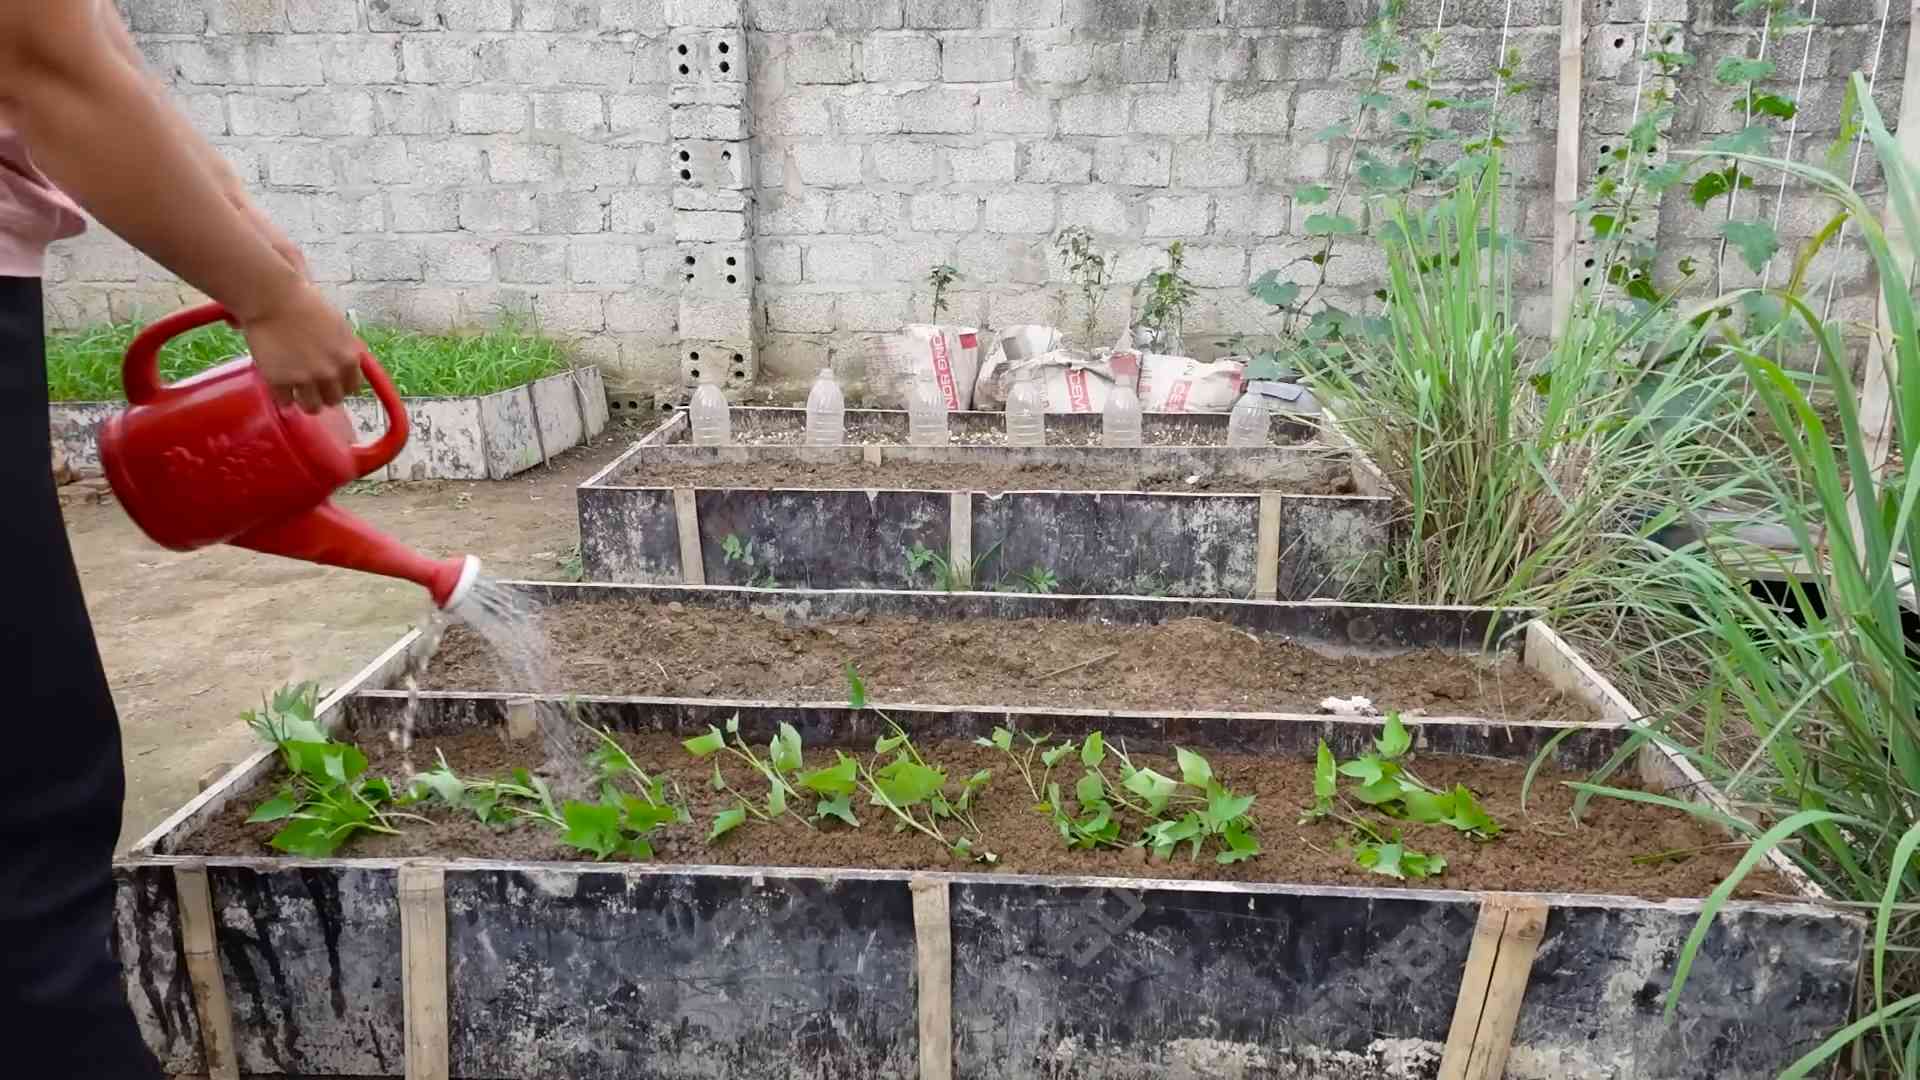
Watering:
* Regular Watering: Water your sweet potato plants regularly, especially during dry periods. Keep the soil consistently moist, but not waterlogged.
* Soaker Hoses: Using soaker hoses or drip irrigation can help deliver water directly to the roots, minimizing water waste.
Fertilizing:
* Light Feeding: Sweet potatoes don’t need a lot of fertilizer. A light feeding of a balanced fertilizer (e.g., 10-10-10) a few weeks after planting can help boost growth.
* Avoid Over-Fertilizing: Avoid over-fertilizing, as this can lead to excessive vine growth and fewer sweet potatoes.
Weeding:
* Regular Weeding: Keep the garden bed free of weeds, as they can compete with the sweet potatoes for nutrients and water.
* Mulching: Mulching with straw, hay, or other organic materials can help suppress weeds and retain moisture in the soil.
Pest and Disease Control:
* Common Pests: Sweet potatoes are generally resistant to pests, but they can be affected by aphids, flea beetles, and sweet potato weevils.
* Organic Pest Control: Use organic pest control methods, such as insecticidal soap or neem oil, to control pests.
* Disease Prevention: To prevent diseases, ensure good air circulation and avoid overwatering.
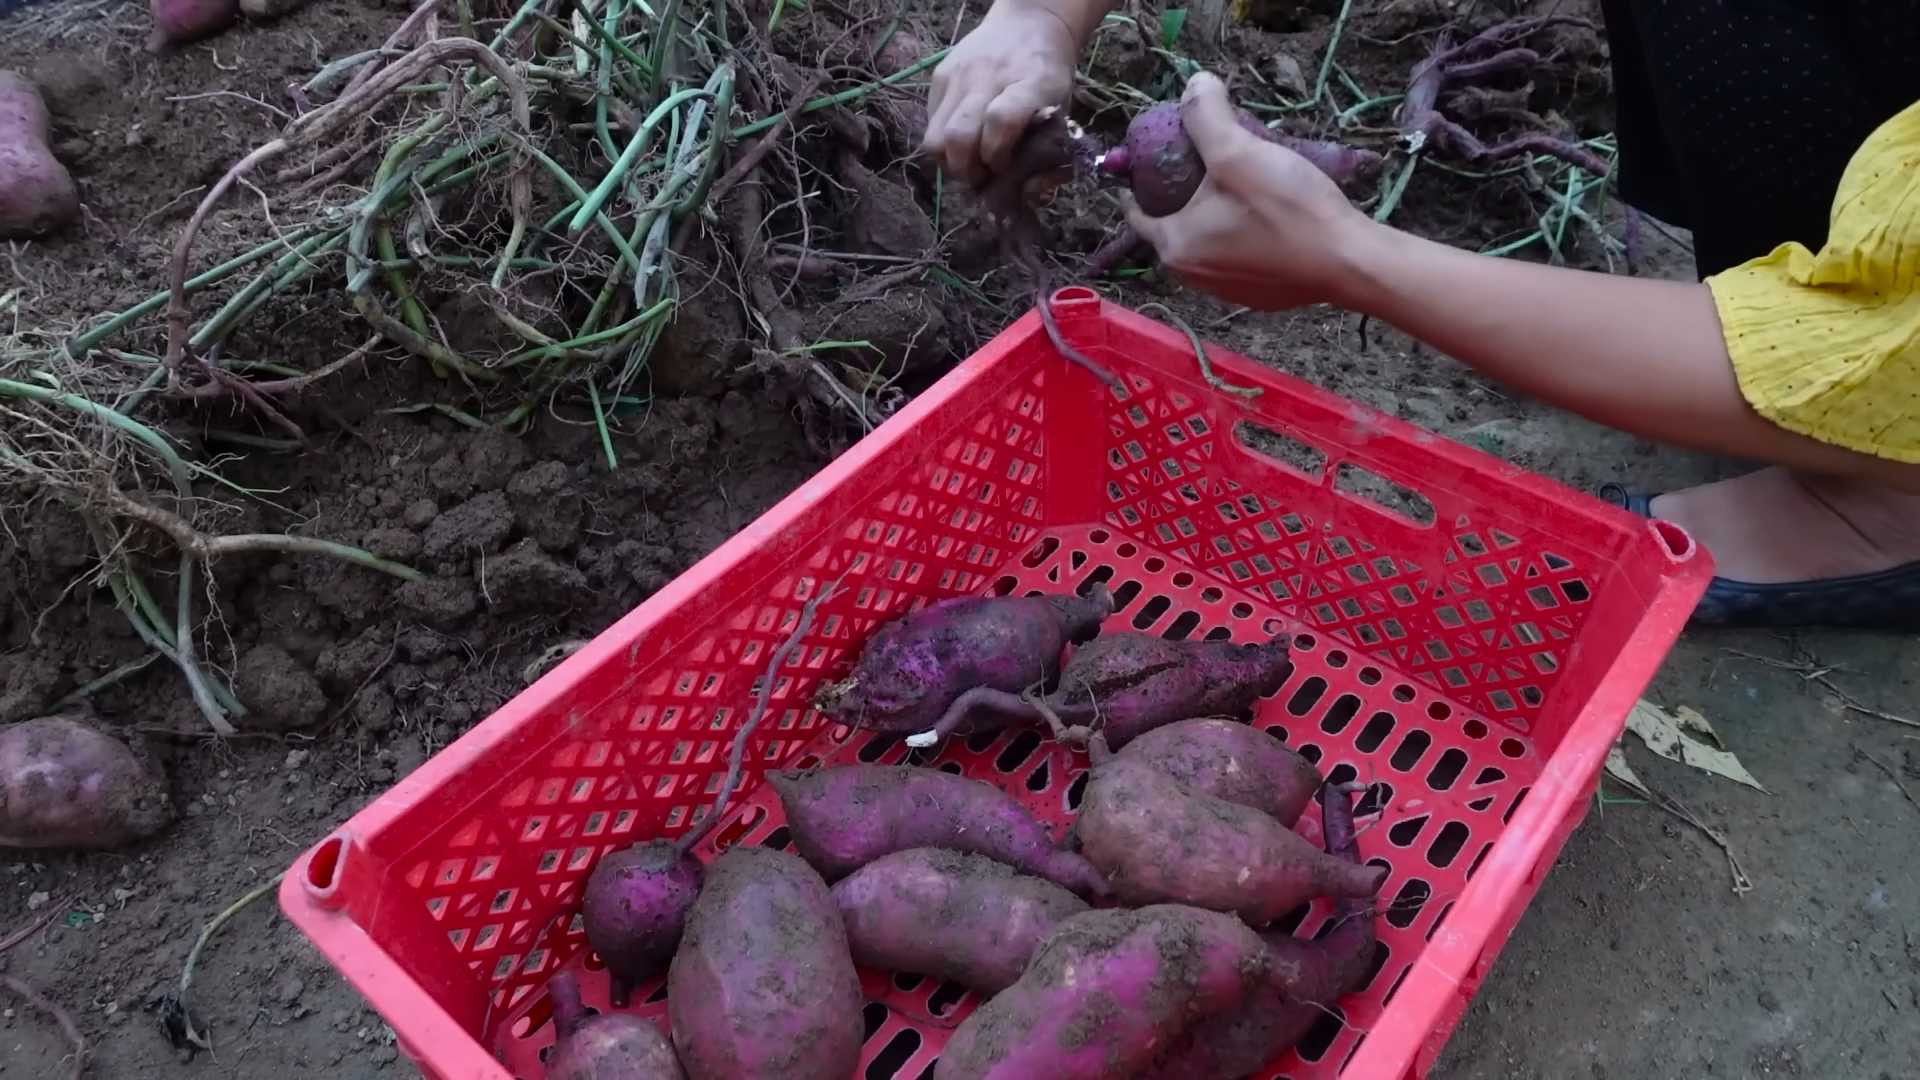
Harvesting Your Sweet Potatoes
The moment you’ve been waiting for! Harvesting your sweet potatoes is the most rewarding part of the process.
When to Harvest:
* Timing: Sweet potatoes are typically ready to harvest about 90-120 days after planting, depending on the variety.
* Signs of Maturity: The leaves will start to turn yellow and the vines will begin to die back.
Harvesting Instructions:
1. Loosen the Soil: Use a garden fork or shovel to carefully loosen the soil around the sweet potato plants. Be careful not to damage the sweet potatoes.
2. Dig Up the Sweet Potatoes: Gently lift the sweet potatoes out of the ground.
3. Cure the Sweet Potatoes: Curing is an important step that helps to improve the flavor and storage life of sweet potatoes.
* Curing Process: Place the sweet potatoes in a warm, humid location (80-85°F and 85-90% humidity) for 7-10 days. A greenhouse or enclosed porch works well.
* Why Cure?: Curing allows the skins to harden and heal any minor cuts or bruises, preventing rot.
4. Store the Sweet Potatoes: After curing, store the sweet potatoes in a cool, dry, and dark place (55-60°F). They should keep for several months.
Troubleshooting
Even with the best planning, things can sometimes go wrong. Here are a few common problems and how to address them:
* Slips Not Growing: If your slips aren’t
Conclusion
So, there you have it! Growing sweet potatoes at home is not only achievable but also incredibly rewarding. From the vibrant slips sprouting in water to the eventual harvest of those earthy, sweet tubers, the entire process is a testament to the magic of gardening. This DIY trick, starting with a simple sweet potato from the grocery store, unlocks a world of fresh, homegrown goodness right in your own backyard (or even on your balcony!).
Why is this a must-try? Because it’s sustainable, cost-effective, and frankly, just plain fun! Imagine the satisfaction of serving a dish made with sweet potatoes you nurtured from start to finish. Plus, you’ll know exactly where your food came from and what went into growing it – no mystery ingredients or questionable farming practices here.
But the beauty of this DIY project lies in its adaptability. Feel free to experiment with different varieties of sweet potatoes. Try growing Beauregard for its classic orange flesh and moist texture, or perhaps explore the Stokes Purple sweet potato for its striking color and slightly drier consistency. You can also adjust your growing methods to suit your space. If you’re short on garden space, consider growing sweet potatoes in large containers or raised beds. Just ensure they have plenty of room to spread their roots.
Another variation to consider is the timing of your planting. While we’ve outlined a general timeline, your specific climate will play a significant role. Research the optimal planting time for sweet potatoes in your region to maximize your yield. You can also experiment with different soil amendments to improve drainage and nutrient content. Adding compost or well-rotted manure to your soil will provide your sweet potatoes with the essential nutrients they need to thrive.
Don’t be afraid to get creative with your sweet potato vines, too! They can be trained to climb trellises or fences, adding a touch of greenery to your outdoor space. Just be sure to provide them with adequate support as they grow.
Ultimately, the key to success with this DIY trick is patience and observation. Pay attention to your sweet potato plants, monitor their growth, and adjust your care as needed. And most importantly, don’t be discouraged if you encounter challenges along the way. Gardening is a learning process, and every mistake is an opportunity to grow (pun intended!).
We wholeheartedly encourage you to give growing sweet potatoes at home a try. It’s a simple, satisfying, and sustainable way to enjoy fresh, delicious produce. And once you’ve harvested your first crop, be sure to share your experience with us! We’d love to hear about your successes, your challenges, and any tips or tricks you’ve discovered along the way. Share your photos and stories on social media using #HomeGrownSweetPotatoes – let’s inspire others to join the sweet potato growing revolution! This is a fantastic way to get involved in growing sweet potatoes home.
Frequently Asked Questions (FAQ)
Q: What kind of sweet potato should I use to start slips?
A: You can use any sweet potato from the grocery store, but organic sweet potatoes are generally recommended. Non-organic sweet potatoes may have been treated with a sprout inhibitor, which can prevent them from producing slips. Look for sweet potatoes that are firm, free from blemishes, and haven’t started to sprout yet. If you have access to sweet potatoes from a local farmer or garden, those are also excellent options.
Q: How long does it take for sweet potato slips to grow?
A: It typically takes 4-8 weeks for sweet potato slips to grow large enough to transplant. The exact timeframe will depend on factors such as temperature, humidity, and the variety of sweet potato you’re using. Be patient and provide your sweet potato with plenty of light and warmth to encourage slip growth.
Q: How do I know when the slips are ready to be transplanted?
A: The slips are ready to be transplanted when they are about 6-8 inches long and have several leaves. They should also have developed a good root system. Gently pull the slips from the sweet potato, being careful not to damage the roots. If the roots are tangled, you can gently separate them with your fingers.
Q: What kind of soil is best for growing sweet potatoes?
A: Sweet potatoes prefer well-drained, sandy loam soil with a pH between 6.0 and 6.5. Avoid heavy clay soils, as they can become waterlogged and prevent the sweet potatoes from developing properly. Amend your soil with compost or well-rotted manure to improve drainage and nutrient content.
Q: How much sun do sweet potatoes need?
A: Sweet potatoes need at least 6-8 hours of direct sunlight per day. Choose a sunny location in your garden or on your balcony to ensure your sweet potatoes get enough light.
Q: How often should I water sweet potatoes?
A: Water sweet potatoes regularly, especially during dry periods. Aim to keep the soil consistently moist, but not waterlogged. Water deeply and less frequently, rather than shallowly and more often.
Q: How do I fertilize sweet potatoes?
A: Sweet potatoes are relatively low-maintenance when it comes to fertilization. Avoid using high-nitrogen fertilizers, as they can promote excessive vine growth at the expense of tuber development. Instead, use a balanced fertilizer or one that is higher in phosphorus and potassium. Apply fertilizer according to the package directions.
Q: When is the best time to harvest sweet potatoes?
A: Sweet potatoes are typically ready to harvest about 90-120 days after transplanting. The exact timing will depend on the variety of sweet potato and your local climate. A good indicator that your sweet potatoes are ready to harvest is when the vines start to turn yellow and die back.
Q: How do I harvest sweet potatoes?
A: Carefully dig around the sweet potato plants, being careful not to damage the tubers. Use a garden fork or shovel to gently lift the sweet potatoes from the soil. Brush off any excess dirt and allow the sweet potatoes to cure in a warm, dry place for about 1-2 weeks. Curing helps to heal any wounds and improve the flavor and storage life of the sweet potatoes.
Q: How do I store sweet potatoes?
A: Store cured sweet potatoes in a cool, dry, and well-ventilated place, such as a basement or pantry. Avoid storing them in the refrigerator, as this can cause them to develop a hard core. Sweet potatoes can typically be stored for several months if properly cured and stored.
Q: Can I grow sweet potatoes in containers?
A: Yes, you can grow sweet potatoes in containers, but you’ll need to use large containers that are at least 20 gallons in size. Choose a container with good drainage and fill it with well-drained potting mix. Provide your container-grown sweet potatoes with plenty of sunlight and water, and fertilize them regularly.
Q: Are sweet potato leaves edible?
A: Yes, sweet potato leaves are edible and nutritious! They can be cooked like spinach or other leafy greens. Harvest young, tender leaves for the best flavor.
Q: My sweet potato vines are growing like crazy, but I’m not getting many sweet potatoes. What could be the problem?
A: Excessive vine growth at the expense of tuber development can be caused by several factors, including:
* **Too much nitrogen:** Avoid using high-nitrogen fertilizers.
* **Too much water:** Ensure your soil is well-drained and avoid overwatering.
* **Too much shade:** Sweet potatoes need at least 6-8 hours of direct sunlight per day.
Q: Can I save slips from my sweet potato harvest to grow next year?
A: Yes, you can save slips from your sweet potato harvest to grow next year. Before harvesting, select healthy, disease-free plants with good tuber production. After harvesting, carefully store a few of the sweet potatoes in a cool, dry place. In the spring, you can start the slip-growing process again using these stored sweet potatoes. This is a great way to ensure you always have a supply of slips for growing sweet potatoes home.
Leave a Comment