
Grow Sweet Potatoes in Bags? Absolutely! Imagine harvesting a bounty of sweet, earthy sweet potatoes right from your patio or balcony. No sprawling garden needed! For centuries, sweet potatoes have been a staple in diets around the world, from their origins in Central and South America to becoming a beloved Thanksgiving side dish in North America. But did you know you don’t need acres of land to enjoy these nutritious tubers?
I’m here to tell you that even if you’re short on space, you can still experience the joy of growing your own food. This DIY guide will walk you through the surprisingly simple process of cultivating sweet potatoes in bags. Think of it: fresh, organic sweet potatoes, grown with your own two hands, ready to be transformed into delicious meals.
Many people are intimidated by the idea of growing root vegetables, believing it requires vast garden beds and specialized knowledge. But this method is perfect for beginners and seasoned gardeners alike. It’s cost-effective, space-saving, and incredibly rewarding. Plus, it’s a fantastic way to reduce your carbon footprint and connect with nature, even in the heart of the city. So, let’s ditch the gardening myths and dive into the world of growing sweet potatoes in bags! I promise, you’ll be amazed at how easy and fun it is!
Süßkartoffeln im Sack anbauen: Eine einfache DIY-Anleitung
Hey Leute! Habt ihr Lust, eure eigenen Süßkartoffeln anzubauen, aber keinen Platz im Garten? Keine Sorge, ich zeige euch, wie ihr das ganz einfach in Säcken machen könnt! Es ist super platzsparend und macht richtig Spaß. Los geht’s!
Was ihr braucht:
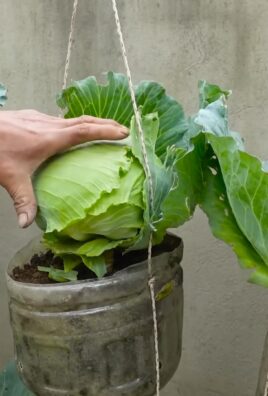
* Säcke: Am besten eignen sich große, stabile Säcke aus Jute, Polypropylen oder sogar alte Futtersäcke. Sie sollten mindestens 50 Liter Fassungsvermögen haben, besser noch 75-100 Liter. Je größer der Sack, desto mehr Platz haben die Süßkartoffeln zum Wachsen.
* Süßkartoffel-Setzlinge (Slips): Diese könnt ihr entweder online bestellen, im Gartencenter kaufen oder sogar selbst ziehen (dazu später mehr!). Achtet darauf, gesunde, kräftige Setzlinge zu bekommen.
* Erde: Eine gute Mischung aus Gartenerde, Kompost und etwas Sand ist ideal. Die Erde sollte locker und gut durchlässig sein, damit die Süßkartoffeln gut wachsen können.
* Kompost: Kompost ist Gold wert! Er versorgt die Pflanzen mit wichtigen Nährstoffen und verbessert die Bodenstruktur.
* Sand: Sand sorgt für eine gute Drainage und verhindert Staunässe.
* Gießkanne oder Schlauch: Zum regelmäßigen Gießen.
* Messer oder Schere: Zum Zuschneiden der Säcke (falls nötig).
* Optional: Mulch (z.B. Stroh oder Holzhackschnitzel) zum Abdecken der Erde.
* Optional: Dünger (organisch oder mineralisch) für eine zusätzliche Nährstoffversorgung.
Schritt-für-Schritt-Anleitung:
1. Die Säcke vorbereiten:
* Falls ihr neue Säcke verwendet, könnt ihr sie einfach so lassen. Bei gebrauchten Säcken solltet ihr sie vorher gründlich reinigen, um Krankheiten oder Schädlinge zu vermeiden.
* Wenn die Säcke keine Löcher am Boden haben, solltet ihr ein paar kleine Löcher hineinschneiden, damit das Wasser gut ablaufen kann. Staunässe ist Gift für Süßkartoffeln!
* Krempelt die Oberseite der Säcke ein paar Mal um, damit sie stabiler stehen und sich leichter befüllen lassen.
2. Die Erde mischen:
* Mischt die Gartenerde, den Kompost und den Sand in einem Verhältnis von etwa 2:1:1. Das bedeutet, auf zwei Teile Gartenerde kommt ein Teil Kompost und ein Teil Sand.
* Achtet darauf, dass die Mischung gut durchgemischt ist, damit die Nährstoffe gleichmäßig verteilt sind.
* Wenn ihr wollt, könnt ihr auch noch etwas organischen Dünger (z.B. Hornspäne oder Komposttee) hinzufügen, um die Pflanzen zusätzlich zu stärken.
3. Die Säcke befüllen:
* Füllt die Säcke mit der Erdmischung bis etwa 10-15 cm unter den Rand.
* Drückt die Erde leicht an, aber nicht zu fest. Sie sollte locker und luftig bleiben.
4. Die Setzlinge pflanzen:
* Macht mit den Fingern oder einem kleinen Spaten kleine Löcher in die Erde, etwa 10-15 cm tief.
* Setzt die Süßkartoffel-Setzlinge vorsichtig in die Löcher und bedeckt die Wurzeln mit Erde.
* Achtet darauf, dass die Blätter der Setzlinge nicht mit Erde bedeckt sind.
* Pflanzt pro Sack etwa 3-5 Setzlinge, je nach Größe des Sacks.
5. Gießen und pflegen:
* Gießt die frisch gepflanzten Setzlinge gründlich an. Die Erde sollte gut durchfeuchtet sein, aber nicht nass.
* Gießt die Süßkartoffeln regelmäßig, besonders bei trockenem Wetter. Die Erde sollte immer leicht feucht sein.
* Achtet darauf, dass das Wasser gut ablaufen kann, um Staunässe zu vermeiden.
* Entfernt regelmäßig Unkraut, das in den Säcken wächst.
* Wenn ihr wollt, könnt ihr die Erde mit Mulch abdecken, um die Feuchtigkeit zu halten und das Unkrautwachstum zu reduzieren.
6. Düngen (optional):
* Wenn ihr wollt, könnt ihr die Süßkartoffeln während der Wachstumsperiode regelmäßig düngen.
* Verwendet dazu am besten einen organischen Dünger, z.B. Komposttee oder verdünnte Brennnesseljauche.
* Achtet darauf, die Düngemittel gemäß den Anweisungen auf der Verpackung zu verwenden.
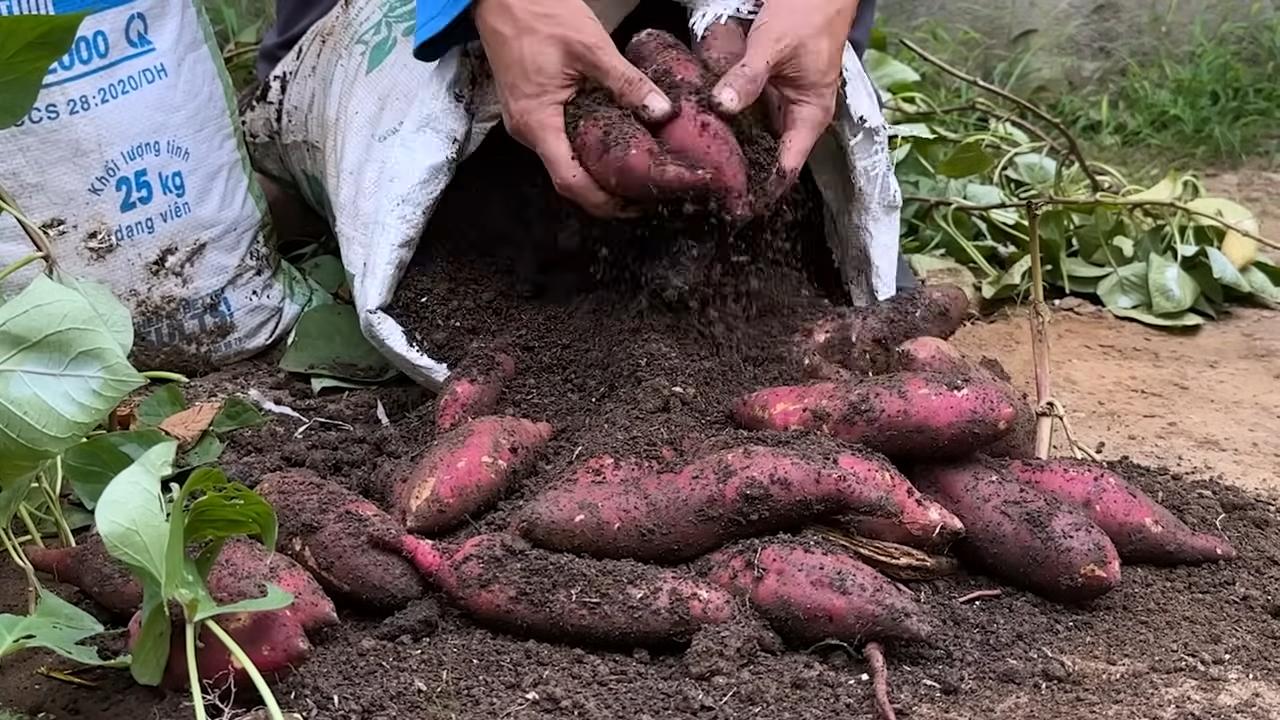
7. Die Ernte:
* Süßkartoffeln sind erntereif, wenn die Blätter anfangen, gelb zu werden und abzusterben. Das ist normalerweise im Herbst, etwa 3-4 Monate nach dem Pflanzen.
* Um die Süßkartoffeln zu ernten, kippt ihr den Sack einfach um und sucht die Knollen heraus.
* Seid vorsichtig, damit ihr die Knollen nicht beschädigt.
* Lasst die geernteten Süßkartoffeln ein paar Tage an einem trockenen, luftigen Ort trocknen, bevor ihr sie lagert.
Süßkartoffel-Setzlinge selbst ziehen:
Wenn ihr eure Süßkartoffel-Setzlinge selbst ziehen wollt, ist das auch kein Problem! Es ist sogar ziemlich einfach.
1. Die Süßkartoffel vorbereiten:
* Nehmt eine gesunde, unbeschädigte Süßkartoffel.
* Schneidet die Süßkartoffel in zwei Hälften oder lasst sie ganz.
* Steckt Zahnstocher in die Seiten der Süßkartoffel, damit sie im Wasserglas Halt findet.
2. Die Süßkartoffel ins Wasser stellen:
* Füllt ein Glas oder eine Schale mit Wasser.
* Stellt die Süßkartoffel so ins Wasser, dass die untere Hälfte im Wasser ist.
* Stellt das Glas an einen hellen, warmen Ort, aber nicht in die direkte Sonne.
3. Warten und pflegen:
* Wechselt das Wasser regelmäßig, etwa alle 2-3 Tage.
* Nach ein paar Wochen sollten sich an der Süßkartoffel Wurzeln und Triebe bilden.
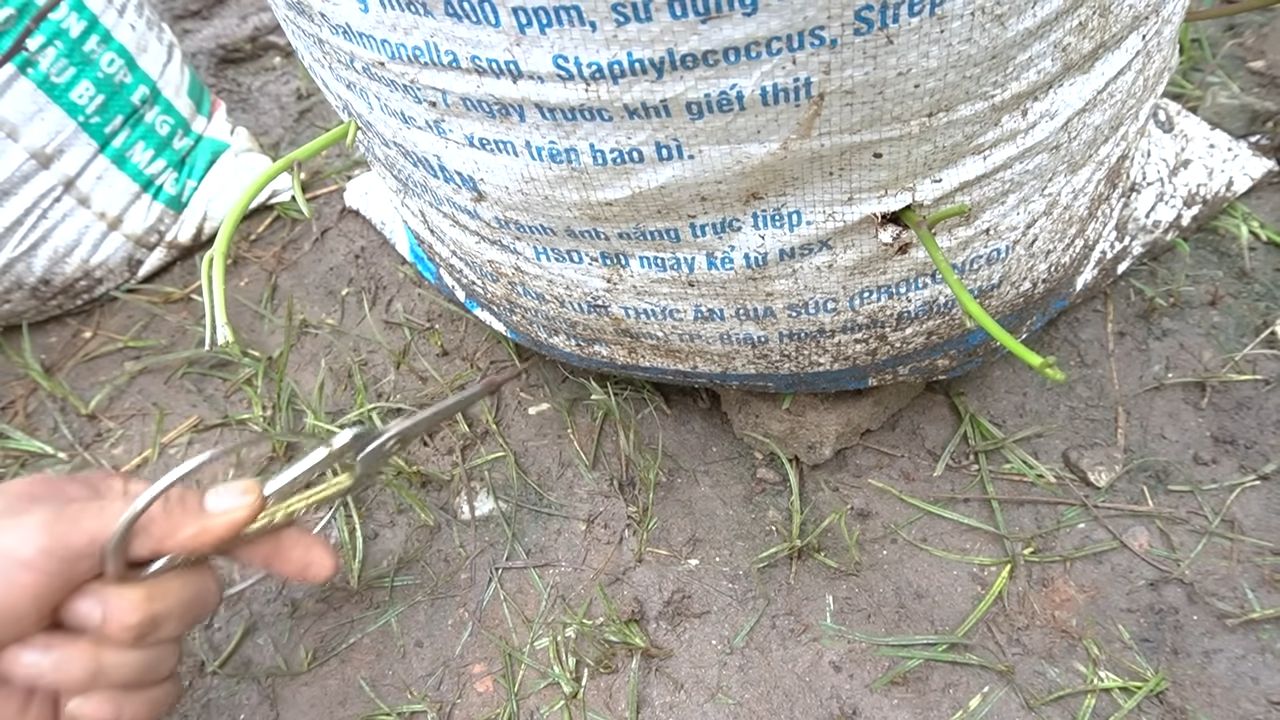
* Wenn die Triebe etwa 15-20 cm lang sind, könnt ihr sie vorsichtig von der Süßkartoffel abbrechen oder abschneiden.
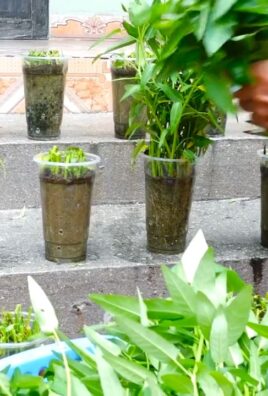
4. Die Setzlinge bewurzeln:
* Stellt die abgetrennten Triebe in ein Glas mit Wasser.
* Nach ein paar Tagen sollten sich an den Trieben Wurzeln bilden.
* Sobald die Wurzeln etwa 2-3 cm lang sind, könnt ihr die Setzlinge in die Säcke pflanzen.
Tipps und Tricks für den Süßkartoffelanbau im Sack:
* Der Standort: Süßkartoffeln lieben die Sonne! Stellt die Säcke an einen sonnigen Platz, wo sie mindestens 6-8 Stunden Sonne am Tag bekommen.
* Die Bewässerung: Achtet darauf, die Süßkartoffeln regelmäßig zu gießen, besonders bei heißem Wetter. Die Erde sollte immer leicht feucht sein, aber nicht nass.
* Die Düngung: Süßkartoffeln sind Starkzehrer. Eine regelmäßige Düngung mit organischem Dünger fördert das Wachstum und den Ertrag.
* Schädlinge und Krankheiten: Süßkartoffeln sind relativ robust, aber sie können von Schädlingen wie Blattläusen oder Schnecken befallen werden. Kontrolliert die Pflanzen regelmäßig und bekämpft Schädlinge bei Bedarf mit natürlichen Mitteln.
* Die Sortenwahl: Es gibt viele verschiedene Süßkartoffelsorten. Wählt eine Sorte, die für eure Region geeignet ist und euch schmeckt.
* Die Lagerung: Lagert die geernteten Süßkartoffeln an einem kühlen, trockenen und dunklen Ort. Sie halten sich so mehrere Monate.
Warum Süßkartoffeln im Sack anbauen?
* Platzsparend: Ideal für Balkone, Terrassen oder kleine Gärten.
* Flexibel: Die Säcke können leicht umgestellt werden,
Conclusion
So, there you have it! Growing sweet potatoes in bags is not just a gardening trend; it’s a game-changer for anyone looking to maximize their yield, regardless of space constraints. We’ve walked you through the simple steps, highlighting the benefits of this method, and hopefully, dispelled any doubts you might have had.
Why is this DIY trick a must-try? Because it offers a controlled environment, allowing you to nurture your sweet potatoes from start to finish. You’re in charge of the soil quality, the watering schedule, and even the sun exposure. This level of control translates to healthier plants and, ultimately, a more bountiful harvest of delicious, nutrient-rich sweet potatoes. Imagine the satisfaction of digging into your own homegrown sweet potatoes, knowing exactly where they came from and how they were cared for. It’s a rewarding experience that connects you to the food you eat in a profound way.
But the advantages don’t stop there. Growing sweet potatoes in bags is incredibly space-efficient. Whether you have a sprawling backyard or just a small balcony, you can still enjoy the pleasure of growing your own food. The portability of the bags also means you can easily move your plants to chase the sun or protect them from harsh weather conditions. This flexibility is a huge advantage, especially for those living in areas with unpredictable climates.
Looking for variations? Absolutely! Experiment with different types of sweet potatoes. Beauregard, Georgia Jet, and Japanese sweet potatoes are all excellent choices for bag gardening. You can also try adding different amendments to your soil mix. Compost, aged manure, and bone meal can all boost the nutrient content of your soil and promote healthy growth. Consider companion planting as well. Marigolds, for example, can help deter pests, while basil can improve the flavor of your sweet potatoes. Don’t be afraid to get creative and tailor the process to your specific needs and preferences.
And speaking of creativity, why not decorate your bags? A little bit of paint or some stencils can transform your ordinary gardening bags into eye-catching works of art. This is a great way to personalize your garden and add a touch of whimsy to your outdoor space.
We wholeheartedly encourage you to try this DIY trick and experience the joy of growing your own sweet potatoes. It’s a simple, rewarding, and sustainable way to add fresh, healthy food to your diet. Once you taste the difference between store-bought and homegrown sweet potatoes, you’ll never go back.
But don’t just take our word for it. Get your hands dirty, experiment with different techniques, and see for yourself the amazing results you can achieve. And most importantly, share your experience with us! We’d love to hear about your successes, your challenges, and any tips or tricks you’ve discovered along the way. Post photos of your sweet potato plants, share your harvest stories, and let’s build a community of bag gardening enthusiasts.
So, grab your bags, your soil, and your sweet potato slips, and get ready to embark on a rewarding gardening adventure. We’re confident that you’ll be amazed by the results. Happy growing! Remember, mastering the art of growing **sweet potatoes in bags** is easier than you think, and the rewards are well worth the effort.
Frequently Asked Questions (FAQ)
What kind of bags should I use for growing sweet potatoes?
The ideal bags for growing sweet potatoes are durable, breathable, and large enough to accommodate the plant’s root system. Fabric grow bags are highly recommended because they allow for excellent drainage and aeration, preventing root rot. Look for bags that are at least 10-15 gallons in size. You can also use sturdy plastic bags, but make sure to poke plenty of drainage holes in the bottom. Avoid using thin, flimsy bags that are likely to tear under the weight of the soil and the growing plants.
How often should I water my sweet potato plants in bags?
Watering frequency depends on several factors, including the weather, the type of soil you’re using, and the size of your bags. Generally, you should water your sweet potato plants whenever the top inch of soil feels dry to the touch. During hot, dry weather, you may need to water them daily. Be careful not to overwater, as this can lead to root rot. Ensure that your bags have adequate drainage to prevent water from pooling at the bottom. A good rule of thumb is to water deeply and less frequently, rather than shallowly and more often.
What kind of soil is best for growing sweet potatoes in bags?
Sweet potatoes thrive in well-draining, nutrient-rich soil. A good soil mix for growing sweet potatoes in bags would include a combination of potting soil, compost, and perlite or vermiculite. The potting soil provides a good base, the compost adds essential nutrients, and the perlite or vermiculite improves drainage and aeration. Avoid using heavy clay soil, as it can become waterlogged and inhibit root growth. You can also add slow-release fertilizer to the soil mix to provide a steady supply of nutrients throughout the growing season.
How much sunlight do sweet potato plants need?
Sweet potato plants need at least 6-8 hours of direct sunlight per day to thrive. Choose a location for your bags that receives plenty of sunlight throughout the day. If you live in a particularly hot climate, you may need to provide some afternoon shade to prevent the plants from overheating. The portability of bags makes it easy to move your plants to chase the sun or protect them from extreme weather conditions.
When is the best time to plant sweet potato slips in bags?
The best time to plant sweet potato slips in bags is after the last frost, when the soil has warmed up to at least 65 degrees Fahrenheit. Sweet potatoes are warm-weather crops and are sensitive to frost. If you live in an area with a short growing season, you can start your slips indoors a few weeks before the last frost. This will give them a head start and allow you to harvest your sweet potatoes earlier in the fall.
How do I know when my sweet potatoes are ready to harvest?
Sweet potatoes are typically ready to harvest about 90-120 days after planting. A good indicator that they are ready is when the leaves start to turn yellow and the vines begin to die back. You can also gently dig around the base of the plant to check the size of the sweet potatoes. They should be at least a few inches in diameter. Be careful not to damage the sweet potatoes when harvesting. Use a garden fork to gently lift them out of the soil.
Can I reuse the soil from my sweet potato bags?
Yes, you can reuse the soil from your sweet potato bags, but it’s important to amend it before planting again. Sweet potatoes are heavy feeders and can deplete the soil of nutrients. Before reusing the soil, remove any remaining plant debris and add fresh compost, aged manure, or other organic matter to replenish the nutrients. You may also want to add some slow-release fertilizer to give your next crop a boost. It’s also a good idea to test the soil pH and adjust it if necessary.
What are some common pests and diseases that affect sweet potato plants?
Some common pests that affect sweet potato plants include aphids, flea beetles, and sweet potato weevils. Diseases that can affect sweet potatoes include fusarium wilt, black rot, and scurf. To prevent pests and diseases, choose disease-resistant varieties, practice good sanitation, and monitor your plants regularly. If you notice any signs of pests or diseases, take action immediately. You can use organic pesticides or fungicides to control the problem.
Can I grow sweet potatoes in bags indoors?
While it’s possible to grow sweet potatoes in bags indoors, it can be challenging. Sweet potatoes need a lot of sunlight, so you’ll need to provide them with supplemental lighting. You’ll also need to ensure that they have adequate ventilation and humidity. It’s generally easier to grow sweet potatoes outdoors in bags, where they can get plenty of sunlight and fresh air.
What are some tips for maximizing my sweet potato harvest in bags?
To maximize your sweet potato harvest in bags, choose a sunny location, use well-draining soil, water regularly, and fertilize as needed. You can also try pinching off the tips of the vines to encourage bushier growth and more sweet potato production. Be sure to monitor your plants for pests and diseases and take action immediately if you notice any problems. And most importantly, be patient! Sweet potatoes take time to mature, so don’t get discouraged if you don’t see results right away. With a little care and attention, you can enjoy a bountiful harvest of delicious, homegrown sweet potatoes.
Leave a Comment