
Grow vegetables indoors with kids? Absolutely! Imagine the look on your child’s face when they harvest a juicy tomato they nurtured from a tiny seed, right in your living room! It’s not just a fun activity; it’s a magical learning experience. For centuries, humans have cultivated plants indoors, from the hanging gardens of Babylon to the humble windowsill herb gardens of today. But now, we’re taking it a step further, making it an engaging and educational adventure for our little ones.
Let’s face it, getting kids excited about healthy eating can be a challenge. But what if they were actively involved in the process? That’s where growing vegetables indoors comes in. This DIY guide is packed with simple, kid-friendly tricks and hacks that will transform your home into a mini-farm. We’ll explore easy-to-grow veggies, creative container ideas, and fun experiments that will spark their curiosity about science and nature. Plus, you’ll be amazed at how much more willing they are to try new foods when they’ve grown them themselves! So, are you ready to embark on this exciting journey and grow vegetables indoors with kids? Let’s get started!
Gemüseanbau für Kinder: Ein Indoor-Garten zum Selbermachen
Hallo liebe Gartenfreunde! Habt ihr Lust, mit euren Kindern die Welt des Gärtnerns zu entdecken, auch wenn draußen kein Platz oder das Wetter nicht mitspielt? Dann seid ihr hier genau richtig! Wir bauen gemeinsam einen kleinen Indoor-Gemüsegarten, der nicht nur Spaß macht, sondern auch leckere Ergebnisse liefert. Keine Angst, es ist einfacher als ihr denkt!
Was wir brauchen: Die Materialliste
Bevor wir loslegen, sammeln wir erstmal alles zusammen, was wir für unser kleines Gartenprojekt benötigen. Keine Sorge, die meisten Sachen habt ihr wahrscheinlich schon zu Hause!
* Behälter: Alte Joghurtbecher, leere Konservendosen (gut gereinigt!), Pflanzschalen oder sogar eine alte Plastikkiste – alles ist erlaubt, solange es Platz für Erde und Pflanzen bietet. Achtet nur darauf, dass die Behälter Löcher im Boden haben, damit überschüssiges Wasser ablaufen kann.
* Erde: Spezielle Anzuchterde ist ideal, da sie besonders nährstoffarm ist und die Wurzelbildung fördert. Normale Blumenerde geht aber auch. Vermeidet Gartenerde, da diese oft zu schwer ist und Schädlinge enthalten kann.
* Saatgut: Hier kommt der Spaß! Wählt Gemüsesorten, die schnell wachsen und einfach zu pflegen sind. Radieschen, Kresse, Salat, Spinat oder kleine Tomatensorten sind perfekt für den Anfang.
* Wasser: Eine Gießkanne oder Sprühflasche, um die Erde feucht zu halten.
* Licht: Ein heller Standort am Fenster ist wichtig. Wenn das nicht ausreicht, könnt ihr auch eine Pflanzenlampe verwenden.
* Kleine Schaufel oder Löffel: Zum Befüllen der Behälter mit Erde.
* Etiketten: Kleine Schilder oder Papierstreifen, um zu markieren, was ihr gepflanzt habt. So behaltet ihr den Überblick!
* Optional: Kleine Steine oder Tonscherben für die Drainage am Boden der Behälter.
Schritt-für-Schritt-Anleitung: So legen wir los!
Jetzt geht’s ans Eingemachte! Folgt einfach diesen Schritten, und schon bald könnt ihr eure eigenen kleinen Gemüsepflanzen bewundern.
1. Behälter vorbereiten: Wenn eure Behälter keine Löcher im Boden haben, bohrt vorsichtig ein paar hinein. Das ist wichtig, damit das Wasser ablaufen kann und die Wurzeln nicht faulen.
2. Drainage anlegen (optional): Legt eine Schicht kleine Steine oder Tonscherben auf den Boden der Behälter. Das sorgt für eine gute Drainage und verhindert Staunässe.
3. Erde einfüllen: Füllt die Behälter mit Erde, aber lasst etwa 2-3 cm Platz bis zum Rand. Drückt die Erde leicht an.
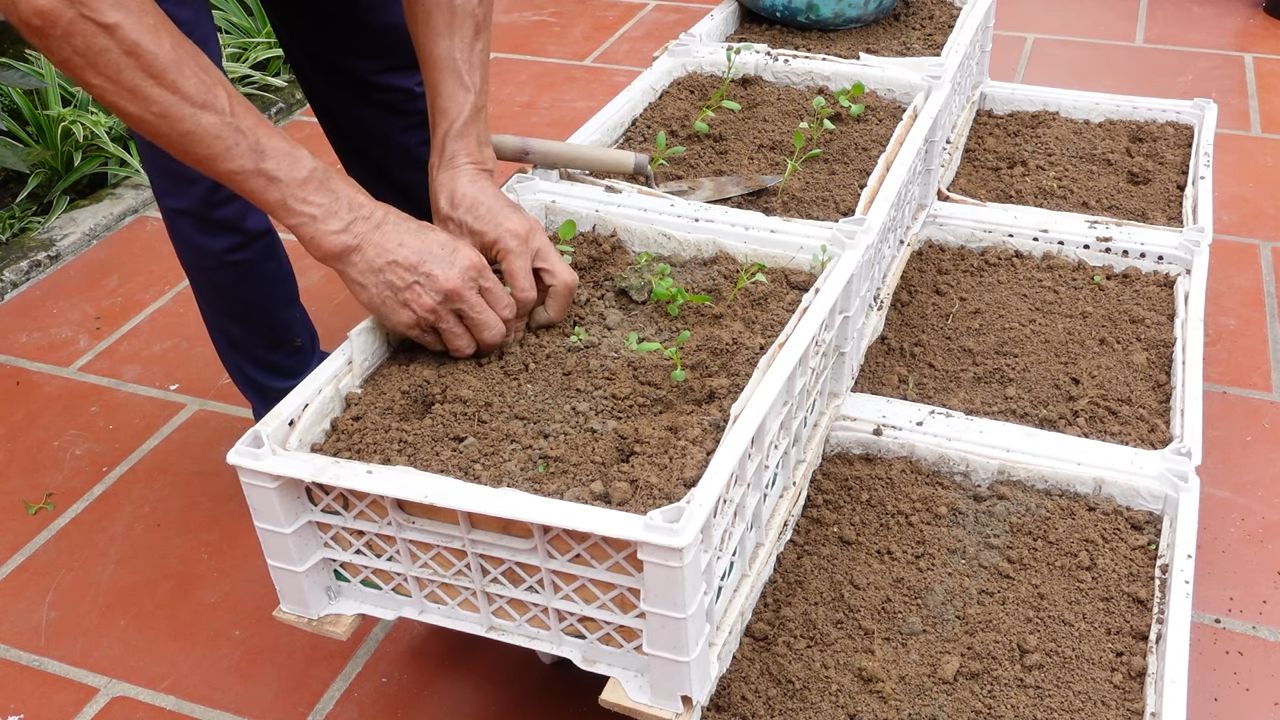
4. Samen säen: Lest die Anweisungen auf der Samenpackung genau durch. Dort steht, wie tief und mit welchem Abstand die Samen gesät werden sollen. In der Regel werden die Samen einfach auf die Erde gelegt und leicht mit Erde bedeckt.
5. Gießen: Gießt die Erde vorsichtig an, sodass sie gut durchfeuchtet ist. Achtet darauf, dass ihr nicht zu viel Wasser verwendet, sonst schwimmen die Samen weg.
6. Beschriften: Vergesst nicht, eure Behälter mit Etiketten zu versehen, damit ihr wisst, was ihr gepflanzt habt.
7. Standort wählen: Stellt die Behälter an einen hellen Standort am Fenster. Ideal ist ein Südfenster, aber auch ein Ost- oder Westfenster kann funktionieren.
8. Geduld haben: Jetzt heißt es warten und beobachten! Die Keimdauer hängt von der Gemüsesorte ab. Kresse keimt zum Beispiel schon nach wenigen Tagen, während Radieschen etwas länger brauchen.
Die Pflege: Damit euer Garten wächst und gedeiht
Damit euer Indoor-Gemüsegarten prächtig gedeiht, ist regelmäßige Pflege wichtig. Aber keine Sorge, es ist nicht viel Arbeit!
* Gießen: Die Erde sollte immer leicht feucht sein, aber nicht nass. Gießt regelmäßig, aber vermeidet Staunässe. Am besten testet ihr mit dem Finger, ob die Erde trocken ist.
* Licht: Achtet darauf, dass eure Pflanzen genügend Licht bekommen. Wenn sie zu wenig Licht haben, werden sie lang und dünn. In diesem Fall könnt ihr eine Pflanzenlampe verwenden.
* Drehen: Dreht die Behälter regelmäßig, damit die Pflanzen gleichmäßig wachsen und sich nicht zum Licht hinbiegen.
* Düngen (optional): Wenn die Pflanzen größer werden, könnt ihr sie ab und zu mit einem organischen Flüssigdünger düngen. Achtet aber darauf, die Dosierungsempfehlungen auf der Packung zu beachten.
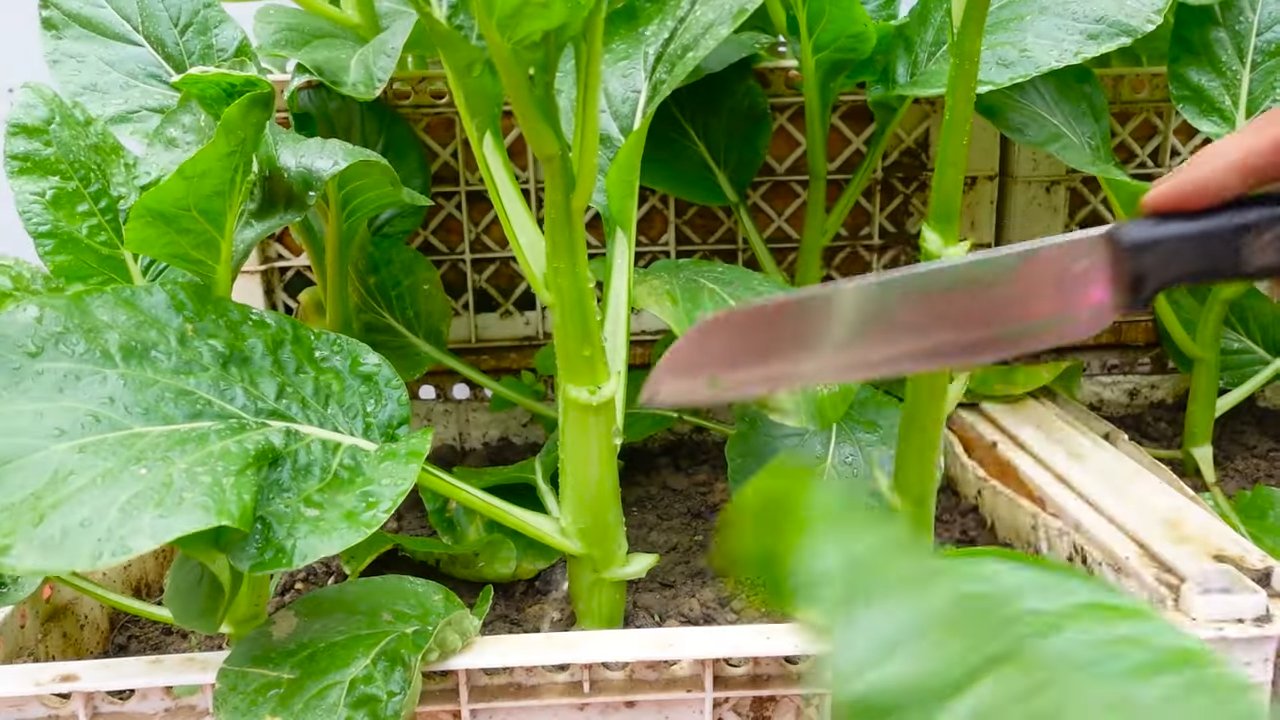
* Ernten: Wenn das Gemüse reif ist, könnt ihr es ernten und genießen! Kresse und Salat können einfach abgeschnitten werden, während Radieschen und Tomaten vorsichtig aus der Erde gezogen werden.
Spezielle Tipps für bestimmte Gemüsesorten
Jede Gemüsesorte hat ihre eigenen Vorlieben. Hier sind ein paar spezielle Tipps für die beliebtesten Sorten für den Indoor-Anbau:
* Kresse: Kresse ist super einfach anzubauen und wächst extrem schnell. Ihr könnt sie sogar auf feuchtem Küchenpapier oder Watte ziehen.
* Radieschen: Radieschen brauchen nicht viel Platz und wachsen relativ schnell. Achtet darauf, dass die Erde locker und gut durchlässig ist.
* Salat: Salat kann in verschiedenen Sorten angebaut werden. Pflücksalat ist besonders praktisch, da ihr immer wieder Blätter ernten könnt.
* Spinat: Spinat braucht einen kühlen Standort und regelmäßige Bewässerung.
* Tomaten: Kleine Tomatensorten wie Cherrytomaten oder Balkontomaten eignen sich gut für den Indoor-Anbau. Sie brauchen viel Licht und regelmäßige Düngung.
Häufige Probleme und Lösungen
Auch beim Indoor-Gärtnern können mal Probleme auftreten. Hier sind ein paar häufige Probleme und wie ihr sie lösen könnt:
* Schimmel: Wenn sich Schimmel auf der Erde bildet, ist die Erde zu feucht. Entfernt den Schimmel und gießt weniger.
* Trauermücken: Trauermücken sind kleine, schwarze Fliegen, die sich in der Erde aufhalten. Sie sind zwar nicht schädlich für die Pflanzen, aber lästig. Ihr könnt sie mit Gelbtafeln oder Nematoden bekämpfen.
* Blattläuse: Blattläuse saugen an den Blättern und können die Pflanzen schwächen. Ihr könnt sie mit einem Wasserstrahl abspülen oder mit einem biologischen Insektizid bekämpfen.
* Gelbe Blätter: Gelbe Blätter können ein Zeichen für Nährstoffmangel sein. Düngt die Pflanzen mit einem Flüssigdünger.
Warum Indoor-Gärtnern mit Kindern so toll ist
Indoor-Gärtnern mit Kindern ist nicht nur eine tolle Beschäftigung, sondern auch eine lehrreiche Erfahrung. Die Kinder lernen, woher ihr Essen kommt, wie Pflanzen wachsen und wie wichtig es ist, die Natur zu respektieren. Außerdem fördert es die Kreativität, die Geduld und die Verantwortung. Und das Beste: Am Ende können sie ihre eigenen, selbst angebauten Gemüse ernten und genießen!
Weitere Ideen für den Indoor-Garten
* Kräutergarten: Baut eure eigenen Kräuter wie Basilikum, Petersilie, Schnittlauch oder Minze an.
* Keimsprossen: Zieht Keimsprossen aus Linsen, Kichererbsen oder Mungbohnen. Das geht super schnell und ist sehr gesund.
* Kartoffeln im Topf: Pflanzt eine Kartoffel in einen Topf und beobachtet, wie sie wächst.
* Avocado ziehen: Steckt einen Avocadokern in ein Glas Wasser und wartet, bis er Wurzeln schlägt.
Ich hoffe, diese Anleitung hat euch inspiriert, euren eigenen Indoor-Gemüsegarten zu starten. Viel Spaß beim Gärtnern! Und vergesst nicht: Auch wenn mal etwas schiefgeht, ist das kein Problem. Gärtnern ist ein Lernprozess, und jede Erfahrung ist wertvoll. Also, ran an die Erde und lasst es sprießen!
Conclusion
So, there you have it! Growing vegetables indoors with kids isn’t just a fun project; it’s a fantastic way to connect with nature, teach valuable life skills, and enjoy fresh, homegrown produce year-round. This DIY approach, focusing on simplicity and engagement, transforms your home into a miniature garden, fostering a sense of accomplishment and wonder in your children.
Why is this a must-try? Because it’s more than just planting seeds. It’s about creating memories, sparking curiosity, and instilling a lifelong appreciation for healthy eating and sustainable living. Imagine the pride on your child’s face when they harvest their own lettuce for a salad or pluck a ripe cherry tomato straight from the vine. These are the moments that make this DIY project truly worthwhile.
But don’t stop there! The possibilities are endless. Experiment with different types of vegetables. Try growing herbs like basil, mint, or chives alongside your vegetables for added flavor and fragrance. Get creative with your containers – repurpose old jars, plastic bottles, or even create a vertical garden using recycled materials. Consider adding a small grow light to boost growth during the darker winter months. You can even introduce companion planting, pairing vegetables that benefit each other, like basil and tomatoes.
This DIY vegetable garden is a journey of discovery, and we encourage you to embrace the learning process. Don’t be afraid to make mistakes – they’re all part of the fun! The most important thing is to get your kids involved, let them get their hands dirty, and enjoy the experience together.
We’re confident that you’ll find this DIY trick for growing vegetables indoors with kids to be a rewarding and enriching experience. It’s a simple, affordable, and effective way to bring the joy of gardening into your home and nurture a love for nature in your children.
Now, it’s your turn! We’d love to hear about your experiences. Share your photos, tips, and stories in the comments below. What vegetables did you choose to grow? What challenges did you face, and how did you overcome them? What did your kids learn from the experience? Let’s create a community of indoor gardeners and inspire others to embark on this exciting adventure. So, grab your seeds, gather your supplies, and get ready to grow! Happy gardening!
Frequently Asked Questions (FAQ)
What are the easiest vegetables to grow indoors with kids?
Starting with easy-to-grow vegetables is key to keeping kids engaged and motivated. Some excellent choices include:
* Lettuce: Lettuce is fast-growing and relatively low-maintenance. You can harvest leaves as needed, making it a rewarding crop for impatient young gardeners. Loose-leaf varieties are particularly well-suited for indoor growing.
* Spinach: Similar to lettuce, spinach is quick to mature and can be harvested multiple times. It’s also packed with nutrients, making it a healthy addition to your family’s diet.
* Radishes: Radishes are incredibly fast-growing, often ready to harvest in just a few weeks. Their peppery flavor adds a zing to salads and snacks.
* Cherry Tomatoes: Cherry tomatoes are a favorite among kids due to their small size and sweet taste. They require a bit more space and sunlight than other vegetables on this list, but the payoff is well worth it.
* Green Onions: Green onions are incredibly easy to regrow from scraps. Simply place the root end of a green onion in a glass of water, and it will start to sprout new growth within days.
* Herbs: While not technically vegetables, herbs like basil, mint, and chives are also easy to grow indoors and can add flavor to your homegrown meals.
How much sunlight do indoor vegetables need?
Most vegetables require at least 6-8 hours of sunlight per day to thrive. If you don’t have a sunny windowsill, you can supplement with a grow light. LED grow lights are energy-efficient and provide the full spectrum of light that plants need. Place the grow light a few inches above the plants and adjust as they grow.
What kind of soil should I use for indoor vegetable gardening?
Use a high-quality potting mix specifically formulated for vegetables. Avoid using garden soil, as it can be too heavy and may contain pests or diseases. A good potting mix will provide adequate drainage and aeration for your plants’ roots.
How often should I water my indoor vegetables?
Water your vegetables when the top inch of soil feels dry to the touch. Avoid overwatering, as this can lead to root rot. Water thoroughly until water drains out of the bottom of the pot.
What kind of containers are best for growing vegetables indoors?
Choose containers that are appropriately sized for the vegetables you’re growing. Make sure the containers have drainage holes to prevent waterlogging. You can use plastic pots, terracotta pots, or even repurposed containers like yogurt cups or plastic bottles.
How can I prevent pests and diseases in my indoor vegetable garden?
Inspect your plants regularly for signs of pests or diseases. If you spot any problems, address them promptly. You can use organic pest control methods like insecticidal soap or neem oil. Ensure good air circulation around your plants to prevent fungal diseases.
How can I get my kids involved in the gardening process?
There are many ways to get your kids involved in growing vegetables indoors. Let them help with planting seeds, watering plants, and harvesting vegetables. Teach them about the different parts of a plant and how they grow. Make it a fun and educational experience for the whole family.
What if my vegetables aren’t growing well?
If your vegetables aren’t growing well, there could be several reasons. Check the amount of sunlight they’re receiving, the quality of the soil, and the watering schedule. Make sure they’re not being overwatered or underwatered. You may also need to fertilize them with a balanced fertilizer.
Can I grow vegetables indoors year-round?
Yes, you can grow vegetables indoors year-round with the right conditions. Provide adequate sunlight or grow lights, maintain a consistent temperature, and water and fertilize your plants regularly.
How do I harvest my indoor vegetables?
Harvest your vegetables when they’re ripe and ready to eat. Lettuce and spinach can be harvested by cutting off individual leaves. Radishes are ready to harvest when they’re about an inch in diameter. Cherry tomatoes are ready to harvest when they’re fully colored and slightly soft to the touch.
Leave a Comment