
Growing Cabbage Successfully can feel like a real victory in the home garden! Imagine serving up a crisp, homegrown coleslaw or a hearty cabbage soup made with vegetables you nurtured from tiny seedlings. It’s a rewarding experience, and I’m here to tell you it’s absolutely achievable, even if you’re a beginner gardener.
Cabbage has a rich history, dating back to ancient times. The Romans and Greeks prized it for its nutritional value and medicinal properties. Over centuries, it has become a staple in cuisines around the world, from sauerkraut in Germany to kimchi in Korea. It’s a testament to its versatility and adaptability.
But let’s be honest, growing cabbage successfully isn’t always a walk in the park. Pests, diseases, and improper growing conditions can quickly derail your efforts. That’s why I’ve put together this guide filled with DIY tricks and hacks to help you navigate the challenges and reap a bountiful harvest. We’ll cover everything from soil preparation and seed starting to pest control and harvesting, ensuring you have all the knowledge you need to enjoy fresh, delicious cabbage straight from your backyard. So, grab your gardening gloves, and let’s get started!
Kohl Anbauen: Dein DIY-Leitfaden für eine reiche Ernte
Hallo Gartenfreunde! Ich liebe es, frisches Gemüse direkt aus meinem Garten zu ernten, und Kohl ist da keine Ausnahme. Er ist vielseitig, gesund und überraschend einfach anzubauen, wenn man ein paar grundlegende Dinge beachtet. In diesem Artikel zeige ich dir, wie du erfolgreich Kohl anbauen kannst, von der Aussaat bis zur Ernte. Los geht’s!
Die Vorbereitung: Der Schlüssel zum Erfolg
Bevor wir mit dem Pflanzen beginnen, müssen wir sicherstellen, dass wir die richtigen Voraussetzungen schaffen.
* Die richtige Kohlsorte wählen: Es gibt unzählige Kohlsorten, von Weißkohl über Rotkohl bis hin zu Wirsing und Rosenkohl. Überlege dir, welche Sorten du am liebsten isst und welche gut in dein Klima passen. Frühsorten sind ideal, wenn du eine schnelle Ernte möchtest, während Spätsorten besser für die Lagerung geeignet sind.
* Der perfekte Standort: Kohl liebt die Sonne! Wähle einen Standort, der mindestens sechs Stunden Sonnenlicht pro Tag bekommt. Außerdem sollte der Boden gut entwässert sein, da Staunässe zu Wurzelfäule führen kann.
* Bodenverbesserung: Kohl ist ein Starkzehrer, das heißt, er benötigt viele Nährstoffe. Verbessere den Boden vor dem Pflanzen mit Kompost oder gut verrottetem Mist. Das sorgt für eine gute Grundlage und versorgt die Pflanzen mit allem, was sie brauchen.
* pH-Wert des Bodens: Kohl bevorzugt einen leicht sauren bis neutralen pH-Wert zwischen 6,0 und 7,0. Du kannst den pH-Wert mit einem Bodentest überprüfen und gegebenenfalls mit Kalk oder Schwefel anpassen.
Aussaat: Der Start ins Kohl-Abenteuer
Es gibt zwei Möglichkeiten, Kohl anzubauen: Entweder du säst die Samen direkt ins Beet oder du ziehst Jungpflanzen vor. Ich bevorzuge die Voranzucht, da sie mir mehr Kontrolle über den Prozess gibt und die Pflanzen einen Vorsprung haben.
* Wann aussäen?: Der Zeitpunkt der Aussaat hängt von der Kohlsorte und deinem Klima ab. Frühsorten kannst du bereits im Februar oder März im Haus vorziehen, während Spätsorten erst im April oder Mai ausgesät werden sollten.
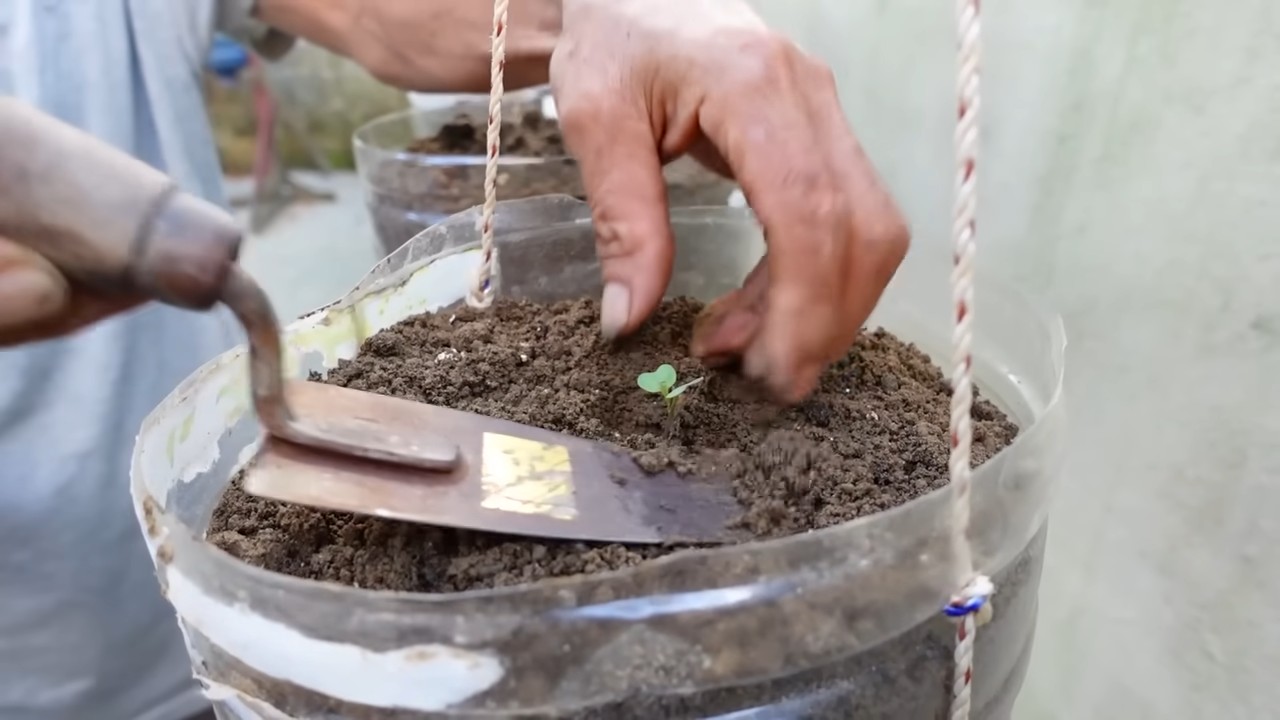
* Aussaat im Haus:
1. Fülle Anzuchttöpfe oder eine Anzuchtschale mit Anzuchterde.
2. Drücke die Erde leicht an und säe die Kohlsamen etwa 1 cm tief.
3. Bedecke die Samen mit Erde und gieße sie vorsichtig an.
4. Stelle die Anzuchttöpfe an einen hellen und warmen Ort (ca. 18-20°C).
5. Halte die Erde feucht, aber nicht nass.
6. Nach etwa einer Woche sollten die Samen keimen.
* Direktsaat im Beet:
1. Bereite das Beet vor, indem du den Boden lockerst und Kompost einarbeitest.
2. Ziehe Saatrillen im Abstand von etwa 40-50 cm.
3. Säe die Kohlsamen etwa 1 cm tief in die Rillen.
4. Bedecke die Samen mit Erde und gieße sie vorsichtig an.
5. Halte die Erde feucht, bis die Samen keimen.
6. Sobald die Pflanzen groß genug sind, vereinzele sie auf einen Abstand von 40-50 cm.
Pflanzung: Ab ins Beet!
Sobald die Jungpflanzen kräftig genug sind (etwa 10-15 cm hoch), können sie ins Beet umgepflanzt werden.
* Vorbereitung des Beets: Lockere den Boden erneut auf und entferne Unkraut.
* Pflanzabstand: Der Pflanzabstand hängt von der Kohlsorte ab. Frühsorten können etwas enger gepflanzt werden (ca. 40 cm), während Spätsorten mehr Platz benötigen (ca. 50-60 cm).
* Pflanzen:
1. Hebe Pflanzlöcher aus, die etwas größer sind als die Wurzelballen der Jungpflanzen.
2. Setze die Jungpflanzen in die Löcher und fülle sie mit Erde auf.
3. Drücke die Erde leicht an und gieße die Pflanzen gründlich an.
* Schutz vor Schädlingen: Kohl ist leider sehr anfällig für Schädlinge wie Kohlweißlinge und Erdflöhe. Schütze die Pflanzen mit einem Insektenschutznetz oder behandle sie bei Bedarf mit einem biologischen Schädlingsbekämpfungsmittel.
Pflege: Damit der Kohl prächtig gedeiht
Die richtige Pflege ist entscheidend für eine reiche Ernte.
* Gießen: Kohl benötigt regelmäßig Wasser, besonders während trockener Perioden. Gieße am besten morgens, damit die Blätter bis zum Abend abtrocknen können. Vermeide Staunässe, da sie zu Wurzelfäule führen kann.
* Düngen: Kohl ist ein Starkzehrer und benötigt regelmäßig Nachschub an Nährstoffen. Dünge die Pflanzen alle zwei bis drei Wochen mit einem organischen Dünger oder Komposttee.
* Unkrautbekämpfung: Halte das Beet unkrautfrei, da Unkraut den Kohl die Nährstoffe streitig macht. Jäte regelmäßig oder verwende Mulch, um das Unkrautwachstum zu unterdrücken.
* Schutz vor Schädlingen und Krankheiten: Kontrolliere die Pflanzen regelmäßig auf Schädlinge und Krankheiten. Bei Befall solltest du schnell handeln, um eine Ausbreitung zu verhindern.
Schädlinge und Krankheiten: Die häufigsten Probleme und ihre Lösungen
Kohl kann von verschiedenen Schädlingen und Krankheiten befallen werden. Hier sind die häufigsten Probleme und wie du sie bekämpfen kannst:
* Kohlweißling: Die Raupen des Kohlweißlings fressen die Blätter des Kohls kahl. Du kannst sie absammeln oder die Pflanzen mit einem Insektenschutznetz schützen.
* Erdflöhe: Erdflöhe sind kleine Käfer, die Löcher in die Blätter fressen. Du kannst sie mit einem Insektenschutznetz abhalten oder die Pflanzen mit Kieselgur bestäuben.
* Kohlfliege: Die Larven der Kohlfliege fressen an den Wurzeln des Kohls. Du kannst sie mit einem Insektenschutznetz abhalten oder die Pflanzen mit Nematoden behandeln.
* Kohlhernie: Kohlhernie ist eine Pilzkrankheit, die zu Wucherungen an den Wurzeln führt. Du kannst sie vermeiden, indem du eine Fruchtfolge einhältst und den Boden kalkst.
* Falscher Mehltau: Falscher Mehltau ist eine Pilzkrankheit, die sich durch gelbliche Flecken auf den Blättern äußert. Du kannst sie mit einem Fungizid bekämpfen oder die Pflanzen mit Brennnesseljauche stärken.
Ernte: Der Lohn der Mühe
Endlich ist es soweit: Die Kohlköpfe sind reif und können geerntet werden!
* Wann ernten?: Der Zeitpunkt der Ernte hängt von der Kohlsorte ab. Frühsorten sind in der Regel nach etwa 60-80 Tagen erntereif, während Spätsorten länger brauchen (ca. 100-120 Tage).
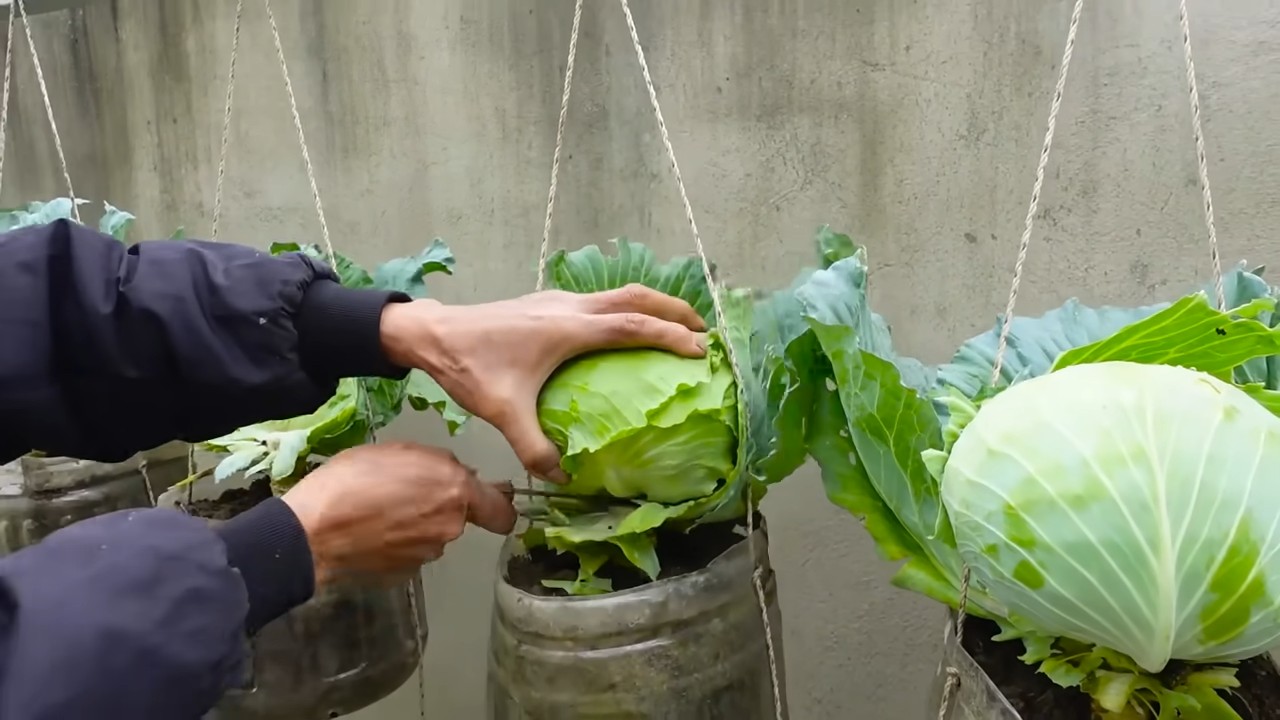
* Wie ernten?: Schneide den Kohlkopf mit einem scharfen Messer oder einer Gartenschere ab. Lasse dabei einige Blätter am Strunk stehen, damit der Kohlkopf länger frisch bleibt.
* Lagerung: Spätsorten können gut gelagert werden. Lagere die Kohlköpfe an einem kühlen und dunklen Ort (z.B. im Keller) bei einer Temperatur von 0-2°C.
Zusätzliche Tipps für eine erfolgreiche Kohlernte
* Fruchtfolge beachten: Baue Kohl nicht jedes Jahr am selben Standort an, um Krankheiten und Schädlingen vorzubeugen.
* Mischkultur: Pflanze Kohl in Mischkultur mit anderen Pflanzen, die ihn vor Schädlingen schützen oder seinen Nährstoffbedarf ergänzen. Gute Partner sind z.B. Ringelblumen, Tagetes, Dill und Kamille.
* Regelmäßig kontrollieren: Kontrolliere die Pflanzen regelmäßig auf Schädlinge und Krankheiten, um frühzeitig handeln zu können.
* Nicht aufgeben: Auch wenn es mal nicht so gut läuft, lass dich nicht ent
Conclusion
So, there you have it! Growing cabbage successfully doesn’t have to be a daunting task reserved for seasoned gardeners. By implementing these simple yet effective DIY tricks, you can transform your garden into a cabbage haven, yielding crisp, flavorful heads that will elevate your culinary creations. We’ve covered everything from soil preparation and seedling selection to pest control and harvesting, providing you with a comprehensive guide to cabbage cultivation.
Why is this a must-try? Because store-bought cabbage simply can’t compare to the taste and satisfaction of harvesting your own. The vibrant color, the crisp texture, and the fresh, earthy flavor are unparalleled. Plus, you have complete control over the growing process, ensuring that your cabbage is free from harmful pesticides and chemicals. You’ll be amazed at the difference in quality and taste.
But the benefits extend beyond just flavor. Growing your own cabbage is a rewarding experience that connects you with nature, promotes sustainable living, and provides you with a healthy and nutritious food source. It’s a fantastic way to reduce your carbon footprint, save money on groceries, and enjoy the fruits (or rather, vegetables) of your labor.
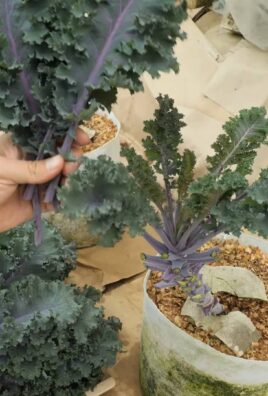
Looking for variations? Consider experimenting with different cabbage varieties. Red cabbage adds a beautiful splash of color to salads and slaws, while Savoy cabbage offers a more delicate flavor and crinkled leaves. You can also try growing different sizes of cabbage, from small, compact heads perfect for individual servings to larger heads ideal for feeding a crowd. Don’t be afraid to get creative and tailor your cabbage garden to your specific needs and preferences.
Another exciting variation is companion planting. Cabbage thrives when planted alongside certain herbs and vegetables that deter pests and improve soil health. Consider planting rosemary, thyme, or dill near your cabbage to repel cabbage moths and other unwanted visitors. Marigolds are also a great addition to your garden, as they attract beneficial insects that prey on cabbage pests.
And remember, success in gardening often comes down to observation and adaptation. Pay close attention to your cabbage plants, monitor their growth, and adjust your care routine as needed. If you notice any signs of pests or diseases, take action promptly to prevent them from spreading. Don’t be discouraged by setbacks; every gardening season is a learning opportunity.
We wholeheartedly encourage you to try these DIY tricks for growing cabbage successfully. We are confident that you will be delighted with the results. Imagine the satisfaction of serving a delicious cabbage dish made with ingredients you grew yourself. It’s a feeling that’s hard to beat.
So, grab your gardening gloves, prepare your soil, and get ready to embark on a cabbage-growing adventure. We can’t wait to hear about your experiences! Share your photos, tips, and stories with us in the comments below. Let’s create a community of cabbage enthusiasts and inspire others to discover the joys of growing their own food. Happy gardening!
Frequently Asked Questions (FAQ)
What is the best time of year to plant cabbage?
The best time to plant cabbage depends on your climate and the specific variety you’re growing. Generally, cabbage is a cool-season crop, meaning it thrives in temperatures between 60°F and 70°F (15°C and 21°C). For spring crops, start seeds indoors 6-8 weeks before the last expected frost. Transplant seedlings outdoors 2-3 weeks before the last frost. For fall crops, start seeds indoors in mid-summer and transplant seedlings outdoors in late summer or early fall. Check your local frost dates and the specific recommendations for your chosen cabbage variety for the most accurate timing.
How much sunlight does cabbage need?
Cabbage requires at least 6 hours of direct sunlight per day to thrive. Choose a planting location that receives ample sunlight throughout the day. If you live in a particularly hot climate, some afternoon shade may be beneficial to prevent the leaves from scorching.
What type of soil is best for growing cabbage?
Cabbage prefers well-drained, fertile soil that is rich in organic matter. The ideal soil pH is between 6.0 and 7.0. Before planting, amend your soil with compost, aged manure, or other organic materials to improve its fertility and drainage. Avoid planting cabbage in heavy clay soil, as this can lead to root rot.
How often should I water my cabbage plants?
Cabbage plants need consistent moisture to thrive. Water deeply and regularly, especially during dry periods. Aim to keep the soil consistently moist but not waterlogged. A good rule of thumb is to water when the top inch of soil feels dry to the touch. Mulching around your cabbage plants can help retain moisture and suppress weeds.
What are some common pests and diseases that affect cabbage?
Cabbage is susceptible to a variety of pests and diseases, including cabbage moths, cabbage loopers, aphids, flea beetles, clubroot, and black rot. To prevent pest and disease problems, practice good garden hygiene, such as removing plant debris and weeds. Use row covers to protect your plants from pests. Inspect your plants regularly for signs of infestation or disease and take action promptly. Organic pest control methods, such as insecticidal soap and Bacillus thuringiensis (Bt), can be effective against many cabbage pests. For disease problems, choose disease-resistant varieties and practice crop rotation.
How do I know when my cabbage is ready to harvest?
Cabbage is ready to harvest when the head is firm and solid to the touch. The size of the head will vary depending on the variety, but generally, a mature cabbage head will be about 6-8 inches in diameter. To harvest, use a sharp knife to cut the head from the stem, leaving a few outer leaves attached.
Can I grow cabbage in containers?
Yes, you can grow cabbage in containers, but you’ll need to choose a large container that is at least 12 inches in diameter and 12 inches deep. Use a well-draining potting mix and provide your cabbage plants with plenty of sunlight and water. Container-grown cabbage may require more frequent fertilization than cabbage grown in the ground.
What are some good companion plants for cabbage?
Good companion plants for cabbage include rosemary, thyme, dill, marigolds, nasturtiums, and onions. These plants can help deter pests, attract beneficial insects, and improve soil health. Avoid planting cabbage near other members of the brassica family, such as broccoli, cauliflower, and kale, as they can attract the same pests and diseases.
How can I prevent cabbage from splitting?
Cabbage heads can split if they receive too much water after a period of drought. To prevent splitting, water your cabbage plants consistently and avoid letting the soil dry out completely. You can also try cutting a few roots on one side of the plant to slow down water uptake.
Is it possible to get a second harvest from my cabbage plant?
After harvesting the main head of cabbage, you may be able to get a second harvest of smaller side shoots. Cut off the main head, leaving the lower leaves intact. New shoots will emerge from the leaf axils. These shoots can be harvested when they reach a usable size. However, the side shoots will be smaller and less dense than the main head.


Leave a Comment