
Growing Choi Sum Easier is something I know we all dream about, right? Imagine stepping out into your backyard and harvesting fresh, vibrant Choi Sum whenever you need it for a delicious stir-fry or a healthy side dish. No more last-minute grocery store runs or settling for wilted greens! This isn’t just about convenience; it’s about connecting with nature and enjoying the incredible flavor of homegrown produce.
Choi Sum, also known as Chinese flowering cabbage, has been a staple in Asian cuisine for centuries. Its cultivation dates back to ancient China, where it was prized for its nutritional value and versatility. Today, it’s enjoyed worldwide, and I’m here to tell you that growing it yourself is easier than you think!
Let’s face it, sometimes gardening can feel overwhelming. Pests, diseases, and unpredictable weather can all throw a wrench in your plans. But don’t worry, I’ve got you covered! This DIY guide is packed with simple yet effective tricks and hacks that will help you growing Choi Sum easier and more successfully, even if you’re a complete beginner. We’ll tackle everything from seed starting to pest control, ensuring you have a bountiful harvest of this delicious and nutritious vegetable. Get ready to transform your garden and your plate!
Choi Sum Anbauen: Dein einfacher DIY-Leitfaden für eine reiche Ernte
Hey Gartenfreunde! Habt ihr Lust, euer eigenes Choi Sum anzubauen? Es ist einfacher als ihr denkt und super lohnend, wenn ihr die frischen, knackigen Blätter auf eurem Teller habt. Ich zeige euch, wie ihr mit ein paar einfachen Schritten und etwas Geduld eine reiche Ernte erzielen könnt. Los geht’s!
Was du für den Choi Sum Anbau brauchst
Bevor wir loslegen, hier eine Liste der Dinge, die ihr benötigt:
* Choi Sum Samen: Wählt eine Sorte, die euch gefällt. Es gibt verschiedene, also schaut euch um!
* Anzuchterde oder Aussaaterde: Diese ist feiner und nährstoffärmer als normale Blumenerde und ideal für Keimlinge.
* Töpfe oder Anzuchtschalen: Für die Voranzucht.
* Gartenerde oder Kompost: Für das Beet oder größere Töpfe, in die ihr die Pflanzen später umsetzen werdet.
* Gießkanne oder Sprühflasche: Zum Bewässern.
* Gartenwerkzeug: Eine kleine Schaufel oder ein Pflanzholz.
* (Optional) Pflanzenetiketten: Um den Überblick zu behalten.
* (Optional) Dünger: Ein organischer Gemüsedünger ist eine gute Wahl.
Die Vorbereitung: Der Schlüssel zum Erfolg
Bevor wir mit dem eigentlichen Anbau beginnen, ist eine gute Vorbereitung entscheidend. Das betrifft sowohl die Erde als auch die Anzuchtgefäße.
* Die richtige Erde: Choi Sum bevorzugt einen lockeren, humusreichen Boden. Wenn ihr ein Beet vorbereitet, lockert die Erde gut auf und mischt Kompost unter. Für Töpfe könnt ihr eine Mischung aus Gartenerde und Kompost verwenden. Achtet darauf, dass die Erde gut durchlässig ist, damit sich keine Staunässe bildet.
* Die Anzuchtgefäße: Reinigt eure Töpfe oder Anzuchtschalen gründlich, um Krankheiten vorzubeugen. Füllt sie dann mit Anzuchterde.
Schritt-für-Schritt Anleitung: Choi Sum säen und vorziehen
Jetzt geht es ans Eingemachte! Hier ist eine detaillierte Anleitung, wie ihr eure Choi Sum Samen säen und vorziehen könnt:
1. Samen säen: Macht kleine Vertiefungen in die Anzuchterde (ca. 0,5 cm tief). Legt in jede Vertiefung 2-3 Samen. Bedeckt die Samen leicht mit Erde und drückt sie vorsichtig an.
2. Bewässern: Befeuchtet die Erde vorsichtig mit einer Sprühflasche oder einer Gießkanne mit Brauseaufsatz. Die Erde sollte feucht, aber nicht nass sein.
3. Standort: Stellt die Anzuchtschalen an einen hellen, warmen Ort. Eine Temperatur von 18-22°C ist ideal für die Keimung. Vermeidet direkte Sonneneinstrahlung, da diese die Keimlinge verbrennen kann.
4. Feuchtigkeit halten: Haltet die Erde gleichmäßig feucht. Ihr könnt die Anzuchtschalen mit einer durchsichtigen Folie oder einem Deckel abdecken, um die Luftfeuchtigkeit zu erhöhen. Lüftet die Abdeckung aber regelmäßig, um Schimmelbildung zu vermeiden.
5. Keimung: Die Samen keimen in der Regel innerhalb von 5-10 Tagen. Sobald die Keimlinge erscheinen, entfernt die Abdeckung.
6. Pikieren: Wenn die Keimlinge ihre ersten richtigen Blätter (nach den Keimblättern) entwickelt haben, ist es Zeit, sie zu pikieren. Das bedeutet, dass ihr die kleinen Pflänzchen vorsichtig aus der Anzuchtschale nehmt und in separate Töpfe oder größere Anzuchtschalen umpflanzt. Achtet darauf, die Wurzeln nicht zu beschädigen. Setzt die Pflänzchen etwas tiefer in die Erde, bis zu den ersten Blättern.
Choi Sum auspflanzen: Ab ins Beet oder in den Topf!
Nachdem eure Choi Sum Pflänzchen kräftig genug sind, können sie ins Beet oder in größere Töpfe umziehen.
1. Zeitpunkt: Pflanzt die Choi Sum Pflänzchen aus, sobald die Frostgefahr vorüber ist (in der Regel ab Mitte Mai). Sie vertragen keinen Frost.
2. Abhärten: Bevor ihr die Pflänzchen auspflanzt, solltet ihr sie einige Tage lang abhärten. Das bedeutet, dass ihr sie tagsüber für einige Stunden ins Freie stellt, um sie an die Sonne und die Temperaturen zu gewöhnen.
3. Pflanzabstand: Pflanzt die Choi Sum Pflänzchen im Beet oder in Töpfen mit einem Abstand von ca. 20-30 cm zueinander.
4. Pflanzen: Grabt kleine Löcher, die groß genug sind, um die Wurzelballen der Pflänzchen aufzunehmen. Setzt die Pflänzchen vorsichtig in die Löcher und füllt sie mit Erde auf. Drückt die Erde leicht an.
5. Bewässern: Gießt die frisch ausgepflanzten Choi Sum Pflänzchen gründlich.
Pflege: So bleiben deine Choi Sum Pflanzen glücklich
Damit eure Choi Sum Pflanzen gut wachsen und eine reiche Ernte bringen, ist die richtige Pflege wichtig.
1. Bewässerung: Choi Sum braucht regelmäßig Wasser, besonders bei trockenem Wetter. Die Erde sollte immer leicht feucht sein, aber nicht nass. Gießt am besten morgens oder abends, um Verdunstung zu vermeiden.
2. Düngung: Düngt eure Choi Sum Pflanzen regelmäßig mit einem organischen Gemüsedünger. Befolgt dabei die Anweisungen auf der Verpackung.
3. Unkrautbekämpfung: Haltet das Beet oder die Töpfe unkrautfrei. Unkraut konkurriert mit den Choi Sum Pflanzen um Nährstoffe und Wasser.
4. Schutz vor Schädlingen: Choi Sum kann von verschiedenen Schädlingen befallen werden, wie z.B. Schnecken, Erdflöhe oder Kohlweißlinge. Kontrolliert eure Pflanzen regelmäßig und bekämpft Schädlinge bei Bedarf mit geeigneten Mitteln. Eine Abdeckung mit einem Insektenschutznetz kann helfen, Schädlinge fernzuhalten.
5. Schutz vor der Sonne: Bei sehr heißem Wetter kann es sinnvoll sein, die Choi Sum Pflanzen mit einem Schattiernetz vor direkter Sonneneinstrahlung zu schützen.
Ernte: Der Lohn deiner Mühe
Nach etwa 4-6 Wochen könnt ihr eure Choi Sum ernten.
1. Zeitpunkt: Erntet die Choi Sum Pflanzen, wenn sie eine Höhe von ca. 20-30 cm erreicht haben.
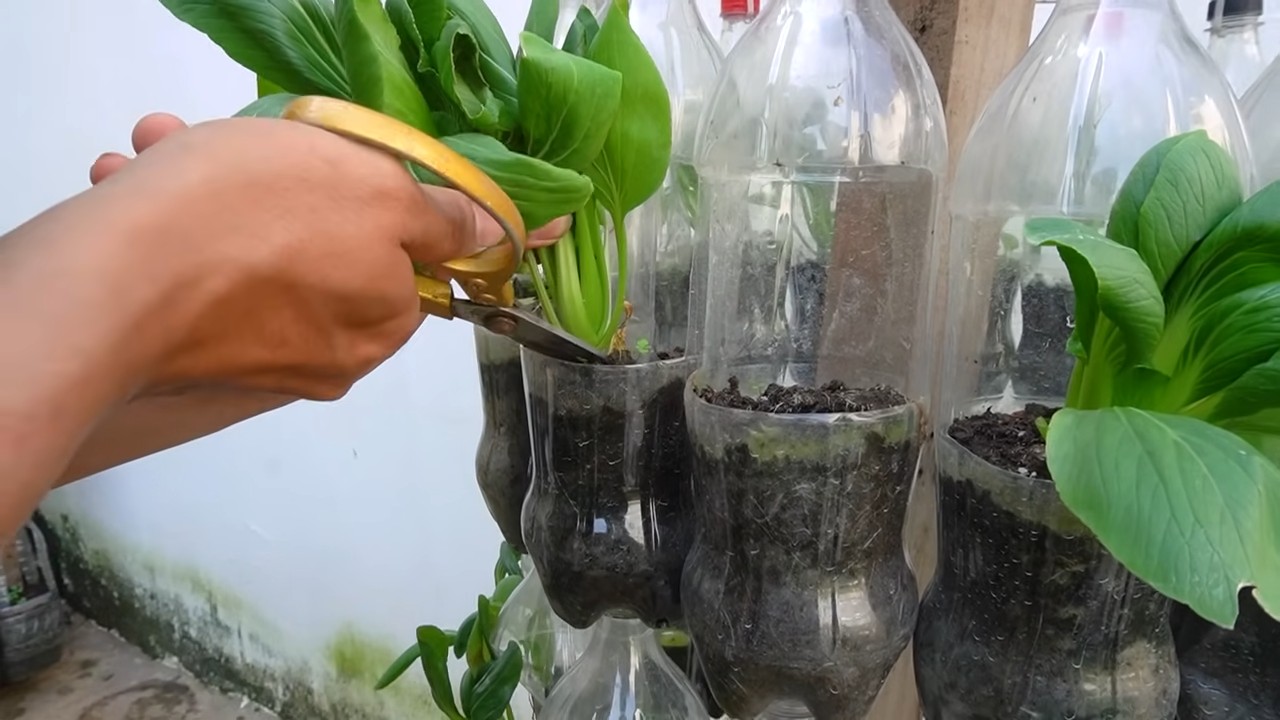
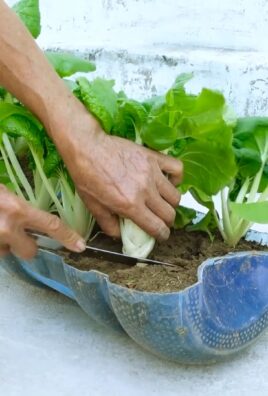
2. Erntemethode: Schneidet die Pflanzen knapp über dem Boden ab. Ihr könnt auch nur einzelne Blätter ernten, um die Pflanze zum weiteren Wachstum anzuregen.
3. Lagerung: Choi Sum ist nicht lange haltbar. Am besten verarbeitet ihr sie direkt nach der Ernte. Im Kühlschrank halten sie sich in einem Plastikbeutel für ein paar Tage.
Zusätzliche Tipps für eine erfolgreiche Choi Sum Ernte
* Aussaatzeitpunkt: Choi Sum kann mehrmals im Jahr ausgesät werden. Die beste Zeit für die Aussaat ist im Frühjahr (März-April) oder im Spätsommer (August-September).
* Sortenwahl: Es gibt verschiedene Choi Sum Sorten. Informiert euch über die Eigenschaften der verschiedenen Sorten und wählt die, die am besten zu euren Bedürfnissen passen.
* Fruchtfolge: Achtet auf eine gute Fruchtfolge. Baut Choi Sum nicht jedes Jahr am selben Standort an.
* Beobachtung: Beobachtet eure Pflanzen regelmäßig und reagiert schnell auf Probleme.
Häufige Probleme und Lösungen
* Gelbe Blätter: Gelbe Blätter können ein Zeichen für Nährstoffmangel, Wassermangel oder Staunässe sein. Überprüft die Bodenfeuchtigkeit und düngt bei Bedarf.
* Schädlinge: Bekämpft Schädlinge frühzeitig, um größere Schäden zu vermeiden.
* Vorzeitiges Schießen: Bei zu hohen Temperaturen oder Wassermangel kann Choi Sum vorzeitig schießen (Blüten bilden). Achtet auf eine ausreichende Bewässerung und schützt die Pflanzen bei Bedarf vor der Sonne.
Ich hoffe, dieser Leitfaden hilft euch dabei,
Conclusion
So, there you have it! Growing Choi Sum Easier than you ever imagined, right in your own backyard (or even on your balcony!). This isn’t just about saving a few dollars at the grocery store; it’s about connecting with your food, understanding the growing process, and enjoying the unparalleled freshness that only homegrown vegetables can offer.
Why is this DIY trick a must-try? Because it simplifies the entire process. We’ve bypassed the common pitfalls that often discourage beginner gardeners, focusing on techniques that maximize your chances of success. From seed selection to pest control, we’ve streamlined the steps to make growing Choi Sum accessible to everyone, regardless of their experience level. Imagine the satisfaction of harvesting your own vibrant, leafy greens, knowing exactly where they came from and what went into their cultivation. That’s a feeling you can’t buy in a store.
But don’t stop there! Experiment with different varieties of Choi Sum. Try growing baby Choi Sum for a more delicate flavor and texture, or explore varieties with different colored stems for a visually appealing addition to your garden. Consider companion planting – basil, dill, and chamomile are all excellent choices that can help deter pests and improve the overall health of your Choi Sum plants. You can also adjust the spacing between plants to see how it affects their size and yield. Some gardeners prefer a denser planting for smaller, more tender leaves, while others opt for wider spacing to encourage larger, more mature plants.
And remember, growing is a learning process. Don’t be discouraged if you encounter challenges along the way. Every mistake is an opportunity to learn and improve your gardening skills. The key is to be patient, observant, and willing to adapt your approach as needed.
We’ve armed you with the knowledge and the techniques to succeed. Now, it’s time to get your hands dirty! Plant those seeds, nurture your seedlings, and watch your Choi Sum flourish. We are confident that you’ll be amazed by the results.
We truly believe that this method of Growing Choi Sum Easier is a game-changer for home gardeners. It’s efficient, effective, and incredibly rewarding. So, what are you waiting for? Give it a try!
Once you’ve harvested your first crop, we’d love to hear about your experience. Share your photos, tips, and any variations you’ve tried in the comments below. Let’s build a community of Choi Sum enthusiasts and learn from each other’s successes (and even our failures!). Happy gardening!
Frequently Asked Questions (FAQ)
1. What is Choi Sum and why should I grow it?
Choi Sum, also known as Choy Sum or Chinese Flowering Cabbage, is a leafy green vegetable popular in Asian cuisine. It’s known for its tender leaves, delicate stems, and small yellow flowers (when allowed to bolt). Growing your own Choi Sum offers several advantages:
* **Freshness:** Homegrown Choi Sum is significantly fresher than store-bought, resulting in a superior flavor and texture.
* **Cost-effectiveness:** Growing your own vegetables can save you money on groceries, especially if you consume Choi Sum regularly.
* **Control over growing practices:** You can avoid pesticides and herbicides by growing your own Choi Sum organically.
* **Nutritional value:** Freshly harvested Choi Sum is packed with vitamins, minerals, and antioxidants.
* **It’s fun!** Gardening is a rewarding hobby that can reduce stress and connect you with nature.
2. What is the best time of year to plant Choi Sum?
Choi Sum is a cool-season crop, meaning it thrives in temperatures between 50°F and 70°F (10°C and 21°C). The best time to plant Choi Sum is in early spring or late summer/early fall. Avoid planting during the hottest months of summer, as high temperatures can cause the plants to bolt (go to seed prematurely), resulting in bitter-tasting leaves. In warmer climates, you can grow Choi Sum throughout the winter.
3. What kind of soil does Choi Sum need?
Choi Sum prefers well-drained soil that is rich in organic matter. Amend your soil with compost or aged manure before planting to improve its fertility and drainage. A slightly acidic to neutral soil pH (around 6.0 to 7.0) is ideal. If your soil is heavy clay, consider growing Choi Sum in raised beds or containers to improve drainage.
4. How much sunlight does Choi Sum need?
Choi Sum needs at least 4-6 hours of sunlight per day. While it can tolerate some shade, especially during the hottest part of the day, insufficient sunlight can result in leggy plants with poor growth. Choose a sunny location in your garden or on your balcony for optimal results.
5. How often should I water Choi Sum?
Choi Sum needs consistent moisture to thrive. Water deeply whenever the top inch of soil feels dry to the touch. Avoid overwatering, as this can lead to root rot. Mulching around the plants can help retain moisture and suppress weeds. During hot, dry weather, you may need to water more frequently.
6. What are some common pests and diseases that affect Choi Sum?
Common pests that can affect Choi Sum include aphids, cabbage worms, flea beetles, and slugs. Diseases include downy mildew and clubroot. To prevent pest and disease problems, practice good garden hygiene, such as removing plant debris and weeds. Use row covers to protect your plants from pests. If you encounter pests or diseases, treat them promptly with organic pest control methods or appropriate fungicides.
7. How do I harvest Choi Sum?
You can harvest Choi Sum when the plants are about 6-8 inches tall, typically 4-6 weeks after planting. Cut the entire plant at the base, or harvest individual leaves as needed. For the best flavor, harvest Choi Sum before it begins to flower. If the plants start to bolt, you can still eat the leaves, but they may have a slightly bitter taste.
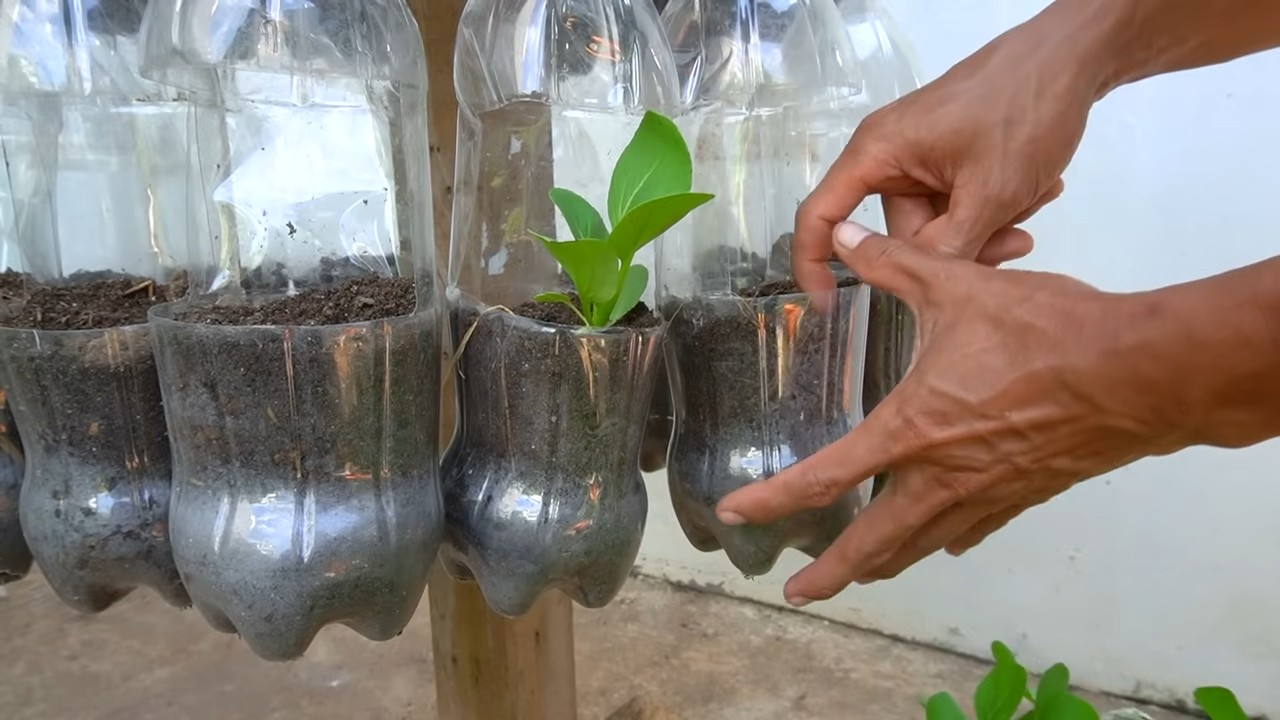
8. Can I grow Choi Sum in containers?
Yes, Choi Sum grows well in containers. Choose a container that is at least 6-8 inches deep and wide. Use a well-draining potting mix and water regularly. Container-grown Choi Sum may need more frequent watering and fertilization than plants grown in the ground.
9. How do I fertilize Choi Sum?
Choi Sum benefits from regular fertilization. Apply a balanced organic fertilizer, such as compost tea or fish emulsion, every 2-3 weeks. Avoid over-fertilizing, as this can lead to excessive leaf growth and reduced flowering.
10. My Choi Sum is bolting (flowering prematurely). What should I do?
Bolting is often caused by hot weather or stress. Once Choi Sum bolts, the leaves can become bitter. You can still eat the leaves, but they may not be as palatable. To prevent bolting, plant Choi Sum during the cool season, provide adequate water, and protect the plants from extreme heat. You can also choose bolt-resistant varieties. If your Choi Sum bolts, you can let it flower and collect the seeds for future planting.
Leave a Comment