
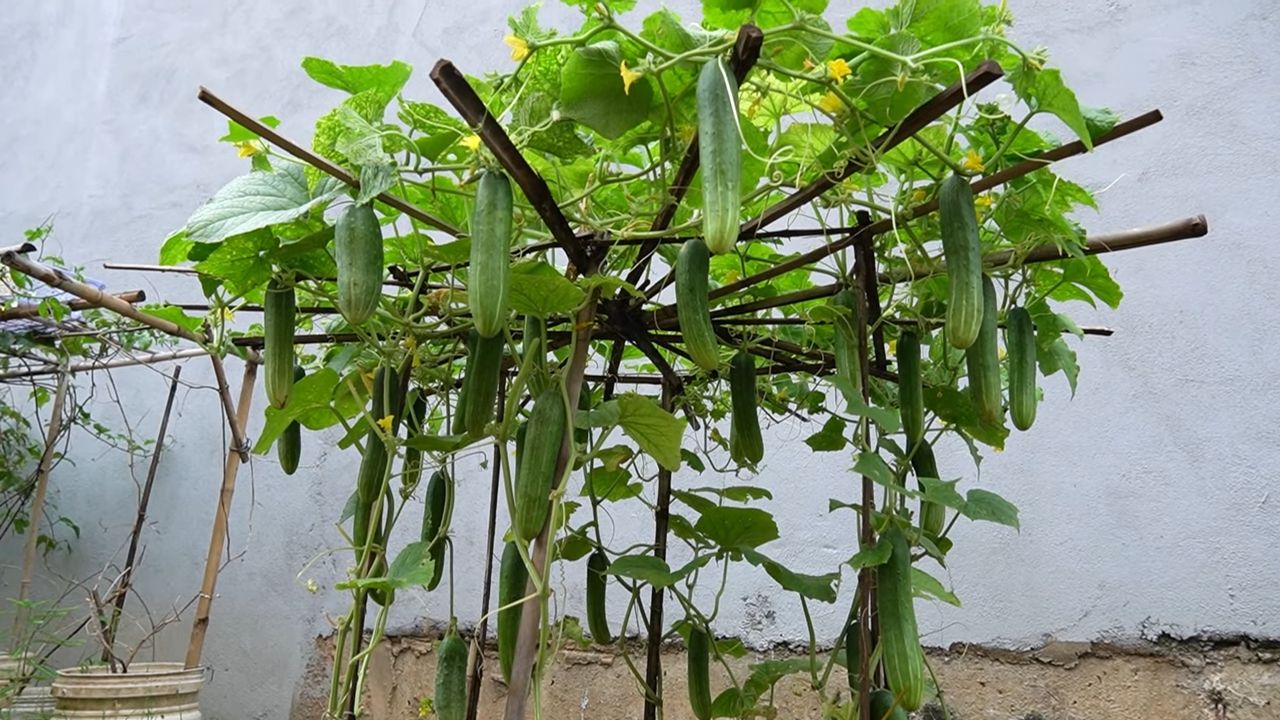
Growing Collard Greens at Home can be surprisingly easy and rewarding, even if you don’t have a sprawling backyard! Imagine stepping outside your door and harvesting fresh, vibrant greens for a delicious and nutritious meal. Forget those limp, pre-packaged greens from the grocery store – we’re talking about crisp, flavorful collards bursting with homegrown goodness.
Collard greens boast a rich history, deeply rooted in Southern American cuisine and culture. Brought over by enslaved Africans, these leafy greens became a staple, symbolizing resilience, resourcefulness, and community. They’re more than just a vegetable; they’re a connection to the past and a celebration of heritage.
But why should you bother with growing collard greens at home? Well, for starters, it’s incredibly satisfying! Plus, you control exactly what goes into your food, avoiding harmful pesticides and ensuring peak freshness. In today’s world, where healthy eating and sustainable living are more important than ever, learning how to cultivate your own food is a powerful and empowering skill. I’m excited to share some simple DIY tricks and hacks that will have you growing collard greens at home like a pro, even if you’re a complete beginner. Let’s get started!
Köstliche Collard Greens selbst anbauen: Ein umfassender DIY-Leitfaden
Hallo Gartenfreunde! Ich freue mich riesig, euch heute zu zeigen, wie ihr eure eigenen Collard Greens (auch bekannt als Grünkohl) zu Hause anbauen könnt. Collard Greens sind nicht nur super gesund, sondern auch unglaublich vielseitig in der Küche. Und das Beste daran? Sie sind relativ einfach anzubauen, selbst wenn ihr keinen grünen Daumen habt! Also, krempeln wir die Ärmel hoch und legen los!
Warum Collard Greens selbst anbauen?
Bevor wir ins Detail gehen, lasst mich kurz erklären, warum ich so begeistert davon bin, Collard Greens selbst anzubauen:
* Frische und Geschmack: Selbst angebaute Collard Greens schmecken einfach besser! Sie sind frischer, aromatischer und haben eine knackige Textur, die man im Supermarkt selten findet.
* Gesundheitliche Vorteile: Collard Greens sind vollgepackt mit Vitaminen, Mineralien und Antioxidantien. Sie sind eine großartige Quelle für Vitamin K, Vitamin A, Vitamin C und Ballaststoffe.
* Kosteneffizienz: Wenn ihr regelmäßig Collard Greens esst, kann der Eigenanbau auf lange Sicht eine Menge Geld sparen.
* Nachhaltigkeit: Durch den Anbau eurer eigenen Lebensmittel reduziert ihr euren ökologischen Fußabdruck und unterstützt eine nachhaltigere Lebensweise.
* Befriedigung: Es gibt kaum etwas Schöneres, als die Früchte (oder in diesem Fall das Gemüse) seiner eigenen Arbeit zu ernten und zu genießen.
Die richtige Sorte auswählen
Es gibt viele verschiedene Sorten von Collard Greens, jede mit ihren eigenen einzigartigen Eigenschaften. Hier sind einige meiner Favoriten:
* Georgia Southern: Eine klassische Sorte mit großen, dunkelgrünen Blättern und einem milden Geschmack.
* Vates: Eine kompakte Sorte, die sich gut für kleinere Gärten eignet. Sie ist bekannt für ihre Kältetoleranz.
* Champion: Eine schnell wachsende Sorte mit einem süßen, milden Geschmack.
* Top Bunch: Eine ertragreiche Sorte mit aufrechten Blättern, die leicht zu ernten sind.
* Blue Max: Eine Sorte mit bläulich-grünen Blättern und einem leicht pfeffrigen Geschmack.
Wählt die Sorte, die am besten zu eurem Klima, eurem Platzangebot und euren Geschmackspräferenzen passt. Ich empfehle, mit einer klassischen Sorte wie Georgia Southern zu beginnen, wenn ihr Anfänger seid.
Die Grundlagen: Was ihr braucht
Bevor wir mit dem Anbau beginnen, solltet ihr sicherstellen, dass ihr alles Notwendige zur Hand habt:
* Collard Greens Samen: Kauft eure Samen von einem seriösen Anbieter.
* Anzuchterde: Verwendet eine hochwertige Anzuchterde für die Aussaat.
* Anzuchttöpfe oder -schalen: Kleine Töpfe oder Schalen mit Drainagelöchern sind ideal für die Anzucht.
* Gartenerde: Verwendet eine gut durchlässige, nährstoffreiche Gartenerde für das Beet oder den Topf, in dem ihr die Collard Greens anpflanzen werdet.
* Kompost oder Dünger: Kompost oder organischer Dünger hilft, den Boden mit Nährstoffen anzureichern.
* Gießkanne oder Gartenschlauch: Zum Bewässern der Pflanzen.
* Gartenwerkzeuge: Eine Schaufel, eine Harke und eine kleine Hacke sind nützlich für die Vorbereitung des Bodens und die Pflege der Pflanzen.
* Mulch: Mulch hilft, Feuchtigkeit im Boden zu halten und Unkraut zu unterdrücken.
* Pflanzetiketten: Um die verschiedenen Sorten zu kennzeichnen, wenn ihr mehrere anbaut.
Aussaat: Der Start eurer Collard Greens
Es gibt zwei Möglichkeiten, Collard Greens anzubauen: durch Direktsaat im Garten oder durch Anzucht in Töpfen. Ich bevorzuge die Anzucht in Töpfen, da sie mir mehr Kontrolle über die Keimung und das frühe Wachstum gibt.
Aussaat in Töpfen (empfohlen)
1. Töpfe vorbereiten: Füllt eure Anzuchttöpfe oder -schalen mit Anzuchterde.
2. Samen säen: Macht kleine Löcher (ca. 1 cm tief) in die Erde und legt 2-3 Samen in jedes Loch.
3. Mit Erde bedecken: Bedeckt die Samen leicht mit Erde und drückt sie vorsichtig an.
4. Bewässern: Gießt die Erde vorsichtig, bis sie feucht, aber nicht durchnässt ist.
5. Warm und hell stellen: Stellt die Töpfe an einen warmen, hellen Ort, z. B. auf eine Fensterbank oder unter eine Pflanzenlampe.
6. Feucht halten: Haltet die Erde feucht, aber nicht durchnässt.
7. Keimung: Die Samen sollten innerhalb von 5-10 Tagen keimen.
8. Vereinzeln: Sobald die Sämlinge ein paar Blätter haben, könnt ihr sie vereinzeln, indem ihr den schwächsten Sämling in jedem Topf entfernt.
Direktsaat im Garten
1. Boden vorbereiten: Lockert den Boden auf und entfernt Unkraut. Mischt Kompost oder organischen Dünger in den Boden.
2. Rillen ziehen: Zieht flache Rillen (ca. 1 cm tief) im Abstand von 45-60 cm.
3. Samen säen: Säet die Samen in die Rillen im Abstand von 2-3 cm.
4. Mit Erde bedecken: Bedeckt die Samen leicht mit Erde und drückt sie vorsichtig an.
5. Bewässern: Gießt die Erde vorsichtig, bis sie feucht, aber nicht durchnässt ist.
6. Feucht halten: Haltet die Erde feucht, bis die Samen keimen.
7. Vereinzeln: Sobald die Sämlinge ein paar Blätter haben, könnt ihr sie vereinzeln, indem ihr die Pflanzen auf einen Abstand von 30-45 cm ausdünnt.
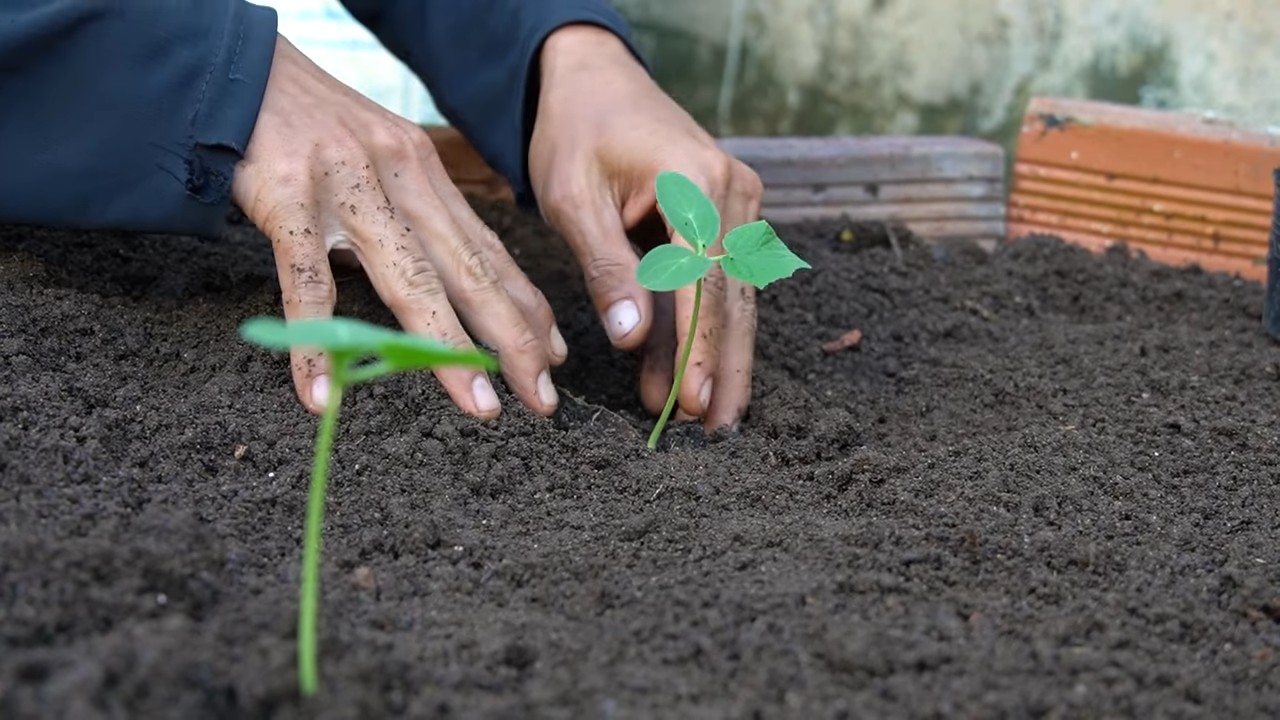
Umpflanzen: Vom Topf ins Beet
Sobald eure Sämlinge etwa 10-15 cm groß sind und 4-6 Blätter haben, sind sie bereit zum Umpflanzen ins Beet oder in größere Töpfe.
1. Boden vorbereiten: Lockert den Boden im Beet oder Topf auf und entfernt Unkraut. Mischt Kompost oder organischen Dünger in den Boden.
2. Pflanzlöcher graben: Grabt Löcher, die etwas größer sind als die Wurzelballen der Sämlinge.
3. Sämlinge vorsichtig entfernen: Nehmt die Sämlinge vorsichtig aus den Töpfen und achtet darauf, die Wurzeln nicht zu beschädigen.
4. Einsetzen: Setzt die Sämlinge in die Pflanzlöcher und füllt die Löcher mit Erde auf.
5. Andrücken: Drückt die Erde um die Pflanzen herum vorsichtig an.
6. Bewässern: Gießt die Pflanzen gründlich.
7. Mulchen: Tragt eine Schicht Mulch um die Pflanzen auf, um Feuchtigkeit zu speichern und Unkraut zu unterdrücken.
Pflege: So bleiben eure Collard Greens gesund und glücklich
Collard Greens sind relativ pflegeleicht, aber es gibt ein paar Dinge, die ihr tun könnt, um sicherzustellen, dass sie gesund und produktiv bleiben:
* Bewässerung: Collard Greens brauchen regelmäßige Bewässerung, besonders während trockener Perioden. Gießt die Pflanzen tief, aber nicht zu oft. Vermeidet es, die Blätter zu benetzen, um Pilzkrankheiten vorzubeugen.
* Düngung: Collard Greens sind Starkzehrer und profitieren von regelmäßiger Düngung. Verwendet einen organischen Dünger oder Kompost, um den Boden mit Nährstoffen zu versorgen.
* Unkrautbekämpfung: Haltet das Beet oder den Topf unkrautfrei, um die Konkurrenz um Nährstoffe und Wasser zu minimieren.
* Schutz vor Schädlingen: Collard Greens können von verschiedenen Schädlingen befallen werden, darunter Kohlweißlinge, Blattläuse und Schnecken. Kontrolliert die Pflanzen
Conclusion
So, there you have it! Growing collard greens at home is not only achievable, but it’s also a deeply rewarding experience that connects you to your food source and provides you with a constant supply of fresh, nutritious greens. We’ve walked through the essential steps, from selecting the right seeds and preparing your soil to nurturing your plants and harvesting your bounty.
But why is this DIY trick a must-try? Beyond the obvious benefit of having access to incredibly fresh and flavorful collard greens, growing your own allows you to control exactly what goes into your food. You can avoid harmful pesticides and herbicides, opting instead for organic and sustainable practices. This is especially important for leafy greens like collard greens, which can readily absorb chemicals from the soil. Plus, let’s be honest, there’s a certain satisfaction that comes from nurturing a plant from seed to table. It’s a tangible connection to nature that can be incredibly grounding and fulfilling.
Consider these variations to personalize your collard green growing experience. Experiment with different varieties of collard greens! There are numerous cultivars available, each with its own unique flavor profile and texture. Some are sweeter, some are more robust, and some are better suited for specific climates. Try Georgia Southern for a classic flavor, or Vates for a cold-hardy option. You can also explore different planting methods. While we focused on direct sowing and transplanting, you could also try container gardening if you have limited space. This is a great option for balconies or patios.
Don’t be afraid to get creative with your harvest! Collard greens are incredibly versatile in the kitchen. Beyond the traditional Southern-style braised collard greens, you can add them to smoothies, salads, soups, and stir-fries. You can even use them as wraps for healthy and delicious meals.
We truly believe that anyone can successfully grow collard greens at home with a little bit of effort and dedication. The rewards are well worth it. So, we encourage you to take the plunge and give it a try. Start small, learn as you go, and don’t be discouraged by initial setbacks. Gardening is a journey, and every mistake is an opportunity to learn and grow.
Most importantly, we want to hear about your experience! Share your tips, tricks, and triumphs in the comments below. Let us know what varieties you’re growing, what challenges you’ve faced, and what delicious dishes you’ve created with your homegrown collard greens. Together, we can build a community of passionate gardeners and inspire others to embrace the joy of growing their own food. Embrace the power of **growing collard greens at home** and taste the difference fresh, homegrown produce makes!
Frequently Asked Questions (FAQ)
What is the best time of year to plant collard greens?
The best time to plant collard greens depends on your climate. In warmer climates with mild winters, you can plant collard greens in the fall for a winter harvest. In colder climates, you can start seeds indoors in late winter or early spring and transplant them outdoors after the last frost. You can also plant collard greens in the late summer for a fall harvest. The key is to avoid planting during the hottest part of the summer, as high temperatures can cause the plants to bolt (go to seed prematurely).
How much sunlight do collard greens need?
Collard greens need at least 6 hours of sunlight per day to thrive. More sunlight is always better, but 6 hours is the minimum. If you’re growing collard greens indoors, you’ll need to supplement with grow lights to provide adequate light.
What kind of soil is best for collard greens?
Collard greens prefer well-drained soil that is rich in organic matter. The ideal soil pH is between 6.0 and 7.5. Before planting, amend your soil with compost or other organic matter to improve drainage and fertility. You can also add a slow-release fertilizer to provide essential nutrients.
How often should I water collard greens?
Collard greens need consistent moisture, especially during hot weather. Water deeply whenever the top inch of soil feels dry to the touch. Avoid overwatering, as this can lead to root rot. Mulching around your plants can help to retain moisture and suppress weeds.
What are some common pests and diseases that affect collard greens?
Common pests that affect collard greens include aphids, cabbage worms, flea beetles, and slugs. Diseases include black rot, clubroot, and downy mildew. To prevent pests and diseases, practice good garden hygiene, such as removing weeds and debris, and rotate your crops regularly. You can also use organic pest control methods, such as insecticidal soap or neem oil. For diseases, choose disease-resistant varieties and ensure good air circulation around your plants.
How do I harvest collard greens?
You can begin harvesting collard greens when the leaves are about 10-12 inches long. Harvest the outer leaves first, leaving the inner leaves to continue growing. This will allow you to harvest collard greens continuously throughout the growing season. To harvest, simply cut the leaves off at the base of the plant with a sharp knife or scissors.
Can I grow collard greens in containers?
Yes, you can grow collard greens in containers. Choose a large container that is at least 12 inches deep and wide. Fill the container with a well-draining potting mix that is rich in organic matter. Be sure to water your container-grown collard greens regularly, as they will dry out more quickly than plants grown in the ground.
How do I store collard greens after harvesting?
To store collard greens, wash them thoroughly and pat them dry. Wrap them in a damp paper towel and store them in a plastic bag in the refrigerator. Collard greens will keep for up to a week in the refrigerator. You can also freeze collard greens for longer storage. To freeze, blanch the leaves in boiling water for 2-3 minutes, then plunge them into ice water to stop the cooking process. Drain the leaves and pack them into freezer bags or containers.
Are there any companion plants that are beneficial for collard greens?
Yes, there are several companion plants that can benefit collard greens. These include herbs like rosemary, thyme, and sage, which can help to repel pests. Other beneficial companion plants include onions, garlic, and marigolds. Avoid planting collard greens near other members of the brassica family, such as broccoli, cabbage, and kale, as they can attract the same pests and diseases.
How can I make my collard greens taste less bitter?
Some people find collard greens to be bitter. To reduce the bitterness, you can blanch the leaves in boiling water for a few minutes before cooking them. You can also add an acid, such as vinegar or lemon juice, to the cooking water. Another trick is to cook the collard greens with a smoked meat, such as ham hocks or bacon, which will add flavor and help to balance the bitterness.

Leave a Comment