
Growing corn in bags might sound unconventional, but trust me, it’s a game-changer for home gardeners like us! Are you dreaming of sweet, juicy corn on the cob, but limited by space or less-than-ideal soil? Then this DIY trick is exactly what you need. Forget sprawling fields – we’re bringing the farm to your patio, balcony, or even your front porch!
For centuries, corn has been a staple crop, deeply woven into the cultures of indigenous peoples across the Americas. From ancient rituals to everyday sustenance, corn has nourished and sustained communities. Now, we’re taking this time-honored grain and adapting its cultivation to the modern urban landscape.
Why bother with growing corn in bags? Well, traditional corn farming requires a lot of space and specific soil conditions. This DIY method bypasses those limitations, allowing anyone, regardless of their gardening experience or available land, to enjoy the satisfaction of harvesting their own fresh corn. Plus, it’s a fantastic way to control soil quality, prevent pests, and even extend your growing season. So, let’s ditch the grocery store corn and embark on this exciting gardening adventure together! I’m excited to show you how easy and rewarding growing corn in bags can be.
Growing Corn in Bags: A Bumper Harvest on Your Patio!
Hey there, fellow gardening enthusiasts! Ever dreamed of sinking your teeth into sweet, juicy corn you grew yourself, but thought you didn’t have the space? Well, I’m here to tell you that you absolutely can! Growing corn in bags is a fantastic way to enjoy a homegrown harvest, even if you only have a balcony, patio, or small yard. It’s surprisingly easy, and I’m going to walk you through every step of the process. Get ready for some corny goodness!
Why Grow Corn in Bags?
Before we dive in, let’s talk about why this method is so great:
* Space-Saving: This is the biggest advantage! Bags take up far less space than a traditional cornfield.
* Portability: You can move your corn plants around to chase the sun or protect them from harsh weather.
* Improved Soil Control: You have complete control over the soil composition, ensuring your corn gets the nutrients it needs.
* Fewer Weeds: Bags help suppress weed growth, making your life a whole lot easier.
* Early Harvest: You can often start your corn earlier indoors and then move the bags outside when the weather warms up, giving you a head start on the growing season.
What You’ll Need
Here’s a list of everything you’ll need to get started. Don’t worry, most of it is readily available at your local garden center or online:
* Large Grow Bags: I recommend using bags that are at least 15-20 gallons in size. Fabric grow bags are ideal because they allow for good drainage and aeration.
* Corn Seeds: Choose a variety that’s well-suited to your climate and growing season. Sweet corn is a popular choice, but there are also ornamental varieties if you’re looking for something different.
* High-Quality Potting Mix: Don’t skimp on this! A good potting mix will provide the nutrients and drainage your corn needs. Look for a mix that contains compost, peat moss, and perlite or vermiculite.
* Slow-Release Fertilizer: This will provide a steady supply of nutrients throughout the growing season. Choose a fertilizer that’s specifically formulated for vegetables.
* Watering Can or Hose: You’ll need a way to water your corn regularly.
* Optional:
* Seed Starting Trays: If you want to start your seeds indoors.
* Heat Mat: To speed up germination if starting indoors.
* Plant Support Stakes: To provide extra support for tall corn stalks, especially in windy areas.
* Bird Netting: To protect your corn from hungry birds.
Step-by-Step Instructions: Planting Your Corn
Okay, let’s get our hands dirty! Here’s how to plant your corn seeds in bags:
1. Prepare Your Grow Bags:
* Unfold your grow bags and place them in a sunny location where they’ll receive at least 6-8 hours of direct sunlight per day.
* If your bags don’t have drainage holes, poke a few holes in the bottom to allow excess water to escape.
* Fill the bags about two-thirds full with your potting mix.
2. Sow Your Corn Seeds:
* Corn needs to be planted in blocks rather than rows to ensure proper pollination. This is because corn is wind-pollinated, and planting in a block increases the chances of the pollen reaching the silks of other ears.
* Sow 3-4 seeds per bag, spacing them evenly apart. I usually aim for about 4-6 inches between each seed.
* Plant the seeds about 1-2 inches deep.
* Cover the seeds with potting mix and gently pat down the soil.
3. Water Thoroughly:
* Water the bags thoroughly until the water drains out of the bottom. This will help settle the soil and ensure good seed-to-soil contact.
4. Optional: Start Seeds Indoors (for an earlier harvest):
* If you live in a cooler climate or want to get a head start on the growing season, you can start your corn seeds indoors 2-3 weeks before the last expected frost.
* Sow the seeds in seed starting trays filled with potting mix.
* Keep the soil moist and warm (around 70-75°F). A heat mat can help with this.
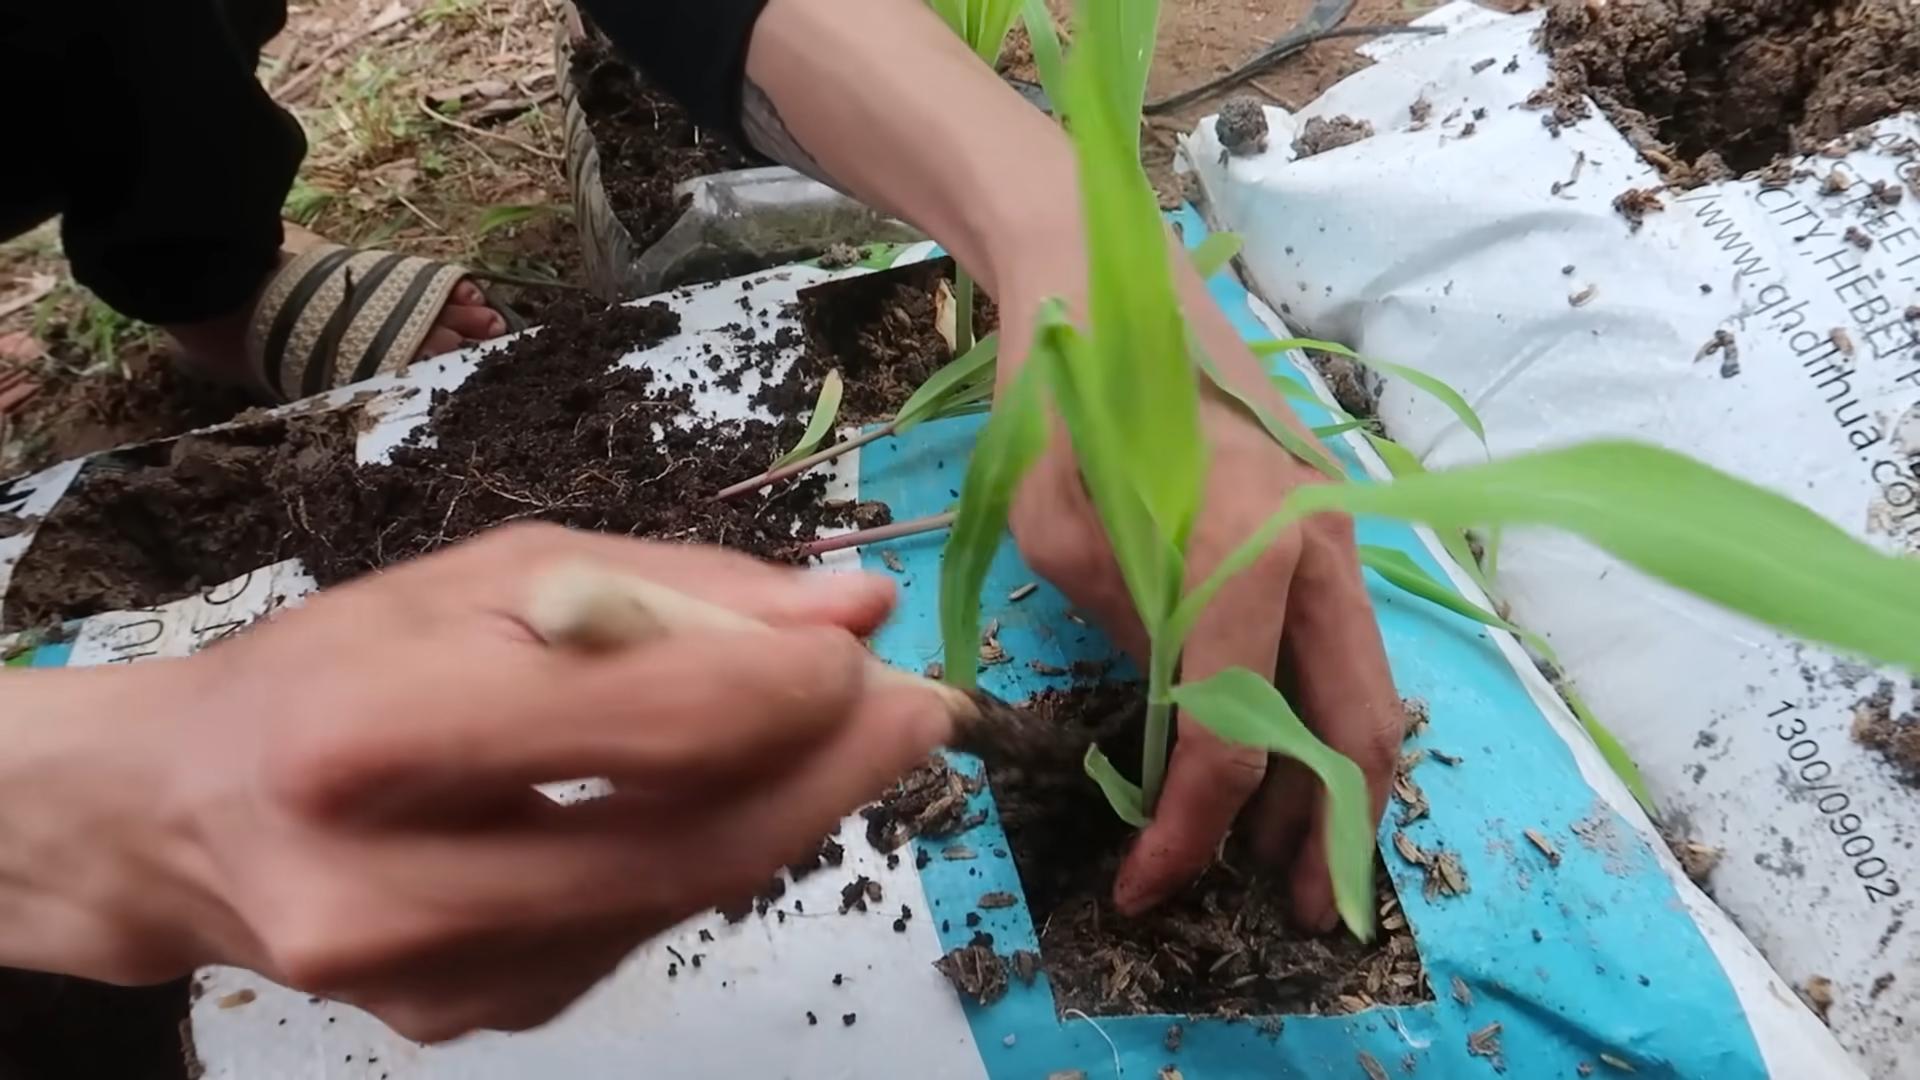
* Once the seedlings have developed a few true leaves, you can transplant them into your grow bags. Be careful not to damage the roots during transplanting.
Caring for Your Corn Plants
Once your corn plants are established, it’s important to provide them with the care they need to thrive. Here’s what you need to do:
1. Watering:
* Corn needs consistent moisture, especially during hot weather. Water deeply whenever the top inch of soil feels dry to the touch.
* Avoid overwatering, as this can lead to root rot.
* Water in the morning to allow the foliage to dry before nightfall, which can help prevent fungal diseases.
2. Fertilizing:
* Corn is a heavy feeder, so it needs plenty of nutrients.
* Apply a slow-release fertilizer at planting time, following the instructions on the package.
* You can also supplement with a liquid fertilizer every 2-3 weeks during the growing season. Look for a fertilizer that’s high in nitrogen, phosphorus, and potassium.
3. Pollination:
* As I mentioned earlier, corn is wind-pollinated. To ensure good pollination, you can gently shake the stalks of your corn plants when the tassels (the male flowers at the top of the plant) are shedding pollen. This will help distribute the pollen to the silks (the female flowers that emerge from the developing ears).
* If you only have a few corn plants, you can also hand-pollinate them. To do this, collect pollen from the tassels using a small brush or cotton swab and then gently brush the pollen onto the silks.
4. Pest and Disease Control:
* Keep an eye out for common corn pests, such as corn earworms, aphids, and spider mites.
* You can control these pests with insecticidal soap or neem oil.
* To prevent fungal diseases, make sure your corn plants have good air circulation and avoid overwatering.
* If you notice any signs of disease, such as spots on the leaves, treat the plants with a fungicide.
5. Support:
* As your corn plants grow taller, they may need some support, especially in windy areas.
* You can use plant support stakes or tie the stalks to a trellis to prevent them from falling over.
Harvesting Your Corn
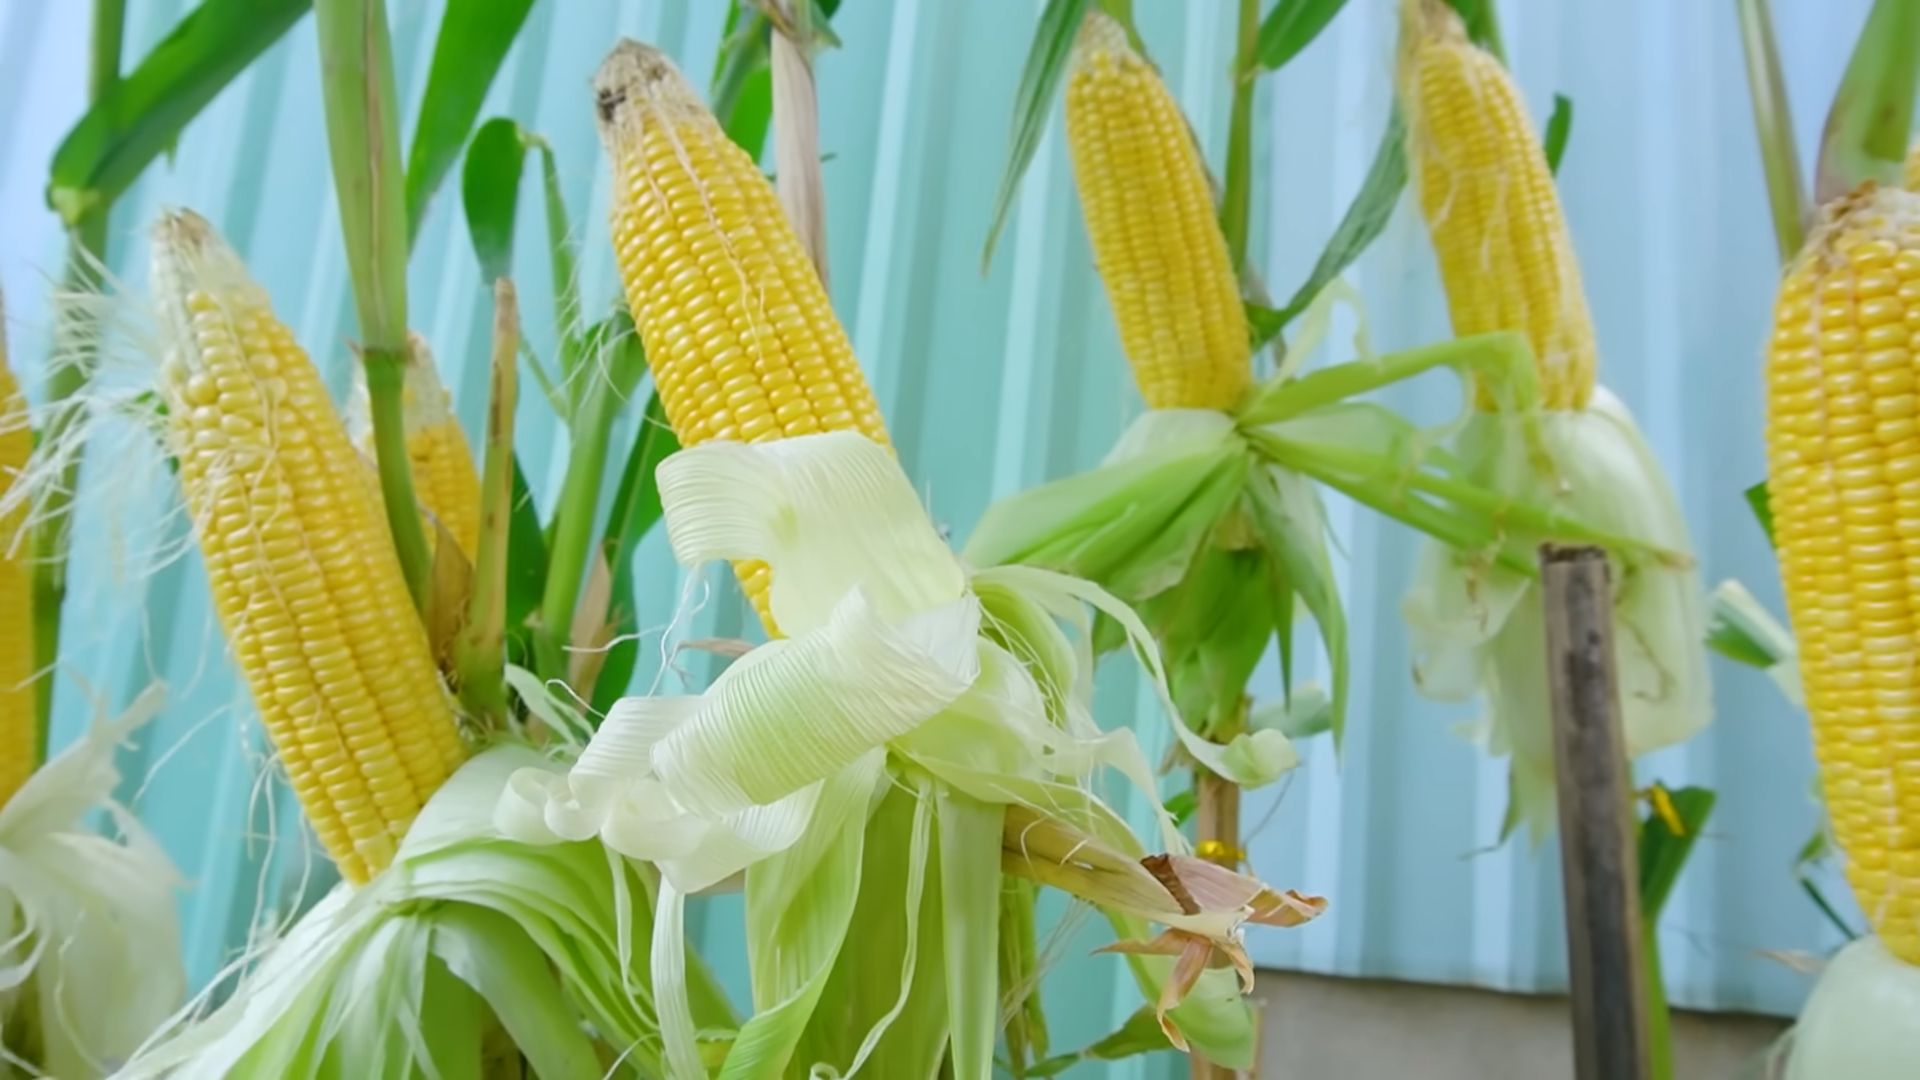
The moment we’ve all been waiting for! Here’s how to tell when your corn is ready to harvest:
1. Check the Silks:
* The silks should be brown and dry.
2. Feel the Ears:
* The ears should feel plump and full.
3. Pierce a Kernel:
* Gently peel back the husk and pierce a kernel with your fingernail. If the liquid that comes out is milky, the corn is ready to harvest. If it’s clear, the corn needs more time to mature.
4. Harvest Carefully:
* To harvest, grasp the ear firmly and twist it downward. The ear should snap off easily from the stalk.
5. Enjoy Your Harvest!
* Eat your corn as soon as possible after harvesting for the best flavor. You can grill it, boil it, roast it, or use it in your favorite recipes.
Troubleshooting
Even with the best care, you might encounter some problems along the way. Here are a few common issues and how to address them:
* Poor Germination:
* Make sure your seeds are fresh and viable.
* Keep the soil moist and warm during germination.
* Don’t plant the seeds too deep.
* Yellowing Leaves:
* This could be a sign of nutrient deficiency. Fertilize your corn plants with a balanced fertilizer.
* It could also be a sign of overwatering. Make sure the soil is well-draining.
* Stunted Growth:
* This could be caused by a lack of sunlight, water, or nutrients.
* Make sure your corn plants are getting at least 6-8 hours of direct sunlight per day.
* Water them regularly and fertilize them as needed.
* Poor Pollination:
* Make sure you’re planting your corn in a block rather than a row.
* Gently shake the stalks of your corn plants when the
Conclusion
So, there you have it! Growing corn in bags isn’t just a quirky gardening experiment; it’s a game-changer for anyone with limited space, challenging soil, or simply a desire for a more controlled growing environment. We’ve walked you through the process, highlighting the benefits and addressing potential pitfalls. But why is this DIY trick a must-try?
Firstly, the sheer convenience is undeniable. Forget back-breaking tilling and weeding vast plots of land. Growing corn in bags allows you to cultivate this delicious crop on patios, balconies, or even driveways. It’s gardening on your terms, tailored to your lifestyle.
Secondly, the improved control over soil conditions is a significant advantage. You can create the perfect growing medium, ensuring your corn receives the nutrients it needs without the risk of nutrient deficiencies or soilborne diseases common in traditional gardens. This translates to healthier plants and a more bountiful harvest.
Thirdly, the portability factor is a huge plus. Need to move your corn plants to chase the sun or protect them from unexpected frost? No problem! Simply relocate the bags as needed. This flexibility is invaluable, especially in regions with unpredictable weather patterns.
But the benefits don’t stop there. Growing corn in bags also offers excellent drainage, preventing waterlogging and root rot. Plus, the contained environment helps to suppress weeds, reducing the need for herbicides and making your gardening experience more enjoyable.
Ready to take your corn growing to the next level? Consider these variations:
* Succession Planting: Plant new bags of corn every few weeks to extend your harvest season. This ensures a continuous supply of fresh corn throughout the summer.
* Companion Planting: Experiment with planting companion plants like beans or squash in the same bag. These plants can help to improve soil health, deter pests, and provide additional benefits to your corn.
* Fertilizer Adjustments: Monitor your corn plants closely and adjust your fertilizer regimen as needed. Yellowing leaves may indicate a nitrogen deficiency, while stunted growth could be a sign of other nutrient imbalances.
* Variety Selection: While we’ve focused on standard sweet corn, don’t be afraid to experiment with different varieties. Consider growing ornamental corn for fall decorations or popcorn varieties for a fun and unique treat.
We’re confident that you’ll find growing corn in bags to be a rewarding and enjoyable experience. It’s a fantastic way to enjoy fresh, homegrown corn, even if you don’t have a traditional garden. So, grab some bags, soil, and seeds, and get started today!
We encourage you to try this DIY trick and share your experiences with us. Let us know what varieties you’ve grown, what challenges you’ve faced, and what successes you’ve achieved. Your feedback will help us to improve this guide and inspire other gardeners to give it a try. Share your photos and stories on social media using #BagCorn or tag us in your posts. We can’t wait to see what you grow! This method of **growing corn in bags** is truly a game changer.
Frequently Asked Questions (FAQ)
What type of bags should I use for growing corn?
The best bags for growing corn are durable, UV-resistant grow bags made of fabric or heavy-duty plastic. Fabric grow bags are preferable because they allow for better drainage and aeration, preventing root rot. Look for bags that are at least 10-15 gallons in size to provide enough space for the corn roots to develop. Avoid using thin plastic bags, as they can easily tear and don’t provide adequate drainage. You can also repurpose large feed bags or burlap sacks, but make sure they are clean and free of any harmful chemicals.
How many corn plants can I grow in one bag?
Generally, it’s best to plant 2-3 corn plants per 10-15 gallon bag. Corn plants need space to grow and develop strong stalks. Overcrowding can lead to stunted growth, reduced yields, and increased susceptibility to diseases. If you’re using a larger bag, you can plant more corn, but make sure each plant has enough room to access sunlight, water, and nutrients. Observe your plants closely and thin them out if they appear to be overcrowded.
What type of soil should I use for growing corn in bags?
Corn thrives in well-draining, nutrient-rich soil. A good soil mix for growing corn in bags should consist of equal parts of the following:
* Topsoil: Provides a base for the soil mix.
* Compost: Adds organic matter, improves drainage, and provides essential nutrients.
* Peat Moss or Coco Coir: Helps to retain moisture and improve soil structure.
* Perlite or Vermiculite: Improves drainage and aeration.
You can also add a slow-release fertilizer to the soil mix to provide a steady supply of nutrients throughout the growing season. Avoid using heavy clay soil, as it can become waterlogged and suffocate the roots.
How often should I water corn grown in bags?
Corn plants need consistent moisture, especially during the critical stages of growth, such as germination, tasseling, and ear development. Water your corn plants deeply whenever the top inch of soil feels dry to the touch. The frequency of watering will depend on the weather conditions, the size of the bag, and the type of soil you’re using. In hot, dry weather, you may need to water your corn plants every day. Avoid overwatering, as this can lead to root rot. Check the drainage of your bags regularly to ensure that water is draining properly.
What kind of fertilizer should I use for growing corn in bags?
Corn is a heavy feeder and requires a balanced fertilizer to thrive. A good fertilizer for growing corn in bags should be high in nitrogen, phosphorus, and potassium (NPK). You can use a granular slow-release fertilizer or a liquid fertilizer. If using a granular fertilizer, incorporate it into the soil mix before planting. If using a liquid fertilizer, apply it every 2-3 weeks during the growing season. Follow the instructions on the fertilizer label carefully. Avoid over-fertilizing, as this can burn the roots and damage the plants.
How much sunlight does corn need when grown in bags?
Corn needs at least 6-8 hours of direct sunlight per day to grow and produce a good harvest. Choose a location for your bags that receives plenty of sunlight throughout the day. If you live in a hot climate, you may need to provide some afternoon shade to protect the plants from scorching. Rotate the bags regularly to ensure that all sides of the plants receive adequate sunlight.
How do I prevent pests and diseases when growing corn in bags?
Growing corn in bags can help to reduce the risk of pests and diseases, but it’s still important to take preventative measures. Here are some tips:
* Choose disease-resistant varieties: Select corn varieties that are known to be resistant to common diseases.
* Practice good sanitation: Remove any dead or diseased leaves and debris from around the plants.
* Water properly: Avoid overwatering, as this can create a favorable environment for fungal diseases.
* Monitor for pests: Check your plants regularly for signs of pests, such as aphids, corn earworms, and spider mites.
* Use organic pest control methods: If you find pests, use organic pest control methods, such as insecticidal soap or neem oil.
* Rotate your crops: Avoid planting corn in the same bags year after year.
When is the best time to harvest corn grown in bags?
The best time to harvest corn is when the silks have turned brown and dry, and the kernels are plump and milky. To check for ripeness, peel back a portion of the husk and puncture a kernel with your fingernail. If the liquid that comes out is milky, the corn is ready to harvest. If the liquid is clear, the corn is not yet ripe. If the liquid is doughy, the corn is overripe. Harvest the corn by twisting the ear off the stalk.
Can I reuse the soil in the bags for growing corn next year?
It’s generally not recommended to reuse the soil in the bags for growing corn the following year. Corn is a heavy feeder and depletes the soil of nutrients. Reusing the soil can lead to nutrient deficiencies and reduced yields. However, you can amend the soil with compost and other organic matter to improve its fertility. Alternatively, you can use the soil for growing other crops that are not as demanding on nutrients.
Leave a Comment