
Growing corn on concrete might sound like an impossible feat, a horticultural oxymoron! But what if I told you that with a little ingenuity and some clever DIY solutions, you could actually enjoy the taste of homegrown corn even without a traditional garden? Forget sprawling fields; we’re talking about bringing the farm-fresh flavor to your patio, balcony, or even a sunny corner of your driveway.
For centuries, corn has been a staple crop, deeply woven into the cultures of the Americas. From ancient civilizations to modern-day barbecues, its sweet kernels have nourished and delighted generations. But access to land shouldn’t be a barrier to enjoying this iconic food. That’s where our DIY spirit comes in!
Many of us dream of fresh, homegrown produce, but lack the space for a conventional garden. Apartment dwellers, urbanites with limited yards, and even those with challenging soil conditions often feel excluded from the joys of gardening. But fear not! This article is your guide to unlocking the secrets of growing corn on concrete. I’m going to share some simple, effective, and budget-friendly DIY tricks and hacks that will empower you to cultivate your own corn, no matter where you live. Get ready to transform your concrete jungle into a mini cornfield!
Maisanbau auf Beton: Ein ungewöhnliches DIY-Projekt
Hey Leute! Habt ihr jemals darüber nachgedacht, Mais auf Beton anzubauen? Klingt verrückt, oder? Aber mit ein bisschen Kreativität und den richtigen Techniken ist es absolut machbar! Ich zeige euch, wie ihr euren eigenen kleinen Maisgarten auf einer Betonfläche anlegen könnt. Das ist nicht nur ein cooles DIY-Projekt, sondern auch eine tolle Möglichkeit, etwas Grün in urbane Umgebungen zu bringen.
Was ihr braucht: Die Materialliste
Bevor wir loslegen, hier eine Liste mit allem, was ihr benötigt:
* Große Pflanzgefäße oder Behälter: Wählt stabile Behälter mit guter Drainage. Größe ist wichtig! Je größer, desto besser für die Maiswurzeln. Ich empfehle mindestens 40 Liter pro Pflanze.
* Hochwertige Blumenerde: Mais ist ein Starkzehrer, also braucht er nährstoffreiche Erde. Achtet auf eine gute Mischung aus Kompost, Torf und Perlit.
* Maiskörner: Am besten Bio-Saatgut, um sicherzustellen, dass ihr gesunde Pflanzen bekommt.
* Dünger: Ein ausgewogener Dünger (z.B. NPK 10-10-10) ist ideal. Alternativ könnt ihr auch organischen Dünger wie Hornspäne oder Komposttee verwenden.
* Gießkanne oder Gartenschlauch: Für die regelmäßige Bewässerung.
* Mulch: Stroh oder Holzhackschnitzel helfen, die Feuchtigkeit im Boden zu halten und Unkraut zu unterdrücken.
* Pflanzstäbe oder Bambusrohre: Um die Maispflanzen bei Bedarf zu stützen. Mais kann ziemlich hoch werden und bei Wind umknicken.
* Schaufel oder Kelle: Zum Befüllen der Pflanzgefäße.
* Handschuhe: Zum Schutz eurer Hände.
* Drainagematerial: Kies oder Blähton für den Boden der Pflanzgefäße, um Staunässe zu vermeiden.
Schritt-für-Schritt-Anleitung: So gelingt der Maisanbau auf Beton
Hier ist eine detaillierte Anleitung, wie ihr euren eigenen Mais auf Beton anbauen könnt. Keine Sorge, es ist einfacher als es klingt!
1. Vorbereitung der Pflanzgefäße
1. Reinigung der Behälter: Beginnt damit, eure Pflanzgefäße gründlich zu reinigen. Entfernt Schmutz, Staub und eventuelle Rückstände von vorherigen Bepflanzungen.
2. Drainage schaffen: Legt eine Schicht Drainagematerial (Kies oder Blähton) auf den Boden der Behälter. Das verhindert Staunässe, die für Mais schädlich sein kann. Eine Schicht von etwa 5-10 cm ist ideal.
3. Befüllen mit Erde: Füllt die Behälter mit hochwertiger Blumenerde. Lasst etwa 5-10 cm Platz bis zum Rand, um das Gießen zu erleichtern. Drückt die Erde leicht an, aber nicht zu fest.
2. Aussaat der Maiskörner
1. Aussaatzeitpunkt: Mais ist wärmeliebend und sollte erst nach den letzten Frösten ausgesät werden. In Deutschland ist das meist ab Mitte Mai der Fall.
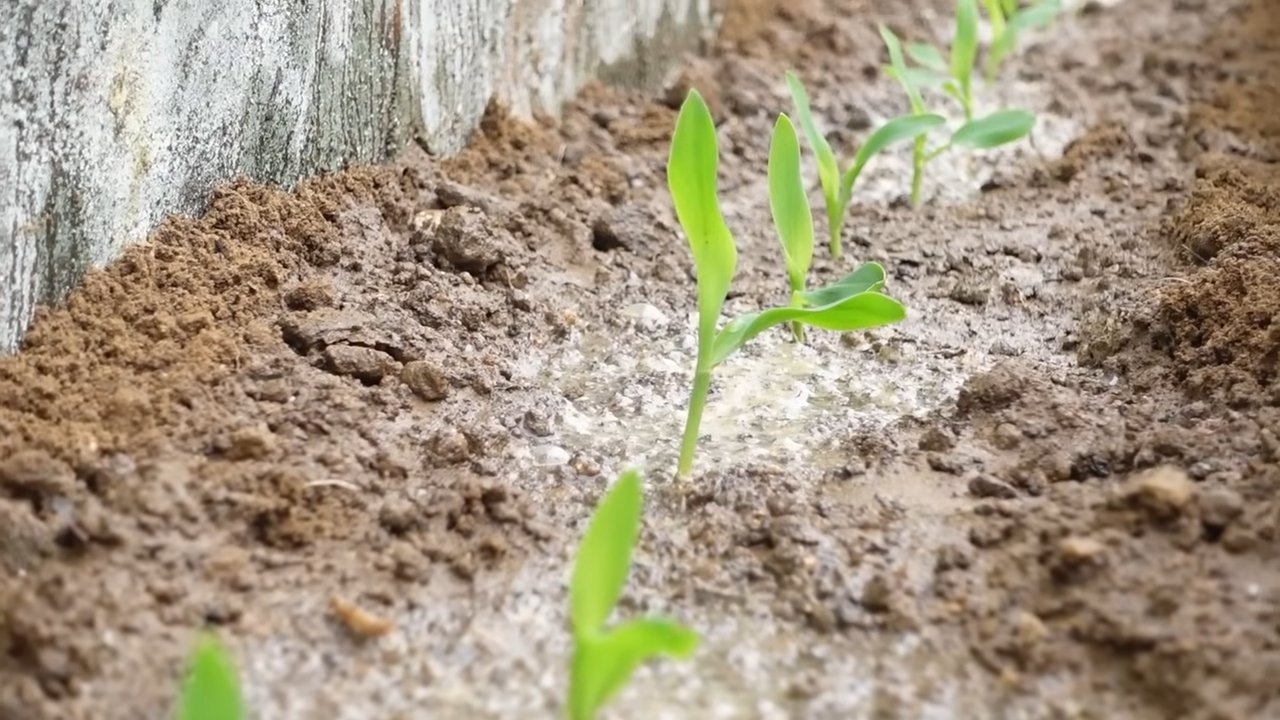
2. Aussaattiefe: Macht kleine Löcher in die Erde (etwa 2-3 cm tief) im Abstand von etwa 20-30 cm zueinander. Legt in jedes Loch 2-3 Maiskörner. Das erhöht die Wahrscheinlichkeit, dass mindestens ein Korn keimt.
3. Bedecken und Gießen: Bedeckt die Löcher mit Erde und gießt die Erde vorsichtig an. Achtet darauf, dass die Erde feucht, aber nicht nass ist.
3. Pflege der Maispflanzen
1. Bewässerung: Mais braucht viel Wasser, besonders während der Wachstums- und Blütezeit. Gießt regelmäßig, am besten morgens oder abends, um Verdunstung zu vermeiden. Achtet darauf, dass die Erde immer leicht feucht ist.
2. Düngung: Düngt die Maispflanzen regelmäßig, etwa alle 2-3 Wochen, mit einem ausgewogenen Dünger. Befolgt die Anweisungen auf der Düngerpackung. Alternativ könnt ihr auch organischen Dünger verwenden.
3. Unkrautbekämpfung: Entfernt regelmäßig Unkraut, das in den Pflanzgefäßen wächst. Unkraut konkurriert mit dem Mais um Nährstoffe und Wasser.
4. Stützen: Wenn die Maispflanzen größer werden, kann es notwendig sein, sie mit Pflanzstäben oder Bambusrohren zu stützen. Besonders bei Wind können die Pflanzen sonst umknicken.
5. Bestäubung: Mais ist windbestäubt. Um die Bestäubung zu fördern, könnt ihr die Pflanzen leicht schütteln, wenn die männlichen Blüten (die Fahnen oben an der Pflanze) Pollen freisetzen.
4. Erntezeit
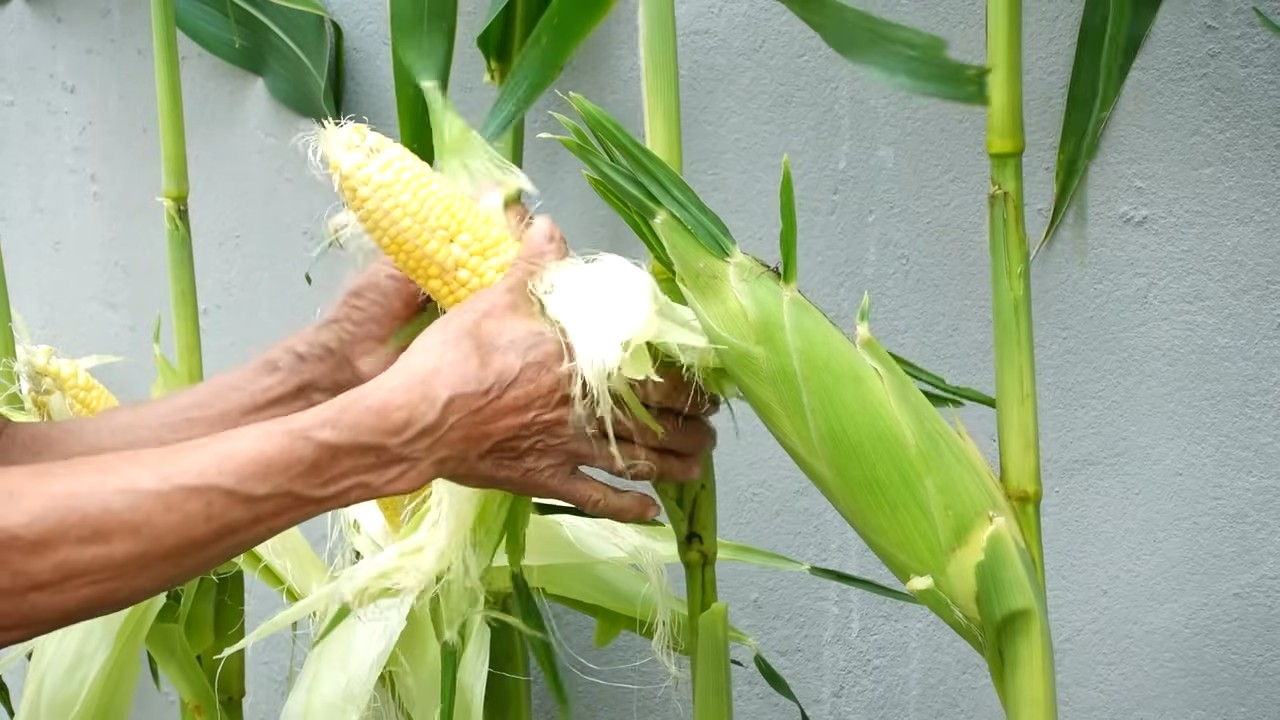
1. Erntezeitpunkt: Die Maiskolben sind reif, wenn die Seidenfäden braun und trocken sind und die Kolben sich prall anfühlen. Drückt auf die Körner – wenn sie milchig sind, ist der Mais reif.
2. Ernte: Brecht die Maiskolben vorsichtig von der Pflanze ab. Dreht sie dabei leicht, um sie nicht zu beschädigen.
3. Verarbeitung: Ihr könnt den Mais sofort essen, grillen, kochen oder einfrieren. Frischer Mais schmeckt am besten!
Zusätzliche Tipps und Tricks für den erfolgreichen Maisanbau
* Sonnenlicht: Mais braucht viel Sonne, mindestens 6-8 Stunden pro Tag. Wählt einen sonnigen Standort für eure Pflanzgefäße.
* Windschutz: Schützt die Maispflanzen vor starkem Wind, um ein Umknicken zu verhindern.
* Sortenwahl: Es gibt verschiedene Maissorten. Wählt eine Sorte, die für den Anbau in Behältern geeignet ist. Zwergmaissorten sind oft eine gute Wahl.
* Schädlinge und Krankheiten: Achtet auf Schädlinge wie Maiszünsler oder Blattläuse. Bei Bedarf könnt ihr biologische Schädlingsbekämpfungsmittel einsetzen.
* Fruchtfolge: Baut im nächsten Jahr keine Pflanzen der gleichen Familie (Gräser) in die gleichen Behälter an, um Krankheiten und Schädlingen vorzubeugen.
Häufige Fehler und wie man sie vermeidet
* Zu wenig Wasser: Mais braucht viel Wasser, besonders während der Wachstums- und Blütezeit. Achtet darauf, dass die Erde immer feucht ist.
* Zu wenig Dünger: Mais ist ein Starkzehrer und braucht regelmäßige Düngung.
* Zu enge Pflanzung: Gebt den Maispflanzen genügend Platz, damit sie sich gut entwickeln können.
* Kein Windschutz: Schützt die Pflanzen vor starkem Wind, um ein Umknicken zu verhindern.
* Falscher Erntezeitpunkt: Erntet den Mais erst, wenn er reif ist.
Fazit: Maisanbau auf Beton ist möglich!
Mit ein bisschen Planung und den richtigen Techniken könnt ihr erfolgreich Mais auf Beton anbauen. Es ist ein tolles DIY-Projekt, das nicht nur Spaß macht, sondern auch frisches Gemüse in euren Garten bringt. Probiert es aus und lasst mich wissen, wie es läuft! Viel Erfolg!
Conclusion
So, there you have it! Growing corn on concrete might sound like an impossible feat, a horticultural oxymoron, but with this simple DIY trick, you can absolutely cultivate your own sweet, juicy corn, even without a traditional garden plot. This method isn’t just about defying expectations; it’s about embracing resourcefulness, maximizing space, and enjoying the unparalleled satisfaction of harvesting food you’ve grown yourself, regardless of your living situation.
This DIY approach to growing corn on concrete offers a multitude of benefits. It’s perfect for apartment dwellers with balconies, urban gardeners with limited yard space, or anyone looking to add a touch of rural charm to their concrete jungle. It eliminates the need for extensive tilling, weeding, and soil preparation, making it an incredibly accessible option for beginners. Plus, the contained environment allows for better control over soil quality, watering, and pest management.
But the beauty of this method lies not only in its practicality but also in its adaptability. Feel free to experiment with different corn varieties. While sweet corn is a classic choice, consider trying popcorn varieties for a fun and unique twist. You can also interplant your corn with companion plants like beans or squash to create a miniature “three sisters” garden in your containers.
Don’t be afraid to get creative with your container choices, too. While large plastic tubs are a reliable option, you can also repurpose old barrels, galvanized steel containers, or even build your own raised beds on top of the concrete. Just ensure that your chosen container provides adequate drainage and is large enough to accommodate the mature corn plants.
Growing corn on concrete is more than just a gardening project; it’s a testament to the power of innovation and the resilience of nature. It’s a chance to connect with the earth, even in the most urban environments, and to experience the joy of nurturing life from seed to harvest.
We wholeheartedly encourage you to give this DIY trick a try. It’s a rewarding experience that will not only provide you with delicious, homegrown corn but also inspire you to think outside the box when it comes to gardening.
Once you’ve embarked on your concrete corn-growing adventure, we’d love to hear about your experiences! Share your photos, tips, and challenges in the comments below. Let’s create a community of concrete corn enthusiasts and inspire others to embrace this innovative gardening technique. What variety of corn did you choose? What challenges did you face, and how did you overcome them? Your insights could be invaluable to other aspiring concrete corn growers. So, grab your seeds, gather your supplies, and get ready to transform your concrete space into a thriving cornfield! The taste of homegrown corn, grown literally from the ground up (or rather, the concrete up), is an experience you won’t soon forget.
FAQ
Can I really grow corn on concrete?
Absolutely! While corn is traditionally grown in open fields, this DIY method allows you to successfully cultivate corn in containers placed on concrete surfaces. The key is providing the corn plants with the right environment, including adequate sunlight, well-draining soil, and sufficient water and nutrients. By mimicking the conditions found in a traditional garden, you can overcome the limitations of a concrete environment and enjoy a bountiful harvest.
What kind of containers should I use?
The ideal containers for growing corn on concrete are large and sturdy, with good drainage. Plastic tubs, large pots, repurposed barrels, or even homemade raised beds are all viable options. The container should be at least 12 inches deep and wide to accommodate the corn’s root system. Ensure that there are drainage holes at the bottom to prevent waterlogging, which can lead to root rot. Consider the weight of the container when filled with soil and water, especially if you’re placing it on a balcony or elevated surface.
What type of soil should I use?
Corn requires well-draining, nutrient-rich soil to thrive. A good potting mix specifically formulated for vegetables is an excellent choice. You can also create your own soil mix by combining equal parts of compost, peat moss (or coconut coir), and perlite or vermiculite. Compost provides essential nutrients, peat moss or coconut coir helps retain moisture, and perlite or vermiculite improves drainage. Avoid using garden soil directly in containers, as it can become compacted and hinder drainage.
How much sunlight does corn need?
Corn is a sun-loving plant and requires at least 6-8 hours of direct sunlight per day to produce a good yield. Choose a location on your concrete surface that receives ample sunlight throughout the day. If you’re growing corn on a balcony or patio, consider the direction it faces and whether it’s shaded by buildings or trees. If you don’t have enough natural sunlight, you can supplement with grow lights.
How often should I water my corn plants?
Corn plants need consistent moisture, especially during hot weather. Water deeply whenever the top inch of soil feels dry to the touch. Avoid overwatering, as this can lead to root rot. The frequency of watering will depend on the weather conditions, the size of your containers, and the type of soil you’re using. Check the soil moisture regularly and adjust your watering schedule accordingly.
What kind of fertilizer should I use?
Corn is a heavy feeder and requires regular fertilization to produce a good yield. Use a balanced fertilizer with an NPK ratio of 10-10-10 or 14-14-14. Apply fertilizer according to the package instructions, typically every 2-3 weeks during the growing season. You can also supplement with organic fertilizers like compost tea or fish emulsion.
How do I pollinate my corn plants?
Corn is wind-pollinated, meaning that the pollen from the tassels (male flowers) needs to reach the silks (female flowers) on the ears of corn. In a container environment, wind pollination may be limited. To improve pollination, you can gently shake the corn stalks or use a small paintbrush to transfer pollen from the tassels to the silks. You can also plant corn in blocks rather than rows to increase the chances of pollination.
What are some common pests and diseases that affect corn?
Common pests that can affect corn include corn earworms, aphids, and spider mites. Diseases include corn smut, rust, and leaf blight. Monitor your plants regularly for signs of pests or diseases and take appropriate action. You can use organic pest control methods like insecticidal soap or neem oil to control pests. Ensure good air circulation around your plants to prevent fungal diseases.
How long does it take to grow corn?
The time it takes to grow corn from seed to harvest varies depending on the variety and growing conditions. Generally, it takes about 60-100 days for sweet corn to mature. Check the seed packet for specific information on the maturity date of your chosen variety.
How do I know when my corn is ready to harvest?
There are several indicators that your corn is ready to harvest. The silks should turn brown and dry, and the ears should feel plump and full. You can also peel back a portion of the husk and check the kernels. The kernels should be milky and release a milky liquid when punctured. If the liquid is clear, the corn is not yet ripe. If the liquid is doughy, the corn is overripe.
Leave a Comment