
Grow Bok Choy Indoors? Absolutely! Imagine fresh, crisp bok choy, ready to harvest right from your windowsill, even when the weather outside is frightful. Forget those sad, wilted greens at the grocery store – with a few simple tricks, you can cultivate your own thriving mini-garden indoors.
For centuries, bok choy, also known as pak choi, has been a staple in Asian cuisine, prized for its mild flavor and nutritional benefits. From stir-fries to soups, this versatile vegetable adds a delightful crunch and a boost of vitamins to any meal. But did you know you don’t need a sprawling outdoor garden to enjoy its goodness?
In today’s busy world, finding time and space for a traditional garden can be a challenge. That’s where the magic of indoor gardening comes in! Learning how to grow bok choy indoors is not only a fun and rewarding project, but it also provides you with a sustainable source of fresh produce. Plus, it’s incredibly satisfying to nurture something from seed to harvest, adding a touch of green to your living space and a healthy dose of goodness to your plate. I’m excited to share these easy DIY tricks and hacks that will have you enjoying homegrown bok choy in no time!
Growing Bok Choy Indoors: A Beginner’s Guide
Hey there, fellow plant enthusiasts! Ever thought about growing your own fresh, crisp bok choy right in your kitchen? It’s easier than you might think, and trust me, the taste of homegrown bok choy is absolutely worth the effort. I’ve been growing bok choy indoors for a while now, and I’m excited to share my tips and tricks with you. Let’s get started!
What You’ll Need
Before we dive into the nitty-gritty, let’s gather all the necessary supplies. Having everything ready beforehand will make the whole process smoother and more enjoyable.
* **Bok Choy Seeds:** Choose a variety that’s well-suited for indoor growing. Dwarf varieties like ‘Toy Choy’ or ‘Mei Qing Choi’ are excellent choices because they don’t require as much space. You can find these at most garden centers or online.
* **Seed Starting Tray or Small Pots:** These are perfect for starting your seeds. I prefer using seed starting trays with individual cells because they make transplanting easier.
* **Seed Starting Mix:** This is a light, airy soil mix specifically designed for germinating seeds. It’s different from regular potting soil and provides the perfect environment for delicate seedlings.
* **Potting Soil:** Once your seedlings are ready to be transplanted, you’ll need a good quality potting soil. Look for a mix that’s well-draining and contains perlite or vermiculite.
* **Grow Lights:** Bok choy needs plenty of light to thrive. If you don’t have a sunny windowsill, grow lights are essential. LED grow lights are energy-efficient and work wonders.
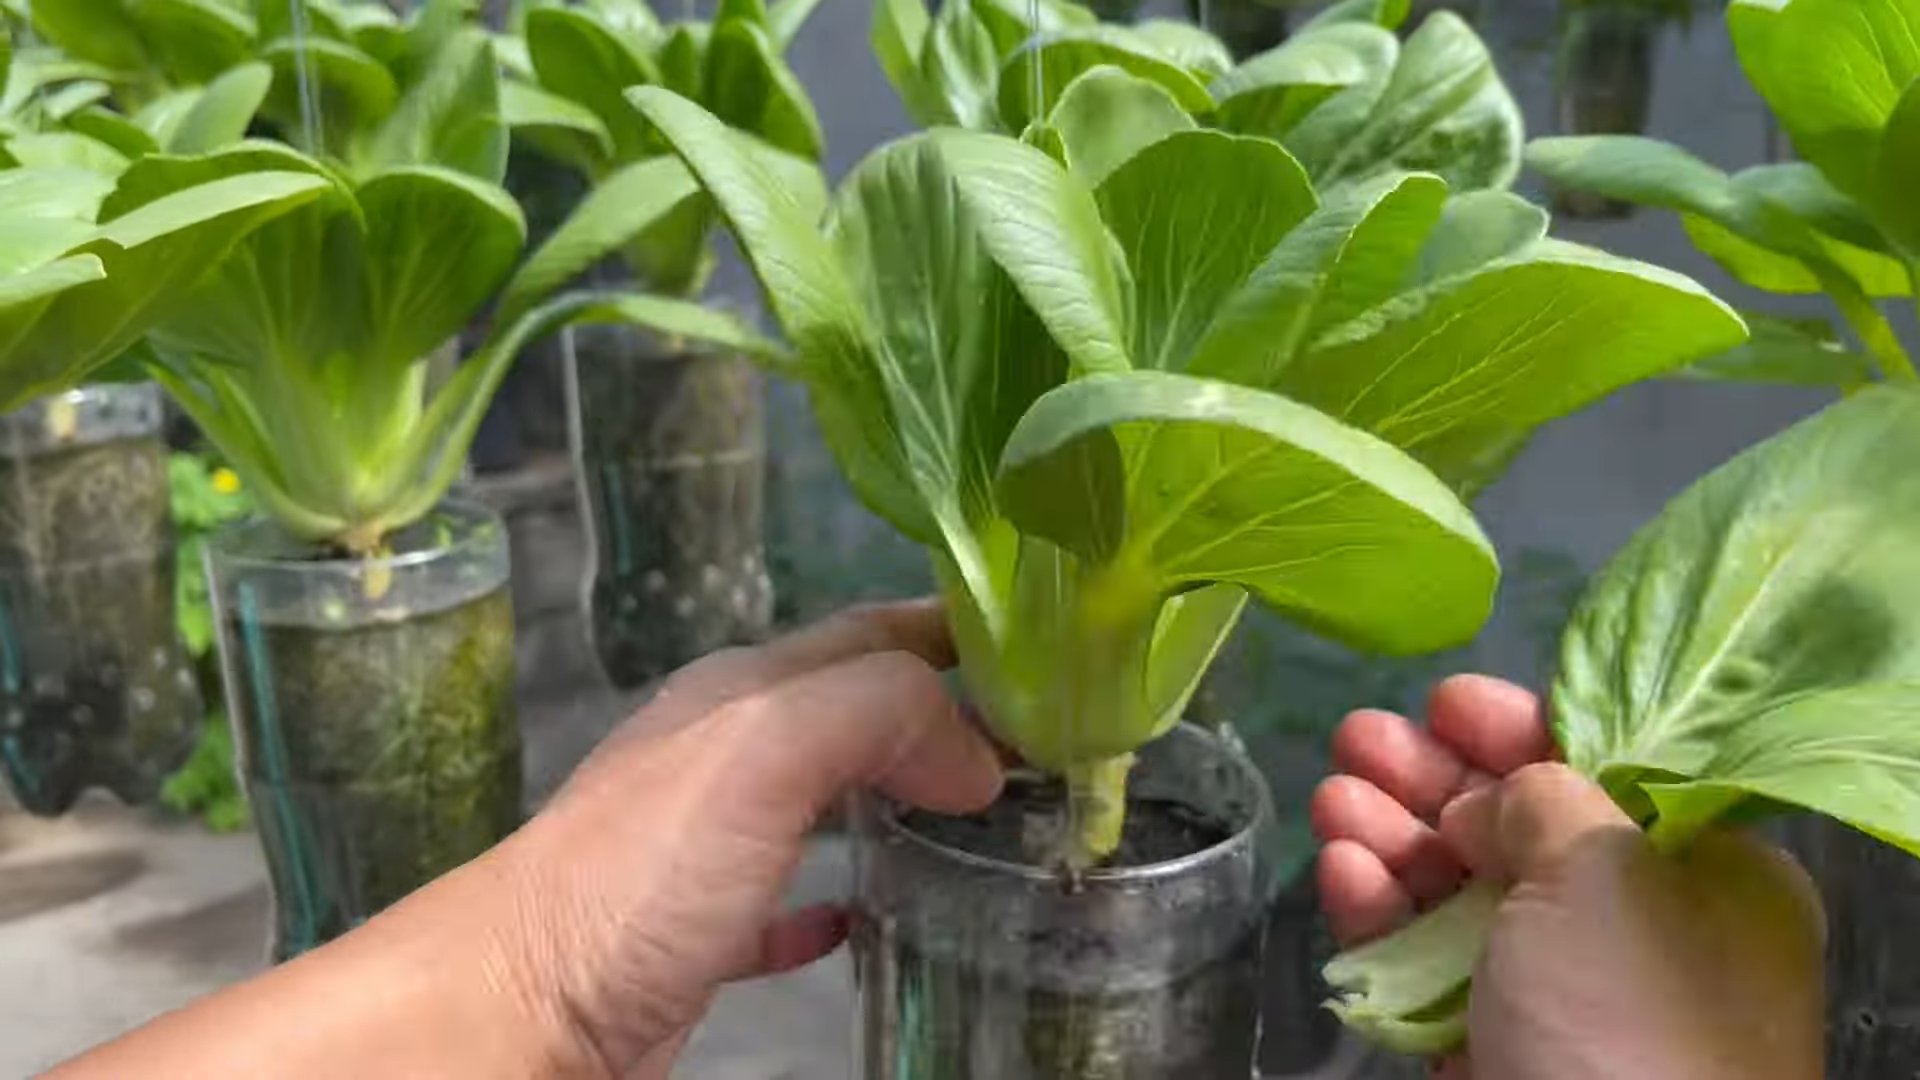
* **Containers:** Choose containers that are at least 6 inches deep and wide. Bok choy needs room for its roots to grow.
* **Watering Can or Spray Bottle:** For gentle watering, especially when the plants are young.
* **Fertilizer:** A balanced liquid fertilizer will help your bok choy grow strong and healthy.
* **Optional: Heat Mat:** A heat mat can speed up germination, especially in cooler environments.
Starting Your Seeds
This is where the magic begins! Getting your seeds off to a good start is crucial for a successful harvest.
1. **Prepare Your Seed Starting Tray:** Fill your seed starting tray or small pots with seed starting mix. Gently pat the soil down to remove any air pockets.
2. **Sow the Seeds:** Sow 2-3 seeds per cell or pot, about ¼ inch deep.
3. **Water Gently:** Use a spray bottle or watering can to moisten the soil. Be careful not to overwater, as this can lead to damping off (a fungal disease that can kill seedlings).
4. **Provide Warmth:** If you’re using a heat mat, place the seed starting tray on top. Otherwise, find a warm spot in your home, ideally around 70-75°F (21-24°C).
5. **Cover with a Dome (Optional):** Covering the tray with a humidity dome or plastic wrap can help retain moisture and speed up germination. Just be sure to remove the cover once the seedlings emerge to prevent fungal growth.
6. **Wait for Germination:** Bok choy seeds typically germinate within 5-7 days. Keep the soil consistently moist but not soggy.
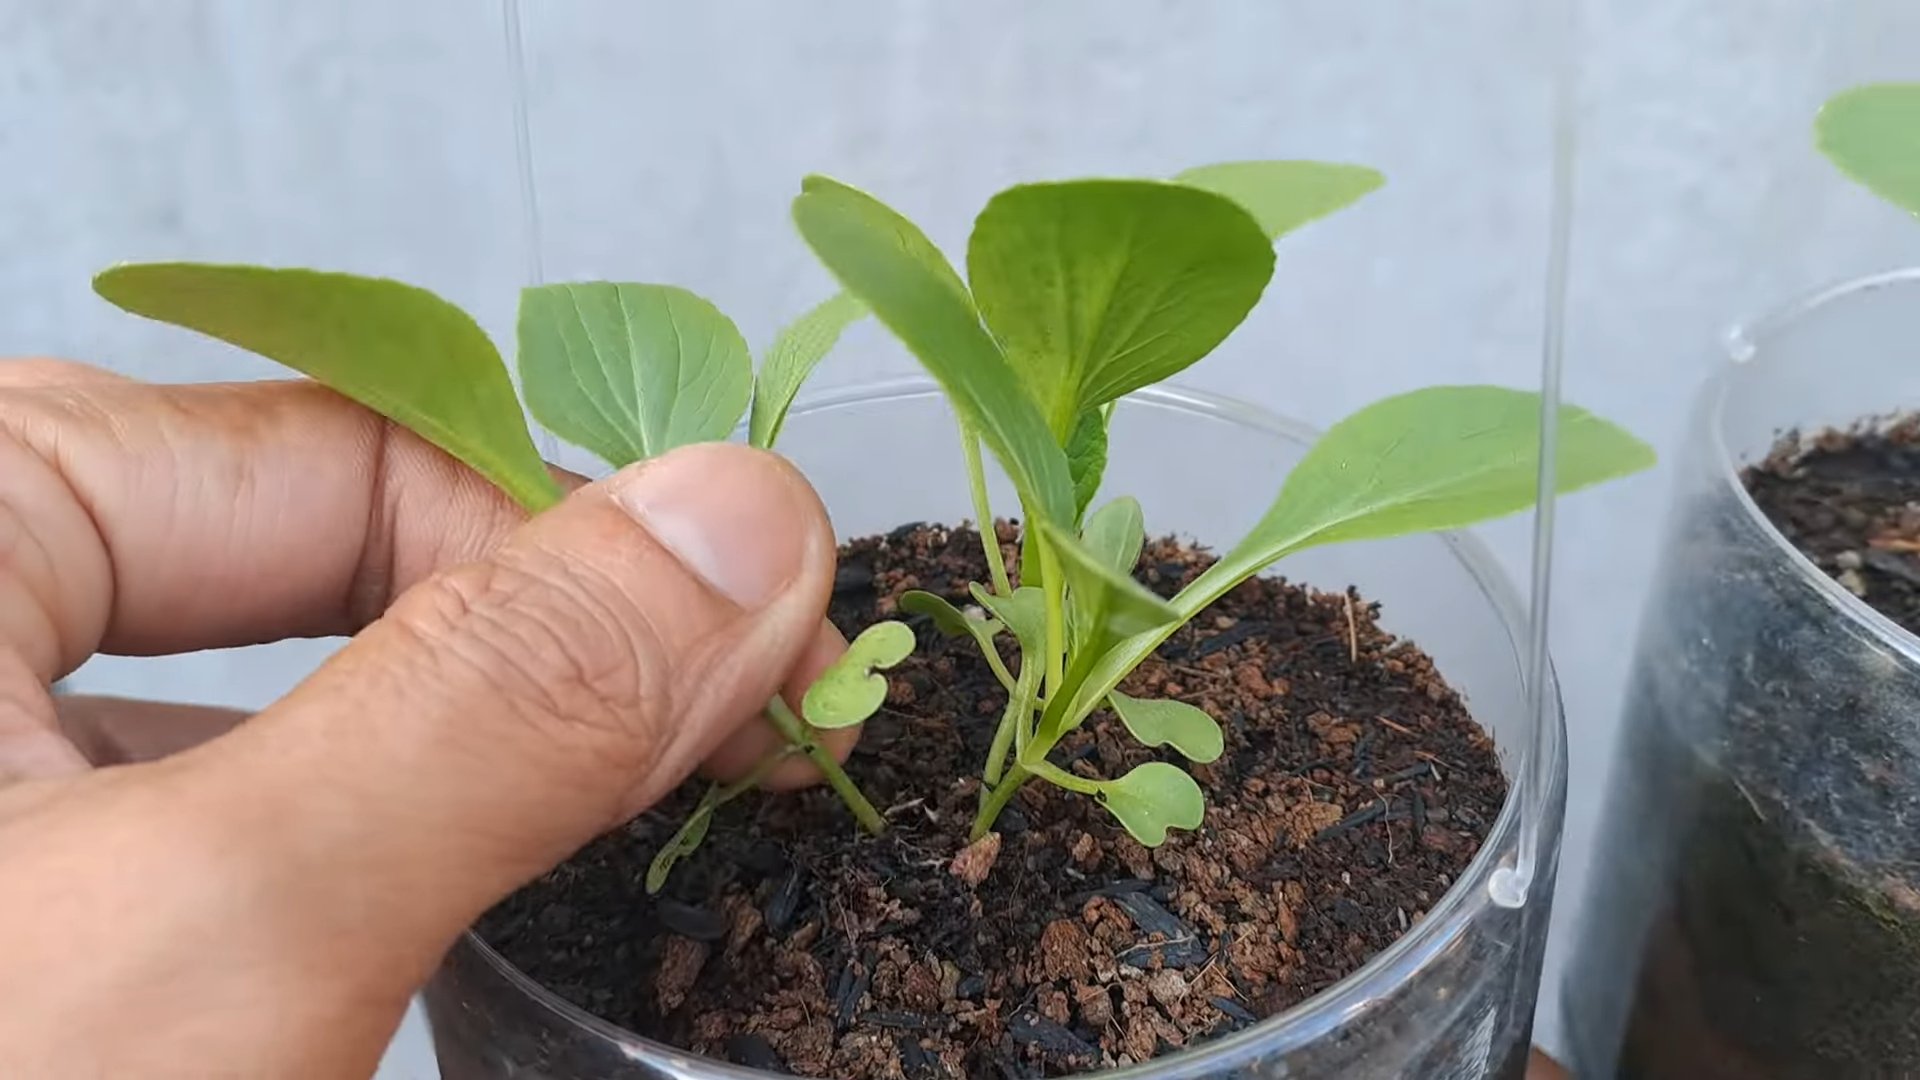
Transplanting Your Seedlings
Once your seedlings have developed a few sets of true leaves (the leaves that look like miniature bok choy leaves), it’s time to transplant them into larger containers.
1. **Prepare Your Containers:** Fill your containers with potting soil, leaving about an inch of space at the top.
2. **Gently Remove Seedlings:** Carefully remove the seedlings from the seed starting tray or pots. If you sowed multiple seeds per cell, gently separate them, being careful not to damage the roots.
3. **Plant the Seedlings:** Make a small hole in the potting soil and place the seedling in the hole. Gently pat the soil around the base of the plant.
4. **Water Thoroughly:** Water the transplanted seedlings thoroughly, allowing the excess water to drain out of the bottom of the container.
Providing the Right Environment
Bok choy needs the right conditions to thrive indoors. Here’s what to keep in mind:
1. **Light:** Bok choy needs at least 6 hours of direct sunlight per day. If you don’t have a sunny windowsill, use grow lights. Position the grow lights about 6-12 inches above the plants. I usually keep my grow lights on for about 14-16 hours a day.
2. **Temperature:** Bok choy prefers cooler temperatures, ideally between 60-70°F (15-21°C). Avoid placing your plants near heat sources, such as radiators or vents.
3. **Watering:** Water your bok choy regularly, keeping the soil consistently moist but not soggy. Check the soil moisture by sticking your finger about an inch into the soil. If it feels dry, it’s time to water.
4. **Fertilizing:** Fertilize your bok choy every 2-3 weeks with a balanced liquid fertilizer. Follow the instructions on the fertilizer label.
5. **Air Circulation:** Good air circulation is important to prevent fungal diseases. You can improve air circulation by opening a window or using a small fan.
Dealing with Pests and Diseases
Even indoors, your bok choy can be susceptible to pests and diseases. Here’s how to deal with them:
* **Aphids:** These tiny insects can suck the sap from your plants, causing them to become weak and stunted. You can get rid of aphids by spraying them with a strong stream of water or by using insecticidal soap.
* **Flea Beetles:** These small beetles can chew holes in the leaves of your bok choy. You can control flea beetles by covering your plants with row covers or by using insecticidal soap.
* **Damping Off:** This fungal disease can kill seedlings. To prevent damping off, use a sterile seed starting mix, avoid overwatering, and provide good air circulation.
* **Downy Mildew:** This fungal disease can cause yellow spots on the leaves of your bok choy. To prevent downy mildew, provide good air circulation and avoid overhead watering. If you see signs of downy mildew, remove the affected leaves and spray the plant with a fungicide.
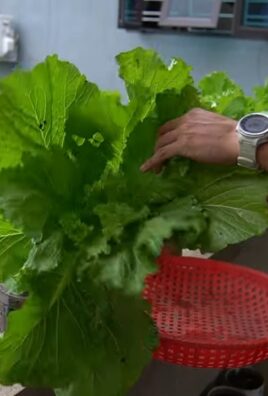
Harvesting Your Bok Choy
The best part! You can start harvesting your bok choy when the leaves are about 4-6 inches long.
1. **Cut the Outer Leaves:** You can harvest the outer leaves as needed, allowing the inner leaves to continue growing. This is called “cut-and-come-again” harvesting.
2. **Harvest the Whole Plant:** Alternatively, you can harvest the entire plant by cutting it off at the base.
Troubleshooting Tips
Sometimes, things don’t go exactly as planned. Here are a few common problems and how to fix them:
* **Yellowing Leaves:** This can be caused by overwatering, underwatering, nutrient deficiencies, or pests. Check the soil moisture, fertilize your plants, and inspect them for pests.
* **Leggy Seedlings:** This is usually caused by insufficient light. Make sure your seedlings are getting enough light, either from a sunny windowsill or grow lights.
* **Slow Growth:** This can be caused by cool temperatures, nutrient deficiencies, or pests. Provide warmth, fertilize your plants, and inspect them for pests.
Enjoying Your Homegrown Bok Choy
Now that you’ve harvested your bok choy, it’s time to enjoy the fruits (or rather, vegetables) of your labor! Bok choy is incredibly versatile and can be used in a variety of dishes. Here are a few ideas:
* **Stir-fries:** Bok choy is a classic ingredient in stir-fries. Simply chop it up and add it to your favorite stir-fry recipe.
* **Soups:** Bok choy adds a delicious flavor and texture to soups. Add it to your favorite soup recipe during the last few minutes of cooking.
* **Salads:** Young, tender bok choy leaves can be used in salads.
* **Steamed:** Steamed bok choy is a simple and healthy side dish.
* **Grilled:** Grilled bok choy is a delicious and smoky side dish.
Final Thoughts
Growing bok choy indoors is a rewarding experience that allows you to enjoy fresh, healthy vegetables year-round. With a little bit of care and attention, you can easily grow your own bountiful harvest of bok choy right in your home. So, grab your seeds, get your hands dirty, and start growing! Happy gardening!
Conclusion
So, there you have it! Growing Bok Choy indoors is not only achievable, but it’s also a deeply rewarding experience. Forget those wilted, overpriced heads of Bok Choy at the grocery store. Imagine stepping into your kitchen and harvesting fresh, crisp leaves whenever you need them. This DIY approach puts you in complete control of your produce, ensuring you have access to healthy, delicious greens year-round, regardless of the weather outside.
This method offers a fantastic way to reduce your carbon footprint by minimizing transportation and packaging waste associated with store-bought vegetables. Plus, you know exactly what’s going into your Bok Choy – no harmful pesticides or herbicides necessary! It’s a win-win for your health and the environment.
But the benefits don’t stop there. Growing Bok Choy indoors is also a fantastic way to connect with nature, even if you live in an apartment or urban setting. The simple act of nurturing a plant from seed to harvest can be incredibly therapeutic and grounding. It’s a chance to slow down, observe the miracle of life, and appreciate the bounty that nature provides.
Why is this DIY trick a must-try? Because it empowers you to cultivate fresh, healthy, and delicious Bok Choy right in your own home, offering a sustainable and fulfilling alternative to relying solely on grocery stores. It’s a simple, cost-effective, and enjoyable way to enhance your culinary creations and connect with nature.
Looking for variations? Consider experimenting with different varieties of Bok Choy. Baby Bok Choy is perfect for quick stir-fries, while Shanghai Bok Choy offers a slightly milder flavor. You can also try growing other leafy greens alongside your Bok Choy, such as spinach, lettuce, or kale, to create a mini indoor garden. Another variation is to use different growing mediums. While we’ve focused on soil, hydroponics can also be used for indoor Bok Choy cultivation, offering a soilless and potentially faster-growing alternative.
Don’t be afraid to get creative with your setup! Use repurposed containers, experiment with different lighting arrangements, and find what works best for your space and resources. The most important thing is to start, learn, and adapt as you go.
We wholeheartedly encourage you to try this DIY trick for growing Bok Choy indoors. It’s a simple yet transformative experience that will bring fresh flavor and a touch of nature into your home. Once you’ve harvested your first batch of homegrown Bok Choy, we’d love to hear about your experience! Share your photos, tips, and stories in the comments below. Let’s create a community of indoor gardeners and inspire others to embrace the joy of growing their own food. Happy growing!
Frequently Asked Questions (FAQ)
What are the best Bok Choy varieties to grow indoors?
While most Bok Choy varieties can be grown indoors, some are better suited for container gardening due to their size and growth habits. Baby Bok Choy is an excellent choice because it matures quickly and stays relatively small, making it ideal for smaller pots. Shanghai Bok Choy is another good option, offering a slightly milder flavor and compact growth. Dwarf varieties, specifically bred for container gardening, are also worth considering. Ultimately, the best variety for you will depend on your personal preferences and the space you have available. Experimenting with different varieties is a great way to discover your favorites.
How much light does Bok Choy need when grown indoors?
Bok Choy requires at least 6 hours of direct sunlight per day to thrive. If you don’t have a sunny windowsill, you’ll need to supplement with artificial lighting. Fluorescent grow lights or LED grow lights are excellent options. Position the lights a few inches above the plants and keep them on for 12-14 hours per day. Monitor your plants closely and adjust the lighting as needed. If the leaves are pale or leggy, they may not be getting enough light. Conversely, if the leaves are scorched or bleached, they may be getting too much light.
What type of soil is best for growing Bok Choy indoors?
Bok Choy prefers well-draining, nutrient-rich soil. A good quality potting mix specifically formulated for vegetables is ideal. You can also amend your own potting mix by combining equal parts of compost, peat moss (or coconut coir), and perlite or vermiculite. Compost provides essential nutrients, peat moss (or coconut coir) helps retain moisture, and perlite or vermiculite improves drainage. Avoid using garden soil, as it can be too heavy and compact for container gardening.
How often should I water my indoor Bok Choy plants?
Water your Bok Choy plants regularly, keeping the soil consistently moist but not waterlogged. Check the soil moisture level daily by sticking your finger about an inch into the soil. If it feels dry, it’s time to water. Water deeply, until water drains out of the bottom of the pot. Avoid overwatering, as this can lead to root rot. During warmer months, you may need to water more frequently.
How often should I fertilize my indoor Bok Choy plants?
Bok Choy is a relatively heavy feeder, so regular fertilization is essential for optimal growth. Start fertilizing your plants about two weeks after they germinate. Use a balanced liquid fertilizer, diluted to half strength, every two to three weeks. Look for a fertilizer with an NPK ratio (nitrogen, phosphorus, potassium) of around 10-10-10 or 5-5-5. You can also use organic fertilizers, such as compost tea or fish emulsion.
How do I harvest Bok Choy grown indoors?
You can harvest Bok Choy at any stage of growth, depending on your preference. For baby Bok Choy, harvest when the leaves are about 4-6 inches long. For mature Bok Choy, harvest when the head is firm and the leaves are fully developed. You can harvest the entire head at once, or you can harvest individual leaves as needed, starting with the outer leaves. To harvest, simply cut the leaves or head at the base of the plant with a sharp knife or scissors.
What are some common pests and diseases that affect indoor Bok Choy?
While growing Bok Choy indoors reduces the risk of pest and disease problems, it’s still important to be vigilant. Common pests that may affect indoor Bok Choy include aphids, spider mites, and whiteflies. These pests can be controlled with insecticidal soap or neem oil. Diseases that may affect indoor Bok Choy include damping-off (a fungal disease that affects seedlings) and root rot. Damping-off can be prevented by using sterile potting mix and avoiding overwatering. Root rot can be prevented by ensuring good drainage and avoiding overwatering.
Can I grow Bok Choy from seed indoors?
Yes, growing Bok Choy from seed indoors is a great way to start your indoor garden. Sow the seeds directly into your potting mix, about ¼ inch deep. Keep the soil moist and warm (around 70-75°F) until the seeds germinate, which usually takes about 5-7 days. Once the seedlings emerge, thin them out so that they are spaced about 2-3 inches apart.
How long does it take to grow Bok Choy indoors?
The time it takes to grow Bok Choy indoors depends on the variety and growing conditions. Baby Bok Choy can be ready to harvest in as little as 30-40 days, while mature Bok Choy may take 45-60 days. Providing adequate light, water, and nutrients will help your plants grow faster.
Is it possible to regrow Bok Choy from its base?
Yes! You can regrow Bok Choy from its base. After harvesting the leaves, place the base in a shallow dish of water, ensuring the cut end is submerged. Place the dish in a bright location, but not in direct sunlight. Change the water every day or two. Within a few days, you should see new roots and leaves starting to grow. Once the roots are well-developed, you can transplant the base into a pot of soil and continue growing it as usual. This is a fun and sustainable way to get multiple harvests from a single Bok Choy plant.
Leave a Comment