
Growing Kale in Soil Bags: Unlock the secrets to a bountiful harvest, even without a traditional garden! Have you ever dreamed of fresh, homegrown kale gracing your dinner table, but felt limited by space or soil conditions? Well, dream no more! This DIY guide is your passport to a thriving kale patch, all contained within the humble soil bag.
For centuries, humans have cultivated kale, a nutritional powerhouse, in various ways. From its ancient Roman roots to its modern-day superfood status, kale has always been a staple. But let’s face it, not everyone has the perfect garden setup. That’s where this clever trick comes in.
I’m going to show you how to transform ordinary soil bags into mini-gardens, perfect for balconies, patios, or even small yards. This method is not only space-saving and cost-effective, but it also offers excellent drainage and weed control. Imagine the satisfaction of harvesting your own vibrant, leafy greens, knowing you nurtured them from seedling to salad, all within a simple bag. Ready to get your hands dirty? Let’s dive into the world of growing kale in soil bags and discover how easy it is to cultivate your own delicious and nutritious kale, no matter where you live!
Kohl Anbauen in Pflanzsäcken: Eine Einfache DIY Anleitung
Ich liebe es, frischen Grünkohl direkt aus meinem Garten zu ernten. Aber nicht jeder hat den Platz für ein traditionelles Gemüsebeet. Deshalb zeige ich euch heute, wie ihr Grünkohl ganz einfach in Pflanzsäcken anbauen könnt! Es ist eine super platzsparende und kostengünstige Methode, die auch für Balkone oder kleine Terrassen perfekt geeignet ist.
Was du brauchst:
* Pflanzsäcke: Ich empfehle robuste Pflanzsäcke aus Gewebe (Geotextil) mit einem Volumen von mindestens 40 Litern pro Pflanze. Sie sind atmungsaktiv und sorgen für eine gute Drainage.
* Hochwertige Pflanzerde: Eine Mischung aus Gartenerde, Kompost und etwas Sand ist ideal. Vermeide reine Blumenerde, da sie oft zu schnell austrocknet.
* Grünkohl-Setzlinge oder Samen: Du kannst entweder vorgezogene Setzlinge kaufen oder deine eigenen Samen vorziehen.
* Organischer Dünger: Grünkohl ist ein Starkzehrer und benötigt regelmäßige Düngergaben.
* Gießkanne oder Gartenschlauch: Für die Bewässerung.
* Schere oder Messer: Zum Öffnen der Pflanzsäcke und eventuell zum Ausdünnen der Setzlinge.
* Handschuhe: Um deine Hände sauber zu halten.
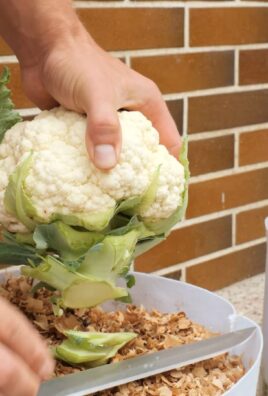
* Optional: Mulchmaterial (z.B. Stroh oder Holzhackschnitzel) zur Feuchtigkeitsspeicherung und Unkrautunterdrückung.
Schritt-für-Schritt Anleitung:
1. Pflanzsäcke vorbereiten:
* Lege die leeren Pflanzsäcke an den Ort, wo du deinen Grünkohl anbauen möchtest. Denk daran, dass sie gefüllt schwer zu bewegen sind.
* Öffne die Pflanzsäcke vorsichtig mit einer Schere oder einem Messer. Achte darauf, die Säcke nicht zu beschädigen.
* Falls deine Pflanzsäcke keine Löcher am Boden haben, kannst du ein paar kleine Löcher hineinschneiden, um Staunässe zu vermeiden.
2. Pflanzerde einfüllen:
* Fülle die Pflanzsäcke mit der vorbereiteten Pflanzerde. Lass oben etwa 5-10 cm Platz frei.
* Drücke die Erde leicht an, aber nicht zu fest. Sie sollte locker und luftig bleiben.
* Gieße die Erde gründlich, bis sie gut durchfeuchtet ist.
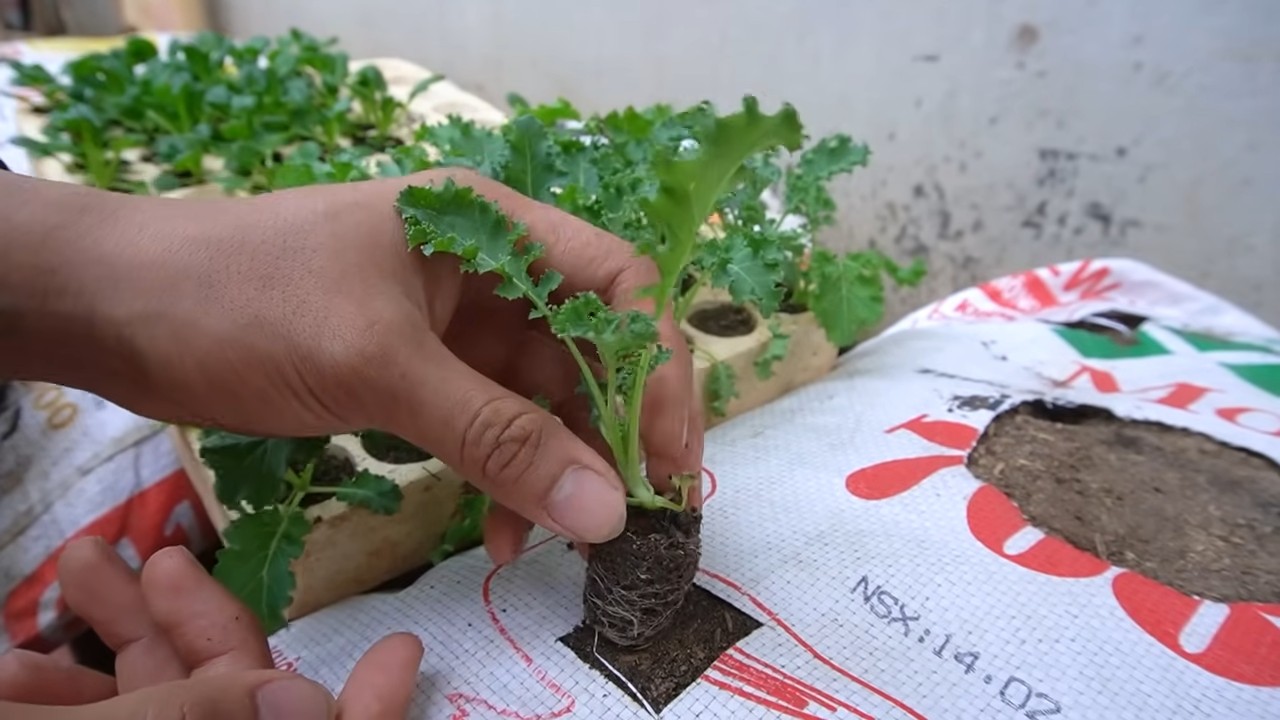
3. Grünkohl pflanzen:
* Bei Setzlingen: Grabe kleine Löcher in die Erde, die groß genug sind, um die Wurzelballen der Setzlinge aufzunehmen. Setze die Setzlinge vorsichtig in die Löcher und fülle sie mit Erde auf. Drücke die Erde leicht an. Achte darauf, dass der Wurzelhals (der Übergang zwischen Wurzel und Stängel) nicht mit Erde bedeckt ist.
* Bei Samen: Säe die Samen gemäß den Anweisungen auf der Saatgutpackung aus. In der Regel werden die Samen etwa 1-2 cm tief in die Erde gelegt. Bedecke die Samen mit Erde und gieße sie vorsichtig an.
* Wenn du mehrere Grünkohlpflanzen in einem Pflanzsack anbauen möchtest, achte auf einen ausreichenden Abstand zwischen den Pflanzen (ca. 30-40 cm).
4. Bewässerung und Düngung:
* Bewässerung: Grünkohl benötigt regelmäßige Bewässerung, besonders während trockener Perioden. Die Erde sollte immer leicht feucht sein, aber nicht nass. Vermeide Staunässe, da dies zu Wurzelfäule führen kann. Am besten gießt du morgens oder abends, um Verdunstung zu minimieren.
* Düngung: Grünkohl ist ein Starkzehrer und benötigt regelmäßige Düngergaben. Beginne etwa 2-3 Wochen nach dem Pflanzen mit der Düngung. Verwende einen organischen Dünger, der speziell für Gemüse geeignet ist. Befolge die Anweisungen auf der Düngerverpackung. Du kannst den Dünger entweder ins Gießwasser geben oder direkt in die Erde einarbeiten.
5. Pflege und Schutz:
* Unkraut entfernen: Entferne regelmäßig Unkraut, das in den Pflanzsäcken wächst. Unkraut konkurriert mit dem Grünkohl um Nährstoffe und Wasser.
* Schutz vor Schädlingen: Grünkohl kann von verschiedenen Schädlingen befallen werden, wie z.B. Kohlweißlingen, Blattläusen oder Schnecken. Kontrolliere deine Pflanzen regelmäßig auf Schädlinge und ergreife gegebenenfalls Maßnahmen. Du kannst z.B. ein Insektizid auf biologischer Basis verwenden oder die Pflanzen mit einem Netz abdecken.
* Mulchen: Eine Mulchschicht aus Stroh oder Holzhackschnitzeln hilft, die Feuchtigkeit im Boden zu halten, Unkraut zu unterdrücken und den Boden vor Temperaturschwankungen zu schützen.
* Ausgeizen (optional): Einige Grünkohlsorten bilden Seitentriebe. Wenn du möchtest, kannst du diese Seitentriebe ausbrechen, um die Energie der Pflanze auf die Haupttriebe zu konzentrieren.
Erntezeit!
Die Erntezeit für Grünkohl hängt von der Sorte und dem Zeitpunkt der Aussaat ab. In der Regel kannst du etwa 2-3 Monate nach der Aussaat mit der Ernte beginnen.
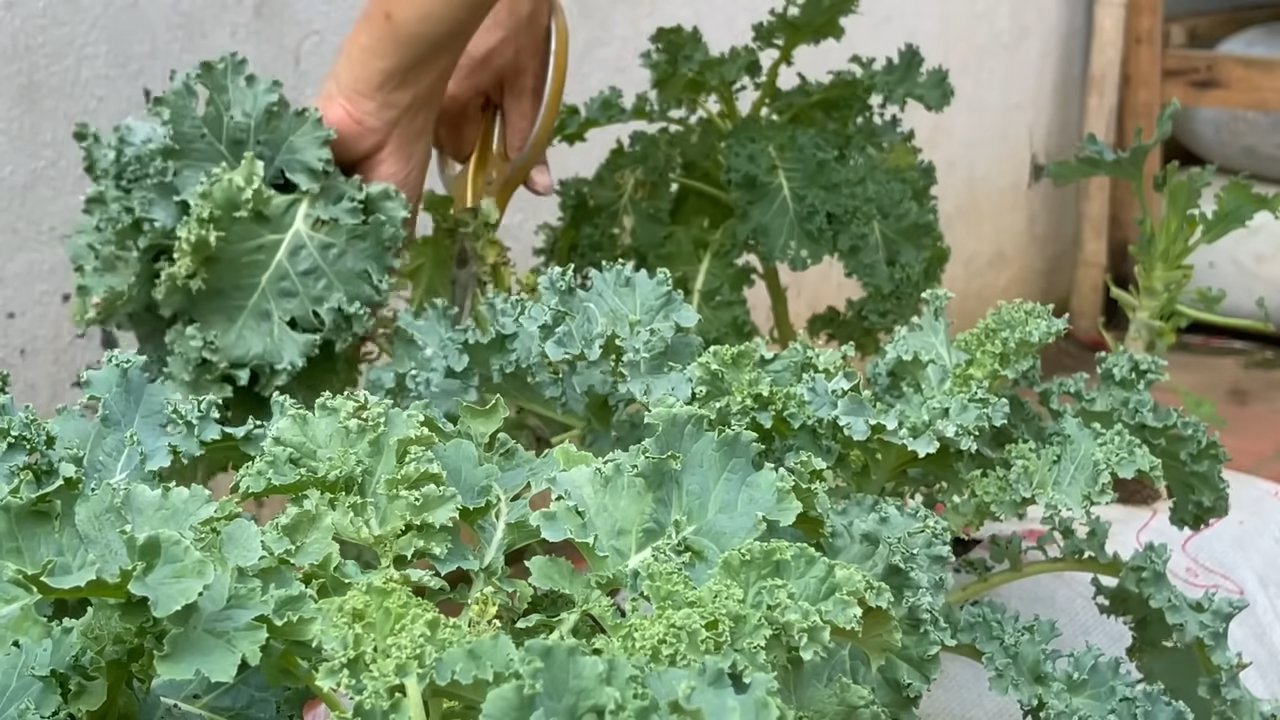
* Ernte: Ernte die äußeren Blätter, wenn sie groß genug sind. Die inneren Blätter können weiterwachsen. Du kannst die Blätter entweder einzeln abzupfen oder den ganzen Strunk abschneiden.
* Lagerung: Grünkohl ist am besten frisch. Du kannst ihn aber auch im Kühlschrank lagern. Wickle die Blätter in ein feuchtes Tuch, dann halten sie sich ein paar Tage. Du kannst Grünkohl auch einfrieren. Blanchiere die Blätter kurz in kochendem Wasser, bevor du sie einfrierst.
Zusätzliche Tipps und Tricks:
* Standort: Grünkohl benötigt einen sonnigen Standort. Mindestens 6 Stunden Sonne pro Tag sind ideal.
* Boden: Grünkohl bevorzugt einen nährstoffreichen, gut durchlässigen Boden.
* Sortenwahl: Es gibt viele verschiedene Grünkohlsorten. Wähle eine Sorte, die dir schmeckt und die für dein Klima geeignet ist. Beliebte Sorten sind z.B. “Lerchenzungen”, “Halbhoher Grüner Krauser” oder “Nero di Toscana”.
* Fruchtfolge: Baue Grünkohl nicht jedes Jahr am selben Standort an. Wechsle die Anbaufläche, um Krankheiten und Schädlingen vorzubeugen.
* Überwinterung: Grünkohl ist winterhart und kann auch im Winter geerntet werden. Bei starkem Frost kannst du die Pflanzen mit einem Vlies abdecken.
* Schneckenbekämpfung: Schnecken lieben Grünkohl! Stelle Schneckenfallen auf oder streue Schneckenkorn um die Pflanzen.
* Blattläuse bekämpfen: Blattläuse können mit einem Wasserstrahl abgespült oder mit einem biologischen Insektizid bekämpft werden.
Häufige Probleme und Lösungen:
* Gelbe Blätter: Gelbe Blätter können ein Zeichen für Nährstoffmangel sein. Dünge die Pflanzen mit einem organischen Dünger.
* Wurzelfäule: Wurzelfäule wird durch Staunässe verursacht. Achte auf eine gute Drainage und vermeide Überwässerung.
* Kohlhernie: Kohlhernie ist eine Pilzkrankheit, die die Wurzeln befällt. Baue Grünkohl nicht auf Flächen an, die von Kohlhernie befallen sind.
* Schädlinge: Kontrolliere deine Pflanzen regelmäßig auf Schädlinge und ergreife gegebenenfalls Maßnahmen.
Grünkohl richtig ernten und zubereiten
Grünkohl ist ein unglaublich vielseitiges Gemüse. Du kannst ihn roh in Salaten verwenden, kochen, dünsten, braten oder backen. Hier sind ein paar Ideen:
* Grünkohl-Chips: Die Blätter mit Olivenöl und Gewürzen vermischen und im Ofen knusprig backen.
* Grünkohl-Smoothie: Grünkohl mit Obst und Joghurt zu einem gesunden
Conclusion
So, there you have it! Growing kale in soil bags is not just a gardening hack; it’s a game-changer for anyone looking to enjoy fresh, nutritious greens with minimal effort and maximum yield. We’ve walked you through the simple steps, highlighting the benefits of this method – from its space-saving nature and improved drainage to its portability and ability to extend your growing season.
Why is this DIY trick a must-try? Because it democratizes gardening. You don’t need acres of land or a green thumb passed down through generations. All you need is a soil bag, some kale seeds or seedlings, a sunny spot, and a little bit of enthusiasm. The beauty of growing kale in soil bags lies in its accessibility. Apartment dwellers, balcony gardeners, and even those with limited mobility can participate in the joy of cultivating their own food.
Beyond the practical advantages, there’s a certain satisfaction that comes from nurturing something from seed to harvest. Watching those tiny kale leaves unfurl, knowing you played a part in their growth, is a reward in itself. And the taste? Forget the store-bought kale that’s been sitting on shelves for days. Homegrown kale, bursting with freshness and flavor, is a culinary delight that will elevate your salads, smoothies, and stir-fries to a whole new level.
But don’t just take our word for it. We encourage you to experiment and find what works best for you.
Variations and Suggestions
* Companion Planting: Consider planting companion herbs like rosemary or thyme around your kale in the soil bag. These herbs can help deter pests and enhance the flavor of your kale.
* Succession Planting: To ensure a continuous harvest, stagger your planting. Sow new seeds or transplant seedlings every few weeks to have a steady supply of fresh kale throughout the growing season.
* Fertilizing: While the soil bag provides initial nutrients, your kale will benefit from regular feeding. Use a balanced organic fertilizer or compost tea every few weeks to keep your plants healthy and productive.
* Kale Varieties: Don’t limit yourself to just one type of kale! Experiment with different varieties like Lacinato (dinosaur kale), Red Russian, or Curly kale to discover your favorites. Each variety offers a unique flavor and texture.
* Vertical Gardening: If space is truly limited, consider creating a vertical garden with your soil bags. Lean them against a wall or fence, or build a simple frame to support them. This maximizes your growing area and adds a visually appealing element to your garden.
So, grab a soil bag, some kale seeds, and get ready to embark on a rewarding gardening adventure. We’re confident that you’ll be amazed by the ease and success of growing kale in soil bags.
We’re eager to hear about your experiences! Share your photos, tips, and challenges in the comments below. Let’s create a community of soil bag kale growers and inspire others to discover the joys of homegrown goodness. Happy gardening! Remember that **growing kale in soil bags** is not just a trend; it’s a sustainable and accessible way to bring fresh, healthy food to your table.
FAQ
What kind of soil should I use in my soil bag for kale?
The best soil for growing kale in soil bags is a well-draining, nutrient-rich potting mix. Avoid using garden soil, as it can be too heavy and compact, hindering drainage and root development. Look for a potting mix that contains ingredients like peat moss, perlite, vermiculite, and compost. These components provide good aeration, water retention, and essential nutrients for healthy kale growth. You can also amend your potting mix with additional compost or aged manure to further boost its fertility. A slightly acidic to neutral pH (around 6.0 to 7.0) is ideal for kale.
How often should I water my kale plants in soil bags?
Watering frequency depends on several factors, including the weather, the size of your soil bag, and the stage of growth of your kale plants. Generally, you should water your kale when the top inch of soil feels dry to the touch. During hot, dry weather, you may need to water daily, while in cooler, wetter conditions, you can water less frequently. Be sure to water thoroughly, allowing the water to drain out of the bottom of the bag. Avoid overwatering, as this can lead to root rot. A good rule of thumb is to check the soil moisture regularly and adjust your watering schedule accordingly.
How much sunlight does kale need when grown in soil bags?
Kale thrives in full sun, which means it needs at least 6 hours of direct sunlight per day. However, it can also tolerate partial shade, especially in hotter climates. If you live in an area with intense summer heat, providing some afternoon shade can help prevent the leaves from scorching. When choosing a location for your soil bag, consider the amount of sunlight it will receive throughout the day. If you’re growing kale indoors, you’ll need to supplement with grow lights to provide adequate light.
What are some common pests and diseases that affect kale grown in soil bags, and how can I prevent them?
Kale is susceptible to several pests and diseases, including aphids, cabbage worms, flea beetles, and fungal diseases like powdery mildew. To prevent these problems, start with healthy seedlings or seeds and use a well-draining potting mix. Regularly inspect your plants for signs of pests or diseases. Handpick any pests you find, or use insecticidal soap or neem oil to control infestations. To prevent fungal diseases, ensure good air circulation around your plants and avoid overwatering. You can also apply a fungicide if necessary. Companion planting with herbs like rosemary or thyme can also help deter pests.
How do I harvest kale from soil bags, and how often can I harvest?
You can begin harvesting kale leaves when they are about 4-6 inches long. Start by harvesting the outer, older leaves, leaving the inner, younger leaves to continue growing. This method, known as “cut and come again,” allows you to harvest kale continuously throughout the growing season. Avoid harvesting more than one-third of the plant at a time, as this can stress the plant and reduce its yield. You can harvest kale every few days or weeks, depending on how quickly it grows.
Can I grow kale in soil bags during the winter?
Yes, you can grow kale in soil bags during the winter, especially in mild climates. Kale is a cold-hardy vegetable that can tolerate temperatures down to 20°F (-6°C). In colder climates, you can protect your kale plants from frost by covering them with a frost blanket or moving them to a sheltered location, such as a greenhouse or garage. Even in colder climates, with proper protection, you can extend your kale growing season well into the winter months.
How long will my kale plants last in soil bags?
Kale is a biennial plant, which means it typically lives for two years. However, in most gardens, it is grown as an annual. In soil bags, kale plants can last for several months, providing a continuous harvest of fresh leaves. The lifespan of your kale plants will depend on factors such as the variety, growing conditions, and how well you care for them. With proper care, you can expect your kale plants to produce for several months, providing you with a bountiful harvest of nutritious greens.
Can I reuse the soil from my soil bag after harvesting kale?
Yes, you can reuse the soil from your soil bag after harvesting kale, but it’s important to amend it with fresh compost or other organic matter to replenish the nutrients that have been depleted. You may also want to sterilize the soil to kill any potential pests or diseases. You can do this by baking the soil in the oven at 180°F (82°C) for 30 minutes or by solarizing it in a black plastic bag for several weeks. After amending and sterilizing the soil, it will be ready for planting another crop.
Leave a Comment