
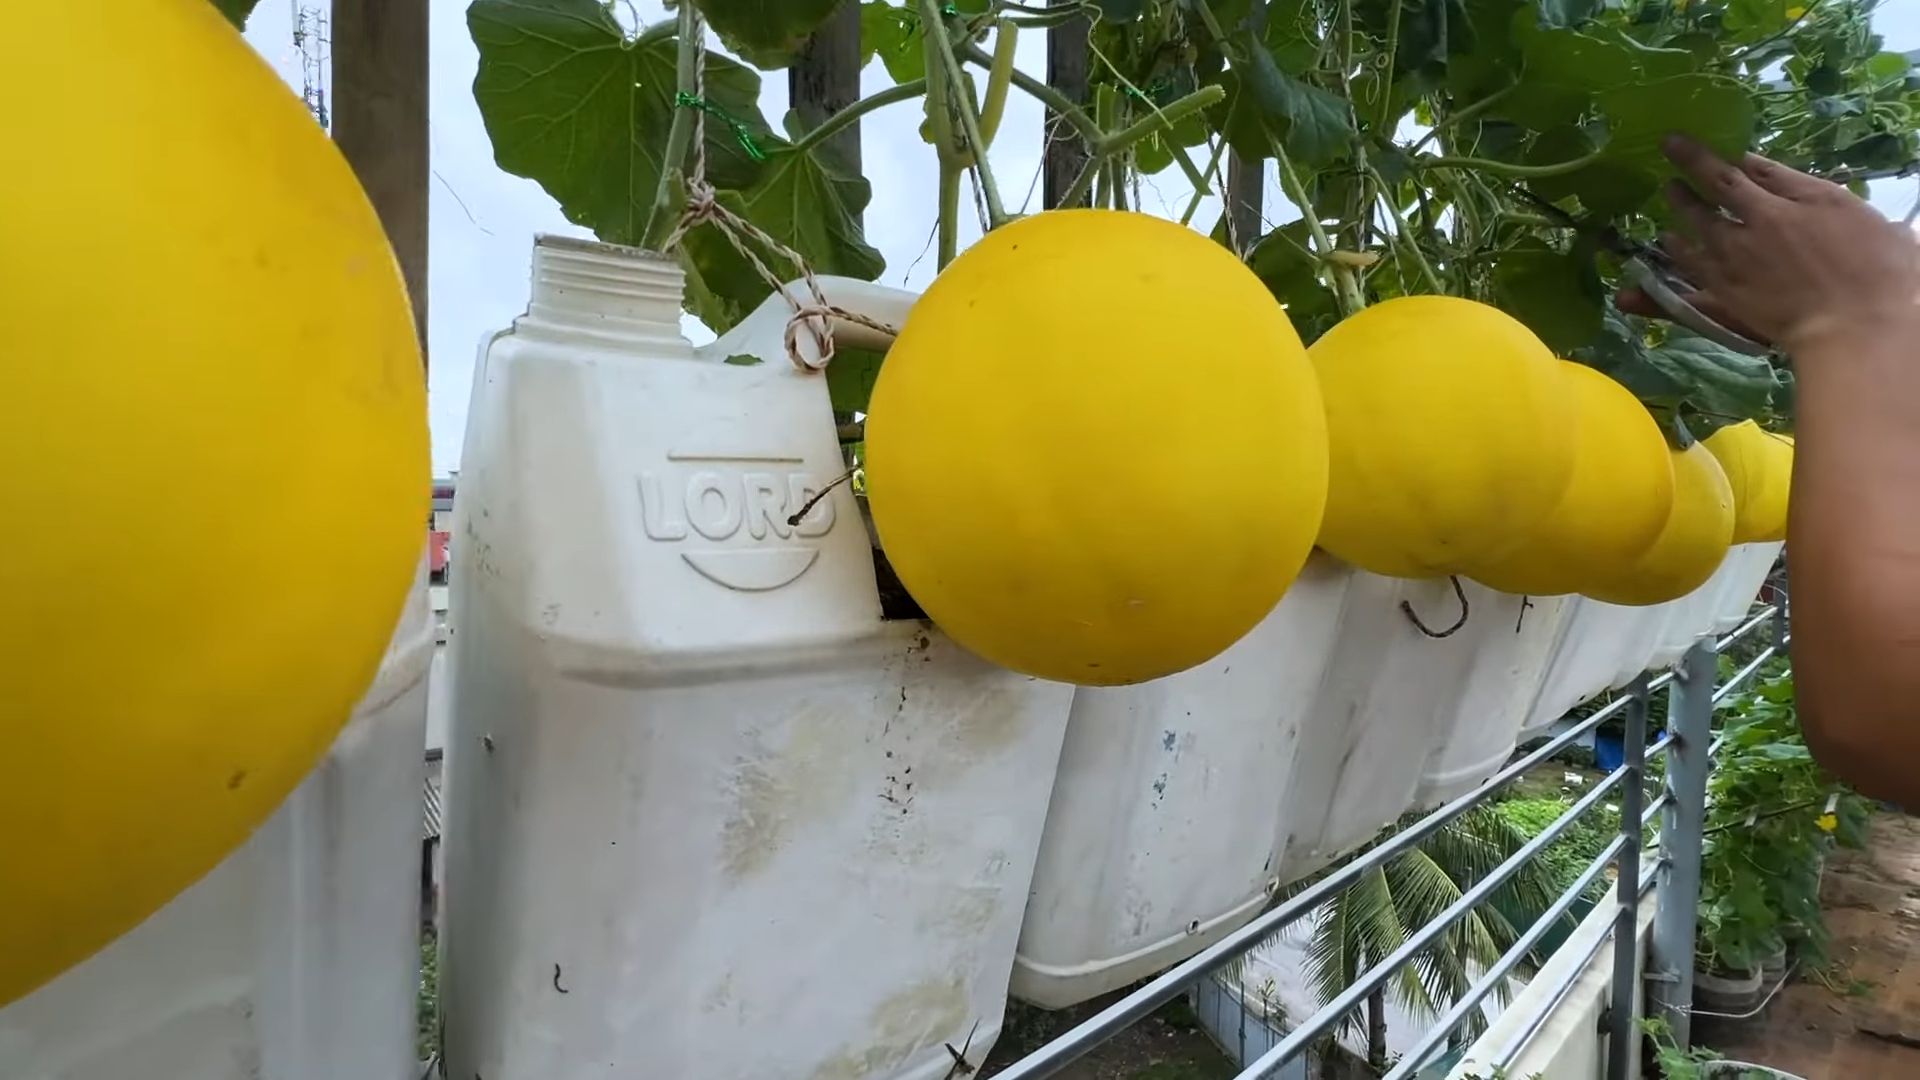
Growing Melons in Containers might sound like a challenge reserved for seasoned gardeners with sprawling acres, but I’m here to tell you it’s totally achievable, even if your “garden” is a sunny balcony or a small patio! Forget the sprawling vines taking over your yard; we’re going vertical and compact! Have you ever dreamt of biting into a juicy, homegrown cantaloupe or watermelon, bursting with flavor that store-bought melons just can’t match? This dream can be a reality, and I’m going to show you how.
Melons have a rich history, dating back to ancient Egypt and beyond, where they were prized for their sweetness and refreshing qualities. For centuries, they were symbols of abundance and luxury, enjoyed by royalty and commoners alike. While traditionally grown in open fields, modern gardening techniques have opened up new possibilities, allowing us to cultivate these delicious fruits in smaller spaces.
Why should you try growing melons in containers? Well, for starters, it gives you complete control over the soil, watering, and sunlight your melons receive, leading to healthier plants and tastier fruit. Plus, it’s a fantastic way to maximize your gardening space, especially if you’re short on room. Imagine the satisfaction of harvesting your own sweet, sun-ripened melons, knowing you nurtured them from tiny seedlings to delicious treats. This DIY guide will provide you with all the essential tricks and hacks you need to succeed, from choosing the right container and soil to providing proper support and pest control. Let’s get started and turn your small space into a melon paradise!
Growing Melons in Containers: A Sweet Success Story!
Hey there, fellow gardening enthusiasts! I’m so excited to share my experience with growing melons in containers. I know, it sounds a little crazy, right? Melons are usually associated with sprawling vines and vast fields. But trust me, with a little know-how and some careful planning, you can absolutely enjoy homegrown, juicy melons even if you only have a balcony or a small patio. I’ve done it, and I’m here to guide you through every step!
Choosing the Right Melon Variety
Okay, first things first: not all melons are created equal when it comes to container gardening. You’ll want to choose varieties that are naturally smaller and more compact. Here are a few of my favorites:
* Bush Sugar Baby Watermelon: This is a classic for a reason! It produces smaller, personal-sized watermelons that are incredibly sweet. The vines are also much more manageable than traditional watermelon varieties.
* Minnesota Midget Cantaloupe: As the name suggests, this cantaloupe is a compact grower, producing small, flavorful melons. It’s perfect for smaller containers.
* Jenny Lind Melon: This heirloom cantaloupe is known for its unique turban shape and delicious, aromatic flesh. It’s a relatively small vine, making it suitable for container growing.
* Honey Dew: Some of the smaller varieties of honeydew can be grown in containers.
Important Tip: Always check the seed packet or plant label for information on vine size and fruit size before making your selection. Look for terms like “bush,” “dwarf,” or “compact.”
Gathering Your Supplies
Now that you’ve chosen your melon variety, let’s gather the necessary supplies. Here’s what you’ll need:
* Large Containers: This is crucial! Melons need plenty of room for their roots to grow. I recommend using containers that are at least 20 gallons in size. The bigger, the better! Think large resin pots, half whiskey barrels, or even repurposed plastic storage bins (with drainage holes, of course!).
* High-Quality Potting Mix: Don’t skimp on the potting mix! Use a well-draining mix that’s rich in organic matter. I like to use a mix specifically formulated for vegetables, or you can create your own by combining equal parts compost, peat moss (or coco coir), and perlite.
* Melon Seeds or Seedlings: You can start your melons from seed indoors or purchase seedlings from a local nursery. Starting from seed gives you more control over the variety, but seedlings will give you a head start.
* Trellis or Support System: Even bush varieties of melons can benefit from some support. A trellis, tomato cage, or even sturdy stakes can help keep the vines off the ground and prevent the fruit from rotting.
* Fertilizer: Melons are heavy feeders, so you’ll need to fertilize them regularly. Use a balanced fertilizer (like 10-10-10) or a fertilizer specifically formulated for fruits and vegetables.
* Watering Can or Hose: Consistent watering is essential for melon growth.
* Gardening Gloves: Protect your hands!
* Pruning Shears or Scissors: For trimming and pruning.
* Mulch: To help retain moisture and suppress weeds.
Planting Your Melons
Alright, let’s get our hands dirty! Here’s how to plant your melons in containers:
1. Prepare the Container: Make sure your container has adequate drainage holes. If not, drill some! Then, fill the container with your high-quality potting mix, leaving a few inches of space at the top.
2. Planting Seeds: If you’re starting from seed, sow the seeds directly into the container, following the instructions on the seed packet. Usually, this means planting them about 1 inch deep. Water gently after planting.
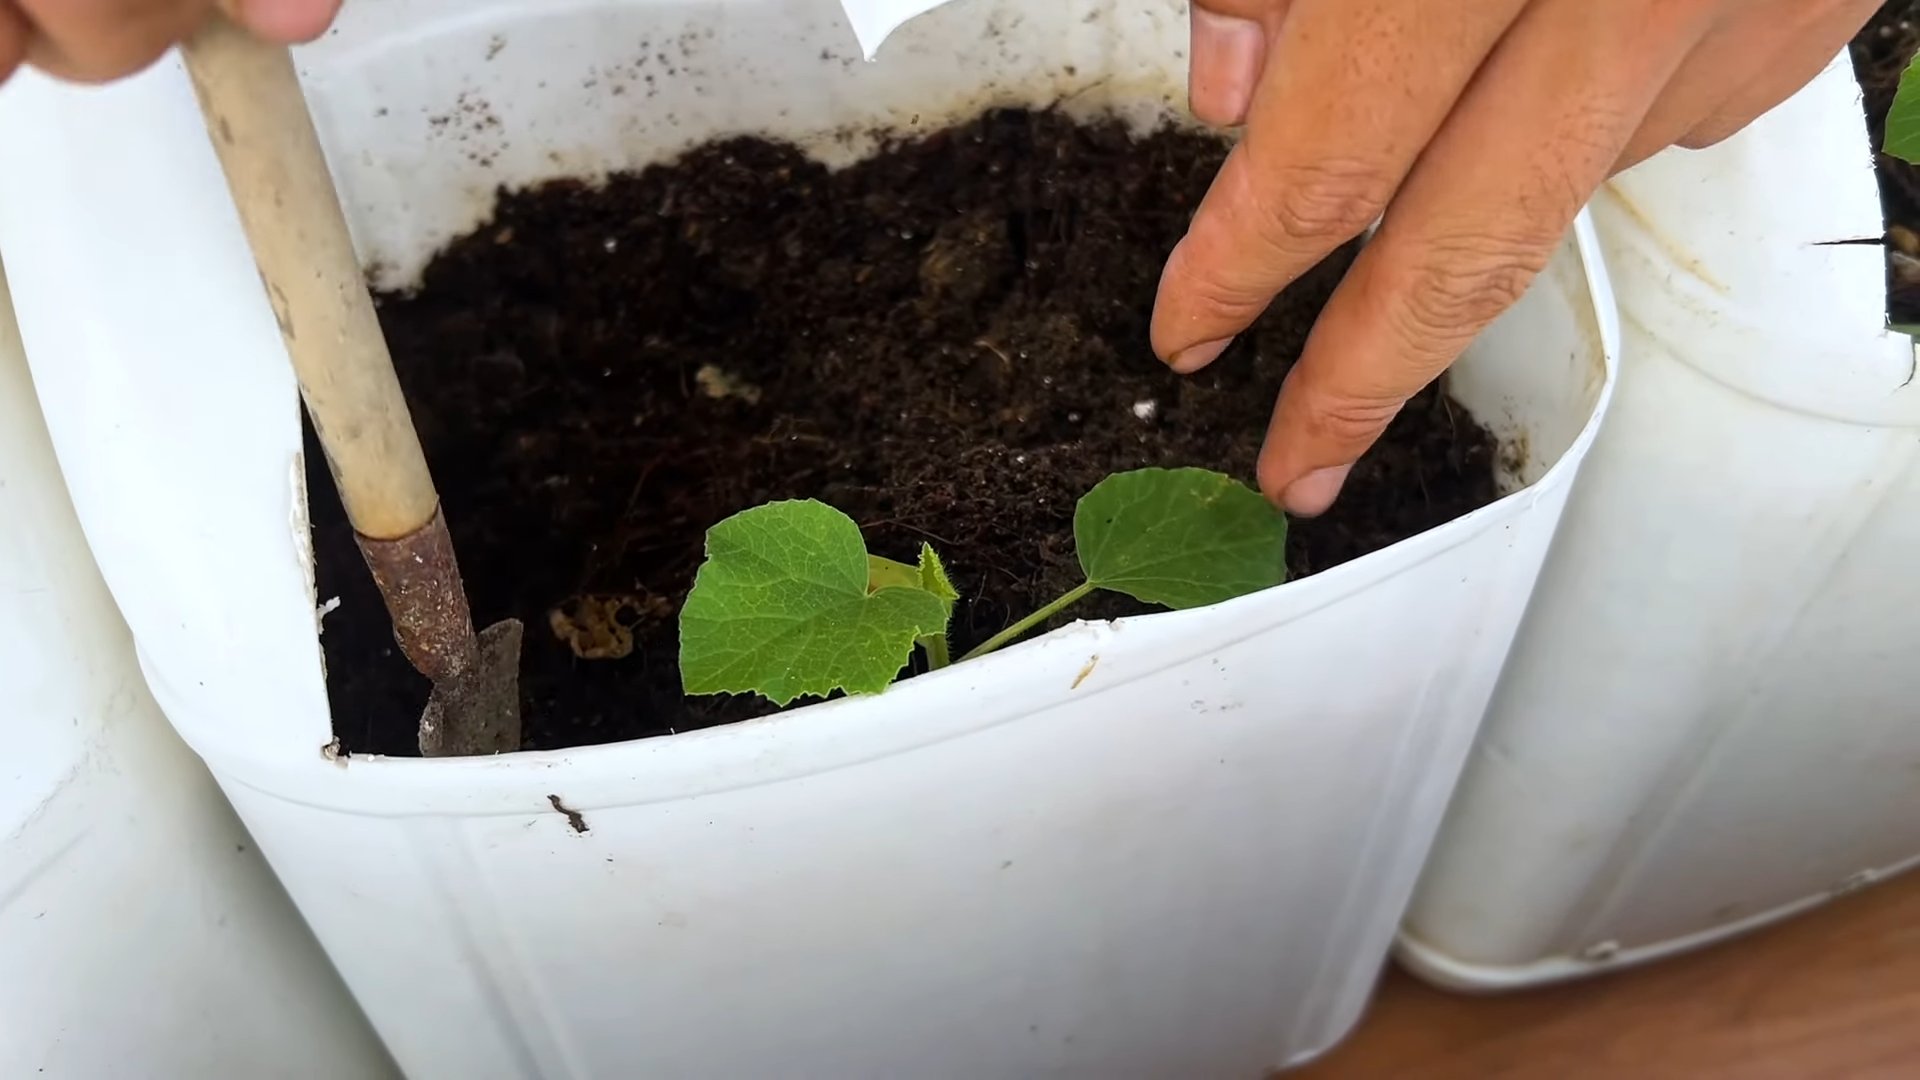
3. Planting Seedlings: If you’re using seedlings, gently remove them from their nursery pots. Loosen the roots slightly and plant the seedlings in the container, making sure the top of the root ball is level with the soil surface. Water thoroughly after planting.
4. Provide Support: Install your trellis or support system at this stage. Gently train the melon vines to grow up the support as they grow.
5. Mulch: Add a layer of mulch around the base of the plants to help retain moisture and suppress weeds.
Caring for Your Container Melons
Now that your melons are planted, it’s time to provide them with the care they need to thrive.
1. Watering: Melons need consistent watering, especially during hot weather. Water deeply whenever the top inch of soil feels dry to the touch. Avoid overhead watering, as this can lead to fungal diseases. I prefer to water at the base of the plant.
2. Fertilizing: As I mentioned earlier, melons are heavy feeders. Start fertilizing about two weeks after planting, using a balanced fertilizer or a fertilizer specifically formulated for fruits and vegetables. Follow the instructions on the fertilizer package. I usually fertilize every two to three weeks.
3. Sunlight: Melons need at least 6-8 hours of direct sunlight per day. Choose a sunny location for your containers.
4. Pruning: Pruning can help improve air circulation and encourage fruit production. Remove any yellowing or dead leaves. You can also pinch off the tips of the vines to encourage branching.
5. Pollination: Melons require pollination to produce fruit. If you’re growing your melons indoors or in a location with limited bee activity, you may need to hand-pollinate them. To do this, use a small paintbrush to transfer pollen from the male flowers to the female flowers. Female flowers have a small, immature melon at the base of the flower.
6. Pest and Disease Control: Keep an eye out for common melon pests like aphids, squash bugs, and vine borers. You can control these pests with insecticidal soap or neem oil. Also, watch out for fungal diseases like powdery mildew. Improve air circulation and avoid overhead watering to prevent these diseases.
Training Your Melon Vines
This is a crucial step, especially if you’re growing a variety that tends to sprawl. Here’s how I train my melon vines:
1. Early Training: As the vines start to grow, gently guide them towards your trellis or support system. Use soft plant ties or twine to secure the vines to the support.
2. Vertical Growth: Encourage the vines to grow vertically by pruning any side shoots that are growing outwards. This will help keep the plant compact and prevent it from taking over your patio.
3. Fruit Support: As the melons start to develop, they may need additional support. You can use slings made from pantyhose or netting to support the fruit and prevent it from breaking off the vine. I’ve even used old t-shirts cut into strips!
4. Regular Inspection: Regularly inspect your vines and adjust the training as needed. Make sure the vines are securely attached to the support and that the fruit is adequately supported.
Harvesting Your Melons
The moment we’ve all been waiting for! Knowing when to harvest your melons can be a little tricky, but here are some tips:
1. Days to Maturity: Check the seed packet or plant label for the days to maturity. This will give you a general idea of when your melons will be ready to harvest.
2. Visual Cues: Look for visual cues like a change in color. For example, watermelons will often develop a dull, matte finish when they’re ripe. Cantaloupes will develop a distinct aroma and the stem will start to slip easily from the fruit.
3. Thumping Test: For watermelons, try the “thumping test.” A ripe watermelon will sound hollow when you thump it.
4. Tendril Test: For some melon varieties, the tendril closest to the fruit will turn brown and dry when the melon is ripe.
5. Taste Test: The best way to know if your melon is ripe is to taste it! If you’re unsure, harvest one melon and give it a try. If it’s not quite ripe, wait a few more days and try again.
Harvesting Tip: Use a sharp knife or pruning shears to cut the melon from the vine, leaving a few inches of stem attached.
Troubleshooting Common Problems
Even with the best care, you may encounter some problems when growing melons in containers. Here are a few common issues and how to address them:
* Poor Fruit Set: If your melons are not setting fruit, it could be due to a lack of pollination. Try hand-pollinating the flowers or attracting more pollinators to your garden by planting flowers that attract bees and butterflies.
* Blossom End Rot: This is a common problem in melons, caused by a calcium deficiency. To prevent blossom end rot, make sure your soil is well-drained and that
Conclusion
So, there you have it! Growing melons in containers might seem like a daunting task, reserved for sprawling farms and experienced gardeners. But with a little planning, the right techniques, and a dash of patience, you can absolutely enjoy the sweet, juicy reward of homegrown melons, even if you only have a balcony or patio to work with. This DIY trick for container melon gardening is a game-changer, transforming what was once considered impossible into a readily achievable feat for any home gardener.
Why is this a must-try? Because it democratizes melon cultivation! No longer are you limited by space or soil conditions. Container gardening allows you to control the environment, providing optimal drainage, sunlight exposure, and nutrient availability. Plus, it’s incredibly satisfying to nurture a tiny seed into a thriving plant that produces delicious fruit. Imagine the pride you’ll feel serving a slice of your own homegrown watermelon or cantaloupe to friends and family!
But the benefits extend beyond just the taste. Growing your own food connects you to the natural world, reduces your carbon footprint by minimizing transportation, and provides a healthy, organic alternative to store-bought produce. And let’s be honest, there’s nothing quite like the flavor of a vine-ripened melon, bursting with sweetness and sunshine.
Now, for a few suggestions and variations to really personalize your container melon gardening experience:
* Vertical Support Systems: Experiment with different trellising methods. While we discussed basic trellises, consider using tomato cages, A-frame trellises, or even repurposing old ladders to create unique and visually appealing support structures. This not only saves space but also adds a decorative element to your garden.
* Companion Planting: Enhance your melon’s growth by incorporating companion plants. Marigolds can deter pests, while basil can improve flavor. Consider planting nasturtiums to attract aphids away from your melon plants.
* Melon Varieties: Don’t limit yourself to just one type of melon! Explore different varieties of watermelon (sugar baby, bush sugar baby), cantaloupe (hale’s best jumbo, Athena), and honeydew. Each variety has its own unique flavor profile and growth habits, so you can find the perfect melon to suit your taste and growing conditions.
* Fertilizer Adjustments: Monitor your plants closely and adjust your fertilizer regimen as needed. During the early stages of growth, focus on nitrogen-rich fertilizers to promote leafy growth. As the plants begin to flower and fruit, switch to a phosphorus and potassium-rich fertilizer to encourage fruit development.
* Watering Techniques: Consider using a self-watering container or setting up a drip irrigation system to ensure consistent moisture levels. This is especially important during hot, dry weather.
* Pollination Assistance: If you notice a lack of fruit set, you may need to hand-pollinate your melon flowers. Use a small paintbrush to transfer pollen from the male flowers to the female flowers.
We are confident that this DIY trick will revolutionize your gardening experience. We wholeheartedly encourage you to give growing melons in containers a try. It’s easier than you think, and the rewards are well worth the effort.
Most importantly, we want to hear about your experiences! Share your successes, your challenges, and any tips or tricks you discover along the way. Post photos of your container melon gardens on social media using #ContainerMelons and #DIYGardening. Let’s build a community of container melon enthusiasts and inspire others to embrace the joy of homegrown produce. Your feedback will help us refine this guide and make it even more helpful for future gardeners. Happy gardening!
Frequently Asked Questions (FAQ)
Q1: What is the best type of container to use for growing melons?
The ideal container size depends on the melon variety. For smaller melons like Sugar Baby watermelons or cantaloupes, a 15-20 gallon container is sufficient. Larger varieties, such as heirloom watermelons, will require at least a 25-30 gallon container. The container should be made of a durable material like plastic, resin, or terracotta. Ensure the container has adequate drainage holes to prevent waterlogging, which can lead to root rot. Dark-colored containers can absorb more heat, which can be beneficial in cooler climates but may overheat the soil in hotter regions. Consider using lighter-colored containers or wrapping dark containers with reflective material to mitigate this issue.
Q2: What type of soil is best for growing melons in containers?
Melons thrive in well-draining, nutrient-rich soil. A good potting mix for container melons should consist of a blend of peat moss or coco coir, perlite or vermiculite, and compost. This combination provides excellent drainage, aeration, and water retention. Avoid using garden soil in containers, as it can become compacted and impede root growth. You can also amend your potting mix with slow-release fertilizer to provide a steady supply of nutrients throughout the growing season. The pH of the soil should be slightly acidic to neutral, around 6.0 to 7.0.
Q3: How much sunlight do container melons need?
Melons are sun-loving plants and require at least 6-8 hours of direct sunlight per day to produce abundant fruit. Choose a location for your container melons that receives full sun exposure. If you live in a particularly hot climate, some afternoon shade may be beneficial to prevent the plants from overheating. If you don’t have access to a sunny location, you can supplement with grow lights. Position the grow lights close to the plants and adjust the height as they grow.
Q4: How often should I water my container melons?
Watering frequency depends on several factors, including the weather, the size of the container, and the type of melon. Generally, container melons need to be watered deeply and regularly, especially during hot, dry weather. Check the soil moisture level daily by sticking your finger into the soil. If the top inch of soil feels dry, it’s time to water. Water thoroughly until water drains out of the drainage holes. Avoid overwatering, as this can lead to root rot. Consider using a soaker hose or drip irrigation system to deliver water directly to the roots.
Q5: How do I fertilize my container melons?
Melons are heavy feeders and require regular fertilization to produce healthy plants and abundant fruit. Start fertilizing your container melons about two weeks after transplanting them into their final containers. Use a balanced fertilizer with an NPK ratio of 10-10-10 or 14-14-14. As the plants begin to flower and fruit, switch to a fertilizer with a higher phosphorus and potassium content, such as 5-10-10 or 5-15-15. Follow the instructions on the fertilizer label for application rates. You can also supplement with organic fertilizers, such as compost tea or fish emulsion.
Q6: How do I support the weight of the melons as they grow?
Melons can become quite heavy as they mature, so it’s important to provide adequate support to prevent the vines from breaking. Use a trellis, tomato cage, or other support structure to support the weight of the melons. You can also use slings made from pantyhose or netting to cradle the melons and prevent them from falling off the vine. Tie the slings to the support structure to provide additional stability.
Q7: How do I know when my container melons are ripe?
Determining when a melon is ripe can be tricky, but there are a few telltale signs to look for. For watermelons, look for a dull rind, a yellow spot on the bottom where the melon rested on the ground, and a hollow sound when you thump it. For cantaloupes, look for a sweet aroma, a slight give when you press on the blossom end, and a stem that slips easily from the vine. For honeydew melons, look for a creamy yellow color and a slight softening of the rind.
Q8: What are some common pests and diseases that affect container melons?
Common pests that affect container melons include aphids, squash bugs, vine borers, and spider mites. Diseases include powdery mildew, fusarium wilt, and anthracnose. Monitor your plants regularly for signs of pests and diseases. Treat infestations with insecticidal soap, neem oil, or other organic pesticides. Prevent diseases by providing good air circulation, avoiding overwatering, and using disease-resistant varieties.
Q9: Can I grow melons indoors in containers?
While it’s possible to grow melons indoors in containers, it can be challenging. Melons require a lot of sunlight, so you’ll need to provide supplemental lighting with grow lights. You’ll also need to hand-pollinate the flowers, as there won’t be any bees or other pollinators indoors. Indoor growing also increases the risk of pests and diseases. If you’re determined to grow melons indoors, choose a compact variety and provide optimal growing conditions.
Q10: What if my melon plant produces flowers but no fruit?
This is a common problem with melons, and it can be caused by several factors. One possibility is that the flowers are not being pollinated. Melons have separate male and female flowers, and the pollen must be transferred from the male flowers to the female flowers for fruit to develop. If there are not enough bees or other pollinators in your area, you may need to hand-pollinate the flowers. Another possibility is that the

Leave a Comment