
Growing mint indoors can seem like a daunting task, conjuring images of sprawling gardens and sunny patios. But what if I told you that fresh, fragrant mint is just a few simple steps away, no matter the size of your living space? Imagine the joy of snipping fresh mint leaves for your morning tea, adding a vibrant touch to your summer cocktails, or infusing your dishes with that unmistakable, refreshing flavor – all from the comfort of your own home!
Mint, with its rich history dating back to ancient Egypt and Rome, has been cherished for centuries for its medicinal and culinary properties. From flavoring chewing gum to soothing digestive ailments, this versatile herb has earned its place in cultures worldwide. But beyond its historical significance, growing mint indoors offers a practical solution for modern living. Whether you’re a seasoned gardener or a complete beginner, this DIY guide will equip you with the knowledge and tricks to cultivate a thriving mint plant indoors, regardless of your experience level.
In today’s fast-paced world, access to fresh, healthy ingredients is more important than ever. Store-bought herbs can be expensive and often lack the vibrant flavor of homegrown varieties. By learning how to grow mint indoors, you’ll not only save money but also gain access to a constant supply of fresh, organic mint, ready to elevate your culinary creations and enhance your well-being. So, let’s dive in and unlock the secrets to successfully growing mint indoors!
Minze im Haus anbauen: Ein DIY-Leitfaden für frische Kräuter das ganze Jahr über
Ich liebe den frischen Duft und Geschmack von Minze! Ob im Mojito, im Tee oder als Garnitur für Desserts – Minze ist einfach vielseitig. Und das Beste daran? Man kann sie ganz einfach zu Hause anbauen, auch wenn man keinen Garten hat. In diesem Artikel zeige ich dir, wie du Minze erfolgreich in Innenräumen anbauen kannst, damit du das ganze Jahr über frische Kräuter zur Hand hast.
Was du brauchst
Bevor wir loslegen, hier eine Liste der Dinge, die du für dein Indoor-Minzprojekt benötigst:
* Minzsetzlinge oder Samen: Du kannst Minzsetzlinge in den meisten Gartencentern kaufen. Alternativ kannst du Minze auch aus Samen ziehen, was aber etwas länger dauert. Ich persönlich finde Setzlinge einfacher für den Anfang.
* Einen Topf: Wähle einen Topf mit einem Durchmesser von mindestens 15 cm. Achte darauf, dass er Drainagelöcher hat, damit das Wasser ablaufen kann.
* Hochwertige Blumenerde: Verwende eine gut durchlässige Blumenerde. Ich empfehle eine Mischung aus Blumenerde, Kompost und Perlit, um eine gute Drainage und Belüftung zu gewährleisten.
* Wasser: Klares, sauberes Wasser zum Gießen.
* Einen sonnigen Standort: Minze braucht viel Licht, also wähle einen Standort mit mindestens 4-6 Stunden Sonnenlicht pro Tag. Ein Fensterbrett nach Süden oder Osten ist ideal.
* Optional: Flüssigdünger für Kräuter, Sprühflasche für die Luftfeuchtigkeit.
Die richtige Minzsorte wählen
Es gibt viele verschiedene Minzsorten, jede mit ihrem eigenen einzigartigen Geschmack und Duft. Hier sind einige beliebte Optionen für den Anbau in Innenräumen:
* Pfefferminze: Bekannt für ihren starken, erfrischenden Geschmack. Perfekt für Tee und Desserts.
* Grüne Minze: Eine mildere, süßere Minze, die oft in Cocktails und Salaten verwendet wird.
* Schokoladenminze: Eine interessante Sorte mit einem Hauch von Schokolade. Ideal für Desserts und Getränke.
* Orangenminze: Eine fruchtige Minze mit einem Hauch von Orange.
Wähle die Sorte, die dir am besten schmeckt!
Minze aus Setzlingen anpflanzen
Das Anpflanzen von Minze aus Setzlingen ist der schnellste Weg, um mit dem Anbau zu beginnen. Hier sind die Schritte:
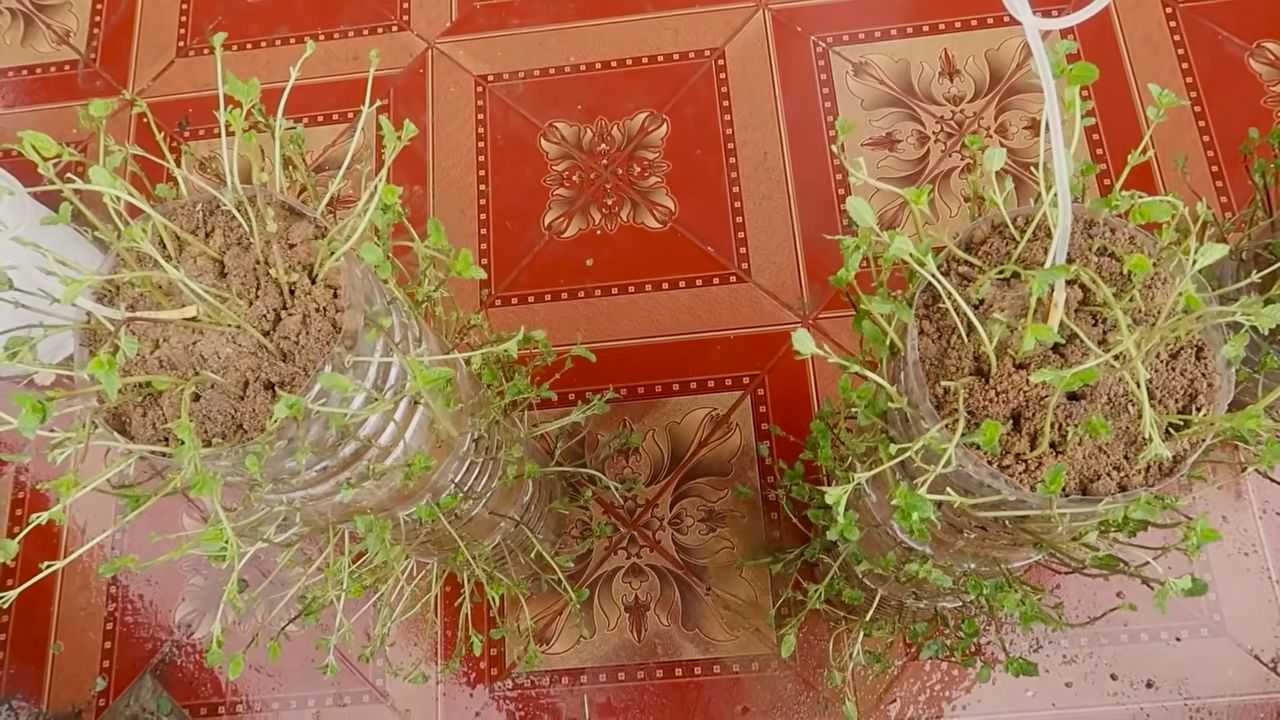
1. Topf vorbereiten: Fülle den Topf mit Blumenerde, lasse aber etwa 2-3 cm Platz bis zum Rand.
2. Setzling einpflanzen: Grabe ein kleines Loch in die Erde, das groß genug ist, um den Wurzelballen des Setzlings aufzunehmen. Nimm den Setzling vorsichtig aus dem Anzuchttopf und lockere die Wurzeln leicht auf. Setze den Setzling in das Loch und fülle es mit Erde auf. Drücke die Erde leicht an.
3. Gießen: Gieße die Minze gründlich, bis das Wasser aus den Drainagelöchern abläuft.
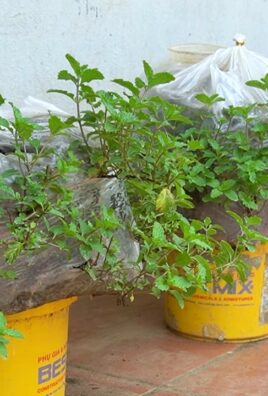
4. Standort wählen: Stelle den Topf an einen sonnigen Standort.
Minze aus Samen ziehen
Das Ziehen von Minze aus Samen dauert länger, ist aber auch lohnend. Hier sind die Schritte:
1. Aussaatgefäß vorbereiten: Fülle ein Anzuchtgefäß oder einen kleinen Topf mit Anzuchterde.
2. Samen aussäen: Streue die Minzsamen gleichmäßig auf die Erde. Da Minze ein Lichtkeimer ist, bedecke die Samen nur leicht mit Erde.
3. Befeuchten: Befeuchte die Erde mit einer Sprühflasche. Achte darauf, dass die Erde feucht, aber nicht nass ist.
4. Abdecken: Decke das Anzuchtgefäß mit einer Plastikfolie oder einem Deckel ab, um die Luftfeuchtigkeit zu erhöhen.
5. Standort wählen: Stelle das Anzuchtgefäß an einen warmen, hellen Ort, aber nicht in direktes Sonnenlicht.
6. Keimung: Die Samen sollten innerhalb von 10-14 Tagen keimen. Sobald die Keimlinge erscheinen, entferne die Plastikfolie oder den Deckel.
7. Pikieren: Wenn die Keimlinge groß genug sind, um sie zu handhaben (etwa 5-7 cm hoch), pikiere sie in separate Töpfe.
Pflege deiner Indoor-Minze
Die richtige Pflege ist entscheidend für den Erfolg deines Indoor-Minzprojekts. Hier sind einige wichtige Tipps:
* Gießen: Gieße die Minze regelmäßig, aber vermeide Staunässe. Die Erde sollte immer leicht feucht sein. Überprüfe die Erde regelmäßig mit dem Finger. Wenn sich die oberste Schicht trocken anfühlt, ist es Zeit zum Gießen.
* Licht: Minze braucht viel Licht. Wenn dein Standort nicht genügend Sonnenlicht bietet, kannst du eine Pflanzenlampe verwenden.
* Düngen: Dünge die Minze alle 2-4 Wochen mit einem Flüssigdünger für Kräuter. Befolge die Anweisungen auf der Verpackung.
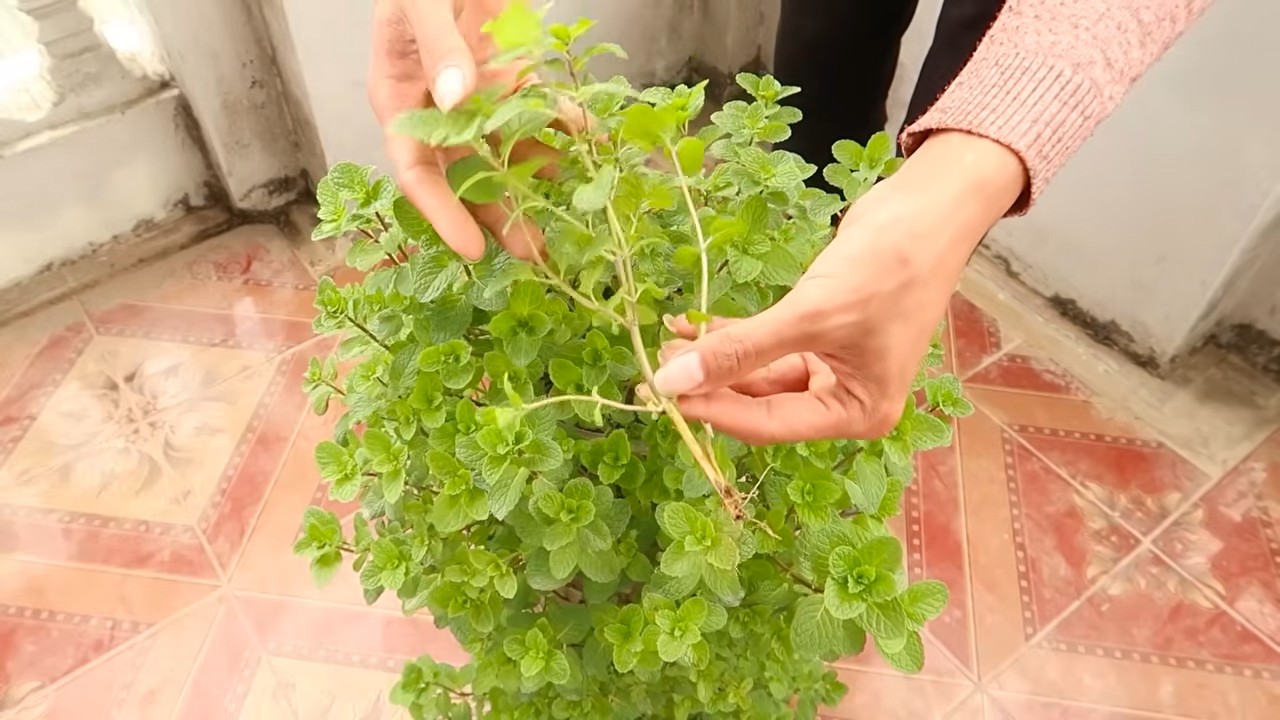
* Schneiden: Schneide die Minze regelmäßig, um das Wachstum zu fördern und zu verhindern, dass sie zu lang und sparrig wird. Schneide die Stängel direkt über einem Blattknoten ab. Das fördert das Wachstum neuer Triebe.
* Luftfeuchtigkeit: Minze mag eine hohe Luftfeuchtigkeit. Du kannst die Luftfeuchtigkeit erhöhen, indem du die Blätter regelmäßig mit Wasser besprühst oder den Topf auf eine Schale mit Wasser und Kieselsteinen stellst.
* Umpflanzen: Wenn die Minze zu groß für ihren Topf wird, pflanze sie in einen größeren Topf um.
Häufige Probleme und Lösungen
Auch beim Anbau von Minze in Innenräumen können Probleme auftreten. Hier sind einige häufige Probleme und wie du sie beheben kannst:
* Gelbe Blätter: Gelbe Blätter können ein Zeichen für Überwässerung, Unterwässerung oder Nährstoffmangel sein. Überprüfe die Erde und passe die Bewässerung entsprechend an. Dünge die Minze bei Bedarf.
* Spinnmilben: Spinnmilben sind kleine Schädlinge, die sich von den Blättern ernähren. Du kannst sie mit einem Insektizid auf Basis von Neemöl bekämpfen.
* Mehltau: Mehltau ist eine Pilzkrankheit, die sich als weißer, pudriger Belag auf den Blättern zeigt. Sorge für eine gute Belüftung und vermeide es, die Blätter beim Gießen zu benetzen. Du kannst Mehltau mit einem Fungizid bekämpfen.
Ernten und Verwenden deiner Indoor-Minze
Du kannst deine Indoor-Minze ernten, sobald sie groß genug ist. Schneide die Stängel direkt über einem Blattknoten ab. Die Minze wird weiterwachsen und neue Triebe bilden.
Hier sind einige Ideen, wie du deine frische Minze verwenden kannst:
* Tee: Übergieße frische Minzblätter mit heißem Wasser und lasse sie einige Minuten ziehen.
* Cocktails: Verwende Minze in Mojitos, Minz-Juleps und anderen Cocktails.
* Salate: Füge Minze zu Salaten hinzu, um ihnen einen frischen Geschmack zu verleihen.
* Desserts: Verwende Minze als Garnitur für Desserts oder füge sie zu Schokoladenkuchen und Eiscreme hinzu.
* Aromatisierung von Wasser: Gib ein paar Minzblätter in eine Karaffe Wasser, um es zu aromatisieren.
Minze vermehren
Minze ist sehr einfach zu vermehren. Du kannst sie durch Stecklinge vermehren. Schneide einfach einen gesunden Stängel ab und stelle ihn in ein Glas Wasser. Nach einigen Tagen sollten sich Wurzeln bilden. Sobald die Wurzeln etwa 2-3 cm lang sind, kannst du den Steckling in einen Topf mit Blumenerde pflanzen.
Zusätzliche Tipps für den Erfolg
* Drehe den Topf regelmäßig: Drehe den Topf regelmäßig, damit die Minze gleichmäßig Licht bekommt.
* Achte auf die Temperatur: Minze mag Temperaturen zwischen 18 und 24 Grad Celsius
Conclusion
So, there you have it! Growing mint indoors is not only achievable, but it’s also incredibly rewarding. Imagine having fresh, fragrant mint readily available to elevate your culinary creations, infuse your beverages, or simply brighten your living space with its invigorating aroma. This simple DIY trick transforms your kitchen into a miniature herb garden, offering a sustainable and cost-effective alternative to constantly buying mint from the store.
Why is this a must-try? Because it’s easy, economical, and environmentally friendly. You’re reducing plastic waste from store-bought packaging, minimizing your carbon footprint by eliminating transportation, and enjoying the unparalleled freshness of homegrown herbs. Plus, the vibrant green of a thriving mint plant adds a touch of natural beauty to your home.
But the benefits don’t stop there. Growing mint indoors allows you to control the growing environment, ensuring your plant receives the optimal amount of light, water, and nutrients. This leads to healthier, more flavorful mint leaves that are free from pesticides and other harmful chemicals.
Looking for variations? Consider experimenting with different varieties of mint, such as peppermint, spearmint, chocolate mint, or even apple mint. Each variety offers a unique flavor profile that can enhance different dishes and drinks. You can also try growing mint in different types of containers, from terracotta pots to repurposed jars, adding a personal touch to your indoor garden. For a more decorative approach, consider using a self-watering planter or a vertical garden system.
Another fun variation is to propagate your mint cuttings in water before planting them in soil. This allows you to observe the root development process and ensures a higher success rate when transplanting. You can also experiment with different soil mixtures to find the one that works best for your mint plant.
Don’t be afraid to get creative and personalize your indoor mint garden to suit your preferences and needs. The possibilities are endless!
We wholeheartedly encourage you to try this DIY trick for growing mint indoors. It’s a simple yet transformative experience that will bring joy, flavor, and freshness into your life. Once you’ve successfully grown your own mint, we’d love to hear about your experience! Share your tips, tricks, and photos with us in the comments below. Let’s create a community of indoor herb enthusiasts and inspire others to embrace the joys of homegrown goodness.
Remember, even if you don’t have a green thumb, growing mint indoors is surprisingly easy. With a little patience and care, you’ll be enjoying fresh, flavorful mint in no time. So, what are you waiting for? Grab a pot, some soil, and a mint cutting, and get ready to embark on your indoor gardening adventure! Let’s all enjoy the benefits of fresh, homegrown mint!
Frequently Asked Questions (FAQ)
1. What kind of light does indoor mint need?
Mint thrives in bright, indirect sunlight. Aim for at least 4-6 hours of sunlight per day. If you don’t have a sunny windowsill, you can supplement with a grow light. Place the grow light about 6-12 inches above the plant for optimal results. Rotate the plant regularly to ensure even growth on all sides. If your mint starts to look leggy (long stems with few leaves), it’s likely not getting enough light.
2. How often should I water my indoor mint plant?
Water your mint plant when the top inch of soil feels dry to the touch. Avoid overwatering, as this can lead to root rot. Ensure your pot has drainage holes to allow excess water to escape. During the warmer months, you may need to water more frequently than in the cooler months. Check the soil moisture regularly and adjust your watering schedule accordingly.
3. What kind of soil is best for growing mint indoors?
A well-draining potting mix is ideal for growing mint indoors. You can use a general-purpose potting mix or create your own by combining equal parts of potting soil, perlite, and vermiculite. This mixture provides good drainage and aeration, which are essential for healthy root growth. Avoid using garden soil, as it can be too heavy and may contain pests or diseases.
4. How do I propagate mint cuttings?
Propagating mint cuttings is a simple and effective way to expand your indoor mint garden. Take a 4-6 inch cutting from a healthy stem, removing the lower leaves. Place the cutting in a glass of water, ensuring that the nodes (where the leaves were removed) are submerged. Change the water every few days. Within a week or two, roots will begin to develop. Once the roots are about an inch long, you can transplant the cutting into a pot filled with well-draining potting mix.
5. How do I harvest mint leaves?
Harvest mint leaves by pinching or cutting off the stems just above a leaf node. This encourages the plant to branch out and produce more leaves. You can harvest mint leaves as needed throughout the growing season. For the best flavor, harvest mint leaves in the morning, after the dew has dried. Avoid harvesting more than one-third of the plant at a time, as this can stress the plant.
6. Why are the leaves on my mint plant turning yellow?
Yellowing leaves can be a sign of several issues, including overwatering, underwatering, nutrient deficiencies, or pests. Check the soil moisture to ensure you’re not overwatering or underwatering. If the soil is consistently wet, reduce your watering frequency. If the soil is dry, water more often. You can also fertilize your mint plant with a balanced liquid fertilizer to address any nutrient deficiencies. Inspect the plant for pests, such as aphids or spider mites, and treat accordingly.
7. How do I prevent mint from spreading too much?
Mint is known for its invasive nature, so it’s important to contain it when growing it indoors. Growing mint in a pot is the best way to prevent it from spreading. You can also prune the plant regularly to keep it under control. If you notice any runners (stems that grow along the surface of the soil), remove them promptly.
8. Can I grow mint from seed indoors?
Yes, you can grow mint from seed indoors, but it’s generally easier and faster to propagate from cuttings. If you choose to grow from seed, start the seeds indoors 6-8 weeks before the last frost. Sow the seeds thinly on the surface of a seed-starting mix and gently press them into the soil. Keep the soil moist and provide plenty of light. Once the seedlings are large enough to handle, transplant them into individual pots.
9. What are some common uses for fresh mint?
Fresh mint is a versatile herb that can be used in a variety of culinary and medicinal applications. It’s commonly used to flavor beverages, such as mojitos, iced tea, and lemonade. It can also be added to salads, soups, and sauces. Mint is a popular ingredient in Middle Eastern and Asian cuisine. Medicinally, mint is known for its digestive properties and can be used to relieve indigestion, nausea, and headaches.
10. My mint plant has a powdery white substance on the leaves. What is it?
The powdery white substance is likely powdery mildew, a fungal disease that commonly affects mint plants. To treat powdery mildew, improve air circulation around the plant by pruning away crowded stems. You can also spray the plant with a fungicide specifically designed for powdery mildew. Avoid watering the leaves of the plant, as this can create a favorable environment for the fungus to thrive.

Leave a Comment