
Growing green onions from scraps is easier than you might think, and I’m here to show you how! Have you ever tossed the root ends of your green onions, thinking they were useless? Well, stop right there! You’re throwing away a fantastic opportunity to have a continuous supply of fresh green onions right at your fingertips. Imagine never having to buy green onions again – that’s the magic we’re unlocking today.
The practice of regrowing vegetables from scraps isn’t new. It’s a time-honored tradition passed down through generations, especially during times of scarcity. Our grandparents and great-grandparents knew the value of resourcefulness, and this is a perfect example of that wisdom in action. It’s a sustainable and budget-friendly way to enjoy fresh produce.
In today’s world, where grocery prices are constantly rising, and we’re all looking for ways to be more eco-conscious, growing green onions from scraps is a total game-changer. It reduces food waste, saves you money, and gives you the satisfaction of nurturing something from virtually nothing. Plus, it’s a fantastic project for kids, teaching them about plant life cycles and the importance of sustainability. So, let’s dive in and learn how to turn those kitchen scraps into a thriving green onion patch!
Growing Green Onions From Scraps: A Beginner’s Guide
Hey there, fellow gardening enthusiasts! Ever find yourself tossing the root ends of your green onions after using the green parts in your cooking? Well, stop right there! Did you know you can easily regrow those scraps into fresh, delicious green onions? It’s a super simple and rewarding DIY project that anyone can do, even if you don’t have a green thumb. I’m going to walk you through the whole process, step-by-step, so you can have a continuous supply of green onions right at your fingertips.
What You’ll Need
Before we dive in, let’s gather our supplies. The beauty of this project is that you probably already have most of what you need!
* Green Onion Scraps: These are the stars of the show! You’ll need the white root ends of your green onions, about 1-2 inches long. Make sure they have some roots still attached.
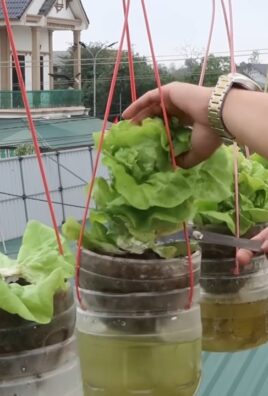
* A Glass or Jar: Any small glass or jar will work. I like to use mason jars or even recycled glass containers.
* Water: Tap water is perfectly fine.
* Potting Soil (Optional): If you want to eventually transplant your green onions into soil, you’ll need some potting soil.
* A Small Pot (Optional): For transplanting.
* Scissors or a Knife: For trimming (optional).
* A Sunny Spot: Green onions need sunlight to thrive.
Regrowing Green Onions in Water: The Quick Start
This is the easiest and fastest way to get started. You’ll see new growth within days!
1. Prepare the Green Onion Scraps: Take your green onion scraps and gently remove any loose or slimy outer layers. You can also trim the very top of the green part, leaving about an inch or two. This encourages new growth. I usually just snip off the very top with scissors.
2. Place the Scraps in Water: Fill your glass or jar with enough water to cover the roots of the green onion scraps. Don’t submerge the entire white part; just the roots need to be in the water.
3. Find a Sunny Spot: Place the jar in a sunny windowsill or any location that receives plenty of sunlight. A south-facing window is ideal.
4. Change the Water Regularly: This is important to prevent bacteria growth and keep your green onions healthy. Change the water every 1-2 days. I usually do it every morning when I’m making coffee.
5. Watch Them Grow! Within a few days, you’ll start to see new green shoots emerging from the center of the scraps. It’s so exciting to watch!
6. Harvest Your Green Onions: Once the green shoots are a few inches long, you can start harvesting them. Simply snip off the amount you need with scissors. The green onions will continue to grow back, providing you with a continuous supply.
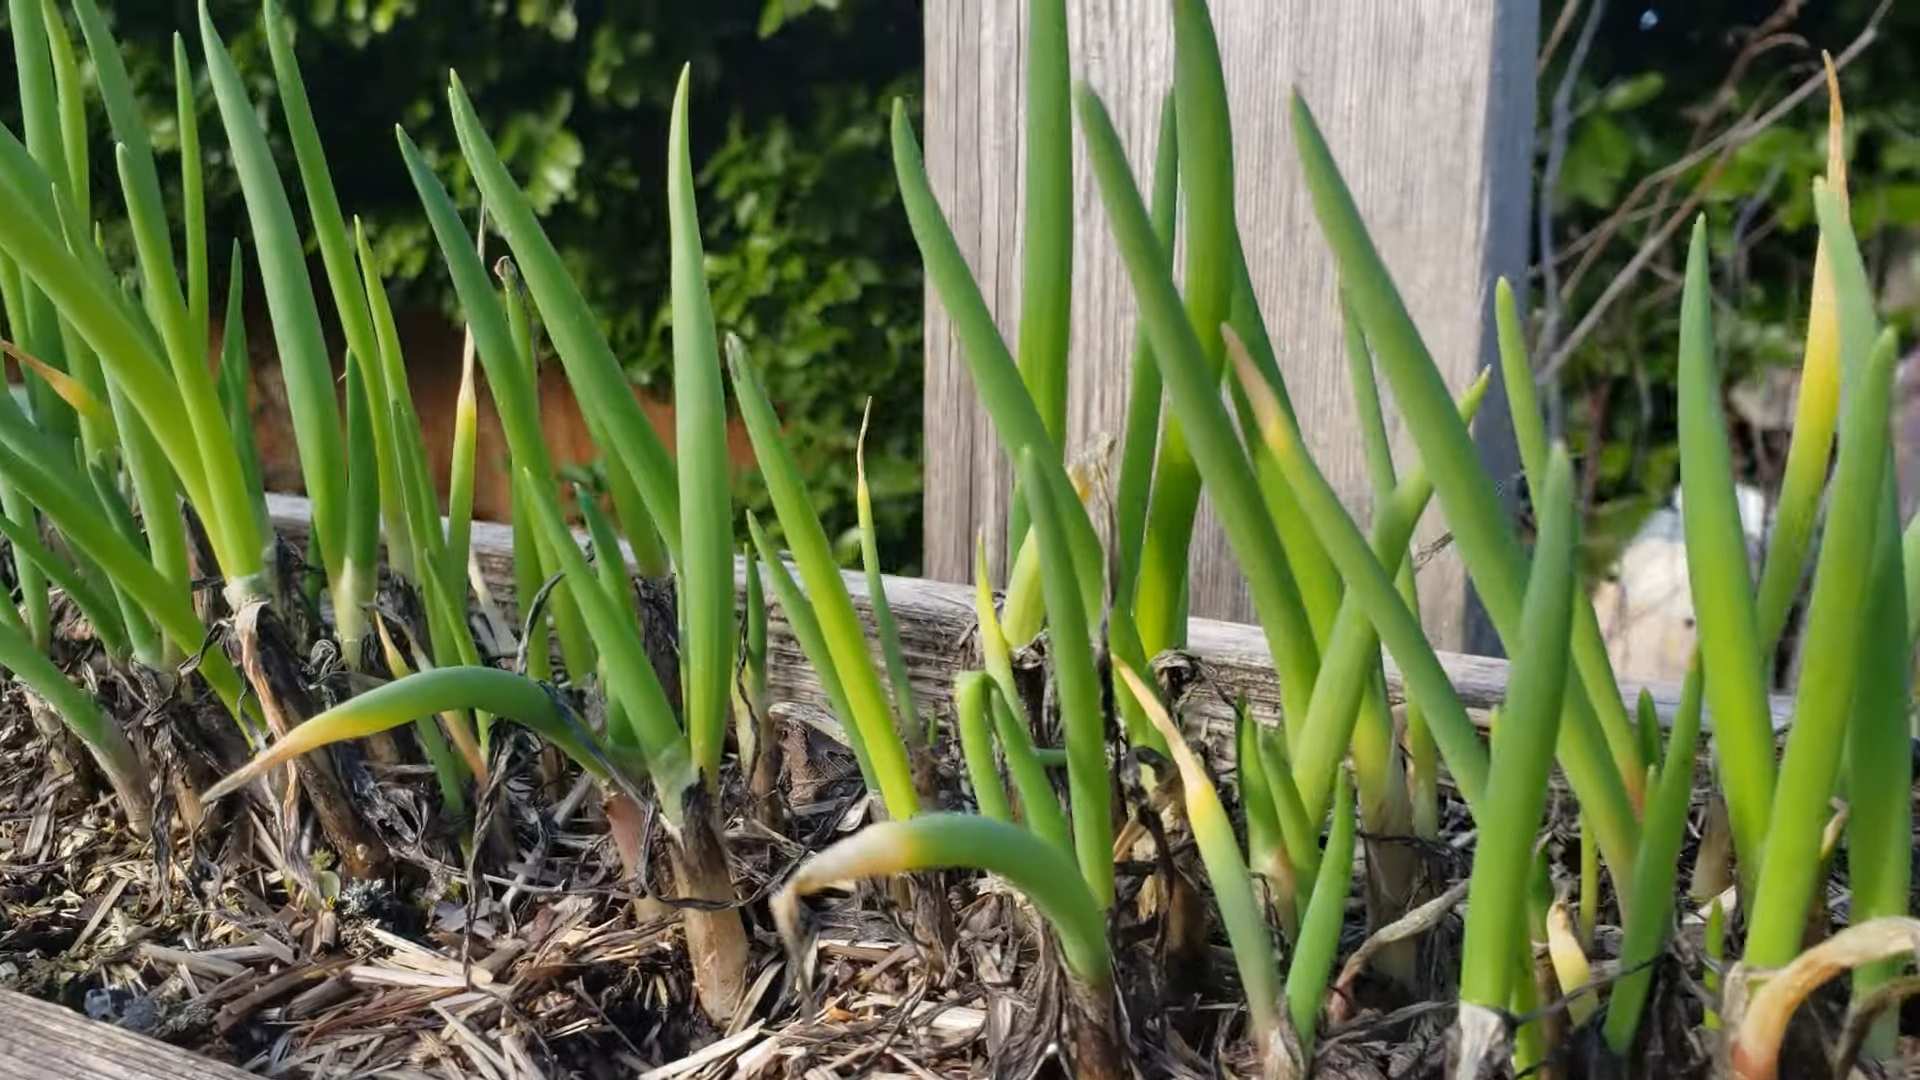
Transplanting to Soil: For Long-Term Growth
While you can keep growing your green onions in water indefinitely, transplanting them to soil will allow them to grow larger and stronger. This is what I recommend for a more sustainable supply.
Preparing for Transplanting
1. Wait for Root Development: Before transplanting, make sure your green onion scraps have developed a good root system. This usually takes about a week or two in water. You should see plenty of healthy, white roots growing from the bottom of the scraps.
2. Choose a Pot: Select a small pot with drainage holes. The size of the pot will depend on how many green onion scraps you want to plant together. A 4-6 inch pot is usually sufficient for a few scraps.
3. Fill the Pot with Potting Soil: Use a good quality potting soil that drains well. Avoid using garden soil, as it can be too heavy and compact.
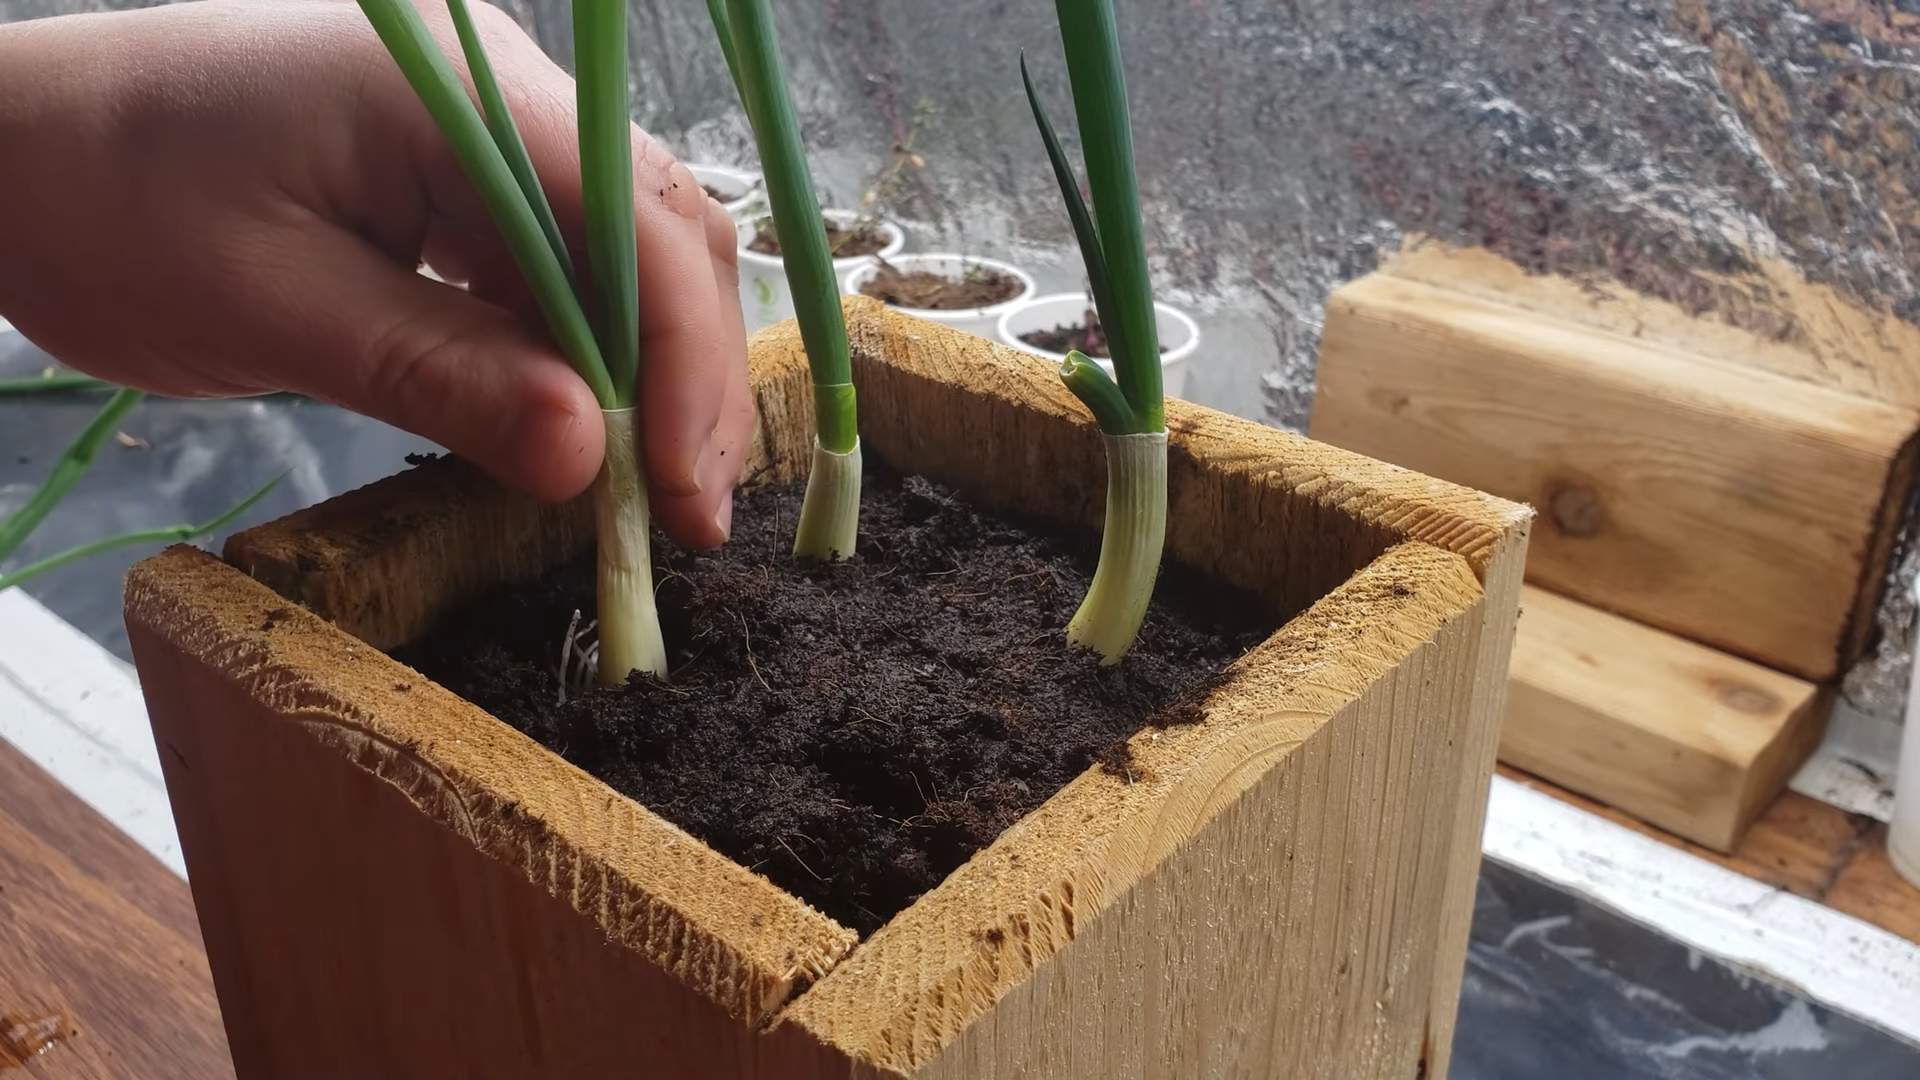
The Transplanting Process
1. Gently Remove the Green Onions from Water: Carefully take the green onion scraps out of the water, being careful not to damage the roots.
2. Make a Hole in the Soil: Use your finger or a small tool to create a hole in the soil that is large enough to accommodate the roots of the green onion scrap.
3. Plant the Green Onion: Place the green onion scrap in the hole, making sure the roots are covered with soil. The white part of the green onion should be partially buried, but the green shoots should be above the soil.
4. Water Thoroughly: Water the soil gently until it is evenly moist. Avoid overwatering, as this can lead to root rot.
5. Place in a Sunny Location: Just like when growing in water, your transplanted green onions need plenty of sunlight. Place the pot in a sunny windowsill or another location that receives at least 6 hours of sunlight per day.
Caring for Your Transplanted Green Onions
1. Water Regularly: Keep the soil consistently moist, but not soggy. Water when the top inch of soil feels dry to the touch.
2. Fertilize Occasionally: To encourage healthy growth, you can fertilize your green onions every few weeks with a diluted liquid fertilizer. I like to use a balanced fertilizer, such as 10-10-10.
3. Harvest as Needed: You can harvest your green onions as needed by snipping off the green shoots with scissors. The green onions will continue to grow back, providing you with a continuous supply.
4. Divide and Replant (Optional): Over time, your green onions may become crowded in the pot. If this happens, you can divide them and replant them in separate pots. This will give them more room to grow and prevent them from becoming root-bound.
Troubleshooting
Even with the best intentions, sometimes things don’t go exactly as planned. Here are a few common issues you might encounter and how to fix them:
* Yellowing Leaves: This can be caused by several factors, including overwatering, underwatering, lack of sunlight, or nutrient deficiencies. Make sure you are watering properly, providing enough sunlight, and fertilizing occasionally.
* Slow Growth: Slow growth can also be caused by a lack of sunlight or nutrients. Make sure your green onions are getting enough sunlight and fertilize them regularly.
* Root Rot: Root rot is caused by overwatering and poor drainage. Make sure your pot has drainage holes and avoid overwatering. If you suspect root rot, you can try transplanting your green onions into fresh soil.
* Pests: Green onions are generally pest-resistant, but they can occasionally be attacked by aphids or other pests. If you notice pests, you can try spraying them with insecticidal soap or neem oil.
Tips and Tricks for Success
Here are a few extra tips to help you get the most out of your green onion growing adventure:
* Use Fresh Scraps: The fresher the green onion scraps, the better the chances of success. Try to use scraps that are only a few days old.
* Experiment with Different Varieties: There are many different varieties of green onions, so feel free to experiment and see which ones grow best for you.
* Rotate Your Crops: If you are growing green onions in the same pot for a long time, it’s a good idea to rotate your crops every few months. This will help prevent nutrient depletion and pest problems.
* Don’t Be Afraid to Experiment: Gardening is all about experimentation, so don’t be afraid to try new things and see what works best for you.
Why I Love This DIY Project
I absolutely love growing green onions from scraps because it’s such a simple, sustainable, and rewarding project. It’s a great way to reduce food waste, save money, and have a constant supply of fresh green onions for cooking. Plus, it’s just plain fun to watch them grow! I hope you give it a try and enjoy the process as much as I do. Happy gardening!
Conclusion
So, there you have it! Transforming those humble green onion scraps into a never-ending supply of fresh, flavorful goodness is not just a fun project; it’s a game-changer for your kitchen and your wallet. We’ve walked you through the simple steps, highlighting how easy it is to coax new life from what would otherwise be tossed in the compost. This isn’t just about saving a few bucks; it’s about embracing a more sustainable lifestyle and connecting with the food you eat on a deeper level.
Why is this DIY trick a must-try? Because it offers a continuous harvest of fresh green onions with minimal effort. Imagine never having to run to the store for that last-minute garnish again. Think of the satisfaction of snipping off vibrant green stalks that you nurtured from mere scraps. And consider the environmental impact of reducing food waste and minimizing your reliance on commercially grown produce. It’s a win-win-win situation!
But the beauty of this method lies in its adaptability. Feel free to experiment with different containers. While a simple glass of water works wonders, you can also use small pots filled with soil or even a hydroponic setup for a more advanced approach. Try different varieties of green onions, too! Scallions, chives, and even leeks can be regrown using similar techniques, adding variety to your homegrown herb garden.
For those who want to take it a step further, consider fertilizing your regrown green onions with a diluted liquid fertilizer every few weeks. This will provide them with the nutrients they need to thrive and produce even more abundant growth. You can also experiment with different lighting conditions. While green onions will grow in partial shade, they’ll flourish in a sunny spot, resulting in thicker, more flavorful stalks.
Don’t be afraid to get creative and personalize your green onion growing experience. The most important thing is to have fun and enjoy the process of nurturing new life from something that would otherwise be discarded.
We wholeheartedly encourage you to try this simple yet rewarding DIY trick. It’s a fantastic way to add fresh flavor to your meals, reduce food waste, and connect with nature. Once you’ve experienced the joy of harvesting your own regrown green onions, you’ll wonder why you didn’t start sooner.
And now, we want to hear from you! Share your experiences, tips, and tricks in the comments below. Did you encounter any challenges? What variations did you try? What dishes did you enhance with your homegrown green onions? Let’s create a community of green onion enthusiasts and inspire others to embrace this sustainable and delicious practice. Let’s all become masters of the green onion regrowth!
Frequently Asked Questions (FAQ)
How long does it take for green onions to regrow?
Generally, you’ll start to see noticeable regrowth within a few days. Within a week or two, you should have enough new growth to harvest. The speed of regrowth depends on factors like temperature, light, and the initial health of the scraps. Warmer temperatures and plenty of sunlight will encourage faster growth.
What part of the green onion do I need to regrow it?
You need the white bulb end with the roots attached. Cut off the green tops, leaving about 1-2 inches of the white base intact. Make sure the roots are still present and healthy. If the roots are dried out, soak the bulb in water for a few hours before planting or placing in water.
Can I regrow green onions in soil instead of water?
Yes, absolutely! Regrowing green onions in soil is a great option, especially if you want to grow them for a longer period. Plant the white bulb end in a pot filled with well-draining potting mix, leaving the green tops exposed. Water regularly, keeping the soil moist but not soggy. Soil-grown green onions tend to develop stronger roots and produce more robust growth.
How often should I change the water when regrowing in water?
It’s recommended to change the water every 1-2 days to prevent bacterial growth and keep the water fresh. This will help ensure the green onions stay healthy and grow properly. If the water becomes cloudy or discolored, change it immediately.
How much sunlight do regrowing green onions need?
Green onions thrive in bright, indirect sunlight. A spot near a sunny window is ideal. While they can tolerate some shade, they’ll grow best with at least 6 hours of sunlight per day. If you don’t have a sunny window, you can use a grow light to supplement their light needs.
Can I eat the regrown green onions?
Yes, you can absolutely eat the regrown green onions! They will taste just like the ones you buy at the store. Simply snip off the green tops as needed, leaving the white bulb end intact to continue regrowing.
How many times can I regrow green onions from the same scraps?
While you can regrow green onions multiple times from the same scraps, the regrowth will eventually slow down and the quality of the green onions may diminish. After 2-3 regrowths, it’s best to start with fresh scraps for optimal results.
Why are my regrowing green onions turning yellow?
Yellowing leaves can indicate a few different issues. It could be due to insufficient sunlight, overwatering, or a lack of nutrients. Make sure your green onions are getting enough light and that the water is changed regularly. If you’re growing them in soil, consider fertilizing them with a diluted liquid fertilizer.
Can I regrow other types of onions besides green onions?
While the technique works best with green onions, you can also try regrowing scallions, chives, and even leeks using similar methods. The success rate may vary depending on the variety and the initial health of the scraps.
What if my green onions start to smell bad?
A foul smell usually indicates bacterial growth or rotting. This is often caused by stagnant water or overcrowding. Make sure to change the water frequently and avoid overcrowding the container. If the smell persists, discard the affected green onions and start with fresh scraps.
Can I plant the regrown green onions in my garden?
Yes, you can definitely transplant your regrown green onions into your garden. Once they have developed a strong root system, carefully dig a hole in your garden bed and plant the bulb end, leaving the green tops exposed. Water regularly and provide them with plenty of sunlight.
Do I need to fertilize my regrown green onions?
While not essential, fertilizing your regrown green onions can help them grow faster and produce more abundant growth. Use a diluted liquid fertilizer every few weeks, following the instructions on the fertilizer package.
Are there any pests or diseases that affect regrowing green onions?
Green onions are generally resistant to pests and diseases, but they can occasionally be affected by aphids or fungal infections. If you notice any pests, try spraying them with insecticidal soap. For fungal infections, ensure good air circulation and avoid overwatering.
What is the best time of year to regrow green onions?
You can regrow green onions year-round indoors. However, if you plan to transplant them into your garden, the best time to do so is in the spring or fall when the weather is mild.
Leave a Comment