
Growing Pineapples for High Yield might seem like an exotic dream reserved for tropical climates, but I’m here to tell you it’s more achievable than you think, even in your own backyard! Forget those expensive grocery store pineapples; imagine biting into a juicy, homegrown pineapple bursting with flavor – a flavor you nurtured from start to finish.
For centuries, pineapples have symbolized hospitality and welcome, a tradition stemming from their rarity and sweetness in early trade routes. Today, while more accessible, the satisfaction of cultivating your own pineapple connects you to that rich history and offers a unique gardening experience.
Why should you try this DIY trick? Well, beyond the bragging rights, growing your own pineapples allows you to control the growing process, ensuring they’re free from harmful pesticides and bursting with natural goodness. Plus, it’s incredibly rewarding to witness the transformation from a simple pineapple top to a thriving plant producing delicious fruit. This article will provide you with the essential tips and tricks to maximize your yield, ensuring a bountiful harvest of sweet, homegrown pineapples. Let’s dive in and unlock the secrets to growing pineapples for high yield!
Ananas Anbauen für eine Reiche Ernte: Dein DIY-Guide
Hallo Gartenfreunde! Habt ihr euch jemals gefragt, wie ihr diese tropische Köstlichkeit, die Ananas, in eurem eigenen Garten oder sogar in einem Topf auf eurem Balkon anbauen könnt? Ich zeige euch, wie ihr mit ein wenig Geduld und den richtigen Schritten eure eigene Ananas ernten könnt. Es ist einfacher, als ihr denkt!
Was du brauchst:
Bevor wir loslegen, hier eine Liste der Dinge, die du benötigst:
* Eine reife Ananas (am besten aus dem Bioladen, da diese oft nicht mit Wachstumsinhibitoren behandelt wurden).
* Ein scharfes Messer.
* Einen Topf (mindestens 20 cm Durchmesser) mit guter Drainage.
* Anzuchterde oder eine Mischung aus Blumenerde, Sand und Perlit.
* Wurzelhormon (optional, aber empfehlenswert).
* Eine Sprühflasche mit Wasser.
* Geduld!
Die Vorbereitung: Die Ananas-Krone
Der wichtigste Teil des Ananas-Anbaus ist die Vorbereitung der Ananas-Krone. Hier sind die Schritte, die du befolgen musst:
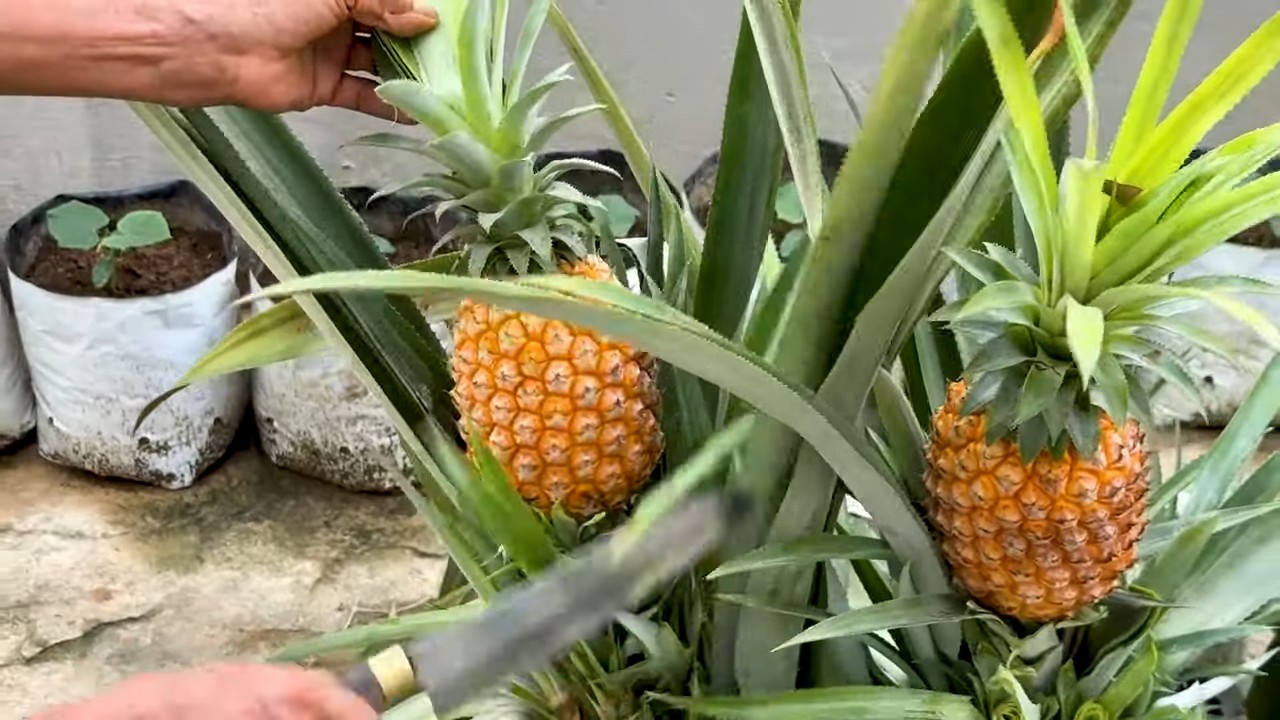
1. Die Krone abtrennen: Nimm deine reife Ananas und schneide die Krone mit einem scharfen Messer etwa 2-3 cm unterhalb der Blätter ab. Achte darauf, dass du einen sauberen Schnitt machst.
2. Das Fruchtfleisch entfernen: Entferne vorsichtig das restliche Fruchtfleisch von der Krone. Fruchtfleischreste können zu Fäulnis führen, was wir unbedingt vermeiden wollen. Du kannst das Fruchtfleisch mit einem Messer oder deinen Fingern entfernen.
3. Die unteren Blätter entfernen: Entferne die untersten Blätter der Krone (etwa 2-3 cm), bis du den Stiel siehst. Hier werden später die Wurzeln wachsen.
4. Trocknen lassen: Lasse die Ananas-Krone für 2-3 Tage an einem trockenen, gut belüfteten Ort trocknen. Dies hilft, die Schnittstelle zu versiegeln und Fäulnis zu verhindern.
Die Bewurzelung: Zwei Methoden
Es gibt zwei Hauptmethoden, um die Ananas-Krone zu bewurzeln: im Wasser oder direkt in der Erde. Ich persönlich bevorzuge die Wassermethode, da man den Fortschritt der Wurzelbildung besser beobachten kann.
Methode 1: Bewurzelung im Wasser
1. Vorbereitung des Wassergefäßes: Fülle ein Glas oder eine Tasse mit Wasser. Achte darauf, dass das Wasser sauber ist.
2. Die Krone ins Wasser stellen: Stelle die Ananas-Krone so ins Wasser, dass nur der Stiel (der Teil, von dem du die Blätter entfernt hast) im Wasser ist. Die Blätter sollten nicht im Wasser sein, da sie sonst faulen können.
3. Standort: Stelle das Glas mit der Ananas-Krone an einen hellen, warmen Ort, aber nicht in direktes Sonnenlicht.
4. Wasserwechsel: Wechsle das Wasser alle 2-3 Tage, um es sauber zu halten und die Bildung von Algen zu verhindern.
5. Geduld haben: Es kann einige Wochen dauern, bis sich Wurzeln bilden. Sei geduldig und beobachte die Krone regelmäßig. Du solltest nach etwa 2-3 Wochen erste Wurzeln sehen.
Methode 2: Direkte Bewurzelung in der Erde
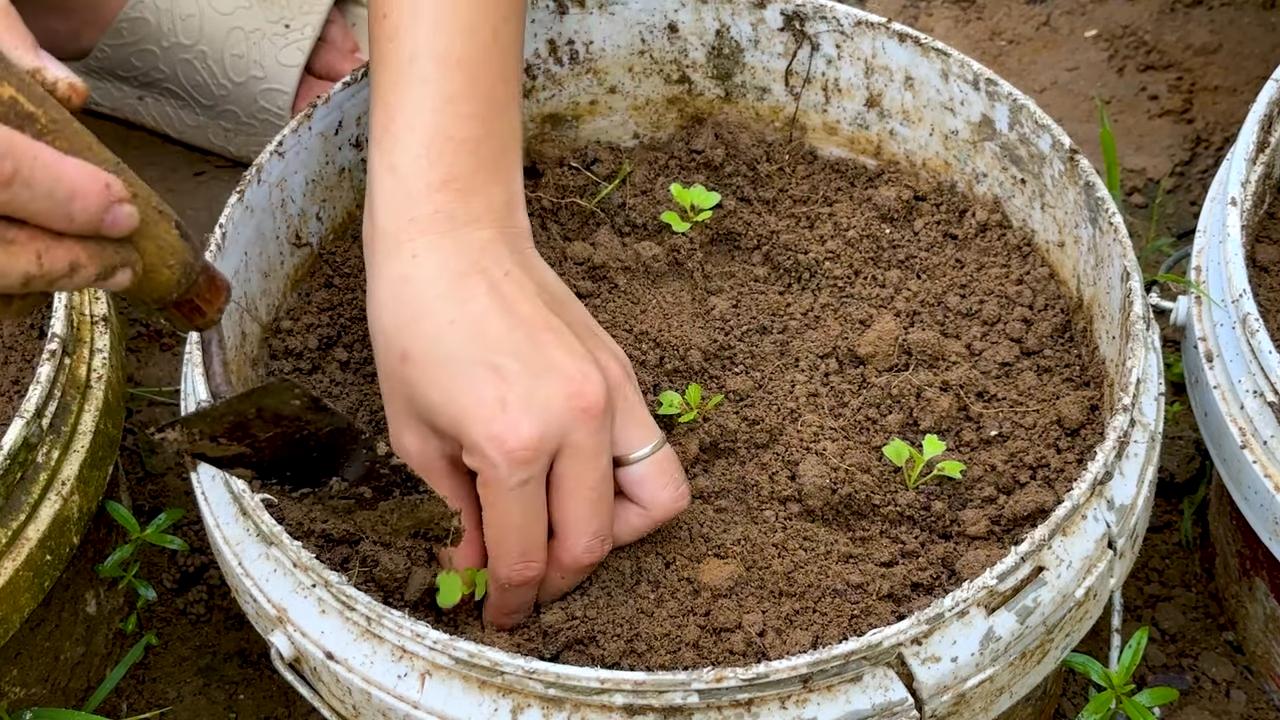
1. Vorbereitung des Topfes: Fülle einen Topf mit Anzuchterde oder einer Mischung aus Blumenerde, Sand und Perlit. Die Erde sollte gut drainiert sein.
2. Die Krone einpflanzen: Mache ein kleines Loch in die Erde und pflanze die Ananas-Krone so ein, dass der Stiel (der Teil, von dem du die Blätter entfernt hast) mit Erde bedeckt ist.
3. Andrücken und gießen: Drücke die Erde leicht an und gieße die Krone vorsichtig an. Die Erde sollte feucht, aber nicht nass sein.
4. Standort: Stelle den Topf an einen hellen, warmen Ort, aber nicht in direktes Sonnenlicht.
5. Feuchtigkeit halten: Halte die Erde feucht, indem du sie regelmäßig mit einer Sprühflasche besprühst.
Das Einpflanzen: Der nächste Schritt
Sobald die Wurzeln etwa 2-3 cm lang sind (bei der Wassermethode) oder du merkst, dass die Krone fest im Topf sitzt (bei der direkten Methode), ist es Zeit, die Ananas in einen größeren Topf umzupflanzen.
1. Vorbereitung des größeren Topfes: Wähle einen Topf mit mindestens 20 cm Durchmesser und guter Drainage. Fülle den Topf mit einer Mischung aus Blumenerde, Sand und Perlit.
2. Die Ananas umpflanzen: Grabe ein Loch in die Erde, das groß genug ist, um die Wurzeln der Ananas aufzunehmen. Nimm die Ananas vorsichtig aus dem alten Topf oder Glas und setze sie in das Loch.
3. Auffüllen und andrücken: Fülle das Loch mit Erde auf und drücke die Erde leicht an.
4. Gießen: Gieße die Ananas gründlich an.
Die Pflege: So bleibt deine Ananas glücklich
Die richtige Pflege ist entscheidend für das Wachstum und die Fruchtbildung deiner Ananas.
1. Standort: Ananas lieben die Sonne! Stelle den Topf an einen sonnigen Standort, an dem die Ananas mindestens 6 Stunden direktes Sonnenlicht pro Tag bekommt.
2. Bewässerung: Gieße die Ananas regelmäßig, aber vermeide Staunässe. Die Erde sollte feucht, aber nicht nass sein. Im Winter solltest du weniger gießen.
3. Düngung: Dünge die Ananas alle 2-3 Monate mit einem ausgewogenen Flüssigdünger. Achte darauf, dass der Dünger für Bromeliengewächse geeignet ist.
4. Temperatur: Ananas bevorzugen warme Temperaturen zwischen 20 und 30 Grad Celsius. Schütze die Ananas vor Frost.
5. Luftfeuchtigkeit: Ananas mögen eine hohe Luftfeuchtigkeit. Du kannst die Luftfeuchtigkeit erhöhen, indem du die Blätter regelmäßig mit Wasser besprühst oder den Topf auf eine Schale mit Wasser und Kieselsteinen stellst.
Die Blüte: Der spannende Teil
Es kann 1-3 Jahre dauern, bis deine Ananas blüht. Die Blüte ist ein Zeichen dafür, dass die Ananas bald Früchte tragen wird.
1. Geduld haben: Hab Geduld! Es braucht Zeit, bis eine Ananas blüht.
2. Ethylen-Trick (optional): Wenn du die Blüte beschleunigen möchtest, kannst du den Ethylen-Trick anwenden. Stelle einen Apfel in eine Plastiktüte und stülpe die Tüte über die Ananas. Der Apfel produziert Ethylen, ein Gas, das die Blüte anregen kann. Lasse die Tüte für etwa eine Woche über der Ananas.
3. Die Blüte beobachten: Wenn die Ananas blüht, erscheinen kleine, violette Blüten in der Mitte der Pflanze.
Die Fruchtbildung: Die Belohnung
Nach der Blüte beginnt die Fruchtbildung. Die kleinen Blüten verschmelzen zu einer einzigen Frucht, der Ananas.
1. Geduld haben: Auch die Fruchtbildung dauert einige Monate.
2. Unterstützung (optional): Wenn die Frucht zu schwer wird, kann es notwendig sein, die Pflanze zu stützen, um zu verhindern, dass sie umkippt.
3. Die Reife erkennen: Die Ananas ist reif, wenn sie einen angenehmen Duft verströmt und die Farbe von grün nach gelb wechselt. Du kannst auch leicht an den Blättern ziehen. Wenn sie sich leicht lösen, ist die Ananas reif.
Die Ernte: Der Höhepunkt
Endlich ist es soweit! Du kannst deine eigene Ananas ernten.
1. Die Ananas abschneiden: Schneide die Ananas mit einem scharfen Messer ab.
2. Genießen: Genieße deine selbst angebaute Ananas!
Zusätzliche Tipps:
* Schädlinge: Achte auf Schädlinge wie Wollläuse oder Spinnmilben. Bei Befall kannst du die Pflanze mit einem Insektizid behandeln.
*
Conclusion
So, there you have it! Growing pineapples at home, especially for a high yield, might seem like a tropical dream reserved for professional farmers, but with a little patience, the right techniques, and a dash of DIY ingenuity, it’s entirely achievable in your own backyard or even in containers on your patio. We’ve explored the key elements – from selecting the perfect pineapple crown to optimizing soil conditions and providing the necessary care – all geared towards maximizing your harvest.
But why should you bother with this DIY project? Beyond the sheer satisfaction of nurturing a plant from scrap to succulent fruit, growing your own pineapples offers several compelling advantages. First, you gain complete control over the growing process, ensuring your pineapples are free from harmful pesticides and chemicals. Second, homegrown pineapples often boast a superior flavor profile compared to store-bought varieties, which are often picked before they’re fully ripe to withstand transportation. And third, let’s be honest, there’s a certain bragging right associated with serving a pineapple you grew yourself!
Remember, the key to a high yield lies in consistency and attention to detail. Don’t be afraid to experiment with different techniques to find what works best for your specific climate and growing conditions. For instance, consider using black plastic mulch to warm the soil and suppress weeds, or try companion planting with nitrogen-fixing legumes to naturally enrich the soil. Another variation to explore is the use of different types of containers. While a standard pot works well, consider using a raised bed or even a large grow bag to provide ample space for root development.
Don’t be discouraged if your first attempt doesn’t yield a bumper crop. Growing pineapples is a learning process, and each attempt will provide valuable insights into what your plants need to thrive. The important thing is to start, experiment, and enjoy the journey.
We’re confident that with the knowledge and tips shared in this article, you’re well-equipped to embark on your own pineapple-growing adventure. So, grab a pineapple crown, prepare your soil, and get ready to experience the joy of harvesting your own delicious, homegrown pineapples.
Now, we want to hear from you! Have you tried growing pineapples at home? What challenges did you face, and what successes did you achieve? Share your experiences, tips, and photos in the comments below. Let’s create a community of pineapple enthusiasts and learn from each other’s journeys. Your insights could be invaluable to someone just starting out. Let’s unlock the secrets to growing pineapples together!
Frequently Asked Questions (FAQ)
1. How long does it take to grow a pineapple from a crown?
Growing a pineapple from a crown is a patience-testing endeavor, but the reward is well worth the wait. Generally, it takes anywhere from 2 to 3 years for a pineapple plant grown from a crown to produce its first fruit. Several factors influence this timeline, including climate, soil quality, and the overall health of the plant. Warmer climates with consistent sunlight tend to promote faster growth. Providing optimal growing conditions, such as well-draining soil, regular fertilization, and protection from frost, can also help accelerate the fruiting process. Remember, consistency is key. Regular watering and monitoring for pests or diseases will contribute to a healthier, faster-growing plant.
2. What is the best type of soil for growing pineapples?
Pineapples thrive in well-draining, slightly acidic soil. The ideal soil composition should be loose and airy, allowing for proper root aeration and preventing waterlogging. A sandy loam soil is often recommended, as it provides a good balance of drainage and nutrient retention. You can amend your existing soil with organic matter, such as compost or well-rotted manure, to improve its structure and fertility. Adding perlite or vermiculite can also enhance drainage. A soil pH between 5.5 and 6.5 is optimal for pineapple growth. You can test your soil pH using a home testing kit and adjust it accordingly with lime (to raise pH) or sulfur (to lower pH). Remember, healthy soil is the foundation for healthy pineapple plants and a bountiful harvest.
3. How often should I water my pineapple plant?
Watering frequency depends on several factors, including climate, soil type, and the size of the plant. Generally, pineapples prefer to be kept consistently moist but not waterlogged. During the warmer months, water your pineapple plant deeply whenever the top inch of soil feels dry to the touch. In cooler months, reduce watering frequency to allow the soil to dry out slightly between waterings. Overwatering can lead to root rot, so it’s crucial to ensure proper drainage. When watering, avoid getting water trapped in the crown of the plant, as this can also lead to rot. Rainwater is ideal for watering pineapples, as it is naturally soft and free of chemicals. If using tap water, allow it to sit for 24 hours to allow chlorine to dissipate.
4. What kind of fertilizer should I use for pineapples?
Pineapples are heavy feeders and benefit from regular fertilization. A balanced fertilizer with an NPK ratio of 10
So, there you have it! Growing pineapples at home, especially for a high yield, might seem like a tropical dream reserved for professional farmers, but with a little patience, the right techniques, and a dash of DIY ingenuity, it’s entirely achievable in your own backyard or even in containers on your patio. We’ve explored the key elements – from selecting the perfect pineapple crown to optimizing soil conditions and providing the necessary care – all geared towards maximizing your harvest.
But why should you bother with this DIY project? Beyond the sheer satisfaction of nurturing a plant from scrap to succulent fruit, growing your own pineapples offers several compelling advantages. First, you gain complete control over the growing process, ensuring your pineapples are free from harmful pesticides and chemicals. Second, homegrown pineapples often boast a superior flavor profile compared to store-bought varieties, which are often picked before they’re fully ripe to withstand transportation. And third, let’s be honest, there’s a certain bragging right associated with serving a pineapple you grew yourself!
Remember, the key to a high yield lies in consistency and attention to detail. Don’t be afraid to experiment with different techniques to find what works best for your specific climate and growing conditions. For instance, consider using black plastic mulch to warm the soil and suppress weeds, or try companion planting with nitrogen-fixing legumes to naturally enrich the soil. Another variation to explore is the use of different types of containers. While a standard pot works well, consider using a raised bed or even a large grow bag to provide ample space for root development.
Don’t be discouraged if your first attempt doesn’t yield a bumper crop. Growing pineapples is a learning process, and each attempt will provide valuable insights into what your plants need to thrive. The important thing is to start, experiment, and enjoy the journey.
We’re confident that with the knowledge and tips shared in this article, you’re well-equipped to embark on your own pineapple-growing adventure. So, grab a pineapple crown, prepare your soil, and get ready to experience the joy of harvesting your own delicious, homegrown pineapples.
Now, we want to hear from you! Have you tried growing pineapples at home? What challenges did you face, and what successes did you achieve? Share your experiences, tips, and photos in the comments below. Let’s create a community of pineapple enthusiasts and learn from each other’s journeys. Your insights could be invaluable to someone just starting out. Let’s unlock the secrets to growing pineapples together!
Frequently Asked Questions (FAQ)
1. How long does it take to grow a pineapple from a crown?
Growing a pineapple from a crown is a patience-testing endeavor, but the reward is well worth the wait. Generally, it takes anywhere from 2 to 3 years for a pineapple plant grown from a crown to produce its first fruit. Several factors influence this timeline, including climate, soil quality, and the overall health of the plant. Warmer climates with consistent sunlight tend to promote faster growth. Providing optimal growing conditions, such as well-draining soil, regular fertilization, and protection from frost, can also help accelerate the fruiting process. Remember, consistency is key. Regular watering and monitoring for pests or diseases will contribute to a healthier, faster-growing plant.
2. What is the best type of soil for growing pineapples?
Pineapples thrive in well-draining, slightly acidic soil. The ideal soil composition should be loose and airy, allowing for proper root aeration and preventing waterlogging. A sandy loam soil is often recommended, as it provides a good balance of drainage and nutrient retention. You can amend your existing soil with organic matter, such as compost or well-rotted manure, to improve its structure and fertility. Adding perlite or vermiculite can also enhance drainage. A soil pH between 5.5 and 6.5 is optimal for pineapple growth. You can test your soil pH using a home testing kit and adjust it accordingly with lime (to raise pH) or sulfur (to lower pH). Remember, healthy soil is the foundation for healthy pineapple plants and a bountiful harvest.
3. How often should I water my pineapple plant?
Watering frequency depends on several factors, including climate, soil type, and the size of the plant. Generally, pineapples prefer to be kept consistently moist but not waterlogged. During the warmer months, water your pineapple plant deeply whenever the top inch of soil feels dry to the touch. In cooler months, reduce watering frequency to allow the soil to dry out slightly between waterings. Overwatering can lead to root rot, so it’s crucial to ensure proper drainage. When watering, avoid getting water trapped in the crown of the plant, as this can also lead to rot. Rainwater is ideal for watering pineapples, as it is naturally soft and free of chemicals. If using tap water, allow it to sit for 24 hours to allow chlorine to dissipate.
4. What kind of fertilizer should I use for pineapples?
Pineapples are heavy feeders and benefit from regular fertilization. A balanced fertilizer with an NPK ratio of 10-10-10 or 14-14-14 is generally recommended. Apply fertilizer every 2-3 months during the growing season (spring and summer). Follow the instructions on the fertilizer packaging for proper application rates. You can also supplement with organic fertilizers, such as compost tea or fish emulsion, to provide additional nutrients and improve soil health. Foliar feeding, where you spray diluted fertilizer directly onto the leaves, can also be beneficial, especially during periods of rapid growth. Avoid over-fertilizing, as this can burn the roots and damage the plant.
5. How do I protect my pineapple plant from frost?
Pineapples are sensitive to frost and can be damaged or killed by freezing temperatures. If you live in an area with cold winters, it’s essential to take precautions to protect your pineapple plant from frost. If your pineapple is planted in a container, you can move it indoors to a warm, sunny location. If it’s planted in the ground, you can cover it with a frost blanket or burlap sack to insulate it from the cold. You can also build a temporary shelter around the plant using stakes and plastic sheeting. Another option is to wrap the base of the plant with straw or mulch to protect the roots. Avoid watering the plant in the late afternoon or evening, as this can increase the risk of frost damage.
6. How do I know when my pineapple is ripe?
Determining when a pineapple is ripe can be tricky, but there are several indicators to look for. First, the pineapple should have a vibrant color, ranging from green to golden yellow, depending on the variety. The fruit should also feel slightly soft to the touch, but not mushy. A ripe pineapple will also have a sweet, fragrant aroma emanating from the base. You can also try gently pulling on one of the leaves near the top of the fruit. If it comes out easily, the pineapple is likely ripe. Avoid picking the pineapple too early, as it will not continue to ripen after being harvested. Once harvested, store the pineapple at room temperature for a few days to allow it to fully ripen.
7. Can I grow pineapples indoors?
Yes, you can grow pineapples indoors, especially if you live in a climate with cold winters. However, it’s important to provide the plant with adequate sunlight and warmth. Place the pineapple plant in a sunny window that receives at least 6 hours of direct sunlight per day. You may also need to supplement with artificial lighting, such as a grow light, to ensure the plant gets enough light. Maintain a consistent temperature between 65°F and 80°F. Use a well-draining potting mix and water regularly, allowing the soil to dry out slightly between waterings. Fertilize every 2-3 months during the growing season. Indoor-grown pineapples may take longer to fruit than those grown outdoors, but with proper care, you can still enjoy a homegrown pineapple.
8. What are some common pests and diseases that affect pineapples?
Pineapples can be susceptible to various pests and diseases, including mealybugs, scale insects, spider mites, and root rot. Mealybugs and scale insects are sap-sucking pests that can weaken the plant and cause yellowing of the leaves. Spider mites are tiny pests that can cause stippling on the leaves. Root rot is a fungal disease that can occur in waterlogged soil. To prevent pests and diseases, maintain good air circulation around the plant, avoid overwatering, and inspect the plant regularly for signs of infestation or disease. If you detect pests or diseases, treat them promptly with appropriate insecticides or fungicides. Organic options, such as neem oil or insecticidal soap, can be effective for controlling many common pests.
9. How can I encourage my pineapple plant to flower?
Getting a pineapple plant to flower can sometimes be challenging, but there are several techniques you can try. One common method is to expose the plant to ethylene gas, which is a natural plant hormone that promotes flowering. You can do this by placing a ripe apple or banana near the plant, as these fruits release ethylene gas as they ripen. Another method is to water the plant with a solution of calcium carbide, which also releases ethylene gas. Dissolve a small amount of calcium carbide in water and use it to water the plant. Be careful not to use too much, as it can damage the plant. You can also try withholding water for a few
Leave a Comment