
Growing Potatoes Indoors might sound like something only seasoned gardeners can achieve, but trust me, it’s easier than you think! Have you ever dreamt of harvesting fresh, homegrown potatoes right from your kitchen, even when the weather outside is frightful? Well, dream no more! This DIY guide will unlock the secrets to cultivating your own spuds within the cozy confines of your home.
Potatoes have a rich history, dating back thousands of years to the Andes Mountains in South America, where they were a staple food for the Inca civilization. Today, they’re a global favorite, and now, thanks to innovative techniques, you don’t even need a sprawling garden to enjoy them.
Why bother growing potatoes indoors? Well, for starters, it extends your growing season, allowing you to enjoy fresh potatoes year-round. Plus, it’s a fantastic way to control pests and diseases, ensuring a healthier and more abundant harvest. Imagine the satisfaction of serving up a delicious potato dish made with ingredients you nurtured from seed to table, all without stepping foot outside! I’m here to guide you through every step, from choosing the right potato variety to harvesting your bountiful crop. Let’s get started and transform your home into a potato paradise!
Growing Potatoes Indoors: A Spud-tacular DIY Guide!
Okay, so you want to grow potatoes indoors? Awesome! It’s totally doable, and honestly, there’s something incredibly satisfying about harvesting your own homegrown spuds, even if they’re grown inside. I’ve done this a few times, and I’m excited to share my tips and tricks with you. Let’s get started!
Choosing Your Potatoes and Preparing Them
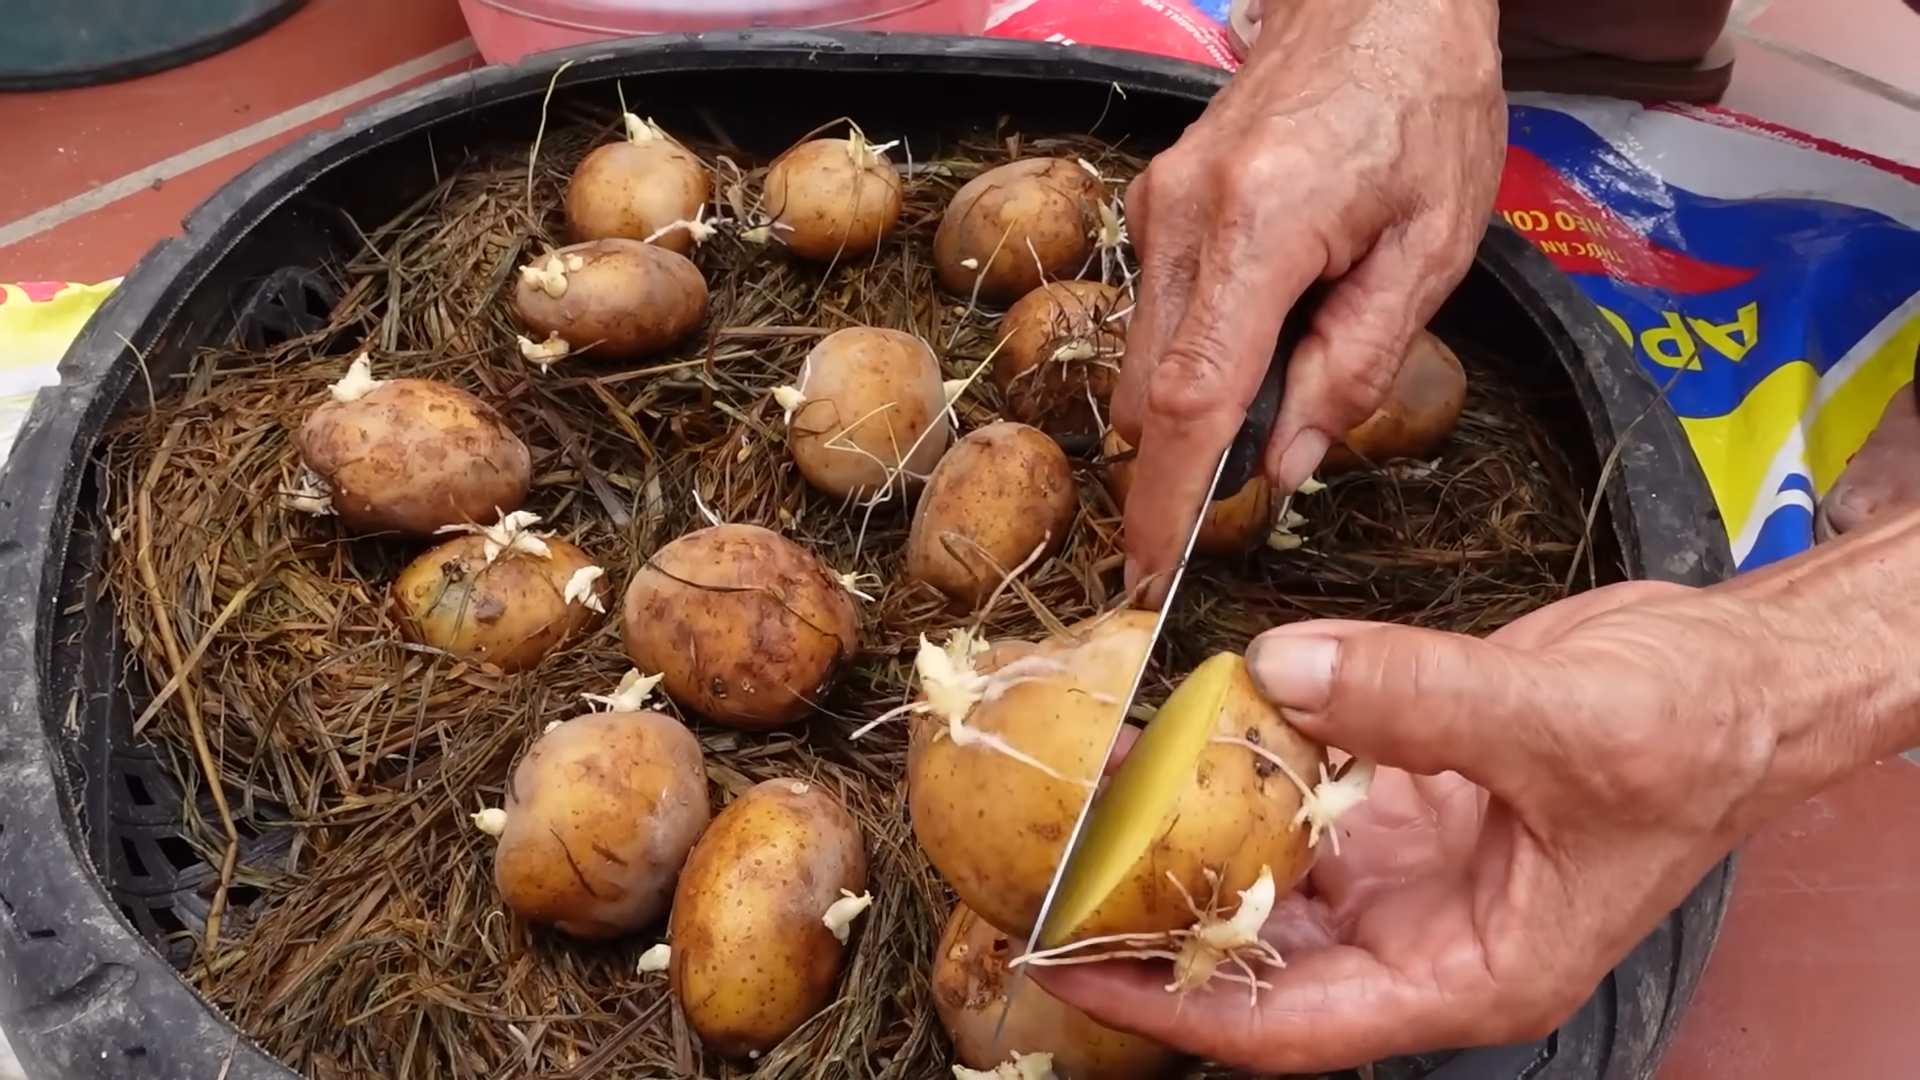
First things first, you need potatoes! Not just any potatoes, though. You’ll want to use seed potatoes, which are specifically grown for planting. You can usually find these at your local garden center or online. If you can’t find seed potatoes, you *can* use organic potatoes from the grocery store, but make sure they haven’t been treated with sprout inhibitors.
* Seed Potato Selection: Look for firm, healthy potatoes with “eyes” (those little bumps where sprouts will emerge). Avoid potatoes that are soft, wrinkled, or have signs of disease.
* Chitting (Optional but Recommended): Chitting is basically pre-sprouting your potatoes. This gives them a head start and can lead to an earlier harvest.
1. Place your seed potatoes in a cool, bright location (but not direct sunlight) for a few weeks. An egg carton works great for this!
2. You’ll notice little green sprouts emerging from the eyes. This is exactly what you want!
3. Once the sprouts are about an inch long, you’re ready to plant.
* Cutting Large Potatoes (If Necessary): If your seed potatoes are large (bigger than an egg), you can cut them into smaller pieces.
1. Make sure each piece has at least one or two eyes.
2. Let the cut pieces air dry for a day or two to allow the cut surfaces to callous over. This helps prevent rot.
Setting Up Your Indoor Potato Growing Station
Now, let’s talk about where your potatoes will live. You’ll need a few things:
* A Large Container: Think big! Potatoes need room to grow. A 10-gallon container or larger is ideal. You can use a plastic tub, a large pot, or even a fabric grow bag. The bigger, the better, really.
* Well-Draining Potting Mix: Regular garden soil is too heavy for containers. Use a good quality potting mix that drains well. I like to mix in some compost for extra nutrients.
* Drainage Holes: Make sure your container has drainage holes! Potatoes don’t like sitting in soggy soil.
* A Sunny Location: Potatoes need at least 6-8 hours of sunlight per day. A south-facing window is ideal. If you don’t have enough natural light, you can supplement with grow lights.
Planting Your Potatoes
Alright, time to get our hands dirty!
1. Fill the Container: Fill your container with about 4-6 inches of potting mix.
2. Plant the Potatoes: Place your seed potatoes (or potato pieces) on top of the soil, with the sprouts facing upwards. Space them about 8-10 inches apart if you’re planting multiple potatoes in the same container.
3. Cover with Soil: Cover the potatoes with another 4-6 inches of potting mix.
4. Water Thoroughly: Water the soil until it’s evenly moist, but not soggy.
The “Hilling” Process: Key to a Bountiful Harvest
This is where the magic happens! “Hilling” is the process of adding more soil to the container as the potato plants grow. This encourages the plants to produce more potatoes along the stems.
1. Wait for Growth: Once the potato plants have grown about 6-8 inches tall, it’s time to hill.
2. Add More Soil: Add another 3-4 inches of potting mix to the container, covering the lower part of the stems. Leave the top few inches of the plant exposed.
3. Repeat: Continue hilling every few weeks as the plants grow, until the container is almost full.
4. Water Regularly: Keep the soil consistently moist, but not waterlogged.
Caring for Your Indoor Potato Plants
Growing potatoes indoors is pretty straightforward, but here are a few things to keep in mind:
* Watering: Water deeply whenever the top inch of soil feels dry to the touch. Avoid overwatering, as this can lead to rot.
* Fertilizing: Feed your potato plants with a balanced liquid fertilizer every few weeks. Follow the instructions on the fertilizer label.
* Light: Make sure your plants are getting enough light. If they’re not, the stems will become leggy and weak. Supplement with grow lights if needed.
* Pest Control: Keep an eye out for pests like aphids or spider mites. If you spot any, treat them with insecticidal soap or neem oil.
* Rotation: Rotate the container regularly to ensure even light exposure on all sides of the plant.
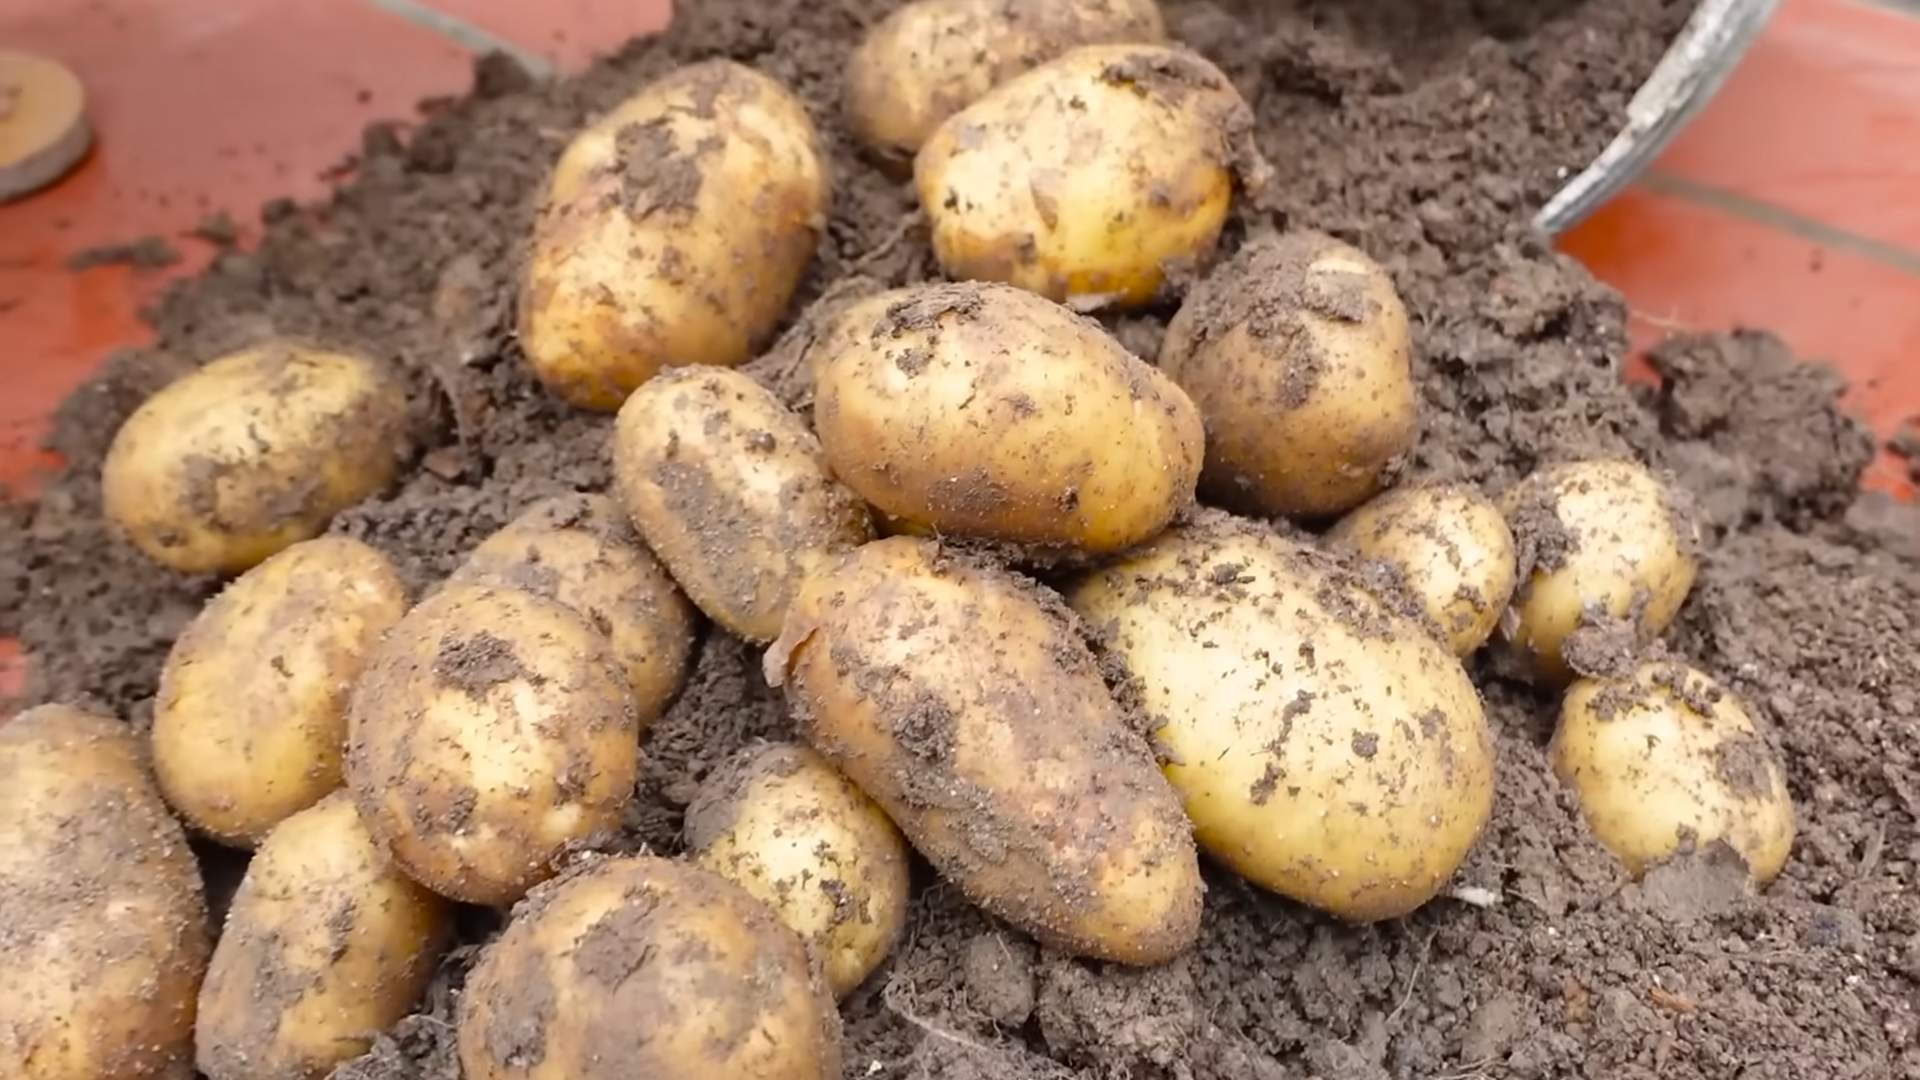
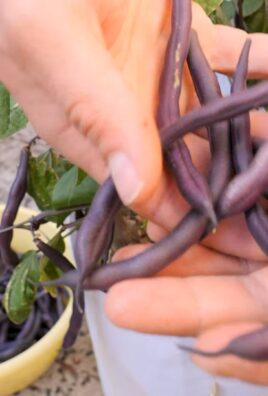
Harvesting Your Indoor Potatoes
The moment we’ve all been waiting for! Harvesting your homegrown potatoes is the most rewarding part of the process.
1. Timing: Potatoes are usually ready to harvest about 70-90 days after planting. You’ll know they’re ready when the foliage starts to turn yellow and die back.
2. Gentle Digging: Carefully dig around the base of the plant, using your hands or a small trowel. Be gentle so you don’t damage the potatoes.
3. Harvesting: Gently lift the potatoes out of the soil.
4. Curing (Optional): If you want to store your potatoes for a longer period, you can cure them. Spread them out in a cool, dark, and well-ventilated place for a week or two. This will help them develop a thicker skin and prevent rot.
Troubleshooting Common Issues
Even with the best care, you might encounter a few challenges along the way. Here are some common issues and how to address them:
* Leggy Plants: This usually means your plants aren’t getting enough light. Move them to a brighter location or supplement with grow lights.
* Yellowing Leaves: This could be a sign of overwatering, underwatering, or nutrient deficiency. Check the soil moisture and adjust your watering schedule accordingly. Fertilize your plants if needed.
* Rotting Potatoes: This is usually caused by overwatering or poor drainage. Make sure your container has drainage holes and avoid letting the soil stay soggy.
* Pests: Inspect your plants regularly for pests and treat them promptly.
Different Potato Varieties to Try Indoors
While any potato *can* technically be grown indoors, some varieties tend to do better than others in containers. Here are a few of my favorites:
* ‘Yukon Gold’: These are known for their creamy texture and buttery flavor. They’re also relatively early maturing, which is a plus for indoor growing.
* ‘Red Norland’: These red-skinned potatoes are great for boiling or roasting. They’re also fairly disease-resistant.
* ‘Fingerling Potatoes’: These small, elongated potatoes are fun to grow and have a unique flavor. They’re also relatively compact, making them a good choice for containers.
* ‘Irish Cobbler’: An early season variety that produces round, white potatoes.
Tips for Maximizing Your Indoor Potato Harvest
Want to get the most out of your indoor potato growing experience? Here are a few extra tips:
* Use a Large Container: I can’t stress this enough! The bigger the container, the more potatoes you’ll be able to grow.
* Provide Plenty of Light: Potatoes need lots of light to thrive. If you don’t have enough natural light, invest in some good quality grow lights.
* Hill Regularly: Hilling is essential for maximizing your potato harvest.
* Don’t Overwater: Overwatering is a common mistake that can lead to rot.
* Be Patient: Growing potatoes takes time. Don’t get discouraged if you don’t see results right away.
Enjoying Your Homegrown Potatoes
Finally, the best part: eating your homegrown potatoes! There’s nothing quite like the taste of freshly harvested potatoes. You can boil them, roast them, mash them, or use them in any of your favorite potato recipes.
Growing potatoes indoors is a fun and rewarding experience. With a little bit of effort, you can enjoy a bountiful harvest of homegrown spuds, even if you don’t have a garden. So, go ahead and give it a try! I promise, you won’t be disappointed. Happy growing!
Conclusion
So, there you have it! Growing potatoes indoors isn’t just a quirky gardening experiment; it’s a genuinely rewarding experience that brings the joy of fresh, homegrown produce right into your home, regardless of the season or your outdoor space limitations. We’ve walked you through the process, from selecting the right potato varieties to ensuring optimal growing conditions, and hopefully, demystified any concerns you might have had.
Why is this DIY trick a must-try? Because it offers a unique blend of sustainability, convenience, and sheer gardening satisfaction. Imagine harvesting your own potatoes, knowing exactly where they came from and how they were grown. Think of the reduced trips to the grocery store and the satisfaction of serving a meal featuring ingredients you nurtured from sprout to spud. Beyond the practical benefits, growing potatoes indoors is a fantastic educational opportunity, especially for children, teaching them about plant life cycles and the importance of sustainable food practices.
But the beauty of this method lies in its adaptability. Feel free to experiment with different potato varieties. Russets are great for baking, Yukon Golds offer a creamy texture perfect for mashing, and fingerling potatoes add a gourmet touch to salads. You can also explore different growing mediums. While we recommended a soil-based mix, hydroponics is another viable option for indoor potato cultivation, offering potentially faster growth rates and reduced risk of soilborne diseases. Consider adding companion plants to your potato containers, such as marigolds to deter pests or basil to improve flavor.
Don’t be afraid to get creative with your container choices, either. While grow bags are convenient and breathable, you can repurpose old buckets, bins, or even large storage containers, as long as they have adequate drainage. Just remember to adjust your watering schedule based on the container size and material.
Growing potatoes indoors is more than just a gardening project; it’s an invitation to connect with nature, learn new skills, and enjoy the fruits (or rather, the tubers) of your labor.
We wholeheartedly encourage you to give this DIY trick a try. It’s easier than you might think, and the rewards are well worth the effort. And most importantly, we want to hear about your experiences! Share your photos, tips, and challenges in the comments below. Let’s build a community of indoor potato growers and learn from each other’s successes and failures. What variety did you choose? What growing medium did you use? What challenges did you face, and how did you overcome them? Your insights could be invaluable to other aspiring indoor gardeners.
So, grab some seed potatoes, prepare your containers, and get ready to embark on a rewarding journey of indoor potato cultivation. Happy growing!
Frequently Asked Questions (FAQ)
What are the best potato varieties to grow indoors?
While many potato varieties can be grown indoors, some are better suited than others. Smaller, early-maturing varieties tend to perform best in containers. Yukon Gold, fingerling potatoes (like Russian Banana or French Fingerling), and Irish Cobbler are excellent choices. These varieties typically produce a good yield in a shorter amount of time and are less demanding in terms of space and resources. Avoid late-maturing varieties like Russet Burbank, as they require a longer growing season and more space, making them less ideal for indoor cultivation. Experimenting with different varieties is part of the fun, so don’t be afraid to try something new! Just be sure to research the specific needs of each variety to ensure optimal growth.
How much light do indoor potatoes need?
Potatoes require a significant amount of light to thrive. Ideally, they need at least 6-8 hours of direct sunlight per day. If you don’t have a sunny window that provides sufficient light, you’ll need to supplement with artificial grow lights. LED grow lights are a great option as they are energy-efficient and provide the full spectrum of light that plants need for photosynthesis. Position the grow lights a few inches above the potato plants and adjust the height as they grow. Insufficient light can lead to leggy growth, weak stems, and reduced tuber production. Observe your plants closely and adjust the light accordingly.
How often should I water my indoor potato plants?
Watering is crucial for successful indoor potato cultivation. The frequency of watering depends on several factors, including the size of the container, the type of growing medium, and the ambient temperature. Generally, you should water your potato plants when the top inch of soil feels dry to the touch. Avoid overwatering, as this can lead to root rot. Ensure that your containers have adequate drainage to prevent water from accumulating at the bottom. During the active growing season, you may need to water more frequently. Check the soil moisture regularly and adjust your watering schedule as needed. A good rule of thumb is to water deeply but infrequently, allowing the soil to dry out slightly between waterings.
How do I know when my potatoes are ready to harvest?
The time it takes for potatoes to mature depends on the variety and growing conditions. Generally, early-maturing varieties are ready to harvest in about 70-80 days, while late-maturing varieties may take up to 120 days. A good indicator that your potatoes are ready to harvest is when the foliage starts to turn yellow and die back. This signals that the plant is diverting its energy into tuber development. You can also gently dig around the base of the plant to check the size of the potatoes. If they are the size you desire, you can begin harvesting. To harvest, carefully dig around the plant and lift the potatoes out of the soil. Be gentle to avoid damaging the tubers.
What kind of fertilizer should I use for indoor potatoes?
Potatoes are heavy feeders and require regular fertilization to produce a good yield. Use a balanced fertilizer with an NPK ratio (nitrogen, phosphorus, potassium) of around 10-10-10 or 14-14-14. You can also use a fertilizer specifically formulated for vegetables. Apply the fertilizer according to the package instructions, typically every 2-3 weeks during the active growing season. Avoid over-fertilizing, as this can lead to excessive foliage growth at the expense of tuber development. Organic fertilizers, such as compost tea or fish emulsion, are also excellent options for feeding your indoor potato plants.
Can I grow potatoes indoors from store-bought potatoes?
While it’s possible to grow potatoes from store-bought potatoes, it’s not always recommended. Store-bought potatoes may have been treated with chemicals to prevent sprouting, which can inhibit their growth. Additionally, they may carry diseases that can affect your indoor garden. If you do choose to use store-bought potatoes, select organic potatoes that are free from blemishes and have begun to sprout. Cut the potatoes into pieces, ensuring that each piece has at least one eye (sprout). Allow the cut pieces to dry for a few days to form a callus before planting. However, for best results, it’s always recommended to use certified seed potatoes from a reputable source.
What are common pests and diseases that affect indoor potatoes, and how can I prevent them?
Indoor potato plants are generally less susceptible to pests and diseases than outdoor plants, but they can still be affected. Common pests include aphids, spider mites, and whiteflies. These pests can be controlled with insecticidal soap or neem oil. Diseases such as early blight and late blight can also affect potato plants. To prevent these diseases, ensure good air circulation, avoid overwatering, and remove any infected leaves promptly. Using disease-resistant potato varieties can also help. Regularly inspect your plants for signs of pests or diseases and take action immediately to prevent them from spreading.
How do I store my harvested potatoes?
Proper storage is essential to keep your harvested potatoes fresh for as long as possible. After harvesting, cure the potatoes by allowing them to dry in a cool, dark, and well-ventilated place for about a week. This helps to harden the skin and prevent rot. Store the cured potatoes in a cool, dark, and dry place with good air circulation. The ideal storage temperature is between 45-50°F (7-10°C). Avoid storing potatoes near apples or onions, as they release ethylene gas, which can cause potatoes to sprout prematurely. Properly stored potatoes can last for several months.
Leave a Comment