
Growing Rainbow Chard can transform your garden from a simple patch of green into a vibrant, edible masterpiece! Have you ever dreamed of strolling through your backyard and harvesting a bunch of jewel-toned leaves for a delicious and healthy meal? Well, dream no more! This DIY guide is your key to unlocking the secrets of cultivating this stunning vegetable right at home.
Rainbow chard, with its brightly colored stalks ranging from ruby red to sunshine yellow, isn’t just a feast for the eyes. Its history stretches back to ancient times, with roots in the Mediterranean. For centuries, it’s been a staple in European cuisine, prized for its nutritional value and versatility. It’s a close relative of beets and spinach, sharing their earthy flavor and packed with vitamins and minerals.
But why should *you* bother with growing rainbow chard? In today’s world, where we’re increasingly conscious of where our food comes from, growing rainbow chard offers a fantastic way to connect with nature and enjoy fresh, organic produce. Plus, let’s be honest, store-bought chard just doesn’t compare to the vibrant colors and crisp texture of homegrown. I’m going to show you some simple DIY tricks and hacks that will make growing rainbow chard a breeze, even if you’re a complete beginner. Get ready to add a splash of color and flavor to your garden and your plate!
Growing Rainbow Chard: A Colorful Guide for Your Garden
Hey there, fellow garden enthusiasts! I’m so excited to share my experience with growing rainbow chard. It’s not only incredibly nutritious but also adds a vibrant splash of color to any garden. Trust me, even if you’re a beginner, you can totally nail this! Let’s dive into how to grow these beauties.
Choosing the Right Variety and Location
Before we get our hands dirty, let’s talk about picking the perfect rainbow chard variety and finding the ideal spot in your garden.
* Variety Selection: Rainbow chard isn’t a single variety, but rather a mix of different chard types with colorful stalks. Look for seed packets labeled “Rainbow Chard” or “Bright Lights.” These usually contain a blend of red, yellow, orange, pink, and white stalks. I personally love the “Bright Lights” mix because of its intense colors.
* Sunlight Needs: Chard thrives in full sun (6-8 hours of direct sunlight per day), but it can also tolerate partial shade, especially in hotter climates. If you live in a region with scorching summers, providing some afternoon shade will prevent the leaves from wilting.
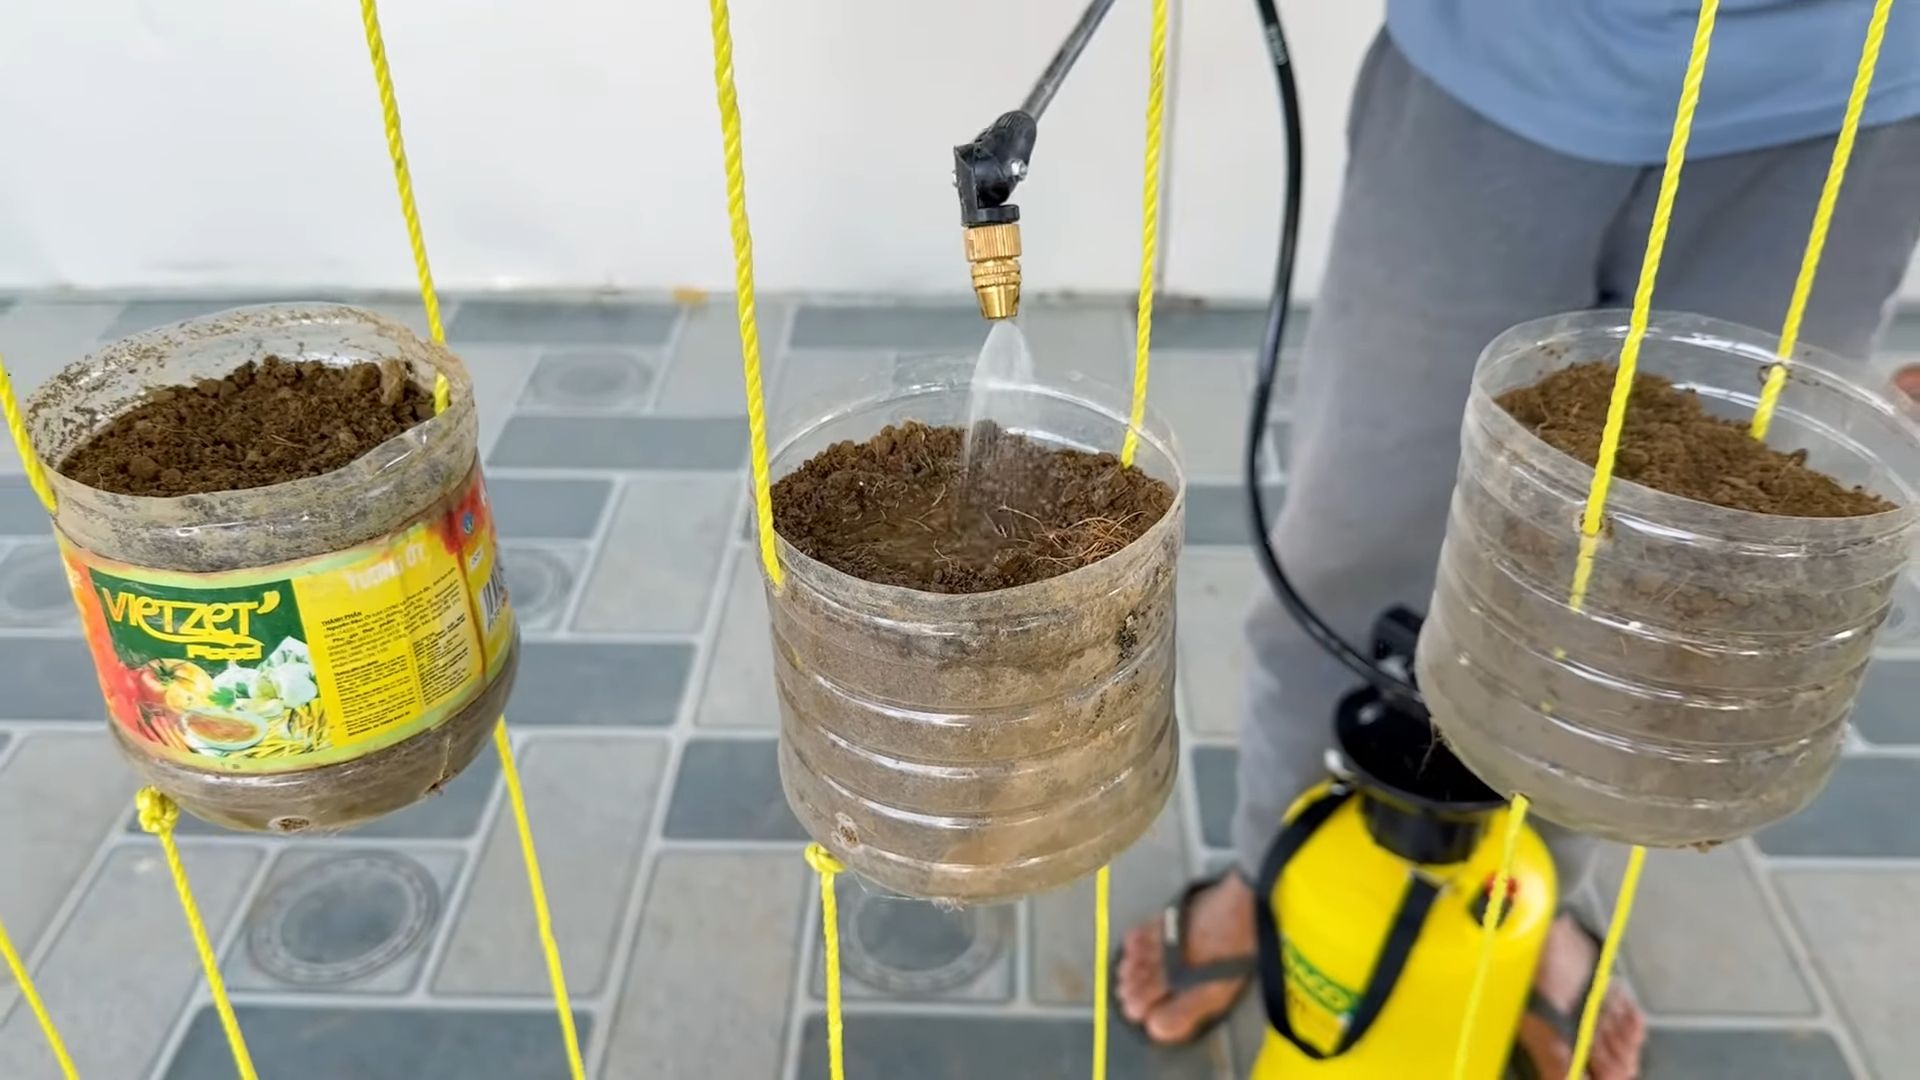
* Soil Requirements: Well-draining soil is crucial. Chard doesn’t like soggy roots. Amend your soil with compost or well-rotted manure to improve drainage and fertility. A slightly acidic to neutral soil pH (6.0-7.5) is ideal. I always test my soil before planting to make sure it’s just right. You can get a simple soil testing kit at most garden centers.
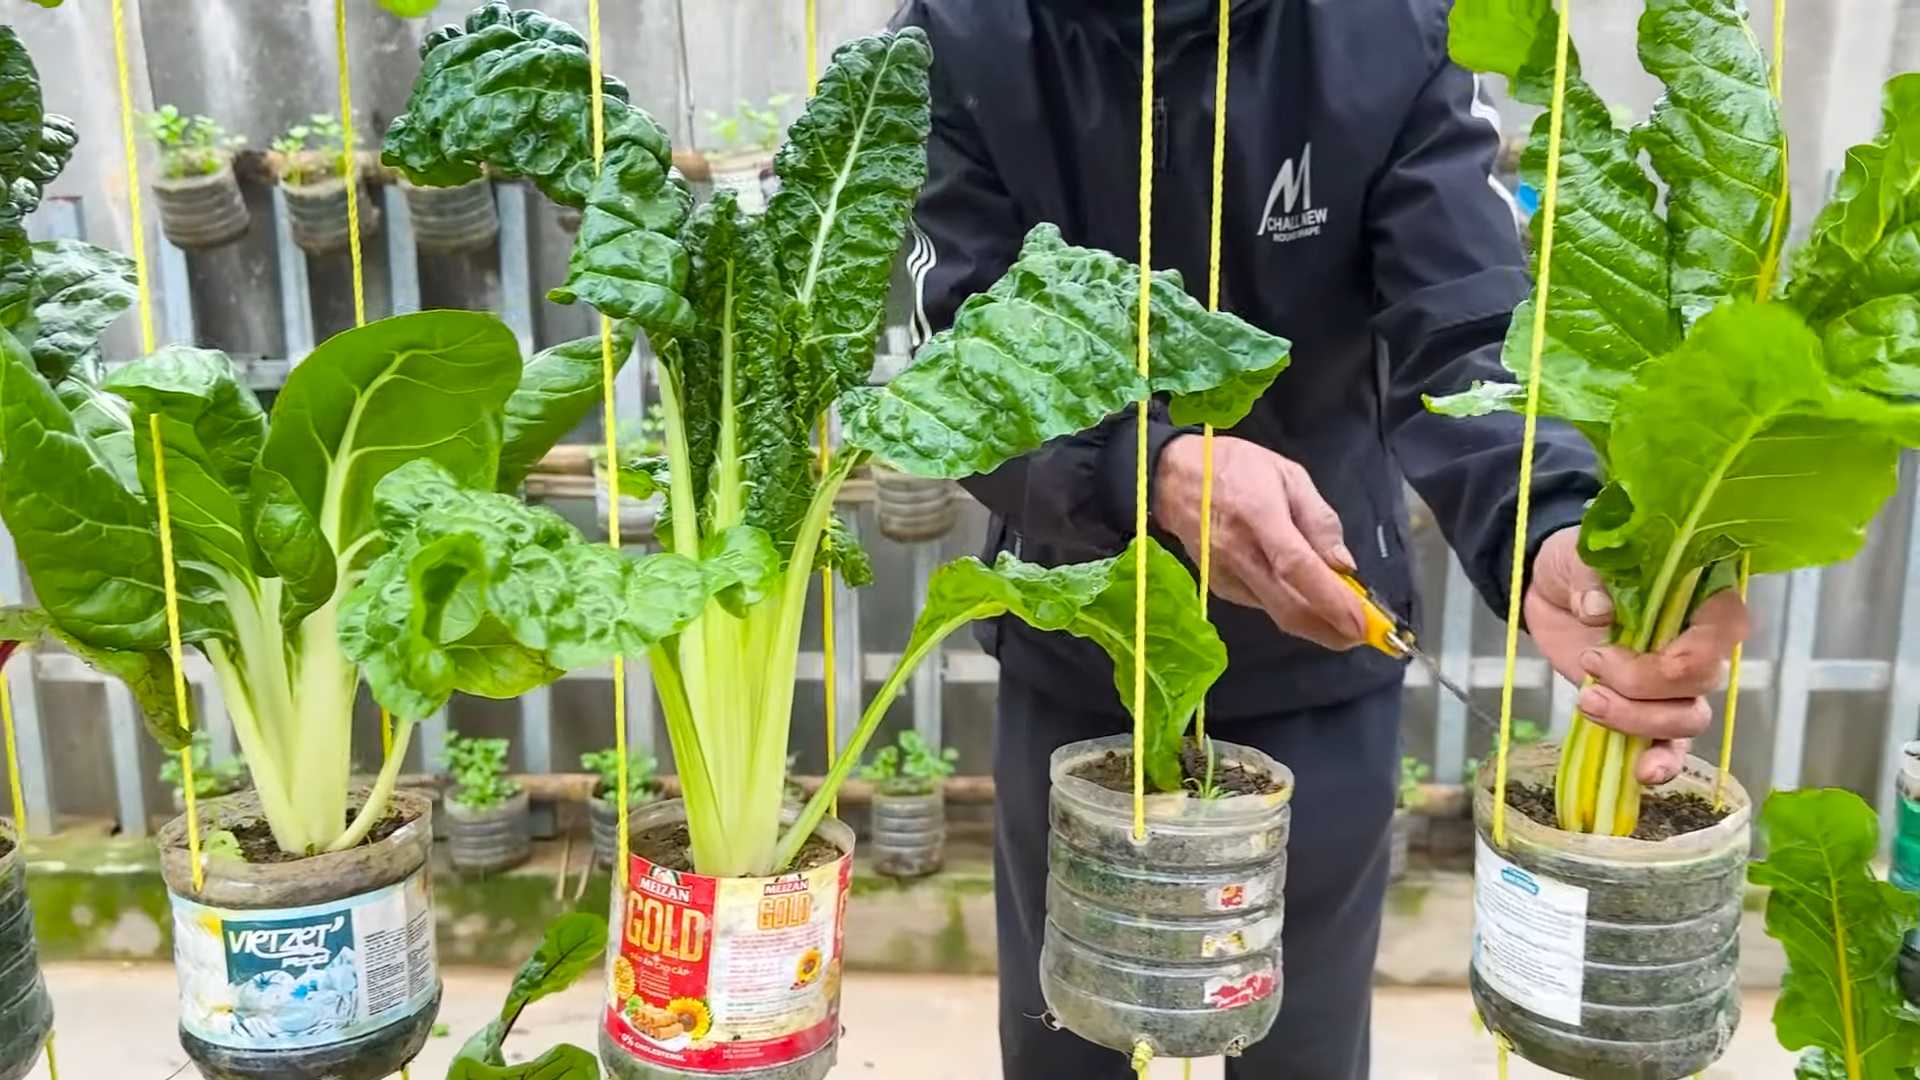
* Space Considerations: Chard plants can get fairly large, so give them enough space to grow. I usually space my plants about 12-18 inches apart. This allows for good air circulation, which helps prevent diseases.
Starting Your Rainbow Chard
You can start chard seeds indoors or directly sow them in your garden. I’ve done both, and I’ll walk you through each method.
Starting Seeds Indoors
Starting seeds indoors gives you a head start, especially if you have a short growing season.
1. Timing: Start seeds indoors about 4-6 weeks before the last expected frost. I usually start mine in late February or early March.
2. Materials: You’ll need seed starting trays or small pots, seed starting mix, rainbow chard seeds, a spray bottle, and a grow light (optional, but highly recommended).
3. Planting: Fill your seed starting trays or pots with seed starting mix. Moisten the mix with a spray bottle. Sow the seeds about ½ inch deep and cover them lightly with soil.
4. Watering: Keep the soil consistently moist, but not soggy. I use a spray bottle to gently water the seedlings.
5. Light: Place the trays or pots under a grow light or in a sunny window. If using a window, rotate the trays regularly to prevent the seedlings from leaning towards the light.
6. Hardening Off: Before transplanting the seedlings outdoors, you’ll need to “harden them off.” This means gradually exposing them to outdoor conditions over a period of 7-10 days. Start by placing them outside for a few hours each day, gradually increasing the amount of time they spend outdoors.
Direct Sowing
Direct sowing is a simpler method, but it requires waiting until the soil has warmed up.
1. Timing: Sow seeds directly in the garden after the last expected frost. The soil temperature should be at least 50°F (10°C).
2. Soil Preparation: Prepare the soil by loosening it and amending it with compost or well-rotted manure.
3. Planting: Sow the seeds about ½ inch deep and 1-2 inches apart in rows.
4. Watering: Keep the soil consistently moist until the seeds germinate.
5. Thinning: Once the seedlings emerge, thin them to 12-18 inches apart. This gives them enough room to grow.
Transplanting Seedlings
If you started your seeds indoors, it’s time to transplant them to your garden.
1. Timing: Transplant the seedlings after the last expected frost and after they have been hardened off.
2. Preparation: Choose a cloudy day to transplant to minimize stress on the seedlings. Dig holes that are slightly larger than the root balls of the seedlings.
3. Planting: Gently remove the seedlings from their trays or pots and place them in the holes. Backfill the holes with soil and gently firm the soil around the base of the plants.
4. Watering: Water the seedlings thoroughly after transplanting.
5. Mulching: Apply a layer of mulch around the plants to help retain moisture and suppress weeds. I like to use straw or wood chips.
Caring for Your Rainbow Chard
Once your chard is planted, it’s relatively easy to care for.
* Watering: Water regularly, especially during dry periods. Chard needs consistent moisture to thrive. Aim for about 1 inch of water per week.
* Fertilizing: Fertilize every 4-6 weeks with a balanced fertilizer. I like to use a liquid fertilizer diluted to half strength. You can also side-dress with compost or well-rotted manure.
* Weeding: Keep the area around your chard plants free of weeds. Weeds compete with the chard for nutrients and water.
* Pest Control: Chard is generally pest-resistant, but it can be susceptible to aphids, slugs, and snails. Check your plants regularly for pests and take action if necessary. For aphids, you can spray the plants with a strong stream of water or use insecticidal soap. For slugs and snails, you can use slug bait or handpick them off the plants.
* Disease Prevention: Good air circulation is key to preventing diseases. Space your plants properly and avoid overhead watering. If you notice any signs of disease, such as yellowing leaves or spots, remove the affected leaves immediately.
Harvesting Your Rainbow Chard
Harvesting is the most rewarding part! You can start harvesting chard leaves as soon as they are large enough to eat.
1. Timing: Harvest leaves when they are 6-8 inches long.
2. Method: Cut the outer leaves near the base of the plant, leaving the inner leaves to continue growing. This is called “cut-and-come-again” harvesting.
3. Frequency: Harvest regularly to encourage continued growth.
4. Storage: Store harvested chard leaves in the refrigerator for up to a week.
Troubleshooting Common Problems
Even with the best care, you might encounter some problems. Here are a few common issues and how to address them:
* Yellowing Leaves: This can be caused by overwatering, underwatering, nutrient deficiencies, or disease. Check the soil moisture and adjust your watering accordingly. Fertilize with a balanced fertilizer. If you suspect disease, remove the affected leaves.
* Wilting Leaves: This can be caused by heat stress, underwatering, or root rot. Provide shade during the hottest part of the day. Water regularly. Make sure the soil is well-draining.
* Pest Infestations: Check your plants regularly for pests and take action if necessary. Use insecticidal soap for aphids and slug bait for slugs and snails.
* Bolting: Bolting is when the plant prematurely flowers and goes to seed. This can be caused by heat stress or long days. To prevent bolting, provide shade during the hottest part of the day and harvest regularly.
Enjoying Your Rainbow Chard
Rainbow chard is incredibly versatile in the kitchen. You can eat it raw in salads, sauté it with garlic and olive oil, add it to soups and stews, or use it in quiches and frittatas. The colorful stalks are also edible and can be cooked like asparagus.
I personally love to sauté chard with garlic, olive oil, and a squeeze of lemon juice. It’s a simple and delicious way to enjoy this nutritious vegetable.
Growing rainbow chard is a rewarding experience that adds beauty and flavor to your garden and your meals. With a little care and attention, you can enjoy a bountiful harvest of colorful and nutritious leaves. Happy gardening!
Conclusion
So, there you have it! Growing rainbow chard from seed to vibrant, leafy perfection is not only achievable but also incredibly rewarding. We’ve walked through the entire process, from selecting the right seeds and preparing your soil to nurturing your seedlings and harvesting those beautiful, colorful leaves.
Why is this DIY trick a must-try? Because it puts you in control of your food source, allowing you to enjoy fresh, organic rainbow chard bursting with flavor and nutrients, all while saving money and reducing your environmental impact. Imagine stepping out into your garden and harvesting a handful of these stunning leaves for a salad, stir-fry, or side dish. The vibrant colors alone will brighten your plate and your day!
But the benefits don’t stop there. Growing your own rainbow chard is a fantastic way to connect with nature, learn about the growing process, and appreciate the effort that goes into producing the food we eat. It’s also a great activity to share with children, teaching them about gardening and healthy eating habits.
Ready to take your rainbow chard game to the next level? Consider these variations and suggestions:
* **Succession Planting:** Plant new seeds every few weeks to ensure a continuous harvest throughout the growing season.
* **Container Gardening:** If you’re short on space, rainbow chard thrives in containers. Choose a large pot with good drainage and use a high-quality potting mix.
* **Companion Planting:** Plant rainbow chard alongside other vegetables like onions, garlic, and carrots to deter pests and improve growth.
* **Experiment with Varieties:** There are many different varieties of rainbow chard, each with its own unique color combination. Try growing a few different varieties to see which ones you like best.
* **Seed Saving:** Allow a few of your rainbow chard plants to bolt (go to seed) and collect the seeds for next year’s planting. This is a great way to save money and preserve your favorite varieties.
Don’t be intimidated if you’re a beginner gardener. Growing rainbow chard is relatively easy, and even if you make a few mistakes along the way, you’ll still learn something valuable. The key is to be patient, observant, and willing to experiment.
Now it’s your turn! We encourage you to try this DIY trick and experience the joy of growing your own rainbow chard. We’re confident that you’ll be amazed by the results.
Once you’ve harvested your first batch of colorful leaves, we’d love to hear about your experience. Share your photos, tips, and tricks in the comments below. Let’s create a community of rainbow chard growers and inspire others to get their hands dirty! Happy gardening!
Frequently Asked Questions (FAQ)
What is the best time of year to plant rainbow chard?
Rainbow chard is a cool-season crop, meaning it thrives in temperatures between 60°F and 70°F (15°C and 21°C). The best time to plant rainbow chard depends on your climate. In areas with mild winters, you can plant it in the fall for a winter or early spring harvest. In colder climates, plant it in the spring after the last frost. You can also start seeds indoors 4-6 weeks before the last frost and transplant them outdoors once the weather warms up.
How much sunlight does rainbow chard need?
Rainbow chard needs at least 6 hours of sunlight per day to thrive. However, it can tolerate partial shade, especially in hot climates. If you’re growing rainbow chard in a container, make sure to place it in a sunny location.
What kind of soil is best for rainbow chard?
Rainbow chard prefers well-drained soil that is rich in organic matter. The ideal soil pH is between 6.0 and 7.0. Before planting, amend your soil with compost or other organic matter to improve its fertility and drainage.
How often should I water rainbow chard?
Rainbow chard needs consistent moisture to thrive. Water deeply whenever the top inch of soil feels dry to the touch. Avoid overwatering, as this can lead to root rot. Mulching around your plants can help to retain moisture and suppress weeds.
What are some common pests and diseases that affect rainbow chard?
Rainbow chard is relatively pest-resistant, but it can be susceptible to aphids, flea beetles, and leaf miners. These pests can be controlled with insecticidal soap or neem oil. Common diseases that affect rainbow chard include leaf spot and downy mildew. These diseases can be prevented by providing good air circulation and avoiding overhead watering.
How do I harvest rainbow chard?
You can begin harvesting rainbow chard leaves when they are about 6 inches long. Harvest the outer leaves first, leaving the inner leaves to continue growing. You can harvest rainbow chard continuously throughout the growing season.
Can I eat the stems of rainbow chard?
Yes, the stems of rainbow chard are edible and delicious. They have a slightly different flavor and texture than the leaves. You can cook the stems in the same way that you would cook celery or asparagus.
How do I store rainbow chard?
Rainbow chard can be stored in the refrigerator for up to a week. To store it, wrap the leaves in a damp paper towel and place them in a plastic bag.
Can I freeze rainbow chard?
Yes, you can freeze rainbow chard. To freeze it, blanch the leaves in boiling water for 2 minutes, then plunge them into ice water to stop the cooking process. Drain the leaves well and place them in freezer bags. Frozen rainbow chard can be stored for up to 6 months.
Is rainbow chard nutritious?
Yes, rainbow chard is a very nutritious vegetable. It is a good source of vitamins A, C, and K, as well as minerals like iron, potassium, and magnesium. It is also a good source of fiber.
How can I use rainbow chard in my cooking?
Rainbow chard can be used in a variety of dishes. It can be eaten raw in salads, sautéed, steamed, or added to soups and stews. It can also be used in quiches, frittatas, and other egg dishes. The stems can be cooked separately and served as a side dish.
My rainbow chard is bolting (going to seed). What should I do?
Bolting is a natural process that occurs when rainbow chard is exposed to hot weather or long days. Once rainbow chard bolts, the leaves become bitter and less palatable. To prevent bolting, plant rainbow chard in the spring or fall, and provide it with shade during the hottest part of the day. If your rainbow chard does bolt, you can still harvest the leaves, but they will be less flavorful. You can also allow the plant to go to seed and collect the seeds for next year’s planting.
Can I grow rainbow chard indoors?
Yes, you can grow rainbow chard indoors, but it will require a sunny location and a large container. You will also need to provide it with supplemental lighting if it doesn’t receive enough natural light.
Is rainbow chard the same as Swiss chard?
Rainbow chard is a variety of Swiss chard. The main difference is that rainbow chard has colorful stems, while Swiss chard typically has white stems. Both rainbow chard and Swiss chard have the same flavor and nutritional value.
What are the benefits of growing my own rainbow chard?
Growing your own rainbow chard allows you to enjoy fresh, organic produce that is free from pesticides and herbicides. It also saves you money and reduces your environmental impact. Plus, it’s a fun and rewarding activity!

Leave a Comment