
Growing tomatoes in plastic cans might sound unconventional, but trust me, it’s a game-changer for any home gardener looking to maximize their yield, especially if space is at a premium! For centuries, humans have cultivated tomatoes, tracing back to their origins in South America. From humble beginnings, they’ve become a staple in cuisines worldwide, a testament to their deliciousness and versatility. But let’s face it, traditional gardening can be intimidating and time-consuming. That’s where this DIY trick comes in.
I’m here to show you how you can transform discarded plastic cans into thriving tomato habitats. Why is this so important? Well, not everyone has access to a sprawling garden. Apartment dwellers, balcony enthusiasts, and even those with limited mobility can now enjoy the satisfaction of harvesting their own juicy, sun-ripened tomatoes. Plus, repurposing plastic cans is a fantastic way to reduce waste and contribute to a more sustainable lifestyle. This method is not only cost-effective but also incredibly efficient, allowing you to control the soil quality, watering, and sunlight exposure for optimal tomato growth. So, get ready to roll up your sleeves and discover the secrets to successfully growing tomatoes in plastic cans – it’s easier than you think!
Tomatenzucht im Plastikkanister: Dein DIY-Guide für eine reiche Ernte
Hallo liebe Gartenfreunde! Ich zeige euch heute, wie ihr aus alten Plastikkanistern wahre Tomatenparadiese zaubern könnt. Diese Methode ist nicht nur super nachhaltig, weil wir Müll wiederverwerten, sondern auch platzsparend und ideal für Balkone, Terrassen oder kleine Gärten. Lasst uns gemeinsam loslegen!
Was du brauchst:
* Plastikkanister (5-10 Liter, gereinigt und ohne schädliche Rückstände)
* Tomatensamen oder Jungpflanzen (am besten buschige Sorten für den Anfang)
* Gute Blumenerde oder Tomatenerde
* Drainagematerial (Kies, Blähton, Tonscherben)
* Messer oder Cutter
* Bohrmaschine oder Nagel
* Gießkanne
* Pflanzstäbe (optional, je nach Tomatensorte)
* Handschuhe (empfohlen)
Vorbereitung der Kanister: Der Grundstein für dein Tomatenparadies
1. Reinigung: Das A und O ist die gründliche Reinigung der Kanister. Spüle sie mit heißem Wasser und etwas Spülmittel aus, um alle Rückstände zu entfernen. Achte darauf, dass keine schädlichen Chemikalien im Kanister waren, bevor du ihn verwendest.
2. Drainagelöcher bohren: Damit das Wasser gut ablaufen kann und Staunässe vermieden wird, bohre mit einer Bohrmaschine oder einem Nagel mehrere Löcher in den Boden des Kanisters. Ich empfehle mindestens 5-6 Löcher, je nach Größe des Kanisters.
3. Kanister zuschneiden: Jetzt kommt der spaßige Teil! Du hast zwei Möglichkeiten:
* Variante 1: Horizontaler Schnitt: Lege den Kanister flach hin und schneide mit einem Messer oder Cutter die obere Seite ab. Lasse dabei einen Rand von ca. 5-10 cm stehen. Dieser Rand dient als Schutz und verhindert, dass die Erde beim Gießen herausschwappt.
* Variante 2: Vertikaler Schnitt: Schneide den Kanister der Länge nach auf, aber nicht ganz durch. Lasse am Boden einen Steg von ca. 5-10 cm stehen. So entsteht eine Art “Klappbeet”, das du später leicht öffnen kannst, um die Erde zu lockern oder Unkraut zu entfernen. Diese Variante ist besonders praktisch, wenn du mehrere Pflanzen in einem Kanister anbauen möchtest.
Wichtig: Sei vorsichtig beim Schneiden und trage am besten Handschuhe, um dich nicht zu verletzen.
4. Kanten entschärfen: Die Schnittkanten können scharf sein. Entschärfe sie mit Schleifpapier oder einem Feuerzeug (vorsichtig!). So vermeidest du Verletzungen beim Hantieren mit den Kanistern.
Die Bepflanzung: So fühlen sich deine Tomaten wohl
1. Drainageschicht einfüllen: Fülle eine Schicht Drainagematerial (Kies, Blähton, Tonscherben) auf den Boden des Kanisters. Diese Schicht sorgt dafür, dass das Wasser gut abfließen kann und die Wurzeln nicht im Wasser stehen. Ich verwende am liebsten Blähton, weil er leicht ist und gut Wasser speichert.
2. Erde einfüllen: Fülle den Kanister mit guter Blumenerde oder Tomatenerde. Lasse dabei einen Rand von ca. 5 cm frei. Die Erde sollte locker und humusreich sein, damit sich die Tomatenpflanzen wohlfühlen.
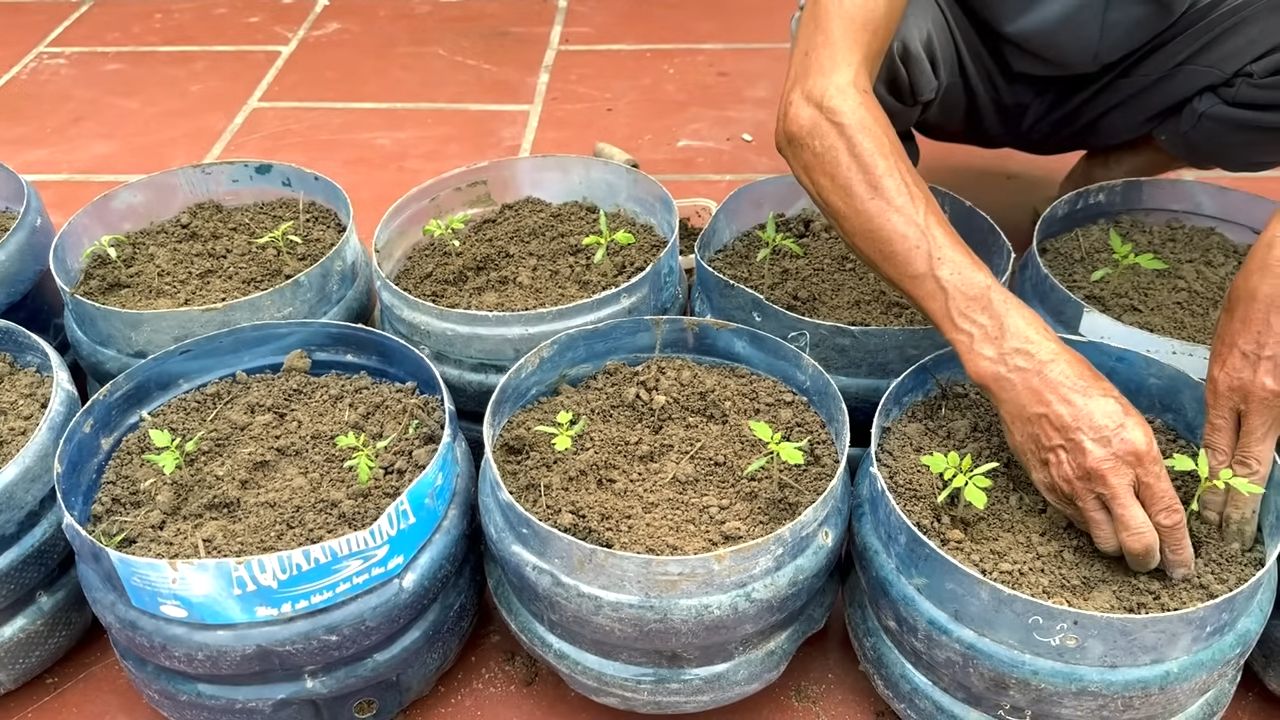
3. Pflanzen vorbereiten: Wenn du Jungpflanzen verwendest, nimm sie vorsichtig aus dem Topf und lockere die Wurzeln etwas auf. Wenn du Samen verwendest, säe sie gemäß den Anweisungen auf der Packung aus.
4. Tomaten einpflanzen: Setze die Tomatenpflanzen in die Erde. Achte darauf, dass der Wurzelballen vollständig mit Erde bedeckt ist. Der Abstand zwischen den Pflanzen sollte je nach Sorte ca. 30-40 cm betragen.
5. Angießen: Gieße die Tomatenpflanzen nach dem Einpflanzen gründlich an. So können sich die Wurzeln gut mit der Erde verbinden.
Pflege: Damit deine Tomaten prächtig gedeihen
1. Standort: Tomaten lieben die Sonne! Stelle die bepflanzten Kanister an einen sonnigen und warmen Standort. Ideal sind mindestens 6 Stunden Sonne pro Tag.
2. Gießen: Gieße die Tomaten regelmäßig, aber vermeide Staunässe. Die Erde sollte immer leicht feucht sein. An heißen Tagen musst du möglicherweise täglich gießen. Am besten gießt du morgens oder abends, wenn die Sonne nicht so stark scheint.
3. Düngen: Tomaten sind Starkzehrer und brauchen regelmäßig Dünger. Beginne ca. 2-3 Wochen nach dem Einpflanzen mit dem Düngen. Verwende einen speziellen Tomatendünger oder einen organischen Dünger. Befolge die Anweisungen auf der Packung.
4. Ausgeizen: Entferne regelmäßig die Seitentriebe (Geiztriebe), die sich in den Blattachseln bilden. So konzentriert sich die Pflanze auf die Bildung von Früchten.
5. Stützen: Je nach Tomatensorte kann es notwendig sein, die Pflanzen mit Pflanzstäben zu stützen. So verhinderst du, dass die Triebe abbrechen, wenn sie viele Früchte tragen.
6. Schutz vor Krankheiten und Schädlingen: Achte auf Anzeichen von Krankheiten oder Schädlingen. Bei Bedarf kannst du biologische Pflanzenschutzmittel einsetzen.
Spezialtipps für den Tomatenanbau im Kanister:
* Sortenwahl: Für den Anbau im Kanister eignen sich besonders buschige Tomatensorten, wie z.B. Buschtomaten, Balkontomaten oder Hängetomaten. Diese Sorten bleiben kleiner und kompakter und sind daher ideal für den Anbau in Töpfen und Kübeln.
* Mulchen: Bedecke die Erde mit einer Schicht Mulch (z.B. Stroh, Holzhackschnitzel oder Rasenschnitt). Das Mulchen hält die Erde feucht, unterdrückt Unkraut und schützt die Pflanzen vor Spritzwasser.
* Belüftung: Sorge für eine gute Belüftung der Pflanzen. Stelle die Kanister nicht zu eng nebeneinander und entferne regelmäßig abgestorbene Blätter.
* Regenschutz: Bei starkem Regen kann es sinnvoll sein, die Pflanzen mit einer Folie oder einem Vlies abzudecken. So verhinderst du, dass die Früchte platzen oder faulen.
* Kombination mit anderen Pflanzen: Du kannst die Tomaten auch mit anderen Pflanzen kombinieren, die sich gegenseitig positiv beeinflussen. Gute Nachbarn für Tomaten sind z.B. Basilikum, Ringelblumen oder Kapuzinerkresse.
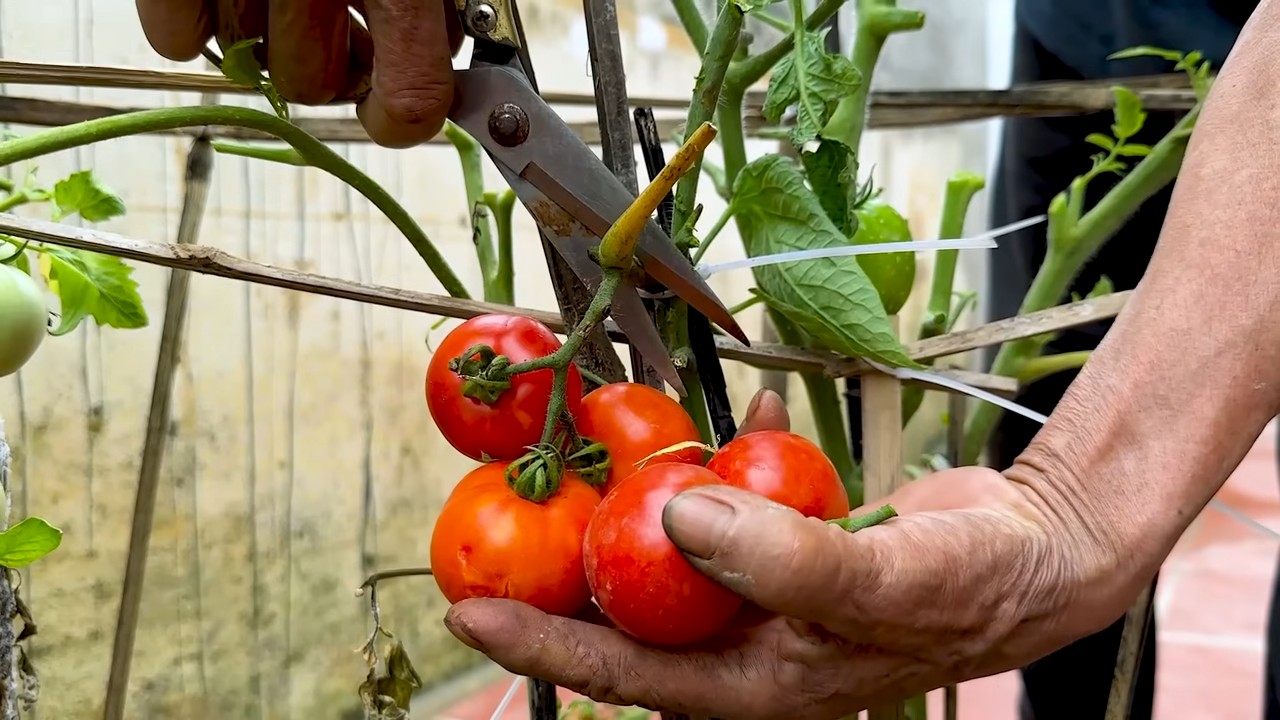
Erntezeit: Die Früchte deiner Arbeit genießen
Sobald die Tomaten reif sind, kannst du sie ernten. Reife Tomaten sind leuchtend rot (oder gelb, orange, je nach Sorte) und lassen sich leicht vom Stiel lösen. Ernte die Tomaten regelmäßig, damit die Pflanze neue Früchte bilden kann.
Ich hoffe, dieser Guide hat dir geholfen und du hast bald eine reiche Tomatenernte! Viel Spaß beim Gärtnern!
Conclusion
So, there you have it! Growing tomatoes in plastic cans isn’t just a quirky gardening experiment; it’s a game-changer for anyone looking to maximize their yield, space, and even their budget. We’ve explored how this simple DIY trick can transform your tomato-growing experience, offering a multitude of benefits that traditional gardening methods often lack.
Think about it: no more battling weeds encroaching on your precious tomato plants. The elevated can design provides a natural barrier, keeping those pesky invaders at bay. Plus, the improved drainage prevents root rot, a common culprit behind tomato plant demise. And let’s not forget the portability! Easily move your tomato plants to chase the sun or shelter them from unexpected frost.
But the real magic lies in the control you gain over your growing environment. By using plastic cans, you can tailor the soil composition to perfectly suit your tomato variety. Whether you’re growing juicy beefsteaks, sweet cherry tomatoes, or tangy Roma tomatoes, you can create the ideal growing medium for optimal flavor and yield.
Ready to take your tomato gardening to the next level?
Don’t be afraid to experiment! Try different can sizes to accommodate various tomato varieties. Consider painting the cans a light color to reflect sunlight and keep the soil cooler in hotter climates. You can even add a trellis to the can for extra support as your tomato plants grow tall and heavy with fruit.
Here are a few variations to consider:
* Upside-Down Tomato Planters: Cut a hole in the bottom of the can, thread the tomato plant through, and hang the can upside down. This method is great for patios and balconies.
* Stacked Tomato Towers: Cut the bottoms out of multiple cans and stack them on top of each other, creating a vertical tomato garden.
* Self-Watering Tomato Cans: Add a water reservoir to the bottom of the can using a smaller container and a wicking system.
The possibilities are endless! The key is to embrace the DIY spirit and find what works best for your garden and your tomatoes.
We’re confident that growing tomatoes in plastic cans will revolutionize your gardening experience. It’s a cost-effective, space-saving, and highly effective method that yields impressive results.
So, grab those plastic cans, gather your supplies, and get ready to enjoy a bountiful harvest of delicious, homegrown tomatoes. We can’t wait to hear about your success!
Don’t forget to share your experiences, tips, and photos with us in the comments below. Let’s build a community of tomato-growing enthusiasts who are passionate about this innovative DIY trick. Happy gardening!
Frequently Asked Questions (FAQ)
What type of plastic cans are best for growing tomatoes?
Ideally, you should use food-grade plastic cans, such as those that previously contained cooking oil, large quantities of vegetables, or other food items. Ensure the cans are thoroughly cleaned with soap and water to remove any residue. Avoid using cans that have contained harsh chemicals or pesticides. The size of the can will depend on the type of tomato you are growing. Smaller varieties like cherry tomatoes can thrive in smaller cans (around 5 gallons), while larger varieties like beefsteak tomatoes will need larger cans (10 gallons or more) to accommodate their extensive root systems.
How do I prepare the plastic cans for planting?
First, thoroughly clean the cans with soap and water to remove any residue. Then, drill drainage holes in the bottom of the cans to prevent waterlogging. The number and size of the holes will depend on the size of the can, but aim for at least four to five holes that are about 1/2 inch in diameter. You can also add a layer of gravel or small stones to the bottom of the can to further improve drainage. If you plan to move the cans around, consider adding handles or wheels to make them easier to transport.
What type of soil should I use for growing tomatoes in plastic cans?
Tomatoes thrive in well-draining, nutrient-rich soil. A good potting mix specifically formulated for vegetables is ideal. You can also create your own mix by combining equal parts of compost, peat moss (or coconut coir), and perlite or vermiculite. Compost provides essential nutrients, peat moss or coconut coir helps retain moisture, and perlite or vermiculite improves drainage. Avoid using garden soil, as it can be too heavy and compacted for container gardening.
How often should I water my tomato plants in plastic cans?
The watering frequency will depend on the weather, the size of the can, and the type of tomato you are growing. Generally, you should water your tomato plants when the top inch of soil feels dry to the touch. Water deeply until water drains out of the drainage holes. Avoid overwatering, as this can lead to root rot. During hot, dry weather, you may need to water your plants daily. In cooler, wetter weather, you may only need to water them every few days.
Do I need to fertilize my tomato plants in plastic cans?
Yes, tomato plants grown in containers need regular fertilization, as the nutrients in the soil will be depleted over time. Use a balanced fertilizer specifically formulated for tomatoes, following the instructions on the package. You can use a slow-release fertilizer at planting time or a liquid fertilizer every few weeks. Look for fertilizers that are high in phosphorus and potassium, as these nutrients are essential for fruit production.
How much sunlight do tomato plants need when grown in plastic cans?
Tomato plants need at least 6-8 hours of direct sunlight per day to thrive. Choose a sunny location for your plastic cans where your tomato plants will receive ample sunlight. If you live in a very hot climate, you may need to provide some afternoon shade to prevent the plants from overheating.
How do I support my tomato plants in plastic cans?
As tomato plants grow, they will need support to prevent them from falling over. You can use stakes, cages, or trellises to support your plants. Insert the support structure into the can when you plant the tomato seedling to avoid damaging the roots later. Tie the tomato stems to the support structure as they grow, using soft twine or plant ties.
What are some common pests and diseases that affect tomato plants grown in plastic cans, and how can I prevent them?
Common pests that affect tomato plants include aphids, whiteflies, tomato hornworms, and spider mites. Common diseases include early blight, late blight, and blossom end rot. To prevent pests and diseases, choose disease-resistant tomato varieties, practice good sanitation, and monitor your plants regularly for signs of problems. You can use insecticidal soap or neem oil to control pests. To prevent diseases, avoid overhead watering, provide good air circulation, and remove any infected leaves. Blossom end rot is caused by a calcium deficiency, so make sure your soil is rich in calcium or add a calcium supplement.
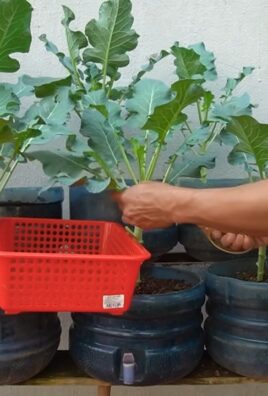
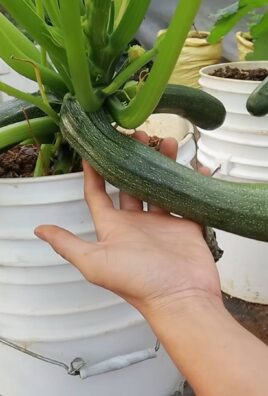
Can I grow other vegetables in plastic cans using the same method?
Yes, many other vegetables can be grown in plastic cans using the same method, including peppers, eggplants, cucumbers, and herbs. Just make sure to choose the appropriate size can for the vegetable you are growing and provide the necessary support and nutrients.
What do I do with the plastic cans at the end of the growing season?
At the end of the growing season, you can clean the plastic cans and store them for reuse next year. Alternatively, you can recycle them if they are made of recyclable plastic. You can also repurpose them for other gardening projects, such as growing flowers or starting seedlings.

Leave a Comment