
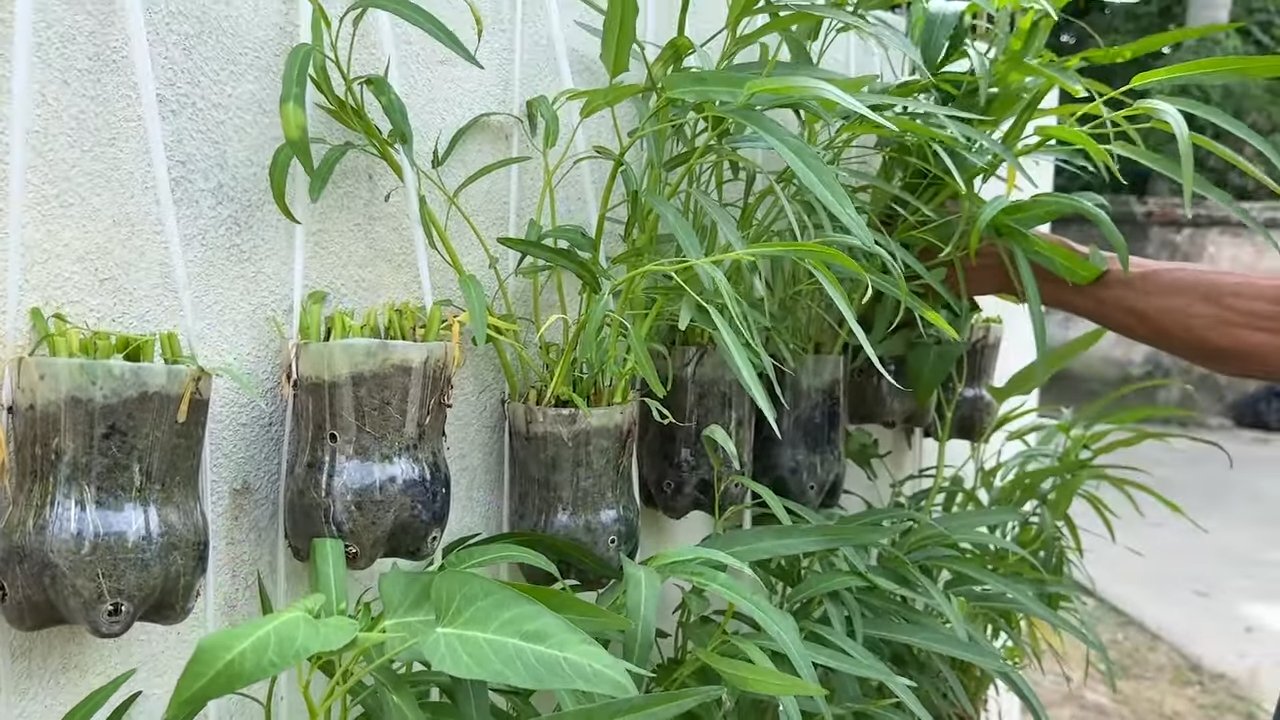
Growing water spinach in bottles might sound like something out of a science fiction movie, but trust me, it’s a super fun and surprisingly easy way to bring fresh, delicious greens right to your kitchen! Forget those wilting, overpriced veggies at the grocery store. Imagine stepping outside your door and harvesting crisp, vibrant water spinach whenever you need it.
Water spinach, also known as “kangkong,” has a rich history, especially in Southeast Asian cuisine. For generations, it’s been a staple ingredient, adding a delightful crunch and earthy flavor to stir-fries, soups, and salads. But you don’t need a sprawling garden to enjoy this versatile vegetable.
In today’s busy world, finding time and space for traditional gardening can be a challenge. That’s where this DIY trick comes in! Growing water spinach in bottles is perfect for apartment dwellers, urban gardeners, or anyone looking for a low-maintenance, space-saving way to grow their own food. Plus, it’s a fantastic project for kids, teaching them about plant life and where their food comes from. I’m excited to share this simple yet effective method that will have you enjoying fresh, homegrown water spinach in no time!
Wasserspinat im Upcycling-Style: So züchtest du ihn in Flaschen!
Hey Leute! Habt ihr Lust auf frischen, knackigen Wasserspinat direkt aus eurer Küche oder vom Balkon? Und das Ganze auch noch super nachhaltig? Dann seid ihr hier genau richtig! Ich zeige euch, wie ihr Wasserspinat ganz einfach in alten Plastikflaschen züchten könnt. Das ist nicht nur platzsparend, sondern auch ein tolles Upcycling-Projekt. Los geht’s!
Was du brauchst: Die Materialliste
Bevor wir loslegen, hier eine Liste mit allem, was du für dein Wasserspinat-Flaschen-Garten brauchst:
* Plastikflaschen: Am besten eignen sich 1,5-Liter-Flaschen oder größere. Je nachdem, wie viel Wasserspinat du anbauen möchtest, kannst du natürlich auch mehrere Flaschen verwenden. Achte darauf, dass die Flaschen sauber und leer sind.
* Wasserspinat-Samen: Die bekommst du im Gartenfachhandel, online oder manchmal auch im Asia-Laden. Achte auf eine gute Qualität der Samen.
* Anzuchterde: Spezielle Anzuchterde ist ideal, da sie nährstoffarm ist und die Wurzelbildung fördert. Du kannst aber auch normale Blumenerde mit etwas Sand vermischen.
* Blumenerde oder Kompost: Für später, wenn die Pflänzchen größer sind.
* Schere oder Messer: Zum Zuschneiden der Flaschen.
* Bohrmaschine oder Nagel und Hammer: Für die Drainagelöcher.
* Wasser: Klar, zum Gießen!
* Optional: Tongranulat oder Kies für die Drainage.
* Optional: Etiketten und Stift zum Beschriften der Flaschen.
Schritt-für-Schritt-Anleitung: So geht’s!
Jetzt geht’s ans Eingemachte! Folge diesen Schritten, um deinen eigenen Wasserspinat-Flaschen-Garten anzulegen:
Phase 1: Die Vorbereitung der Flaschen
1. Flaschen reinigen: Spüle die Plastikflaschen gründlich mit warmem Wasser und Spülmittel aus. Achte darauf, dass keine Rückstände mehr vorhanden sind.
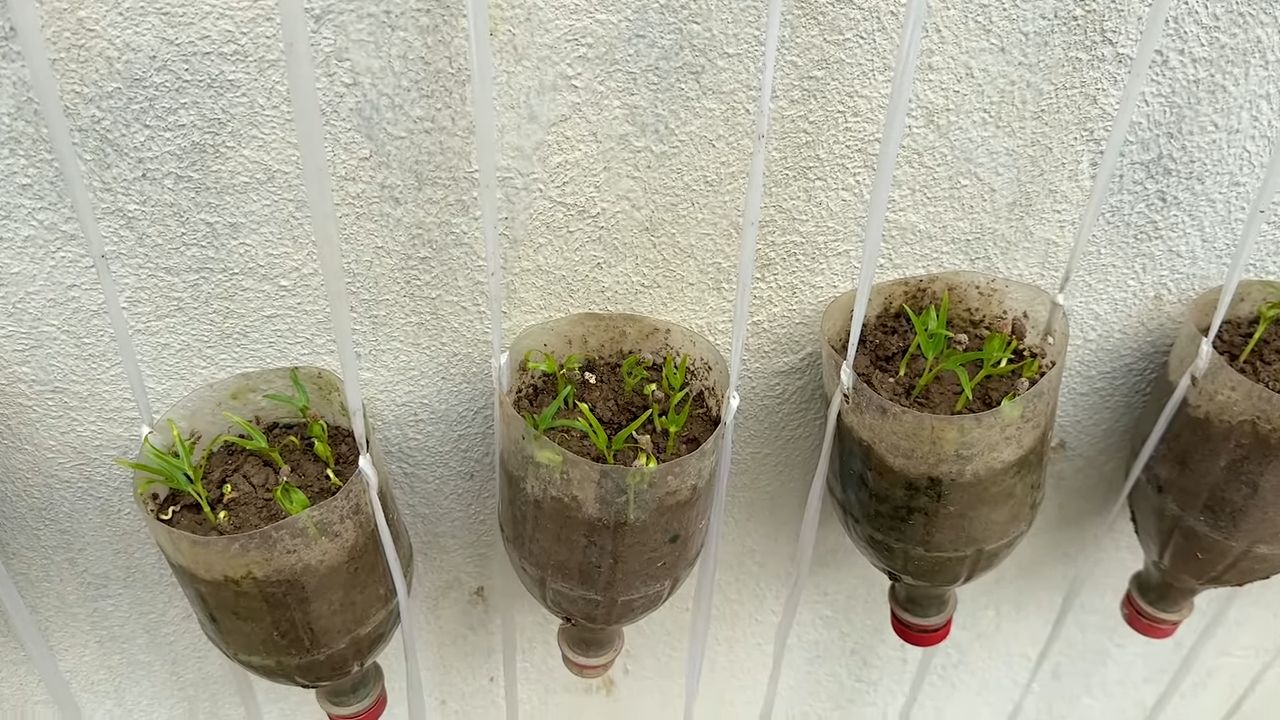
2. Flaschen zuschneiden: Schneide die Flaschen mit einer Schere oder einem Messer durch. Du kannst sie entweder in der Mitte durchschneiden oder den oberen Teil etwas kürzer lassen. Der obere Teil der Flasche wird später als eine Art Mini-Gewächshaus dienen.
3. Drainagelöcher bohren: Bohre mit einer Bohrmaschine oder einem Nagel und Hammer mehrere kleine Löcher in den Boden des unteren Flaschenteils. Diese Löcher sind wichtig, damit überschüssiges Wasser ablaufen kann und Staunässe vermieden wird.
4. Optional: Drainage einfüllen: Fülle eine Schicht Tongranulat oder Kies in den Boden des unteren Flaschenteils. Das verbessert die Drainage zusätzlich und verhindert, dass die Erde die Löcher verstopft.
Phase 2: Die Aussaat des Wasserspinats
1. Anzuchterde einfüllen: Fülle den unteren Flaschenteil mit Anzuchterde. Lass dabei etwa 2-3 cm Platz bis zum Rand.
2. Samen aussäen: Verteile die Wasserspinat-Samen gleichmäßig auf der Anzuchterde. Drücke sie leicht an.
3. Mit Erde bedecken: Bedecke die Samen mit einer dünnen Schicht Anzuchterde (ca. 0,5 cm).
4. Angießen: Gieße die Erde vorsichtig mit einer Sprühflasche oder einer Gießkanne mit feinem Brausekopf an. Die Erde sollte feucht, aber nicht nass sein.
5. Mini-Gewächshaus bauen: Setze den oberen Teil der Flasche umgekehrt auf den unteren Teil. So entsteht ein Mini-Gewächshaus, das die Keimung der Samen beschleunigt.
6. Warm und hell stellen: Stelle die Flaschen an einen warmen und hellen Ort, aber nicht in die pralle Sonne. Ein Fensterbrett oder ein heller Balkon sind ideal.
Phase 3: Die Pflege der Pflänzchen
1. Feuchtigkeit kontrollieren: Überprüfe regelmäßig die Feuchtigkeit der Erde. Sie sollte immer leicht feucht sein. Gieße bei Bedarf mit einer Sprühflasche oder einer Gießkanne mit feinem Brausekopf.
2. Lüften: Lüfte das Mini-Gewächshaus regelmäßig, indem du den oberen Teil der Flasche kurz abnimmst. Das verhindert Schimmelbildung.
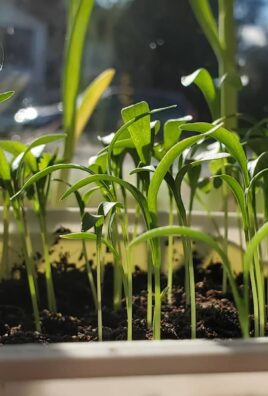
3. Umtopfen: Sobald die Pflänzchen groß genug sind (ca. 5-10 cm hoch), kannst du sie in größere Töpfe oder Behälter umtopfen. Verwende dafür Blumenerde oder Kompost.
4. Düngen: Dünge die Pflänzchen regelmäßig mit einem organischen Flüssigdünger. Das sorgt für ein gesundes Wachstum und eine reiche Ernte.
5. Sonnenschutz: Schütze die Pflänzchen vor direkter Sonneneinstrahlung, besonders in den heißen Mittagsstunden.
6. Ernten: Du kannst den Wasserspinat ernten, sobald die Blätter groß genug sind. Schneide die Stängel einfach mit einer Schere ab. Der Wasserspinat wächst immer wieder nach, sodass du mehrmals ernten kannst.
Zusätzliche Tipps und Tricks für den perfekten Wasserspinat-Anbau
* Die richtige Sorte wählen: Es gibt verschiedene Sorten von Wasserspinat. Informiere dich, welche Sorte für deine Region und deine Anbaubedingungen am besten geeignet ist.
* Samen vorbehandeln: Um die Keimung zu beschleunigen, kannst du die Samen vor der Aussaat für einige Stunden in warmem Wasser einweichen.
* Schädlinge bekämpfen: Wasserspinat ist relativ robust, kann aber von Blattläusen oder anderen Schädlingen befallen werden. Kontrolliere die Pflanzen regelmäßig und bekämpfe Schädlinge bei Bedarf mit natürlichen Mitteln.
* Regelmäßig gießen: Wasserspinat braucht viel Wasser, besonders an heißen Tagen. Achte darauf, dass die Erde immer feucht ist.
* Erntezeitpunkt: Ernte den Wasserspinat am besten am Morgen, wenn die Blätter noch frisch und knackig sind.
* Lagerung: Lagere den geernteten Wasserspinat im Kühlschrank. Er hält sich dort einige Tage.
* Kreative Gestaltung: Du kannst die Flaschen auch bemalen oder mit Etiketten versehen, um deinen Wasserspinat-Garten noch individueller zu gestalten.
Warum Wasserspinat so gesund ist
Wasserspinat ist nicht nur lecker, sondern auch super gesund! Er ist reich an Vitaminen (A, C, B), Mineralstoffen (Eisen, Kalzium, Kalium) und Ballaststoffen. Außerdem enthält er Antioxidantien, die freie Radikale bekämpfen und das Immunsystem stärken. Wasserspinat ist also ein echtes Superfood!
Wasserspinat in der Küche: Vielseitige Verwendungsmöglichkeiten
Wasserspinat ist in der asiatischen Küche sehr beliebt und vielseitig einsetzbar. Du kannst ihn roh in Salaten verwenden, gedünstet als Beilage servieren oder in Suppen und Currys verarbeiten. Besonders lecker ist er auch in Wok-Gerichten. Probiere es einfach aus!
Ich hoffe, diese Anleitung hat dir geholfen und du hast bald deinen eigenen, frischen Wasserspinat aus Flaschen! Viel Spaß beim Gärtnern!
Conclusion
So, there you have it! Growing water spinach, also known as kangkong or ong choy, in bottles is not just a quirky gardening experiment; it’s a genuinely practical and rewarding way to bring fresh, nutritious greens right to your doorstep, even if you’re short on space. We’ve walked you through the simple steps, highlighting the ease and accessibility of this method. But why is this DIY trick a must-try?
Firstly, it’s incredibly space-efficient. Forget sprawling gardens; a few repurposed bottles can yield a surprising amount of water spinach. This makes it ideal for apartment dwellers, balcony gardeners, or anyone looking to maximize their small outdoor areas. Secondly, it’s budget-friendly. You’re essentially recycling materials and using minimal resources to cultivate a valuable food source. The cost of seeds or cuttings is negligible compared to the price of buying water spinach regularly. Thirdly, it’s a fantastic learning experience. Watching your water spinach thrive in its bottle environment provides a tangible connection to the food you eat and a deeper understanding of plant growth.
But the benefits don’t stop there. Growing your own water spinach allows you to control the growing environment, ensuring that your greens are free from harmful pesticides and herbicides. You know exactly what’s going into your food, giving you peace of mind and a healthier harvest. Plus, the fresh, homegrown taste of water spinach is simply unmatched by anything you can find in the store.
Now, let’s talk about variations and suggestions. While we’ve focused on using plastic bottles, feel free to experiment with other containers like glass jars or even repurposed buckets. Just ensure they’re clean and have adequate drainage. You can also adjust the nutrient solution to suit your specific needs. Some gardeners prefer using diluted compost tea or fish emulsion for a more organic approach. Consider adding a small air pump to your bottle setup to further oxygenate the water, which can promote even faster growth.
For those living in colder climates, you can extend your growing season by bringing your bottle gardens indoors during the winter months. Place them near a sunny window or supplement with grow lights to ensure they receive enough light. You can also experiment with different varieties of water spinach. Some varieties are more heat-tolerant, while others are better suited for cooler temperatures.
Don’t be afraid to experiment and adapt the method to your own unique circumstances. The beauty of DIY gardening is the freedom to customize and create something that works perfectly for you.
We wholeheartedly encourage you to give this DIY trick a try. It’s a fun, easy, and rewarding way to grow your own fresh water spinach. And most importantly, we want to hear about your experiences! Share your photos, tips, and challenges in the comments section below. Let’s build a community of bottle gardeners and inspire others to embrace sustainable and accessible food production. What are you waiting for? Grab some bottles, get some seeds, and start growing your own delicious water spinach today! We are confident that you will find that growing water spinach in bottles is a simple and effective way to have fresh greens at your fingertips.
Frequently Asked Questions (FAQ)
What kind of bottles are best for growing water spinach?
Ideally, you want to use food-grade plastic bottles that are clean and free of any harmful chemicals. Two-liter soda bottles or larger water bottles work well. Make sure to thoroughly wash the bottles before using them to remove any residue. Darker colored bottles can help prevent algae growth, but clear bottles will work just fine as long as you monitor them. Avoid using bottles that have contained harsh chemicals or pesticides.
How often should I change the water in the bottles?
The frequency of water changes depends on several factors, including the size of the bottle, the temperature, and the amount of sunlight the plants are receiving. As a general rule, you should change the water every 1-2 weeks. If you notice the water becoming cloudy or developing an unpleasant odor, change it more frequently. When changing the water, be careful not to damage the roots of the water spinach. Gently lift the plants out of the bottle, discard the old water, and refill with fresh water and nutrient solution.
What kind of nutrient solution should I use?
You can use a commercially available hydroponic nutrient solution specifically formulated for leafy greens. Follow the instructions on the product label for dilution rates. Alternatively, you can create your own nutrient solution using diluted compost tea, fish emulsion, or other organic fertilizers. Start with a weak solution and gradually increase the concentration as the plants grow. It’s important to monitor the plants for signs of nutrient deficiencies, such as yellowing leaves or stunted growth, and adjust the nutrient solution accordingly.
How much sunlight does water spinach need?
Water spinach thrives in full sun, meaning it needs at least 6-8 hours of direct sunlight per day. If you’re growing water spinach indoors, you’ll need to supplement with grow lights to provide adequate light. Place the grow lights about 6-12 inches above the plants and keep them on for 12-16 hours per day. Insufficient light can lead to leggy growth and reduced yields.
How long does it take for water spinach to grow in bottles?
Water spinach is a fast-growing plant, and you can typically start harvesting leaves within 3-4 weeks of planting. The exact time will depend on factors such as temperature, sunlight, and nutrient availability. Once the plants reach a height of about 6-8 inches, you can begin harvesting the outer leaves, allowing the inner leaves to continue growing.
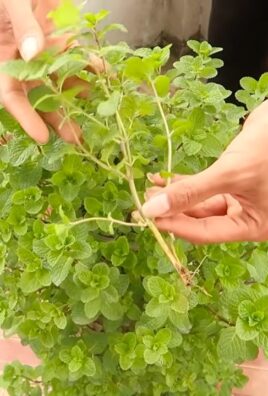
Can I grow water spinach from cuttings instead of seeds?
Yes, growing water spinach from cuttings is a very effective method. Simply take cuttings from a mature water spinach plant, making sure each cutting has at least one node (the point where leaves emerge). Remove the lower leaves from the cutting and place it in water. Roots will typically develop within a few days. Once the roots are about an inch long, you can transplant the cuttings into your bottle garden.
How do I prevent algae growth in the bottles?
Algae growth can be a common problem in bottle gardens, especially if the bottles are exposed to direct sunlight. To prevent algae growth, you can try the following:
* Use darker colored bottles to block out light.
* Wrap the bottles in aluminum foil or dark plastic.
* Add a small amount of hydrogen peroxide to the water (1 teaspoon per gallon).
* Regularly clean the bottles to remove any algae buildup.
What are some common pests and diseases that affect water spinach?
Water spinach is generally a hardy plant, but it can be susceptible to certain pests and diseases, such as aphids, spider mites, and fungal infections. To prevent these problems, keep your plants healthy by providing them with adequate sunlight, water, and nutrients. Regularly inspect your plants for signs of pests or diseases and take action promptly. You can use organic pesticides or fungicides to control infestations.
How do I harvest water spinach?
Harvesting water spinach is easy. Simply cut the outer leaves or stems with a sharp knife or scissors, leaving the inner leaves to continue growing. You can harvest water spinach multiple times from the same plant. Regular harvesting encourages the plant to produce more leaves.
Is growing water spinach in bottles sustainable?
Yes, growing water spinach in bottles can be a very sustainable practice. By repurposing plastic bottles, you’re reducing waste and minimizing your environmental impact. Growing your own food also reduces your reliance on commercially produced food, which often involves long-distance transportation and resource-intensive farming practices. Furthermore, you can compost the spent water spinach plants and use the compost to enrich your garden soil.

Leave a Comment