
Hanging bottle lettuce growing – sounds like something out of a futuristic garden, right? Well, it’s surprisingly simple and a fantastic way to bring fresh, delicious lettuce right to your doorstep, even if you’re short on space! Forget those expensive, pre-packaged salad mixes from the grocery store; imagine plucking crisp, vibrant lettuce leaves grown with your own two hands, just moments before you toss them into your salad.
The concept of vertical gardening, which hanging bottle lettuce growing falls under, has roots stretching back centuries. Think of the Hanging Gardens of Babylon, one of the Seven Wonders of the Ancient World! While we might not be building elaborate tiered structures, the principle remains the same: maximizing space and bringing nature closer to our living areas. In modern times, with increasing urbanization and smaller living spaces, the need for innovative gardening solutions has never been greater.
But why should you try this DIY trick? Well, for starters, it’s incredibly space-saving, perfect for balconies, patios, or even sunny windowsills. Plus, it’s a fantastic way to recycle those plastic bottles that might otherwise end up in a landfill. And let’s be honest, there’s something incredibly satisfying about growing your own food. I’ve found that it connects me to nature and provides a sense of accomplishment that’s hard to beat. So, if you’re looking for a fun, sustainable, and rewarding gardening project, keep reading! I’m going to show you exactly how to create your own hanging bottle lettuce garden, step-by-step. Get ready to enjoy fresh, homegrown lettuce all season long!
Hängende Salatgärten aus Plastikflaschen: Dein DIY-Guide für frischen Salat von der Wand
Hallo liebe Gartenfreunde! Habt ihr wenig Platz, aber Lust auf frischen Salat? Dann habe ich genau das Richtige für euch: Hängende Salatgärten aus recycelten Plastikflaschen! Das ist nicht nur super nachhaltig, sondern sieht auch noch richtig cool aus. Ich zeige euch, wie ihr ganz einfach euren eigenen vertikalen Garten bauen könnt. Los geht’s!
Was du brauchst: Die Materialliste
Bevor wir loslegen, hier eine Liste mit allen Materialien, die du benötigst:
* Plastikflaschen: Am besten eignen sich 1,5-Liter- oder 2-Liter-Flaschen. Je nachdem, wie groß dein Garten werden soll, brauchst du entsprechend viele. Achte darauf, dass sie sauber und trocken sind.
* Schere oder Cuttermesser: Zum Schneiden der Flaschen. Sei bitte vorsichtig!
* Bohrmaschine oder Nagel und Hammer: Für die Löcher zum Aufhängen und zur Drainage.
* Starkes Seil oder Draht: Zum Aufhängen der Flaschen.
* Erde: Am besten Blumenerde oder spezielle Gemüseerde.
* Salatsamen oder Setzlinge: Je nachdem, was du anbauen möchtest. Ich empfehle Pflücksalat, Feldsalat oder Rucola, da diese schnell wachsen und wenig Platz benötigen.
* Gießkanne oder Sprühflasche: Zum Bewässern deiner Pflanzen.
* Optional: Sprühfarbe oder Marker zum Dekorieren der Flaschen.
* Optional: Vlies oder Jute zum Auslegen der Flaschen (verhindert das Ausspülen der Erde).
Schritt-für-Schritt-Anleitung: So baust du deinen hängenden Salatgarten
1. Flaschen vorbereiten:
* Entferne die Etiketten von den Plastikflaschen. Das geht am besten mit warmem Wasser und etwas Spülmittel.
* Reinige die Flaschen gründlich von innen und außen.
* Lass die Flaschen vollständig trocknen.
2. Schneiden der Flaschen:
* Wichtig: Hier ist Vorsicht geboten! Benutze eine Schere oder ein Cuttermesser und schneide die Flaschen so, dass du eine Art “Pflanzgefäß” erhältst.
* Es gibt verschiedene Möglichkeiten, die Flaschen zu schneiden:
* Variante 1 (Horizontal): Schneide die Flasche horizontal in der Mitte durch. Der obere Teil wird später umgedreht und in den unteren Teil gesteckt. So entsteht ein kleiner Topf.
* Variante 2 (Oval): Schneide ein ovales Loch in die Seite der Flasche. Dieses Loch sollte groß genug sein, um später die Salatpflanzen einzusetzen.
* Variante 3 (Längs): Schneide die Flasche längs auf, aber nicht ganz durch. So entsteht eine Art “Boot”, in das du die Erde füllen kannst.
* Ich persönlich finde die horizontale Variante am einfachsten und stabilsten.
3. Drainagelöcher bohren:
* Bohre mit einer Bohrmaschine oder einem Nagel und Hammer mehrere kleine Löcher in den Boden jeder Flasche. Diese Löcher sind wichtig, damit überschüssiges Wasser ablaufen kann und die Wurzeln nicht faulen.
* Achte darauf, dass die Löcher nicht zu groß sind, damit keine Erde herausfällt.
4. Aufhängelöcher bohren:
* Bohre nun Löcher in die Seiten der Flaschen, durch die du später das Seil oder den Draht ziehen kannst, um die Flaschen aufzuhängen.
* Die Anzahl und Position der Löcher hängt davon ab, wie du die Flaschen aufhängen möchtest.
* Variante 1 (Einzeln): Bohre zwei Löcher gegenüberliegend am oberen Rand der Flasche.
* Variante 2 (Kette): Bohre vier Löcher: zwei am oberen Rand und zwei am unteren Rand. So kannst du die Flaschen wie eine Kette untereinander aufhängen.
5. Flaschen dekorieren (optional):
* Wenn du möchtest, kannst du die Flaschen jetzt noch dekorieren.
* Benutze Sprühfarbe, um die Flaschen in deinen Lieblingsfarben anzusprühen.
* Oder bemale sie mit wasserfesten Markern.
* Lass deiner Kreativität freien Lauf!
6. Flaschen auslegen (optional):
* Um zu verhindern, dass Erde durch die Drainagelöcher ausgespült wird, kannst du die Flaschen mit Vlies oder Jute auslegen.
* Schneide das Vlies oder die Jute in passende Stücke und lege sie in die Flaschen.
7. Flaschen befüllen:
* Fülle die Flaschen mit Erde.
* Achte darauf, dass die Erde locker und luftig ist.
* Lass oben noch etwas Platz, damit du die Pflanzen später gut einsetzen kannst.
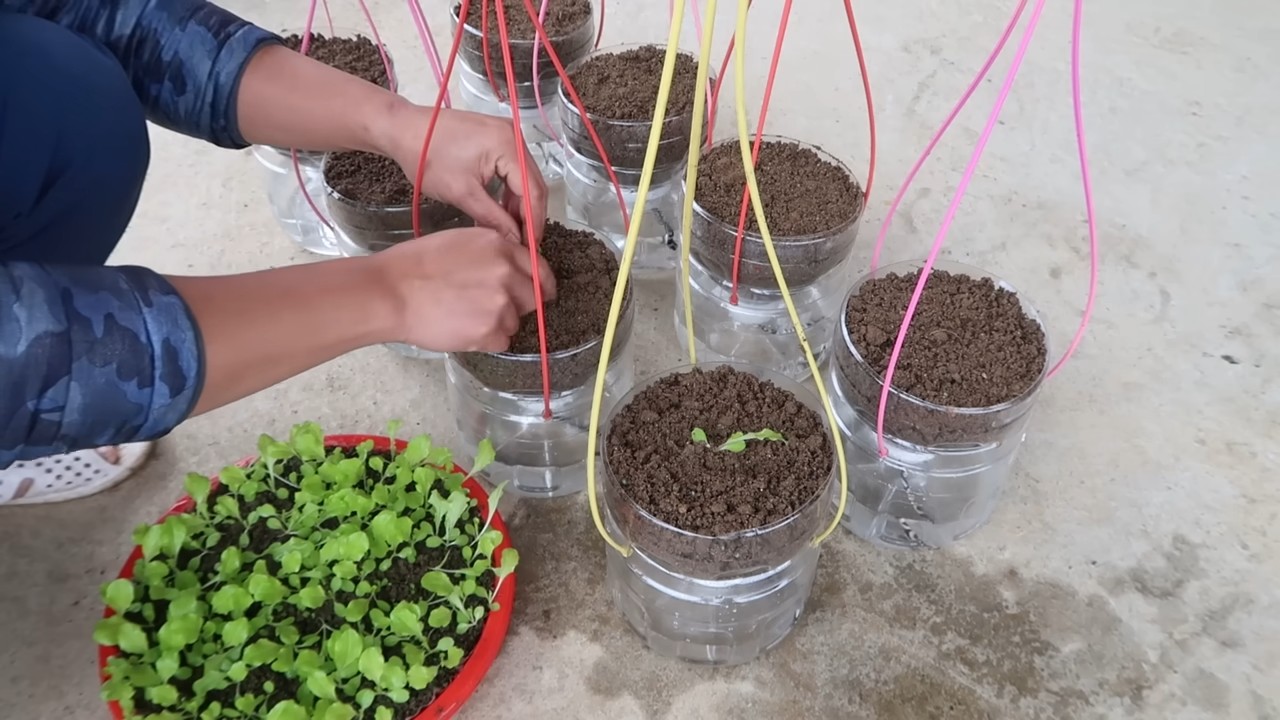
8. Salat pflanzen:
* Nun kannst du deine Salatsamen aussäen oder die Setzlinge einpflanzen.
* Wenn du Samen verwendest, befolge die Anweisungen auf der Samenpackung.
* Wenn du Setzlinge verwendest, grabe kleine Löcher in die Erde und setze die Setzlinge vorsichtig ein.
* Drücke die Erde leicht an.
9. Flaschen aufhängen:
* Ziehe das Seil oder den Draht durch die Löcher in den Flaschen.
* Verknote das Seil oder den Draht fest, damit die Flaschen sicher hängen.
* Hänge die Flaschen an einem sonnigen Ort auf.
* Achte darauf, dass die Flaschen vor Wind geschützt sind.
10. Bewässern:
* Gieße deine Salatpflanzen regelmäßig.
* Die Erde sollte immer leicht feucht sein, aber nicht nass.
* Am besten gießt du morgens oder abends, wenn die Sonne nicht so stark scheint.
* Benutze eine Gießkanne oder eine Sprühflasche, um die Pflanzen schonend zu bewässern.
Tipps und Tricks für deinen hängenden Salatgarten
* Die richtige Erde: Verwende am besten spezielle Gemüseerde oder Blumenerde mit einem hohen Nährstoffgehalt.
* Der richtige Standort: Salat benötigt viel Licht, aber keine direkte Sonneneinstrahlung. Ein halbschattiger Standort ist ideal.
* Regelmäßiges Gießen: Achte darauf, dass die Erde immer leicht feucht ist. Gieße lieber öfter wenig als selten viel.
* Düngen: Dünge deine Salatpflanzen regelmäßig mit einem organischen Dünger.
* Schutz vor Schädlingen: Kontrolliere deine Pflanzen regelmäßig auf Schädlinge. Bei Bedarf kannst du natürliche Schädlingsbekämpfungsmittel verwenden.
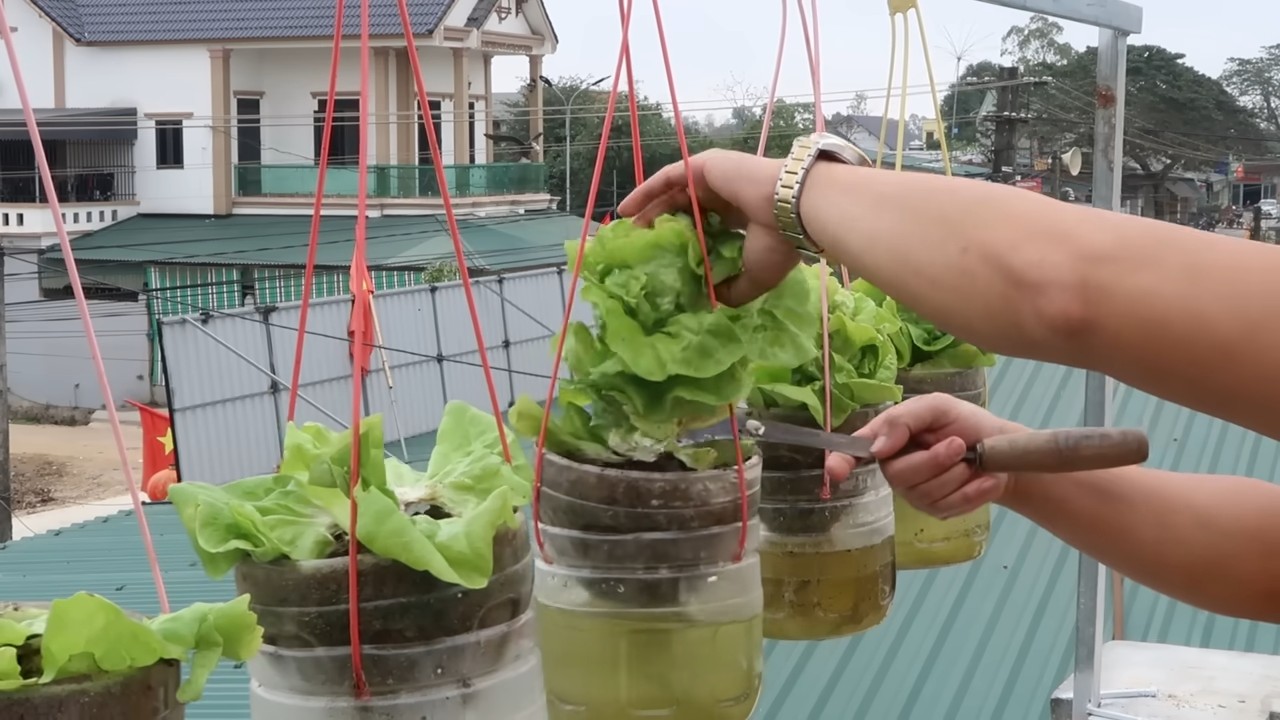
* Ernten: Pflücksalat kannst du nach und nach ernten, indem du die äußeren Blätter abpflückst. Feldsalat und Rucola kannst du komplett ernten, sobald sie groß genug sind.
* Kombinationen: Du kannst verschiedene Salatsorten in deinem hängenden Garten kombinieren. Auch Kräuter wie Petersilie, Schnittlauch oder Basilikum eignen sich gut für den Anbau in Plastikflaschen.
* Upcycling: Nutze verschiedene Arten von Plastikflaschen, um deinem Garten einen individuellen Look zu verleihen.
* Vertikale Erweiterung: Wenn du mehr Platz brauchst, kannst du deinen hängenden Garten beliebig erweitern.
Häufige Fehler und wie du sie vermeidest
* Zu wenig Drainagelöcher: Achte darauf, dass genügend Drainagelöcher vorhanden sind, damit überschüssiges Wasser ablaufen kann. Sonst faulen die Wurzeln.
* Zu viel Sonne: Direkte Sonneneinstrahlung kann die Blätter verbrennen. Wähle einen halbschattigen Standort.
* Zu wenig Wasser: Salat benötigt viel Wasser. Kontrolliere die Erde regelmäßig und gieße bei Bedarf.
* Falsche Erde: Verwende keine normale Gartenerde, da diese oft zu schwer ist und die Wurzeln nicht ausreichend belüftet werden.
* Schädlinge ignorieren: Kont
Conclusion
So, there you have it! Transforming ordinary plastic bottles into a thriving vertical lettuce garden is not just a fun project; it’s a game-changer for anyone looking to maximize space, minimize waste, and enjoy the freshest possible greens right at their fingertips. This DIY hanging bottle lettuce growing method offers a sustainable and visually appealing way to cultivate your own salad ingredients, regardless of whether you have a sprawling backyard or a tiny balcony.
Why is this a must-try? Because it’s incredibly versatile. Imagine the satisfaction of snipping off a handful of crisp lettuce leaves just moments before adding them to your sandwich or salad. Think about the money you’ll save by reducing your trips to the grocery store for pre-packaged greens. And consider the positive impact you’ll have on the environment by repurposing plastic bottles that would otherwise end up in a landfill.
But the benefits don’t stop there. This method is also surprisingly low-maintenance. Once your hanging bottle garden is set up, it requires minimal watering and weeding compared to traditional gardening. Plus, the vertical arrangement helps to deter pests and diseases, keeping your lettuce healthy and productive.
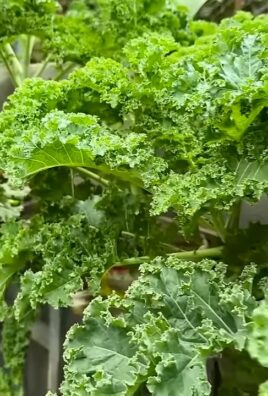
Looking for variations? Absolutely! You can experiment with different types of lettuce, from crisp romaine to delicate butter lettuce. You can also add other leafy greens like spinach, kale, or arugula to your hanging bottle garden. Consider painting the bottles to add a splash of color to your space, or use different sizes of bottles to create a tiered effect. You can even incorporate herbs like basil, parsley, or mint into your vertical garden for a truly diverse and flavorful harvest.
Another exciting variation is to explore different growing mediums. While soil works perfectly well, you could also try using coco coir or perlite for a lighter and more aerated growing environment. This can be particularly beneficial in areas with heavy rainfall, as it helps to prevent waterlogging.
We encourage you to embrace this DIY project and experience the joy of growing your own lettuce. It’s a rewarding and sustainable way to connect with nature, even in the most urban environments. Don’t be afraid to get creative and personalize your hanging bottle garden to suit your own style and preferences.
Most importantly, we want to hear about your experiences! Share your photos, tips, and challenges in the comments below. Let’s build a community of DIY gardeners who are passionate about sustainable living and fresh, homegrown food. Your insights could inspire others to take the plunge and discover the magic of hanging bottle lettuce growing for themselves. So, grab some bottles, some soil, and some lettuce seeds, and get ready to embark on a green adventure! Let us know how your hanging bottle lettuce growing project turns out!
Frequently Asked Questions (FAQ)
What type of plastic bottles are best for hanging bottle lettuce growing?
Ideally, you should use food-grade plastic bottles, such as those that have contained water, juice, or soda. Avoid using bottles that have held harsh chemicals or cleaning products, as these could contaminate your lettuce. PET (polyethylene terephthalate) bottles, which are commonly used for water and soda, are a good choice. Make sure to thoroughly clean and rinse the bottles before using them. The size of the bottle will depend on the type of lettuce you’re growing. Smaller bottles are suitable for compact varieties, while larger bottles can accommodate larger, more leafy types.
How do I water my hanging bottle lettuce garden?
Watering is crucial for healthy lettuce growth. The frequency of watering will depend on the climate, the type of soil you’re using, and the size of the bottles. Generally, you’ll need to water your lettuce garden every day or two, especially during hot and dry weather. Check the soil moisture by sticking your finger into the soil. If it feels dry to the touch, it’s time to water. When watering, make sure to saturate the soil evenly, allowing excess water to drain out of the drainage holes. Avoid overwatering, as this can lead to root rot. Consider using a watering can with a gentle nozzle to avoid damaging the delicate lettuce leaves.
What kind of soil should I use for growing lettuce in bottles?
A well-draining potting mix is essential for successful lettuce growing. Avoid using garden soil, as it can be too heavy and compacted, which can hinder root growth. A good potting mix will contain a blend of peat moss, perlite, and vermiculite, which provides good drainage and aeration. You can also add compost to the potting mix to provide additional nutrients. Alternatively, you can use a soilless growing medium like coco coir, which is a sustainable and lightweight option.
How much sunlight does my hanging bottle lettuce garden need?
Lettuce thrives in partial shade to full sun. Aim for at least 4-6 hours of sunlight per day. If you live in a hot climate, it’s best to provide some afternoon shade to prevent the lettuce from bolting (going to seed). If you’re growing your lettuce indoors, you’ll need to supplement with artificial lighting, such as grow lights. Position the grow lights about 6-12 inches above the lettuce plants and keep them on for 12-16 hours per day.
How do I prevent pests and diseases in my hanging bottle lettuce garden?
The vertical arrangement of hanging bottle gardens helps to deter many common pests and diseases. However, it’s still important to take precautions. Regularly inspect your lettuce plants for signs of pests, such as aphids, slugs, or snails. If you find any pests, you can remove them by hand or spray the plants with insecticidal soap. To prevent fungal diseases, avoid overwatering and ensure good air circulation. You can also apply a fungicide if necessary.
Can I grow other plants besides lettuce in hanging bottles?
Yes, you can grow a variety of other plants in hanging bottles, including other leafy greens like spinach, kale, and arugula. You can also grow herbs like basil, parsley, and mint. When choosing plants, consider their size and growth habits. Smaller, more compact plants are generally better suited for hanging bottles.
How do I harvest lettuce from my hanging bottle garden?
You can harvest lettuce leaves as needed, starting when the plants are about 4-6 inches tall. Simply snip off the outer leaves with scissors or a knife, leaving the inner leaves to continue growing. This cut-and-come-again method allows you to harvest lettuce continuously throughout the growing season.
How long will my hanging bottle lettuce garden last?
The lifespan of your hanging bottle lettuce garden will depend on the type of lettuce you’re growing and the climate. Generally, lettuce plants will produce for several weeks or months before bolting. Once the plants start to bolt, the leaves will become bitter and less palatable. To extend the lifespan of your lettuce garden, you can succession plant, which means planting new seeds every few weeks.
What do I do with the plastic bottles after the lettuce has finished growing?
Once your lettuce plants have finished growing, you can reuse the plastic bottles for another planting season. Simply clean and disinfect the bottles before using them again. Alternatively, you can recycle the bottles or repurpose them for other projects.
Is hanging bottle lettuce growing organic?
Yes, hanging bottle lettuce growing can easily be organic. Use organic potting mix, organic fertilizer, and avoid using any synthetic pesticides or herbicides. This ensures that your lettuce is free from harmful chemicals and safe to eat.

Leave a Comment