
Hanging mustard greens growing might sound like something out of a futuristic farm, but trust me, it’s a surprisingly simple and incredibly rewarding way to bring fresh, peppery greens right to your doorstep! Forget those sad, wilted bunches at the grocery store. Imagine stepping outside and snipping vibrant, healthy mustard greens whenever you need them.
For centuries, cultures around the world have utilized vertical gardening techniques to maximize space and bring nature closer to home. From the Hanging Gardens of Babylon to the humble window boxes of today, the desire to cultivate plants in unconventional ways is deeply ingrained in our history. But why should you embrace this trend now?
Well, let’s face it: space is a premium, and fresh, healthy food is more important than ever. Hanging mustard greens growing offers a fantastic solution for apartment dwellers, balcony gardeners, or anyone looking to add a touch of green to their lives without sacrificing precious ground space. Plus, it’s a fun and engaging DIY project that even beginners can master. I’m excited to share some simple tricks and hacks that will have you harvesting your own delicious mustard greens in no time. Get ready to transform your space into a vibrant, edible oasis!
DIY Hängende Senfgrün-Gärten: Ein Leitfaden für Anfänger
Hallo liebe Gartenfreunde! Habt ihr wenig Platz, aber trotzdem Lust auf frische, selbst angebaute Senfgrün-Blätter? Dann seid ihr hier genau richtig! Ich zeige euch, wie ihr ganz einfach hängende Senfgrün-Gärten selber machen könnt. Das ist nicht nur platzsparend, sondern sieht auch noch super aus! Lasst uns loslegen!
Was du brauchst: Die Materialliste
Bevor wir anfangen, sollten wir sicherstellen, dass wir alles beisammen haben. Hier ist eine Liste der Dinge, die du für dein hängendes Senfgrün-Paradies benötigst:
* Hängekörbe oder Pflanzgefäße: Wähle Körbe oder Gefäße, die groß genug sind, um den Senfgrün-Pflanzen genügend Platz zum Wachsen zu bieten. Ich empfehle einen Durchmesser von mindestens 25 cm. Achte darauf, dass sie Abflusslöcher haben!
* Kokosfaser-Einsätze oder Jute-Liner: Diese helfen, die Feuchtigkeit im Boden zu halten und verhindern, dass Erde durch die Körbe fällt.
* Hochwertige Blumenerde: Verwende eine gut durchlässige Blumenerde, die reich an Nährstoffen ist. Ich mische gerne etwas Kompost unter, um den Pflanzen einen zusätzlichen Schub zu geben.
* Senfgrün-Samen oder Jungpflanzen: Du kannst entweder Samen aussäen oder bereits vorgezogene Jungpflanzen kaufen. Ich persönlich ziehe es vor, mit Samen zu beginnen, da es günstiger ist und ich den gesamten Wachstumsprozess miterleben kann.
* Hängende Ketten oder Seile: Diese benötigst du, um die Körbe aufzuhängen. Achte darauf, dass sie stabil genug sind, um das Gewicht der bepflanzten Körbe zu tragen.
* Gießkanne oder Schlauch: Zum Bewässern deiner Senfgrün-Pflanzen.
* Gartenschere oder Schere: Zum Ernten der Blätter.
* Optional: Langzeitdünger: Um die Pflanzen während der gesamten Saison mit Nährstoffen zu versorgen.
Schritt-für-Schritt-Anleitung: So baust du deinen hängenden Garten
Jetzt, wo wir alle Materialien haben, können wir mit dem Bau unseres hängenden Senfgrün-Gartens beginnen. Folge einfach diesen Schritten:
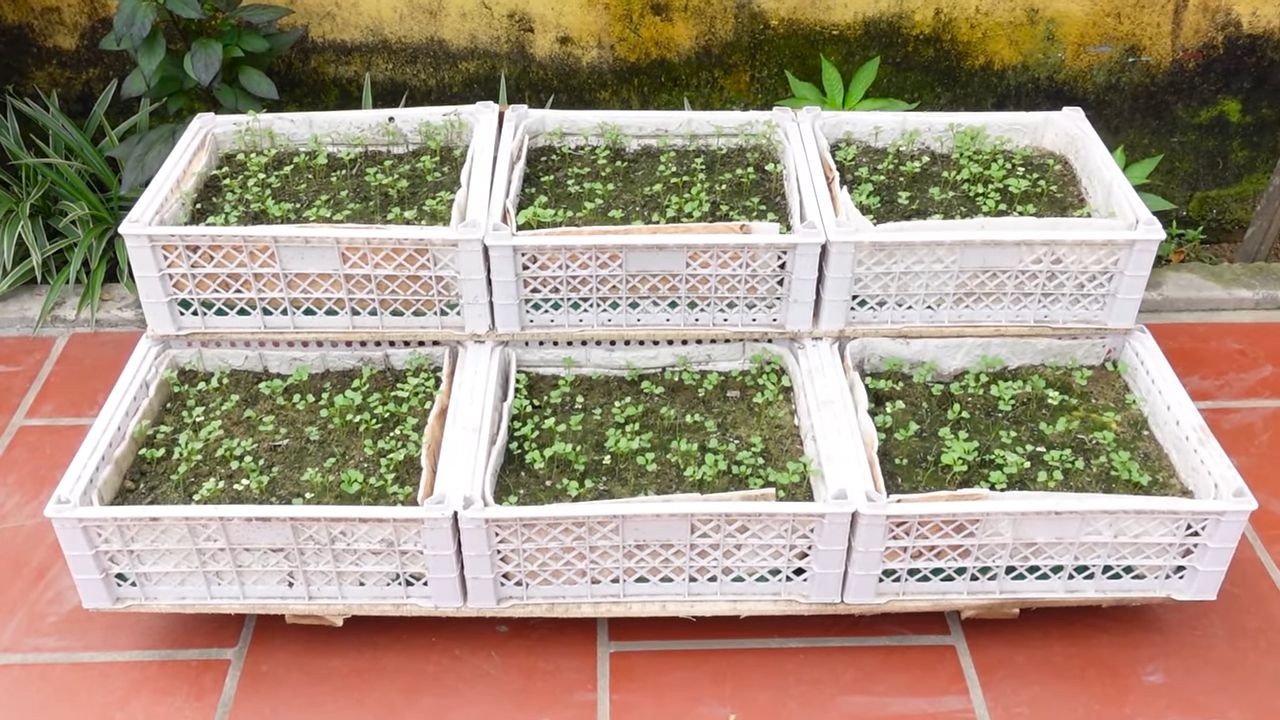
1. Vorbereitung der Körbe: Lege die Kokosfaser-Einsätze oder Jute-Liner in die Hängekörbe oder Pflanzgefäße. Stelle sicher, dass sie gut sitzen und die gesamte Innenseite der Körbe bedecken. Das verhindert, dass Erde herausfällt und hält die Feuchtigkeit besser.
2. Befüllen mit Erde: Fülle die Körbe mit hochwertiger Blumenerde. Lass oben etwa 2-3 cm Platz, damit du beim Gießen nicht alles überschwemmst. Wenn du möchtest, kannst du jetzt auch etwas Langzeitdünger unter die Erde mischen.
3. Aussaat der Samen oder Einpflanzen der Jungpflanzen:
* Aussaat: Wenn du Samen verwendest, streue sie gleichmäßig über die Oberfläche der Erde. Bedecke sie dann leicht mit einer dünnen Schicht Erde. Drücke die Erde leicht an und gieße sie vorsichtig an.
* Einpflanzen: Wenn du Jungpflanzen verwendest, grabe kleine Löcher in die Erde, die groß genug sind, um die Wurzelballen aufzunehmen. Setze die Pflanzen in die Löcher und fülle sie mit Erde auf. Drücke die Erde leicht an und gieße sie gut an. Achte darauf, dass die Pflanzen nicht zu eng beieinander stehen, damit sie genügend Platz zum Wachsen haben. Ich empfehle einen Abstand von etwa 10-15 cm zwischen den Pflanzen.
4. Aufhängen der Körbe: Befestige die Hängeketten oder Seile an den Körben. Stelle sicher, dass sie sicher befestigt sind und das Gewicht der bepflanzten Körbe tragen können. Suche dir einen geeigneten Ort zum Aufhängen der Körbe. Ideal ist ein sonniger Standort mit mindestens 6 Stunden Sonnenlicht pro Tag. Achte darauf, dass die Körbe vor starkem Wind geschützt sind.
5. Bewässerung: Gieße die Senfgrün-Pflanzen regelmäßig, besonders während der heißen Sommermonate. Die Erde sollte immer leicht feucht sein, aber nicht nass. Vermeide Staunässe, da dies zu Wurzelfäule führen kann. Am besten gießt du am frühen Morgen oder späten Nachmittag, um Verdunstung zu vermeiden.
6. Düngung: Wenn du keinen Langzeitdünger verwendet hast, solltest du deine Senfgrün-Pflanzen regelmäßig düngen. Verwende einen Flüssigdünger für Blattgemüse und befolge die Anweisungen auf der Verpackung. Ich dünge meine Pflanzen alle zwei Wochen.
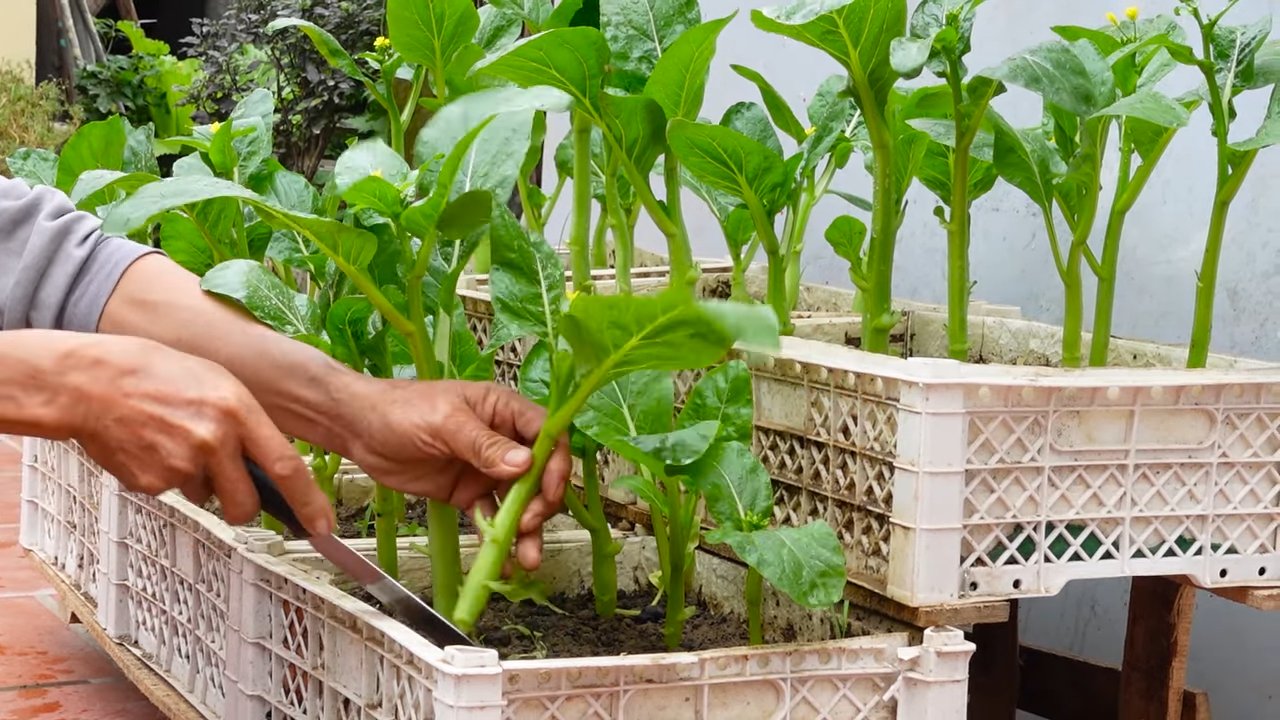
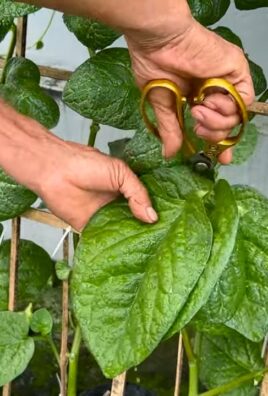
7. Ernte: Du kannst die Senfgrün-Blätter ernten, sobald sie groß genug sind. Schneide die äußeren Blätter ab und lass die inneren Blätter weiterwachsen. So kannst du über einen längeren Zeitraum ernten. Die Blätter sind am besten, wenn sie jung und zart sind.
Pflege-Tipps für deinen hängenden Senfgrün-Garten
Damit dein hängender Senfgrün-Garten prächtig gedeiht, hier noch ein paar zusätzliche Tipps:
* Schutz vor Schädlingen: Senfgrün kann von verschiedenen Schädlingen befallen werden, wie z.B. Blattläusen oder Kohlweißlingen. Kontrolliere deine Pflanzen regelmäßig auf Schädlinge und bekämpfe sie gegebenenfalls mit natürlichen Mitteln, wie z.B. Neemöl oder einer Seifenlösung.
* Regelmäßiges Ausputzen: Entferne regelmäßig verwelkte oder gelbe Blätter, um die Gesundheit der Pflanzen zu fördern.
* Drehen der Körbe: Drehe die Körbe regelmäßig, damit alle Seiten gleichmäßig Sonnenlicht erhalten.
* Überwinterung: Senfgrün ist nicht winterhart. Wenn du in einer Region mit kalten Wintern lebst, kannst du die Pflanzen entweder ins Haus holen oder neue Samen im Frühjahr aussäen.
Häufige Probleme und Lösungen
Auch beim Anbau von Senfgrün können Probleme auftreten. Hier sind einige häufige Probleme und wie du sie lösen kannst:
* Gelbe Blätter: Gelbe Blätter können ein Zeichen für Überwässerung, Nährstoffmangel oder Schädlingsbefall sein. Überprüfe die Bewässerung, dünge die Pflanzen und kontrolliere sie auf Schädlinge.
* Schlaffe Blätter: Schlaffe Blätter können ein Zeichen für Wassermangel oder zu viel Sonne sein. Gieße die Pflanzen und stelle sie gegebenenfalls an einen schattigeren Ort.
* Kleine Löcher in den Blättern: Kleine Löcher in den Blättern sind oft ein Zeichen für Schädlingsbefall. Kontrolliere die Pflanzen auf Schädlinge und bekämpfe sie gegebenenfalls.
Senfgrün in der Küche: Leckere Rezeptideen
Senfgrün ist nicht nur einfach anzubauen, sondern auch unglaublich vielseitig in der Küche. Hier sind ein paar Ideen, wie du deine selbst angebauten Blätter verwenden kannst:
* Salate: Senfgrün verleiht Salaten eine würzige Note.
* Suppen: Senfgrün kann Suppen und Eintöpfen hinzugefügt werden, um ihnen mehr Geschmack zu verleihen.
* Smoothies: Senfgrün ist eine gesunde Ergänzung für Smoothies.
* Pfannengerichte: Senfgrün kann in Pfannengerichten verwendet werden, um ihnen eine würzige Note zu verleihen.
* Pesto: Senfgrün kann zu Pesto verarbeitet werden.
Ich hoffe, dieser Leitfaden hat dir geholfen, deinen eigenen hängenden Senfgrün-Garten zu bauen. Viel Spaß beim Gärtnern und Genießen deiner frischen, selbst angebauten Blätter!
Conclusion
So, there you have it! Transforming your gardening game with hanging mustard greens is not just a trend; it’s a revolution in maximizing space, minimizing pests, and adding a vibrant, edible aesthetic to your home. We’ve explored the simple yet effective methods to create your own hanging mustard green garden, and hopefully, you’re already envisioning the possibilities.
Why is this DIY trick a must-try? Because it’s more than just growing vegetables; it’s about embracing sustainability, connecting with nature, and enjoying the freshest, most flavorful mustard greens imaginable, right at your fingertips. Imagine stepping onto your balcony or into your garden and snipping off a handful of peppery greens for your salad, stir-fry, or even a vibrant green smoothie. The taste is unparalleled, the satisfaction immense, and the environmental impact significantly reduced compared to buying commercially grown produce.
Beyond the practical benefits, hanging mustard greens offer a unique visual appeal. They transform ordinary spaces into lush, green havens, adding a touch of rustic charm and natural beauty. Think cascading foliage spilling over the edges of your planters, creating a living curtain of edible goodness. It’s a conversation starter, a source of pride, and a constant reminder of the power of nature.
But the beauty of this DIY project lies in its adaptability. Feel free to experiment with different container types. While we’ve highlighted the effectiveness of repurposed materials like plastic bottles and buckets, you can also explore using hanging baskets, macrame planters, or even specially designed vertical gardening systems. Consider the aesthetic you’re aiming for and choose containers that complement your existing decor.
Furthermore, don’t limit yourself to just one variety of mustard greens. Explore the diverse world of mustard greens, from the mild and tender Mizuna to the spicy and robust Red Giant. Each variety offers a unique flavor profile and visual appeal, allowing you to create a truly personalized hanging garden. You can even interplant your mustard greens with other compatible herbs and vegetables, such as radishes, lettuce, or chives, to maximize space and create a diverse and productive ecosystem.
And if you’re feeling adventurous, consider adding companion plants that attract beneficial insects and deter pests. Marigolds, for example, are known for their ability to repel nematodes and other harmful insects, while dill attracts ladybugs, which are voracious predators of aphids. By incorporating companion planting techniques, you can create a self-sustaining and thriving hanging garden that requires minimal intervention.
The key to success with hanging mustard greens is consistent care and attention. Regular watering is essential, especially during hot and dry weather. Monitor the moisture levels in your containers and water thoroughly whenever the soil feels dry to the touch. Fertilize your plants regularly with a balanced organic fertilizer to provide them with the nutrients they need to thrive. And don’t forget to prune your plants regularly to encourage bushier growth and prevent them from becoming leggy.
So, what are you waiting for? Gather your supplies, choose your favorite mustard green varieties, and embark on this exciting DIY adventure. We’re confident that you’ll be amazed by the results. Not only will you enjoy a bountiful harvest of fresh, delicious mustard greens, but you’ll also experience the joy and satisfaction of creating something beautiful and sustainable with your own hands.
We encourage you to try this DIY trick and share your experiences with us. Post photos of your hanging mustard green gardens on social media using the hashtag #HangingMustardGreens and let us know what tips and tricks you’ve discovered along the way. We’re eager to see your creations and learn from your experiences. Together, we can inspire others to embrace the joys of gardening and create a more sustainable and vibrant world. Let’s get growing!
Frequently Asked Questions (FAQ)
What are the best varieties of mustard greens to grow in hanging baskets?
The best varieties for hanging baskets are those that tend to be more compact and have attractive foliage. Mizuna is an excellent choice due to its mild flavor and feathery leaves. Red Giant mustard is also popular for its striking color and spicy kick. Green Wave is another good option, offering a frilly texture and robust flavor. Consider your personal taste preferences and the visual appeal you’re aiming for when selecting your varieties. Experimenting with different types can also be a fun way to discover your favorites.
How often should I water my hanging mustard greens?
Watering frequency depends on several factors, including the weather, the type of container you’re using, and the size of your plants. As a general rule, check the soil moisture daily and water thoroughly whenever the top inch of soil feels dry to the touch. During hot and dry weather, you may need to water your plants more frequently, possibly even twice a day. Hanging baskets tend to dry out more quickly than in-ground gardens, so it’s essential to monitor them closely. Ensure your containers have adequate drainage to prevent waterlogging, which can lead to root rot.
What type of soil is best for growing mustard greens in hanging baskets?
A well-draining potting mix is essential for growing healthy mustard greens in hanging baskets. Avoid using garden soil, as it can be too heavy and compact, hindering drainage and root growth. A good potting mix should be lightweight, porous, and rich in organic matter. You can purchase pre-made potting mixes or create your own by combining equal parts peat moss, perlite, and compost. Adding a slow-release fertilizer to the potting mix can also provide your plants with a steady supply of nutrients.
How much sunlight do mustard greens need?
Mustard greens thrive in full sun, which means they need at least six hours of direct sunlight per day. However, they can also tolerate partial shade, especially during the hottest part of the day. If you live in a particularly hot climate, providing some afternoon shade can help prevent your plants from wilting and scorching. When choosing a location for your hanging baskets, consider the amount of sunlight the area receives throughout the day and select a spot that provides optimal conditions for your mustard greens.
How do I fertilize my hanging mustard greens?
Mustard greens are heavy feeders and require regular fertilization to thrive. You can use a balanced organic fertilizer, such as compost tea, fish emulsion, or seaweed extract. Apply the fertilizer according to the manufacturer’s instructions, typically every two to four weeks. Avoid over-fertilizing, as this can lead to excessive foliage growth and reduced flavor. You can also amend your potting mix with slow-release fertilizer granules at planting time to provide a continuous supply of nutrients.
How do I protect my hanging mustard greens from pests?
Hanging mustard greens are generally less susceptible to pests than in-ground gardens, but they can still be affected by aphids, flea beetles, and cabbage worms. To prevent pest infestations, inspect your plants regularly for signs of damage and take action promptly. You can handpick pests off your plants or use a strong stream of water to dislodge them. Insecticidal soap and neem oil are also effective organic pest control options. Companion planting with marigolds and dill can also help deter pests and attract beneficial insects.
When is the best time to harvest my mustard greens?
You can begin harvesting your mustard greens as soon as the leaves are large enough to eat, typically about four to six weeks after planting. Harvest the outer leaves first, leaving the inner leaves to continue growing. This cut-and-come-again method allows you to enjoy a continuous harvest throughout the growing season. Mustard greens are most flavorful when harvested in cool weather. Avoid harvesting during the hottest part of the day, as the leaves can become bitter.
Can I grow mustard greens indoors in hanging baskets?
Yes, you can grow mustard greens indoors in hanging baskets, provided you can provide them with adequate light. A sunny windowsill or a grow light can provide the necessary illumination. Indoor mustard greens may require more frequent watering and fertilization than outdoor plants, as they are not exposed to natural rainfall and nutrients. Choose a well-draining potting mix and monitor the soil moisture closely.
How do I prevent my hanging baskets from drying out too quickly?
To prevent your hanging baskets from drying out too quickly, consider using a potting mix that contains water-retaining polymers. These polymers absorb water and release it slowly, helping to keep the soil moist for longer. You can also add a layer of mulch to the top of the soil to help retain moisture and suppress weeds. Grouping your hanging baskets together can also help create a more humid microclimate, reducing water loss.
What are some creative ways to display my hanging mustard greens?
There are endless possibilities for displaying your hanging mustard greens. You can hang them from your porch, balcony, patio, or even indoors. Consider using different types of containers, such as macrame planters, hanging baskets, or repurposed materials, to create a unique and visually appealing display. You can also group your hanging baskets together to create a living wall or vertical garden. Get creative and experiment with different arrangements to find what works best for your space and style.
Leave a Comment