
Harvest Turnips at Home – sounds like a dream, right? Imagine stepping into your backyard and plucking fresh, crisp turnips straight from the earth. It’s more achievable than you think, and this DIY guide is your ticket to making that dream a reality! For centuries, root vegetables like turnips have been a staple in diets across the globe, offering essential nutrients and a hearty, earthy flavor. From ancient Roman feasts to humble peasant meals, the turnip has nourished generations.
But why should you bother learning how to harvest turnips at home? Well, store-bought turnips often lack the vibrant freshness and flavor of homegrown ones. Plus, growing your own food is incredibly rewarding! You control the growing process, ensuring your turnips are free from unwanted chemicals and pesticides. In this article, I’m going to share some simple, yet effective DIY tricks and hacks that will empower you to successfully harvest turnips at home, even if you’re a complete beginner. Get ready to dig in (literally!) and discover the joy of homegrown goodness!
Harvesting Turnips Like a Pro: A DIY Guide
Okay, so you’ve nurtured your turnip patch, watched those leafy greens flourish, and now you’re wondering, “When and how do I actually *harvest* these things?” Don’t worry, I’ve been there! Harvesting turnips is surprisingly straightforward, and with a few simple steps, you’ll be enjoying fresh, homegrown turnips in no time. This guide will walk you through everything you need to know, from identifying the perfect time to harvest to storing your bounty for later.
Knowing When to Harvest: Size Matters (and So Does Time!)
The key to delicious turnips is harvesting them at the right size. Too small, and they’ll lack flavor. Too big, and they can become woody and bitter. Here’s what to look for:
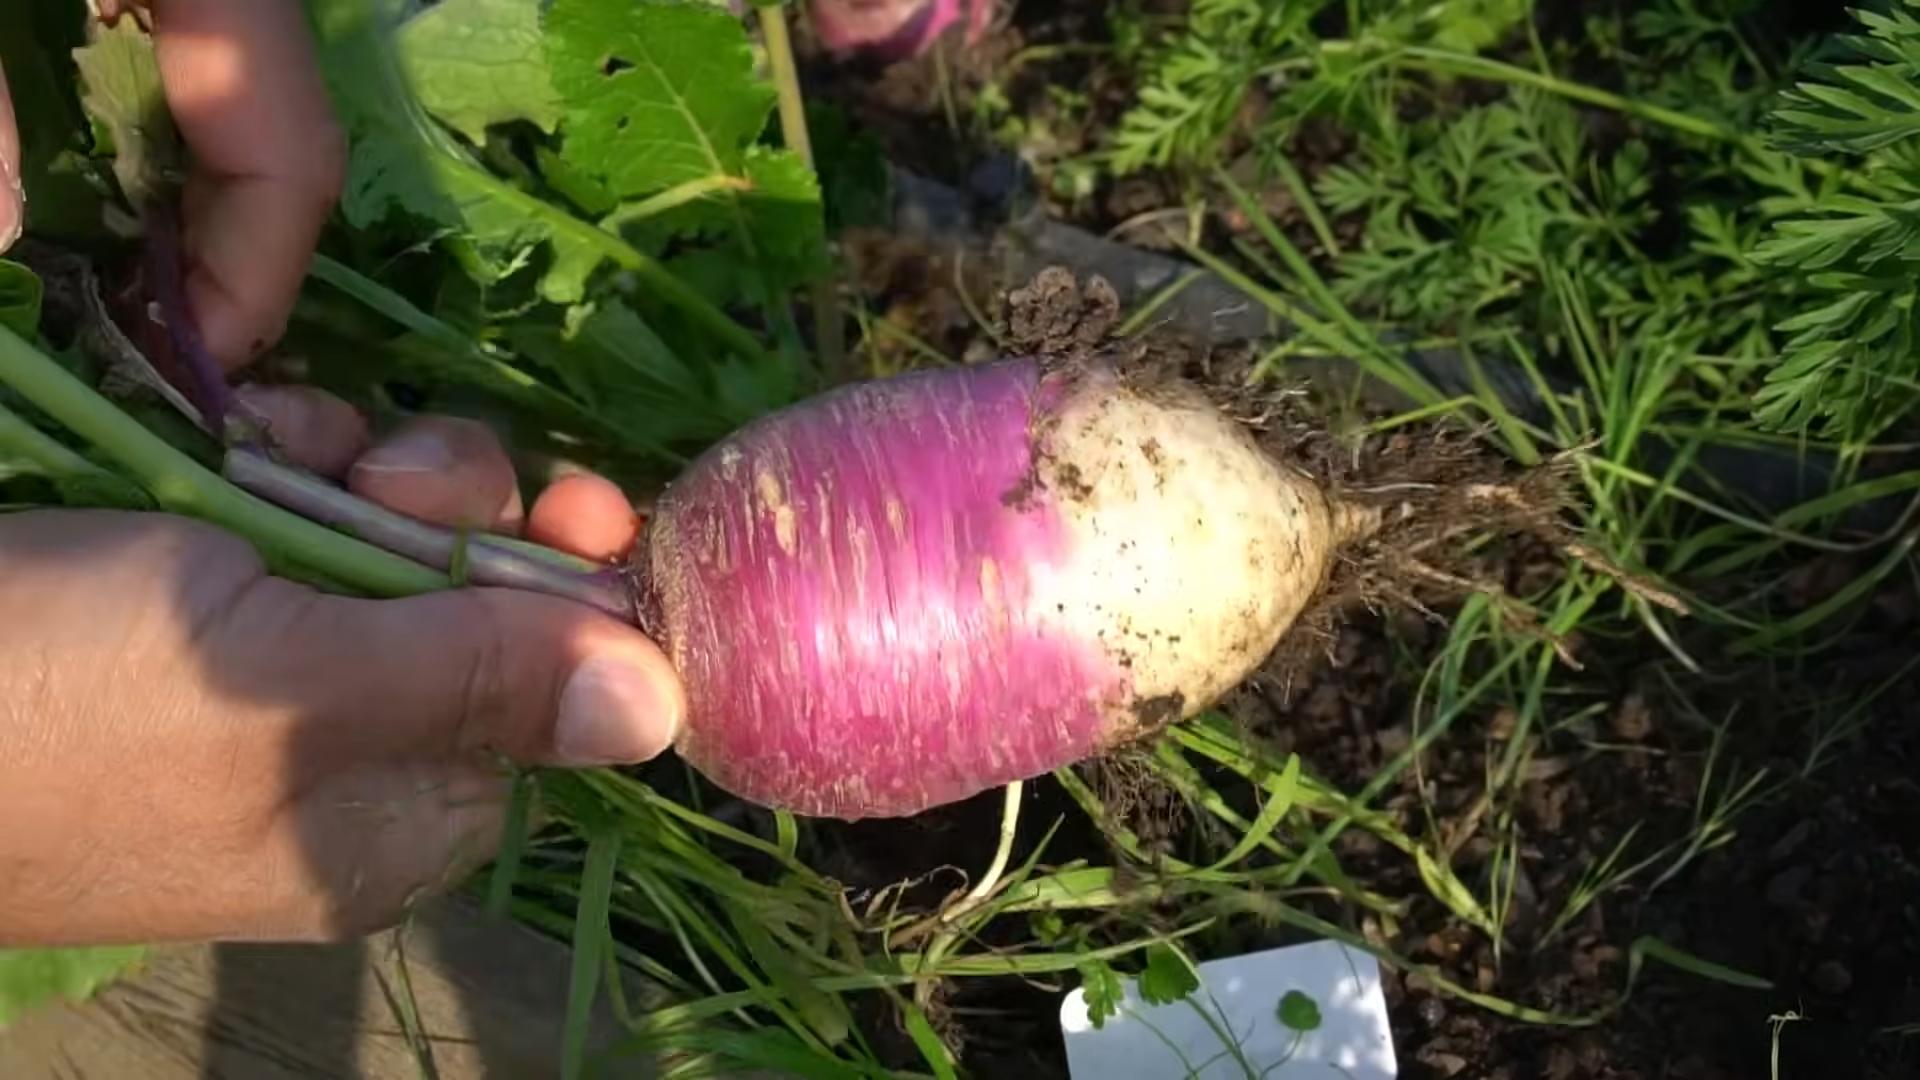
* **Size:** Aim for turnips that are roughly 2-3 inches in diameter. This is generally the sweet spot for flavor and texture. Think about the size of a tennis ball or a slightly smaller baseball.
* **Time from Planting:** Most turnip varieties mature in about 50-60 days. Check your seed packet for the specific variety you planted, as this can vary. Keep track of your planting date!
* **The “Peek” Test:** Gently brush away the soil around the base of a few turnips to get a better look at their size. This is the most accurate way to determine if they’re ready.
* **Don’t Wait Too Long:** Once your turnips reach the ideal size, don’t leave them in the ground for too much longer. Overripe turnips can become tough and lose their sweetness.
Tools You’ll Need
Before you head out to the garden, gather these essentials:
* **Gardening Gloves:** Protect your hands from dirt and any potential irritants.
* **A Sturdy Trowel or Garden Fork:** This will help you loosen the soil around the turnips.
* **A Sharp Knife or Pruning Shears:** For trimming the greens.
* **A Basket or Bucket:** To collect your harvested turnips.
* **Water Hose or Bucket of Water:** For washing off the dirt.
Harvesting Your Turnips: Step-by-Step
Alright, let’s get down to the nitty-gritty. Here’s how to harvest your turnips:
1. **Loosen the Soil:** Using your trowel or garden fork, carefully loosen the soil around the turnip you want to harvest. Be gentle to avoid damaging the turnip itself. Insert the tool a few inches away from the base of the plant and gently pry upwards.
2. **Grasp the Greens:** Grab the turnip greens firmly near the base of the plant.
3. **Pull Upwards:** With a steady, even motion, pull the turnip straight up out of the ground. If it’s stubborn, wiggle it gently from side to side while pulling. The loosened soil should make this easier.
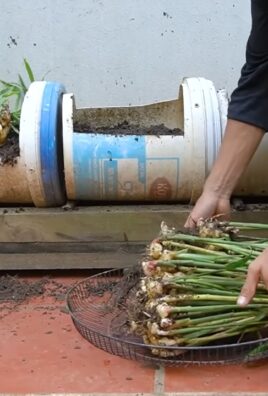
4. **Trim the Greens:** Using your sharp knife or pruning shears, trim the greens about 1-2 inches above the turnip root. You can save these greens – they’re edible and delicious! I love sautéing them with garlic and olive oil.
5. **Remove Excess Soil:** Gently brush off any excess soil clinging to the turnip.
6. **Wash the Turnips:** Rinse the harvested turnips with water to remove any remaining dirt. A hose works great for this, or you can use a bucket of water.
7. **Repeat:** Repeat steps 1-6 for the remaining turnips that are ready to harvest.
Handling and Storing Your Harvest
Once you’ve harvested your turnips, proper handling and storage are crucial to maintaining their freshness and flavor.
1. **Inspect for Damage:** Before storing, inspect each turnip for any cuts, bruises, or signs of rot. Discard any damaged turnips, as they can spoil the rest.
2. **Dry Thoroughly:** Allow the washed turnips to air dry completely before storing them. This will help prevent mold and rot. You can spread them out on a clean towel or wire rack.
3. **Storage Options:**
* **Refrigerator:** The best way to store turnips is in the refrigerator. Place them in a plastic bag or container, and store them in the crisper drawer. They should last for several weeks.
* **Root Cellar:** If you have a root cellar, you can store turnips in bins or crates filled with slightly damp sand or sawdust. This will help keep them cool and moist.
* **Freezing:** You can also freeze turnips, but they will need to be blanched first. Cut the turnips into cubes or slices, blanch them in boiling water for 2-3 minutes, then plunge them into ice water to stop the cooking process. Drain well, and then freeze them in freezer bags or containers. Frozen turnips will be softer than fresh turnips, so they’re best used in cooked dishes.
4. **Storing the Greens:** If you’re saving the turnip greens, wash and dry them thoroughly. Store them in a plastic bag in the refrigerator. They’ll last for a few days.
Using Your Harvest: Delicious Turnip Recipes
Now for the fun part: enjoying your homegrown turnips! Here are a few of my favorite ways to use them:
* **Roasted Turnips:** Toss cubed turnips with olive oil, salt, pepper, and your favorite herbs (rosemary and thyme are great). Roast them in a preheated oven at 400°F (200°C) for 20-30 minutes, or until tender and slightly browned.
* **Mashed Turnips:** Peel and boil turnips until tender. Drain well, and then mash them with butter, milk or cream, salt, and pepper. You can also add other vegetables like potatoes or carrots for a more complex flavor.
* **Turnip Soup:** Sauté diced turnips with onions, garlic, and other vegetables. Add vegetable broth and simmer until the turnips are tender. Puree the soup with an immersion blender or in a regular blender. Season to taste.
* **Sautéed Turnip Greens:** Sauté turnip greens with garlic, olive oil, and a pinch of red pepper flakes. They’re a delicious and nutritious side dish.
* **Pickled Turnips:** Pickled turnips are a tangy and flavorful condiment. There are tons of recipes online, so find one that suits your taste!
Troubleshooting: Common Turnip Harvesting Issues
Even with the best planning, you might encounter a few hiccups along the way. Here are some common issues and how to address them:
* **Turnips are too small:** If your turnips are still small after the expected maturity date, it could be due to poor soil, lack of sunlight, or overcrowding. Thin out the plants to give them more space, and make sure they’re getting enough sunlight. You can also try fertilizing them with a balanced fertilizer.
* **Turnips are woody and bitter:** This usually happens when turnips are left in the ground for too long. Harvest them as soon as they reach the ideal size. Overwatering can also contribute to bitterness.
* **Turnips are cracked:** Cracking can be caused by inconsistent watering. Try to keep the soil consistently moist, especially during dry spells.
* **Pests and Diseases:** Keep an eye out for pests and diseases that can affect your turnip crop. Common pests include aphids, flea beetles, and root maggots. Diseases include clubroot and powdery mildew. Treat any problems promptly to prevent them from affecting your harvest.
Final Thoughts
Harvesting turnips is a rewarding experience that allows you to enjoy the fruits (or rather, roots!) of your labor. By following these simple steps, you can ensure a bountiful harvest of delicious and nutritious turnips. Happy gardening!
Conclusion
So, there you have it! Mastering the art of harvesting turnips at home is not just about pulling a root vegetable from the ground; it’s about connecting with the earth, enjoying the freshest possible produce, and taking control of your food source. This simple DIY trick transforms your garden into a personal farm-to-table experience, offering unparalleled flavor and nutritional benefits.
Why is this a must-try? Because store-bought turnips simply can’t compare to the vibrant taste and crisp texture of freshly harvested ones. The difference is palpable, a testament to the fact that food tastes best when it’s grown with love and harvested at its peak. Plus, knowing exactly where your food comes from and how it was grown provides peace of mind in a world increasingly concerned with food safety and sustainability.
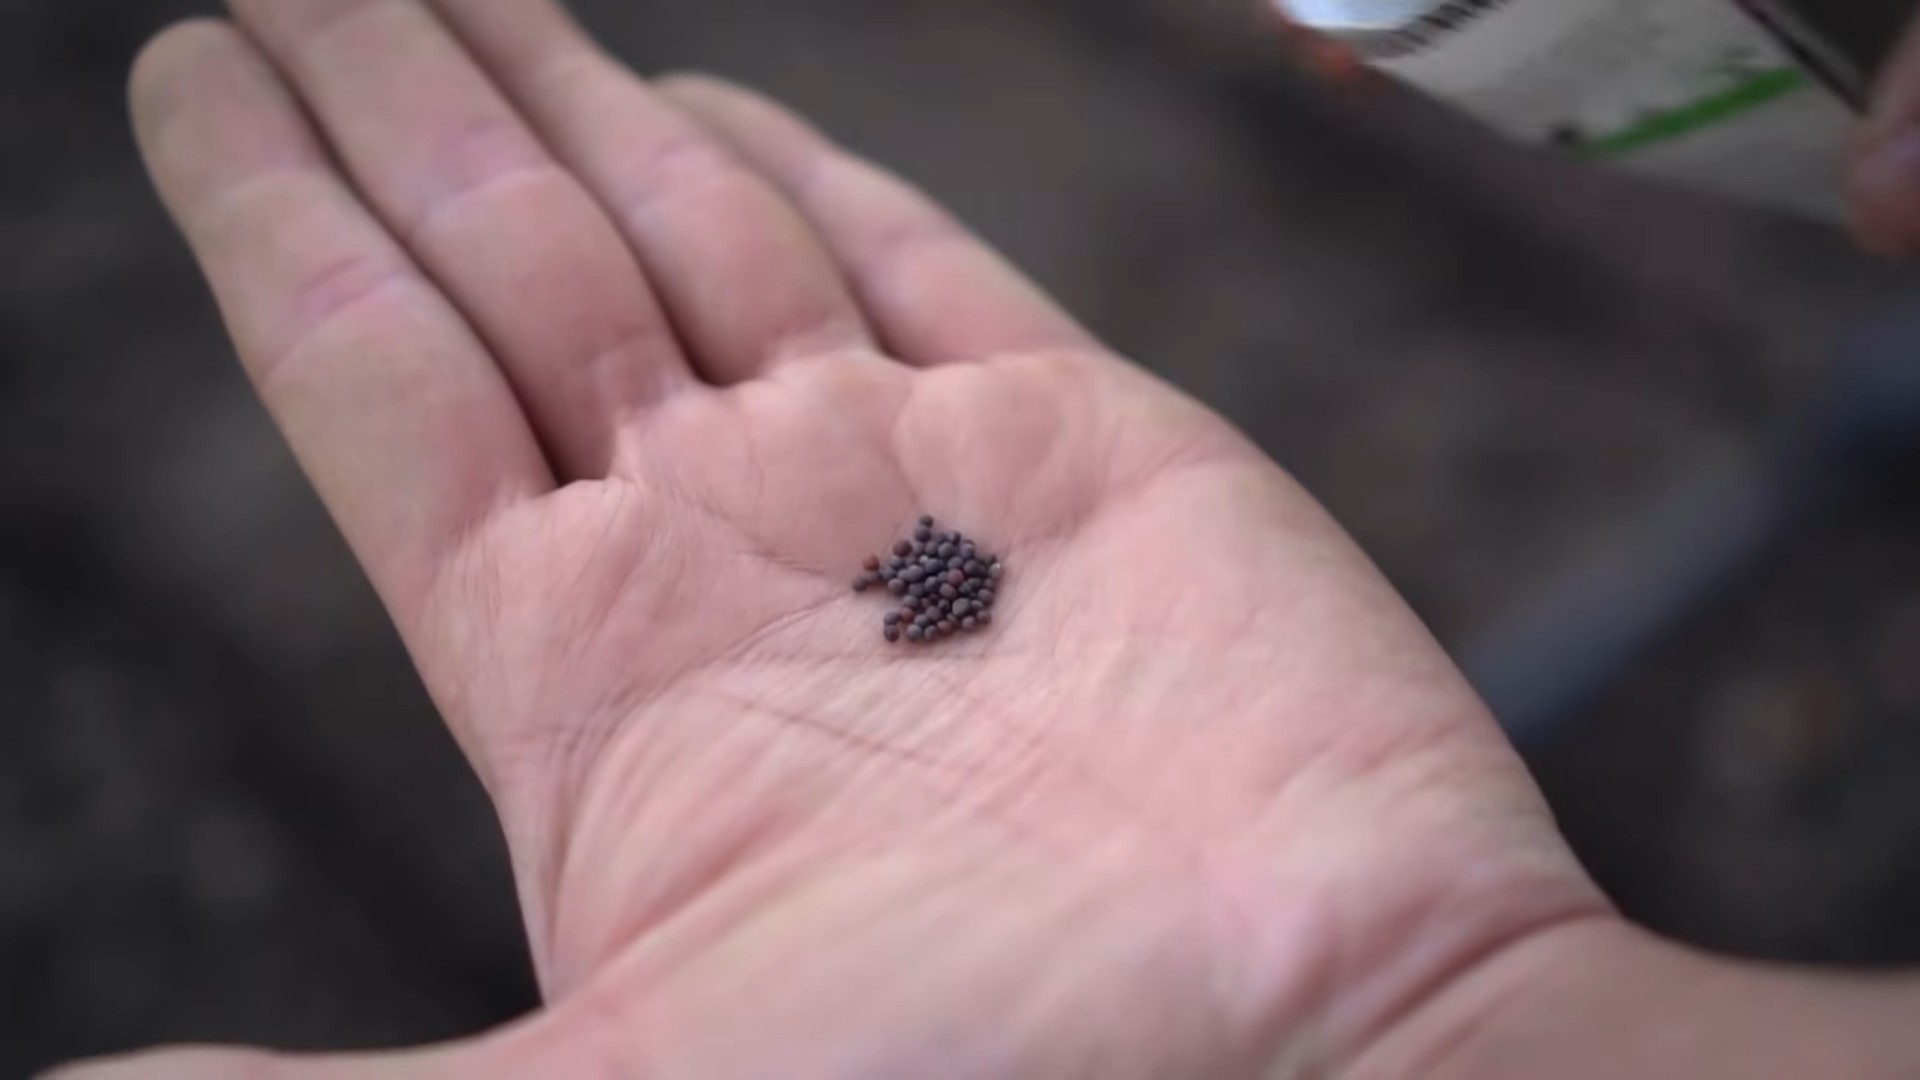
But the benefits don’t stop there. Harvesting your own turnips allows you to experiment with different varieties. Consider planting purple top white globe turnips for their classic flavor, or try the Japanese turnip, Hakurei, known for its mildness and suitability for eating raw. You can even succession plant, sowing seeds every few weeks to ensure a continuous harvest throughout the growing season.
And don’t forget the greens! Turnip greens are incredibly nutritious and delicious. Sauté them with garlic and olive oil, add them to soups and stews, or even blend them into smoothies for a healthy boost. When harvesting, you can selectively remove some of the outer leaves to encourage bulb growth while still enjoying a steady supply of greens.
For a spicier twist, try pickling your harvested turnips. A simple brine of vinegar, water, sugar, and spices can transform them into a tangy and flavorful condiment that’s perfect for sandwiches, salads, or as a side dish. Or, roast them with other root vegetables like carrots and potatoes for a hearty and satisfying meal.
We understand that gardening can sometimes feel daunting, but harvesting turnips is surprisingly straightforward. With a little planning and attention, you can enjoy a bountiful harvest of these versatile vegetables. Remember to loosen the soil around the turnip before pulling, and always handle them gently to avoid bruising.
Ultimately, the joy of harvesting turnips at home lies in the satisfaction of nurturing something from seed to table. It’s a rewarding experience that connects you to the natural world and provides you with delicious, healthy food.
So, what are you waiting for? Grab your gardening gloves, head out to your garden, and experience the magic of harvesting turnips for yourself. We’re confident that you’ll be amazed by the flavor and freshness of homegrown turnips.
We encourage you to try this DIY trick and share your experience with us! Post photos of your harvest on social media using #HomegrownTurnips and tell us about your favorite ways to prepare them. We can’t wait to see what you create! Let’s build a community of home gardeners who appreciate the simple pleasures of fresh, homegrown food. Your tips and tricks could inspire others to embark on their own turnip-growing adventures. Happy harvesting!
FAQ: Harvesting Turnips at Home
What is the best time to harvest turnips?
The ideal time to harvest turnips depends on the variety and your personal preference. Generally, turnips are ready to harvest when the roots are 2-3 inches in diameter. For smaller, more tender turnips, you can harvest them earlier. Larger turnips can be harvested later, but they may become woody or bitter if left in the ground for too long. Check the seed packet for specific maturity dates for your chosen variety. A good rule of thumb is to start checking the size of the roots about 50-60 days after planting.
How do I know if my turnips are ready to harvest?
Besides the size of the root, there are other indicators that your turnips are ready for harvest. The top of the turnip root should be visible above the soil line. Gently brush away some soil to check the size. The greens should be healthy and vibrant. If the greens start to yellow or wilt, it’s a sign that the turnips are past their prime. You can also gently push on the turnip; it should feel firm and solid.
What is the best way to harvest turnips?
The easiest way to harvest turnips is to loosen the soil around the root with a garden fork or trowel. This will make it easier to pull the turnip out of the ground without damaging it. Grasp the turnip greens close to the root and gently pull upwards with a twisting motion. If the turnip is difficult to pull, loosen the soil further. Avoid pulling too hard, as this can break the greens off and leave the root in the ground.
Can I eat the turnip greens?
Absolutely! Turnip greens are a nutritious and delicious addition to any meal. They are rich in vitamins A, C, and K, as well as fiber and antioxidants. You can harvest the greens at any time during the growing season, even before the turnips are fully mature. Simply cut off the outer leaves, leaving the inner leaves to continue growing. Wash the greens thoroughly before cooking. They can be sautéed, steamed, boiled, or added to soups and stews.
How do I store harvested turnips?
To store harvested turnips, first remove the greens, leaving about an inch of stem attached. Wash the turnips thoroughly and allow them to dry completely. Store them in a cool, dark, and humid place, such as a refrigerator or root cellar. The ideal temperature is between 32-40°F (0-4°C). You can store them in a plastic bag or container to prevent them from drying out. Turnips can be stored for several months under these conditions.
What if my turnips are small and underdeveloped?
If your turnips are small and underdeveloped, it could be due to several factors, such as poor soil, insufficient watering, or overcrowding. Make sure your soil is rich in organic matter and well-drained. Water regularly, especially during dry periods. Thin out your turnip seedlings to give them enough space to grow. You can also fertilize your turnips with a balanced fertilizer to promote growth.
Can I leave turnips in the ground over winter?
In mild climates, you can leave turnips in the ground over winter. However, in colder climates, the ground may freeze, making it difficult to harvest them. If you live in a cold climate, you can mulch your turnips with straw or leaves to protect them from the cold. You can also harvest them before the ground freezes and store them as described above.
What are some common pests and diseases that affect turnips?
Some common pests that affect turnips include aphids, flea beetles, and root maggots. Diseases that can affect turnips include clubroot and powdery mildew. You can prevent these problems by practicing good garden hygiene, such as removing weeds and debris, and by using resistant varieties. If you encounter pests or diseases, you can use organic pest control methods, such as insecticidal soap or neem oil.
How often should I water my turnips?
Turnips need consistent moisture to grow well. Water them deeply whenever the top inch of soil feels dry. Avoid overwatering, as this can lead to root rot. During hot, dry weather, you may need to water them more frequently. Mulching around your turnips can help to retain moisture in the soil.
What kind of soil is best for growing turnips?
Turnips prefer well-drained soil that is rich in organic matter. The ideal pH is between 6.0 and 6.8. Before planting, amend your soil with compost or other organic matter to improve its fertility and drainage. Avoid planting turnips in heavy clay soil, as this can lead to root rot. If you have clay soil, you can improve its drainage by adding sand or gravel.
Leave a Comment