
DIY Strawberry Growing: Imagine plucking juicy, sun-ripened strawberries straight from your own backyard! There’s nothing quite like the taste of homegrown berries, and the satisfaction of nurturing them from tiny plants to a bountiful harvest. But what if you don’t have a sprawling garden? Or maybe you’re short on time and space? Don’t worry, I’ve got you covered!
Growing strawberries at home has been a cherished tradition for centuries. From ancient Roman gardens to the kitchen gardens of colonial America, these delightful fruits have always held a special place in our hearts (and stomachs!). They symbolize summer, sweetness, and the simple pleasures of life. But let’s face it, traditional strawberry patches can be a bit demanding. They require a lot of space, careful weeding, and constant vigilance against pests.
That’s where these clever DIY strawberry growing tricks come in! I’m going to share some easy and effective methods that will allow you to enjoy fresh, delicious strawberries, even if you only have a small balcony or patio. These hacks are designed to save you time, money, and effort, while maximizing your strawberry yield. So, get ready to transform your space into a mini strawberry paradise and enjoy the sweet taste of success!
DIY Strawberry Growing: From Seed to Sweetness!
Hey there, fellow garden enthusiasts! I’m so excited to share my tried-and-true method for growing delicious, juicy strawberries right in your own backyard (or even on your balcony!). Forget those bland, store-bought berries – we’re going to cultivate some seriously flavorful goodness. This guide will walk you through everything, from choosing the right variety to harvesting your sweet rewards. Let’s get started!
Choosing Your Strawberry Variety
Before we dive into the nitty-gritty, let’s talk strawberries! There are three main types, and each has its own unique characteristics:
* June-Bearing: These are your classic, one-big-harvest-per-year strawberries. They produce a large crop, usually in late spring or early summer (hence the name!). If you want a lot of berries all at once for jam-making or freezing, these are a great choice.
* Everbearing: Don’t let the name fool you – everbearing strawberries don’t produce fruit continuously. Instead, they have two or three harvests throughout the growing season: one in spring, one in late summer/early fall, and sometimes a smaller one in between. They’re perfect for a steady supply of berries.
* Day-Neutral: These are the most consistent producers, fruiting throughout the growing season as long as the temperature is between 35°F and 85°F. They’re less sensitive to day length than the other two types, making them a good option for areas with shorter growing seasons.
Consider your climate, your available space, and how you plan to use your strawberries when making your decision. I personally love day-neutral varieties because I enjoy having fresh berries all summer long!
Preparing Your Strawberry Patch
Strawberries need a sunny spot and well-drained soil to thrive. Here’s how to get your growing area ready:
* Sunlight: Strawberries need at least 6-8 hours of direct sunlight per day. Choose a location that gets plenty of sunshine.
* Soil: Strawberries prefer slightly acidic soil with a pH between 5.5 and 6.8. If your soil is heavy clay or sandy, amend it with plenty of organic matter like compost or well-rotted manure. This will improve drainage and provide essential nutrients.
* Drainage: Good drainage is crucial! Strawberries hate having wet feet. If your soil doesn’t drain well, consider growing them in raised beds or containers.
* Weed Control: Clear the area of all weeds and grass. Strawberries don’t compete well with weeds, so it’s important to start with a clean slate.
Planting Your Strawberry Plants
Now for the fun part – planting! You can start strawberries from seeds, but it’s much easier and faster to start with bare-root plants or potted plants.
Planting Bare-Root Strawberries
Bare-root strawberries are dormant plants that are sold without soil. Here’s how to plant them:
1. Soak the Roots: Before planting, soak the bare roots in water for about an hour. This will rehydrate them and help them get off to a good start.
2. Dig the Holes: Dig holes that are wide and deep enough to accommodate the roots without crowding them. The crown of the plant (where the roots meet the stem) should be level with the soil surface.
3. Plant the Plants: Gently spread the roots out in the hole and backfill with soil. Firm the soil around the plant to eliminate air pockets.
4. Water Thoroughly: Water the newly planted strawberries thoroughly.
5. Space Them Properly: Space June-bearing strawberries about 18 inches apart in rows that are 3-4 feet apart. Everbearing and day-neutral strawberries can be planted closer together, about 12 inches apart in rows that are 2-3 feet apart.
Planting Potted Strawberries
Potted strawberries are already established plants, making them even easier to plant.
1. Prepare the Hole: Dig a hole that is slightly larger than the pot the strawberry plant is in.
2. Remove the Plant: Gently remove the strawberry plant from its pot. If the roots are circling the bottom of the pot, gently loosen them up.
3. Plant the Plant: Place the plant in the hole, making sure the top of the root ball is level with the soil surface.
4. Backfill and Water: Backfill with soil and firm it around the plant. Water thoroughly.
5. Spacing: Follow the same spacing guidelines as for bare-root plants.
Caring for Your Strawberry Plants
Once your strawberries are planted, it’s important to provide them with the care they need to thrive.
* Watering: Strawberries need consistent moisture, especially during fruit production. Water deeply whenever the top inch of soil feels dry. Avoid overhead watering, as this can promote fungal diseases. Drip irrigation is ideal.
* Fertilizing: Fertilize your strawberries in early spring with a balanced fertilizer. Avoid over-fertilizing, as this can lead to excessive foliage growth at the expense of fruit production. I like to use a fertilizer specifically formulated for berries.
* Mulching: Mulch around your strawberry plants with straw, wood chips, or pine needles. Mulch helps to retain moisture, suppress weeds, and keep the berries clean.
* Weed Control: Keep your strawberry patch free of weeds. Hand-pull weeds regularly, or use a hoe to cultivate the soil around the plants.
* Pest and Disease Control: Keep an eye out for pests and diseases. Common strawberry pests include slugs, snails, and aphids. Common diseases include gray mold and leaf spot. Treat any problems promptly with appropriate organic or chemical controls. I prefer using organic methods whenever possible.
* Renovating June-Bearing Strawberries: After your June-bearing strawberries have finished fruiting, it’s important to renovate the patch. This involves mowing the foliage down to about an inch above the crown and thinning out the plants. This will help to promote new growth and improve fruit production in the following year.
Growing Strawberries in Containers
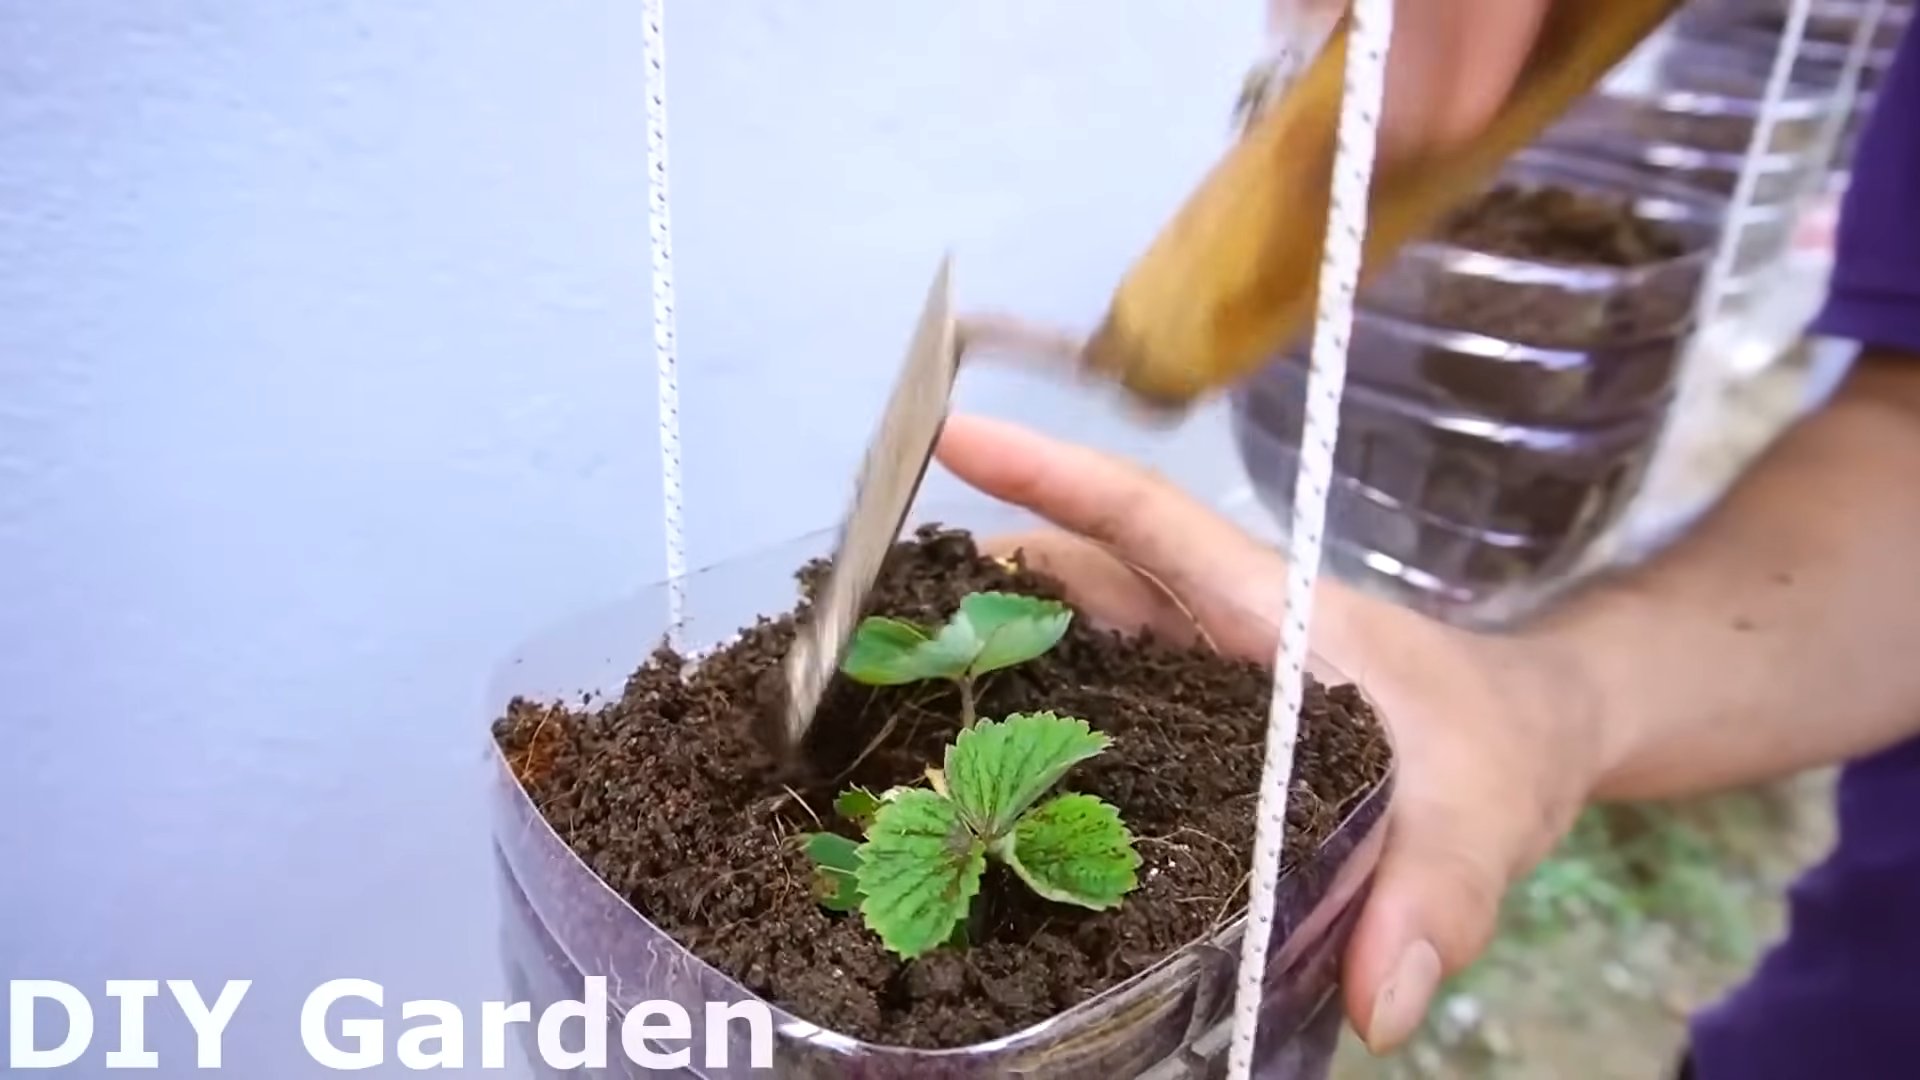
Don’t have a garden? No problem! Strawberries grow beautifully in containers.
* Choose the Right Container: Select a container that is at least 12 inches in diameter and 8 inches deep. Hanging baskets are also a great option for strawberries.
* Use a Good Potting Mix: Use a high-quality potting mix that drains well. Avoid using garden soil, as it can become compacted in containers.
* Planting: Plant your strawberry plants in the container, following the same guidelines as for planting in the ground.
* Watering and Fertilizing: Container-grown strawberries need to be watered and fertilized more frequently than those grown in the ground. Water whenever the top inch of potting mix feels dry, and fertilize every 2-3 weeks with a balanced fertilizer.
* Sunlight: Place your container in a location that gets at least 6-8 hours of direct sunlight per day.
* Overwintering: In cold climates, container-grown strawberries may need to be overwintered indoors. Bring the container inside before the first frost and place it in a cool, bright location. Water sparingly during the winter months.
Harvesting Your Strawberries
The moment we’ve all been waiting for – harvesting!
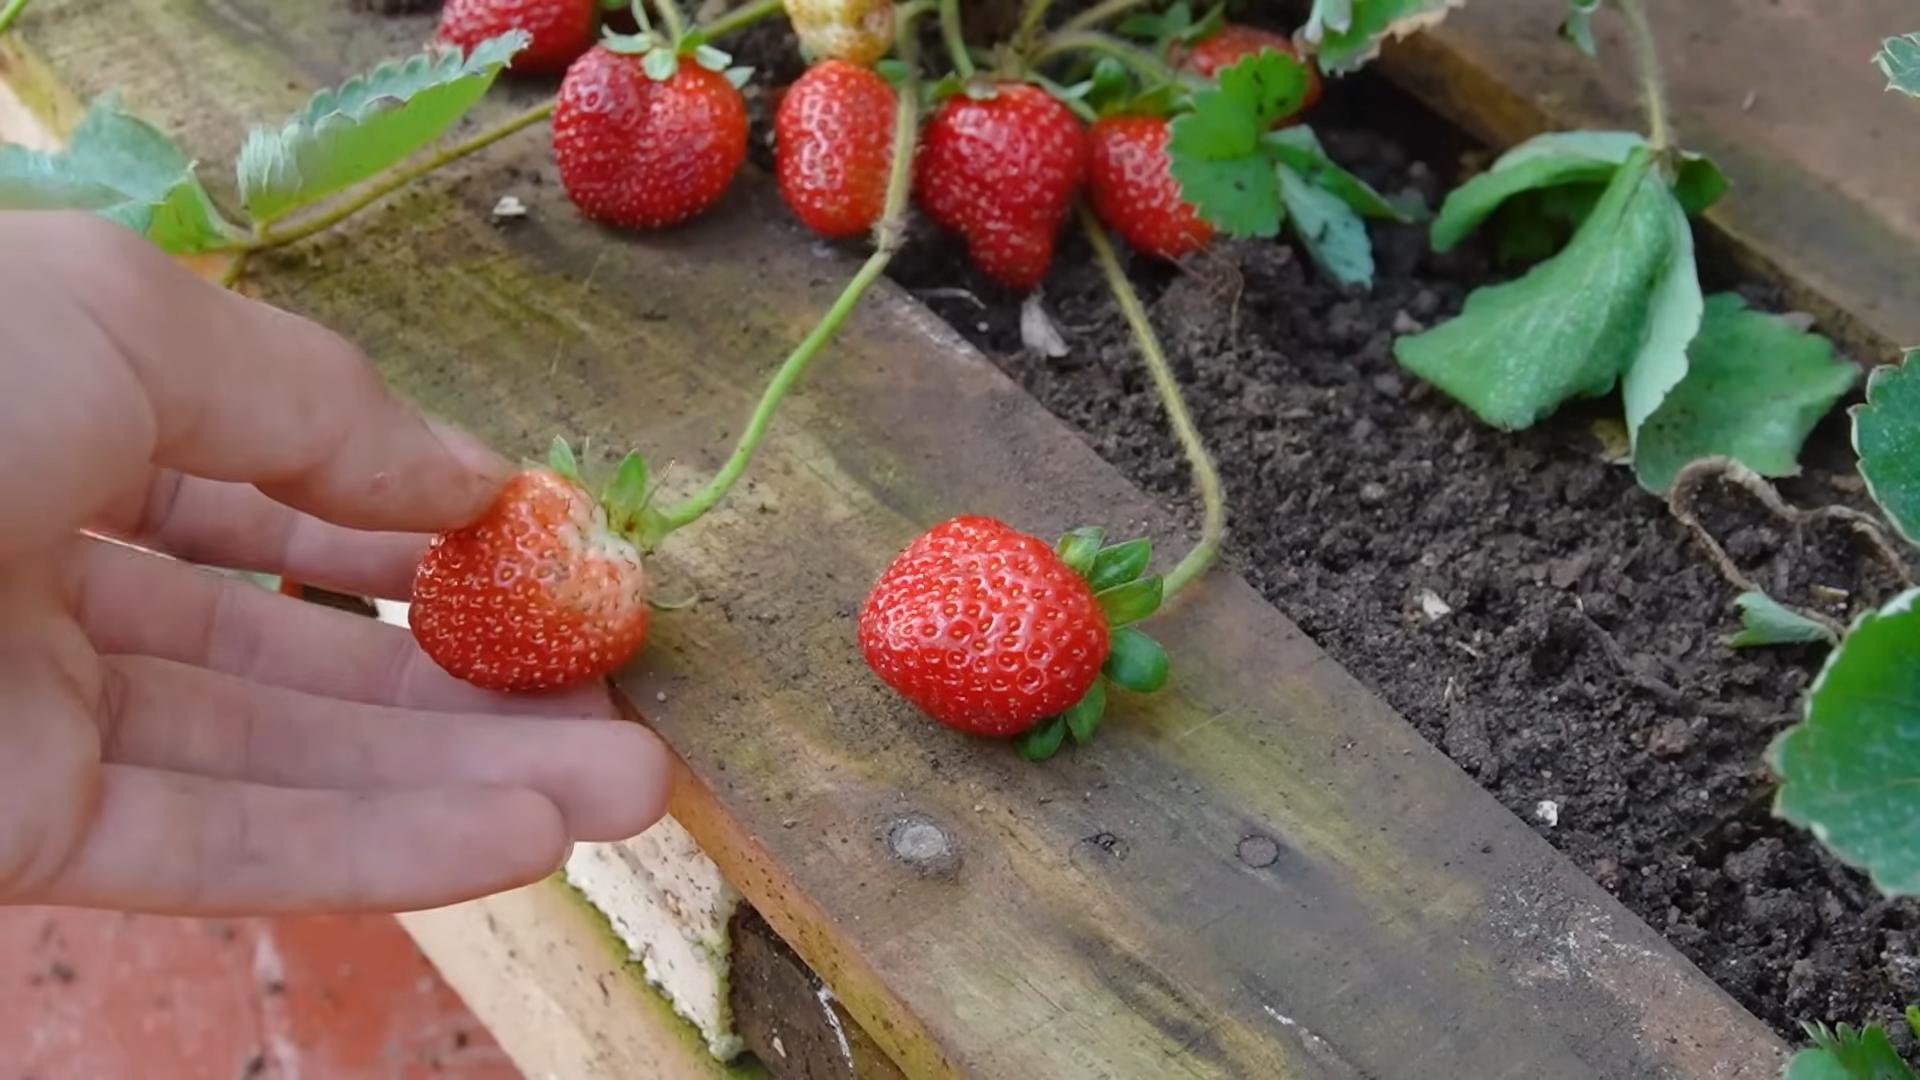
* When to Harvest: Strawberries are ready to harvest when they are fully red and slightly soft to the touch. They should also detach easily from the plant.
* How to Harvest: Gently grasp the strawberry near the stem and twist it off the plant. Avoid pulling on the berry, as this can damage the plant.
* Enjoy Your Harvest: Eat your strawberries fresh, or use them in your favorite recipes. They’re delicious in pies, jams, smoothies, and more!
Troubleshooting Common Strawberry Problems
Even with the best care, you may encounter some problems when growing strawberries. Here are a few common issues and how to address them:
* Lack of Fruit: If your strawberry plants are not producing fruit, it could be due to a number of factors, including insufficient sunlight, poor soil, over-fertilizing, or pest problems. Make sure your plants are getting enough sunlight, amend the soil with organic matter, avoid over-fertilizing, and control any pests that may be present.
* Small Berries: Small berries can be caused by insufficient watering, poor soil, or overcrowding. Make sure your plants are getting enough water, amend the soil with organic matter, and thin out the plants if they are overcrowded.
* Rotting Berries: Rotting berries are often caused by fungal diseases, such as gray mold. To prevent rotting berries, avoid overhead watering, provide good air circulation, and remove any infected berries promptly.
* Pest Infestations: Strawberries are susceptible to a variety of pests, including slugs, snails, aphids, and spider mites. Control pests with appropriate organic or chemical controls.
Conclusion
So, there you have it! Transforming your backyard, balcony, or even a sunny windowsill into a thriving strawberry patch is not only achievable but incredibly rewarding. This DIY strawberry growing method, using readily available materials and a little bit of ingenuity, offers a sustainable and cost-effective way to enjoy fresh, juicy strawberries right at your fingertips. Forget those bland, store-bought berries that lack the vibrant flavor of homegrown goodness. With this simple technique, you’ll be harvesting baskets of sweet, sun-ripened strawberries in no time.
But why is this DIY approach a must-try? Beyond the sheer joy of nurturing your own food, it’s about control. You control the soil, the water, and the environment, ensuring your strawberries are free from harmful pesticides and chemicals. You know exactly what goes into your food, providing peace of mind and a healthier option for you and your family. Plus, it’s a fantastic learning experience, especially for children, teaching them about the wonders of nature and the importance of sustainable living.
The beauty of this DIY strawberry growing method lies in its adaptability. Feel free to experiment with different container sizes and materials. Upcycled plastic bottles, old tires, or even repurposed wooden pallets can all be transformed into charming strawberry planters. Consider adding companion plants like basil or marigolds to deter pests and attract beneficial insects. For those with limited space, vertical strawberry towers are an excellent option, maximizing your yield in a small footprint. And if you’re feeling adventurous, try growing different varieties of strawberries, from everbearing to June-bearing, to extend your harvest season.
Don’t be intimidated if you’re a beginner gardener. This DIY project is designed to be accessible to everyone, regardless of their experience level. The steps are straightforward, and the rewards are immense. Imagine the satisfaction of biting into a perfectly ripe strawberry, knowing that you grew it yourself. Picture the smiles on your children’s faces as they help you harvest the sweet bounty. Envision the delicious desserts and snacks you can create with your homegrown strawberries.
We wholeheartedly encourage you to give this DIY strawberry growing method a try. It’s a fun, fulfilling, and sustainable way to enjoy the taste of summer all season long. And once you’ve experienced the joy of growing your own strawberries, we’re confident you’ll be hooked.
But don’t just take our word for it. We want to hear about your experiences! Share your photos, tips, and stories with us in the comments below. Let us know what worked for you, what challenges you faced, and what delicious creations you made with your homegrown strawberries. Together, we can create a community of passionate strawberry growers, sharing our knowledge and inspiring others to embrace the joys of DIY gardening. So, grab your tools, gather your supplies, and get ready to embark on a sweet and rewarding adventure. Happy growing!
Frequently Asked Questions (FAQ)
What type of strawberries are best for DIY growing?
The best type of strawberries for DIY growing depends on your climate and preferences. Generally, everbearing varieties like Albion, Seascape, and Ozark Beauty are popular choices because they produce fruit throughout the growing season. June-bearing varieties, such as Chandler and Honeoye, produce a large crop of strawberries in a short period, typically in June. Day-neutral varieties, like Tristar, are less sensitive to day length and can produce fruit throughout the summer in many climates. Consider your local climate and desired harvest schedule when selecting your strawberry plants. Also, consider disease resistance when choosing your plants.
What kind of soil should I use for my DIY strawberry garden?
Strawberries thrive in well-draining, slightly acidic soil with a pH between 5.5 and 6.5. A good potting mix specifically formulated for fruits and vegetables is ideal. You can also create your own mix by combining equal parts of garden soil, compost, and peat moss or coco coir. Ensure the soil is rich in organic matter to provide essential nutrients for healthy growth and abundant fruit production. Avoid heavy clay soils, as they can retain too much moisture and lead to root rot.
How often should I water my DIY strawberry plants?
Water your strawberry plants regularly, especially during dry periods. Aim to keep the soil consistently moist but not waterlogged. Water deeply at the base of the plants, avoiding wetting the foliage to prevent fungal diseases. The frequency of watering will depend on the weather conditions, soil type, and container size. Check the soil moisture regularly by sticking your finger about an inch deep. If the soil feels dry, it’s time to water. In general, water deeply 2-3 times per week, increasing the frequency during hot, sunny weather.
How much sunlight do strawberries need?
Strawberries need at least 6-8 hours of direct sunlight per day to produce abundant fruit. Choose a location that receives plenty of sunlight throughout the day. If you’re growing strawberries indoors, supplement with grow lights if necessary. Insufficient sunlight can result in smaller yields and less flavorful berries.
How do I fertilize my DIY strawberry plants?
Fertilize your strawberry plants regularly throughout the growing season to provide them with the nutrients they need to thrive. Use a balanced fertilizer specifically formulated for fruits and vegetables, following the instructions on the package. You can also use organic fertilizers like compost tea or fish emulsion. Avoid over-fertilizing, as this can lead to excessive foliage growth and reduced fruit production. Fertilize every 2-4 weeks during the growing season.
How do I protect my strawberries from pests and diseases?
To protect your strawberries from pests and diseases, practice good gardening hygiene. Remove any dead or diseased leaves promptly. Use organic pest control methods like insecticidal soap or neem oil to control common pests like aphids and spider mites. Consider using netting to protect your strawberries from birds and other animals. Ensure good air circulation around your plants to prevent fungal diseases. Choose disease-resistant strawberry varieties whenever possible.
How do I overwinter my DIY strawberry plants?
In colder climates, strawberry plants need protection during the winter months. Mulch around the plants with straw or leaves to insulate the roots and protect them from freezing temperatures. If you’re growing strawberries in containers, move them to a sheltered location like a garage or shed. Water sparingly during the winter months, only enough to keep the soil from completely drying out. In early spring, remove the mulch and begin watering and fertilizing as usual.
Can I grow strawberries from seed?
Yes, you can grow strawberries from seed, but it’s a more challenging and time-consuming process than starting with established plants. Strawberry seeds require a period of cold stratification before they will germinate. Sow the seeds indoors in late winter or early spring, and transplant the seedlings outdoors after the last frost. Be patient, as it can take several months for strawberry plants grown from seed to produce fruit. Starting with bare-root or potted plants is generally recommended for beginners.
How long does it take for strawberries to produce fruit?
The time it takes for strawberries to produce fruit depends on the variety and the growing conditions. June-bearing varieties typically produce fruit the following year after planting. Everbearing and day-neutral varieties may produce a small crop in the first year, but the main harvest will occur in the second year. Provide your strawberry plants with optimal growing conditions, including plenty of sunlight, well-draining soil, and regular watering and fertilizing, to encourage early and abundant fruit production.
How do I know when my strawberries are ripe?
Strawberries are ripe when they are fully red and easily detach from the plant. The berries should be firm and plump, with a glossy sheen. Taste a few berries to ensure they are sweet and flavorful before harvesting the entire crop. Pick the strawberries in the morning, after the dew has dried, for the best flavor and texture.

Leave a Comment