
Home mushroom growing strategy: Ever dreamt of strolling into your kitchen and harvesting fresh, delicious mushrooms right from your own home? It sounds like something out of a fairy tale, doesn’t it? But trust me, it’s totally achievable, and I’m here to show you how! For centuries, cultivating mushrooms has been a revered practice, dating back to ancient civilizations who prized them not only for their unique flavor but also for their medicinal properties. Think about it – from the royal courts of Europe to the humble kitchens of Asia, mushrooms have held a special place in culinary history.
But why should you embark on this fascinating journey of home mushroom cultivation? Well, for starters, imagine the satisfaction of growing your own food, knowing exactly where it came from and what went into it. Plus, store-bought mushrooms can be pricey, and their freshness is often questionable. With a simple home mushroom growing strategy, you can enjoy a constant supply of these earthy delights, adding a gourmet touch to your meals without breaking the bank.
This DIY guide is packed with easy-to-follow instructions and clever hacks that will transform even the smallest space into a thriving mushroom farm. Whether you’re a seasoned gardener or a complete beginner, I’ll walk you through every step, from choosing the right mushroom variety to creating the perfect growing environment. So, grab your gardening gloves, and let’s get ready to unlock the secrets of home mushroom cultivation!
Pilzzucht zu Hause: Dein umfassender DIY-Leitfaden
Hallo Pilzfreunde! Habt ihr euch jemals gefragt, wie es wäre, eure eigenen köstlichen Pilze zu Hause zu züchten? Es ist einfacher als ihr denkt und unglaublich befriedigend. In diesem Artikel zeige ich euch, wie ihr mit einfachen Mitteln und etwas Geduld eure eigene kleine Pilzfarm aufbauen könnt. Lasst uns loslegen!
Was du für den Start brauchst
Bevor wir ins Detail gehen, hier eine Liste der Dinge, die du für dein Pilzzucht-Abenteuer benötigst:
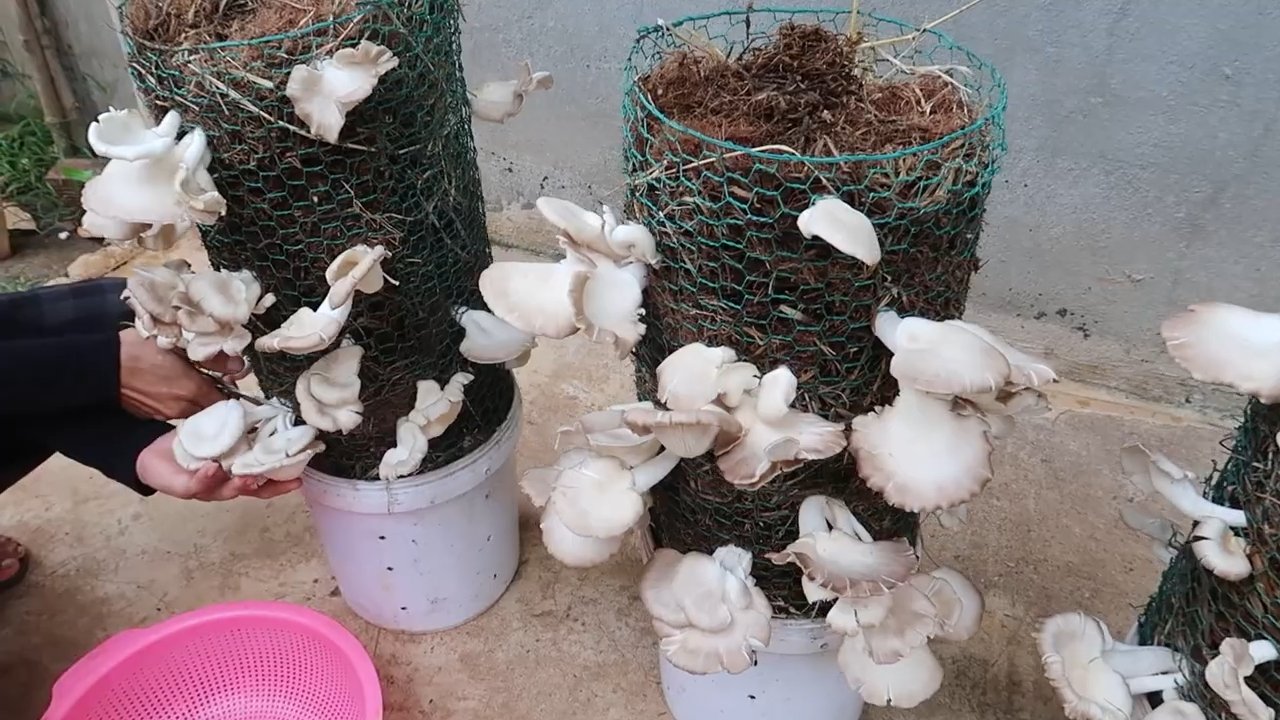
* Pilzbrut: Das ist das “Saatgut” für deine Pilze. Du kannst sie online oder in spezialisierten Gartencentern kaufen. Beliebte Sorten für Anfänger sind Austernpilze, Shiitake und Kräuterseitlinge.
* Substrat: Das ist das Material, auf dem deine Pilze wachsen werden. Geeignete Substrate sind Stroh, Holzspäne, Kaffeesatz oder Sägemehl. Die Wahl des Substrats hängt von der Pilzsorte ab.
* Behälter: Du brauchst einen Behälter, in dem du das Substrat und die Pilzbrut mischen kannst. Das kann ein Eimer, ein Plastiksack oder eine spezielle Pilzzuchtbox sein.
* Sprühflasche: Um die Feuchtigkeit zu regulieren.
* Alkohol oder Desinfektionsmittel: Für die Sterilisation deiner Arbeitsgeräte.
* Handschuhe: Um Kontamination zu vermeiden.
* Ein dunkler, kühler Raum: Für die Inkubationsphase.
* Ein heller, feuchter Raum: Für die Fruchtungsphase.
Schritt-für-Schritt-Anleitung zur Pilzzucht
Hier ist eine detaillierte Anleitung, die dir hilft, deine eigenen Pilze zu züchten. Ich habe den Prozess in verschiedene Phasen unterteilt, um ihn übersichtlicher zu gestalten.
Phase 1: Substratvorbereitung
Die Vorbereitung des Substrats ist entscheidend für den Erfolg deiner Pilzzucht. Ein sauberes und richtig vorbereitetes Substrat minimiert das Risiko von Kontaminationen und bietet den Pilzen die besten Wachstumsbedingungen.
1. Substrat auswählen: Wähle das passende Substrat für deine Pilzsorte. Austernpilze wachsen gut auf Stroh oder Kaffeesatz, während Shiitake Holzspäne bevorzugen.
2. Substrat pasteurisieren oder sterilisieren: Dies ist ein wichtiger Schritt, um unerwünschte Mikroorganismen abzutöten.
* Stroh pasteurisieren: Schneide das Stroh in kurze Stücke (ca. 5-10 cm). Lege es in einen großen Topf oder Eimer und übergieße es mit kochendem Wasser. Lasse es für 1-2 Stunden einweichen. Das Wasser sollte das Stroh vollständig bedecken. Nach dem Einweichen das Stroh abgießen und abkühlen lassen, bis es handwarm ist. Es sollte feucht, aber nicht tropfnass sein.
* Holzspäne sterilisieren: Fülle die Holzspäne in hitzebeständige Beutel oder Gläser. Füge etwas Wasser hinzu, so dass die Späne feucht sind. Verschließe die Beutel oder Gläser und sterilisiere sie im Dampfdrucktopf (Autoklav) für 90 Minuten bei 15 PSI (ca. 1 bar). Wenn du keinen Autoklav hast, kannst du die Holzspäne auch im Backofen sterilisieren. Verteile sie auf einem Backblech und backe sie bei 120°C für 2 Stunden. Lasse die Späne vollständig abkühlen, bevor du sie verwendest.
* Kaffeesatz verwenden: Kaffeesatz ist von Natur aus relativ steril, da er beim Brühen erhitzt wird. Du kannst ihn direkt verwenden, aber es ist ratsam, ihn kurz in der Mikrowelle zu erhitzen, um sicherzustellen, dass er frei von Schimmelsporen ist. Lasse den Kaffeesatz abkühlen, bevor du ihn mit der Pilzbrut vermischst.
3. Substrat abkühlen lassen: Lasse das pasteurisierte oder sterilisierte Substrat vollständig abkühlen, bevor du es mit der Pilzbrut vermischst. Dies verhindert, dass die Hitze die Pilzbrut abtötet.
Phase 2: Inokulation (Beimpfung)
In dieser Phase vermischst du die Pilzbrut mit dem vorbereiteten Substrat. Sauberkeit ist hier extrem wichtig, um Kontaminationen zu vermeiden.
1. Arbeitsbereich vorbereiten: Reinige deinen Arbeitsbereich gründlich mit Alkohol oder Desinfektionsmittel. Trage Handschuhe, um deine Hände sauber zu halten.
2. Pilzbrut vorbereiten: Brich die Pilzbrut vorsichtig auf, so dass sie locker und krümelig ist.
3. Substrat und Brut vermischen: Mische das Substrat und die Pilzbrut in deinem Behälter. Die Menge der Pilzbrut, die du benötigst, hängt von der Größe deines Behälters ab. Als Faustregel gilt: Verwende etwa 5-10% Pilzbrut im Verhältnis zum Substratgewicht. Verteile die Pilzbrut gleichmäßig im Substrat.
4. Behälter verschließen: Verschließe den Behälter, aber sorge für eine ausreichende Belüftung. Wenn du einen Plastiksack verwendest, verschließe ihn mit einem Gummiband oder einer Klammer und mache kleine Löcher für die Luftzirkulation. Wenn du einen Eimer oder eine Box verwendest, decke ihn mit einem Deckel ab, aber lasse einen kleinen Spalt offen.
Phase 3: Inkubation (Myzelwachstum)
In dieser Phase wächst das Myzel (das Wurzelgeflecht der Pilze) im Substrat.
1. Behälter lagern: Stelle den Behälter an einen dunklen, kühlen Ort mit einer Temperatur von 20-24°C. Die ideale Temperatur hängt von der Pilzsorte ab. Informiere dich über die spezifischen Anforderungen deiner Pilzsorte.
2. Regelmäßig überprüfen: Überprüfe den Behälter regelmäßig auf Anzeichen von Kontamination. Wenn du Schimmel oder andere unerwünschte Mikroorganismen entdeckst, entsorge den Behälter sofort.
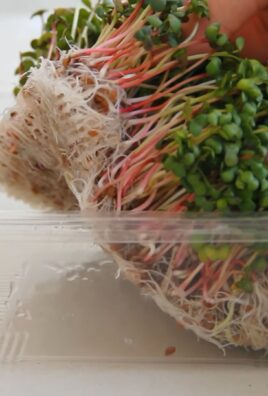
3. Wachstum beobachten: Nach einigen Tagen oder Wochen (je nach Pilzsorte) solltest du sehen, wie das Myzel das Substrat durchwächst. Es sieht aus wie ein weißes, flaumiges Netzwerk.
4. Geduld haben: Die Inkubationsphase kann mehrere Wochen dauern. Sei geduldig und lass das Myzel seine Arbeit machen. Das Substrat sollte vollständig vom Myzel durchwachsen sein, bevor du mit der nächsten Phase fortfährst.
Phase 4: Fruchtung (Pilzbildung)
Sobald das Substrat vollständig vom Myzel durchwachsen ist, ist es Zeit, die Bedingungen für die Fruchtung zu schaffen.
1. Behälter an einen helleren Ort stellen: Stelle den Behälter an einen helleren Ort, aber vermeide direkte Sonneneinstrahlung. Die Pilze benötigen Licht, um zu fruchten, aber zu viel Licht kann sie austrocknen.
2. Luftfeuchtigkeit erhöhen: Die Luftfeuchtigkeit ist entscheidend für die Fruchtung. Besprühe das Substrat und die Umgebung regelmäßig mit Wasser, um die Luftfeuchtigkeit hoch zu halten. Du kannst auch eine Plastiktüte über den Behälter stülpen, um die Feuchtigkeit zu erhöhen, aber achte darauf, dass genügend Luftzirkulation vorhanden ist, um Schimmelbildung zu vermeiden.
3. Temperatur senken: Senke die Temperatur leicht ab. Die ideale Temperatur für die Fruchtung hängt von der Pilzsorte ab. Informiere dich über die spezifischen Anforderungen deiner Pilzsorte.
4. Belüftung sicherstellen: Sorge für eine gute Belüftung. Pilze benötigen Sauerstoff, um zu wachsen. Öffne den Behälter regelmäßig, um frische Luft hineinzulassen.
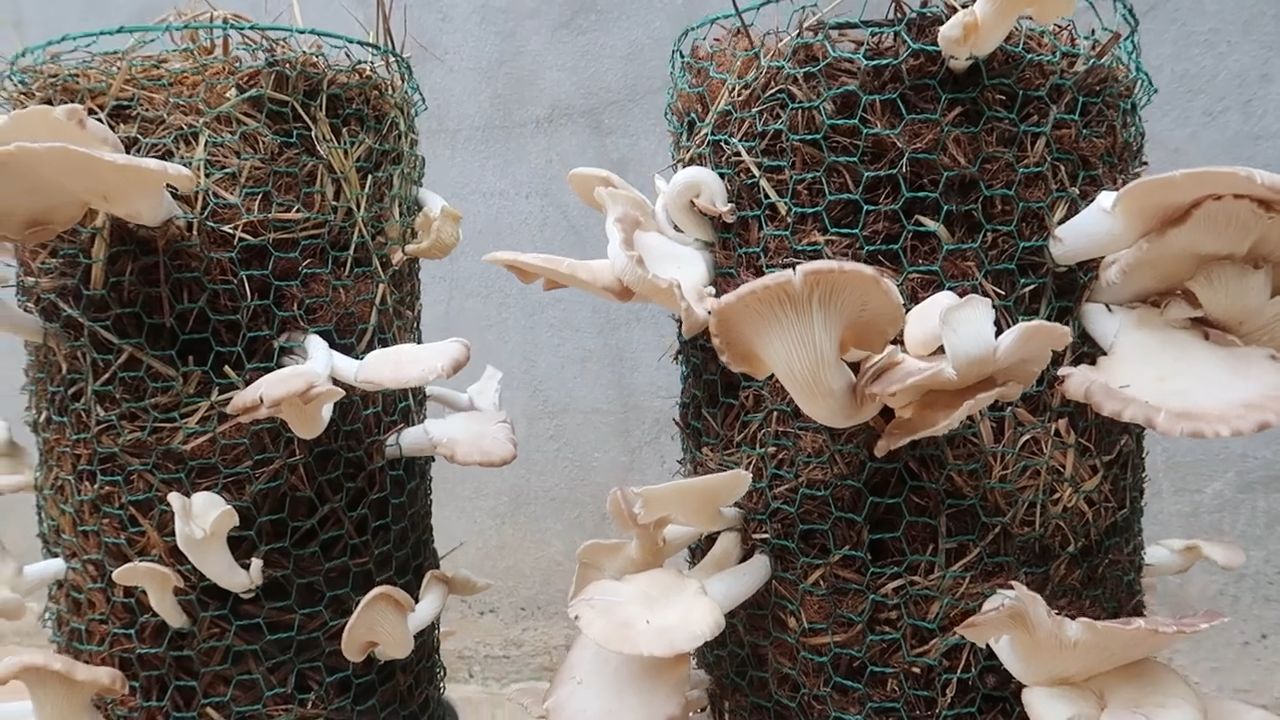
5. Pilze beobachten: Nach einigen Tagen oder Wochen solltest du die ersten Pilze sehen, die aus dem Substrat sprießen.
Phase 5: Ernte
Endlich ist es soweit! Du kannst deine eigenen Pilze ernten.
1. Pilze ernten: Ernte die Pilze, wenn sie die gewünschte Größe erreicht haben. Schneide sie mit einem scharfen Messer oder einer Schere am Stiel ab.
2. Substrat pflegen: Nach der Ernte kannst du das
Conclusion
So, there you have it! A simple, effective, and incredibly rewarding home mushroom growing strategy that puts fresh, delicious fungi right at your fingertips. Forget expensive grocery store prices and questionable freshness; with a little patience and this straightforward method, you can cultivate your own gourmet mushrooms in the comfort of your own home.
Why is this DIY trick a must-try? Because it empowers you to take control of your food source, reduces your environmental impact by minimizing transportation and packaging, and offers a fascinating glimpse into the world of mycology. Imagine the satisfaction of harvesting your own oyster mushrooms for a creamy pasta dish, or adding homegrown shiitakes to a savory stir-fry. The possibilities are endless!
But don’t stop there! This home mushroom growing strategy is just the beginning. Once you’ve mastered the basics, you can experiment with different substrates, such as coffee grounds, straw, or even cardboard, to see which yields the best results for your chosen mushroom variety. You can also explore different growing environments, adjusting temperature and humidity to optimize your mushroom production.
Consider these variations to elevate your mushroom growing game:
* Vertical Growing: Maximize space by using vertical shelving or hanging bags to grow your mushrooms. This is especially useful for smaller apartments or homes.
* Outdoor Patches: If you have a shady spot in your garden, you can create an outdoor mushroom patch using logs or wood chips inoculated with mushroom spawn.
* Mushroom Teas: Once you have a surplus of mushrooms, consider drying them and using them to make flavorful and nutritious mushroom teas.
This isn’t just about growing mushrooms; it’s about connecting with nature, learning new skills, and enjoying the fruits (or fungi!) of your labor. It’s a sustainable and rewarding hobby that can provide you with fresh, healthy food for years to come.
We wholeheartedly encourage you to try this DIY home mushroom growing strategy. It’s easier than you think, and the rewards are well worth the effort. Don’t be afraid to experiment, learn from your mistakes, and most importantly, have fun!
Once you’ve embarked on your mushroom growing journey, we’d love to hear about your experiences. Share your successes, challenges, and tips in the comments below. Let’s build a community of home mushroom growers and learn from each other. What varieties did you try? What substrate worked best for you? What unexpected challenges did you encounter? Your insights could help other aspiring mushroom farmers achieve their goals.
So, grab your supplies, inoculate your substrate, and get ready to witness the magic of mushroom cultivation. Happy growing!
Frequently Asked Questions (FAQ)
What types of mushrooms are easiest to grow at home using this strategy?
Oyster mushrooms (Pleurotus spp.) are generally considered the easiest for beginners due to their aggressive growth and tolerance of a wide range of conditions. Shiitake mushrooms (Lentinula edodes) are also relatively easy to grow, especially on hardwood logs. Other beginner-friendly options include wine cap mushrooms (Stropharia rugosoannulata) and Pioppino mushrooms (Agrocybe aegerita). Avoid more demanding varieties like morels or truffles until you have more experience.
What is the best substrate to use for growing mushrooms at home?
The best substrate depends on the type of mushroom you’re growing. Oyster mushrooms thrive on a variety of substrates, including straw, coffee grounds, and cardboard. Shiitake mushrooms prefer hardwood logs or sawdust. Wine cap mushrooms do well on wood chips and straw. Research the specific substrate requirements for your chosen mushroom variety to ensure optimal growth.
How long does it take to grow mushrooms at home?
The time it takes to grow mushrooms varies depending on the species, substrate, and environmental conditions. Oyster mushrooms can typically be harvested within a few weeks of inoculation, while shiitake mushrooms may take several months to produce their first flush. Be patient and monitor your mushrooms regularly for signs of growth.
What are the ideal environmental conditions for growing mushrooms?
Mushrooms generally prefer cool, humid, and dark environments. The specific temperature and humidity requirements vary depending on the species. Oyster mushrooms typically thrive in temperatures between 60-75°F (15-24°C) and humidity levels of 80-90%. Shiitake mushrooms prefer cooler temperatures, around 50-60°F (10-15°C), and high humidity. Maintain adequate ventilation to prevent the buildup of carbon dioxide.
How do I prevent contamination when growing mushrooms at home?
Contamination is a common challenge in mushroom cultivation. To minimize the risk of contamination, sterilize your substrate thoroughly before inoculation. Use sterile techniques when handling spawn and substrate. Maintain a clean growing environment and avoid introducing potential contaminants. Regularly inspect your mushrooms for signs of mold or other unwanted growth.
What are the signs of a successful mushroom grow?
Signs of a successful mushroom grow include the appearance of white, fluffy mycelium on the substrate, followed by the formation of small mushroom pins. The pins will gradually develop into mature mushrooms, ready for harvest. The mushrooms should be healthy and free from signs of disease or contamination.
How do I harvest mushrooms?
Harvest mushrooms when they are fully developed but before they begin to drop spores. Gently twist or cut the mushrooms from the substrate, being careful not to damage the surrounding mycelium. Store harvested mushrooms in a paper bag in the refrigerator for up to a week.
Can I reuse the substrate after harvesting mushrooms?
Yes, you can often get multiple flushes of mushrooms from the same substrate. After harvesting the first flush, rehydrate the substrate and provide it with fresh air and humidity. You may need to add nutrients to the substrate to encourage further growth. Eventually, the substrate will become depleted and will need to be replaced.
What do I do if my mushrooms are not growing?
If your mushrooms are not growing, check the environmental conditions to ensure they are optimal for your chosen species. Make sure the substrate is properly hydrated and that there is adequate ventilation. If you suspect contamination, remove the affected area and try to salvage the remaining substrate. Be patient and remember that mushroom growing can be unpredictable.
Is it safe to eat home-grown mushrooms?
Yes, it is generally safe to eat home-grown mushrooms, provided you have properly identified the species and followed safe growing practices. Only consume mushrooms that you are 100% certain are edible. If you are unsure about the identity of a mushroom, consult with an expert before consuming it. Always cook mushrooms thoroughly before eating them.
Leave a Comment