
Indoor Celery Gardening: Ever dreamt of snipping fresh celery stalks right from your kitchen windowsill? I know I have! Forget those limp, store-bought celery sticks – imagine the crisp, vibrant flavor of homegrown celery adding a zing to your salads, soups, and snacks. This isn’t just a whimsical idea; it’s a surprisingly simple and rewarding DIY project that anyone can tackle, regardless of gardening experience.
Celery, with its origins tracing back to the Mediterranean, has been enjoyed for centuries, initially valued for its medicinal properties before becoming a culinary staple. Now, you can bring this historical veggie right into your home! But why bother with indoor celery gardening? Well, for starters, it’s a fantastic way to reduce food waste. Instead of tossing the celery base after using the stalks, you can regrow it! Plus, it provides a constant supply of fresh celery, free from pesticides and tailored to your taste.
In this article, I’m going to share some easy-to-follow tricks and hacks that will transform your kitchen into a mini celery farm. We’ll cover everything from selecting the right celery base to providing the ideal growing conditions. Get ready to discover the joy of indoor celery gardening and enjoy the freshest celery you’ve ever tasted!
Regrowing Celery from Scraps: A Beginner’s Guide
Hey there, fellow gardening enthusiasts! Ever find yourself tossing out the base of your celery after using the stalks? Well, stop right there! I’m going to show you how to regrow celery from those seemingly useless scraps, right in your own home. It’s a super easy and rewarding project, perfect for beginners and a great way to reduce food waste. Plus, fresh celery is always a welcome addition to soups, salads, and snacks. Let’s get started!
What You’ll Need
Before we dive in, let’s gather our supplies. This is a pretty low-key project, so you probably already have most of these things lying around:
* Celery base (the part you usually cut off)
* Shallow dish or bowl
* Water
* Spray bottle (optional, but helpful)
* Potting soil
* A pot with drainage holes (about 6-8 inches in diameter is ideal)
* Sunny windowsill or grow light
Step-by-Step Instructions: From Scrap to Stalk
Okay, let’s get our hands dirty (well, not *too* dirty just yet!). Here’s the breakdown of how to turn that celery base into a thriving little plant:
1. Prepare the Celery Base: After you’ve used the celery stalks, don’t just toss the base! Carefully cut off the bottom about 2 inches from the base. You want to keep the root end intact. Try to make a clean cut to avoid any rotting.
2. Place in Water: Now, grab your shallow dish or bowl and place the celery base in it, cut-side up. Add enough water so that the bottom inch or so of the base is submerged. Be careful not to completely submerge the entire base, as this can lead to rot.
3. Find a Sunny Spot: Place the dish with the celery base on a sunny windowsill or under a grow light. Celery needs plenty of light to thrive, so make sure it gets at least 6 hours of sunlight per day. If you don’t have a sunny windowsill, a grow light will work just as well.
4. Change the Water Regularly: This is crucial! Change the water every 1-2 days to prevent bacteria growth and keep the water fresh. This will also help encourage root growth.
5. Observe and Wait: Over the next few days, you should start to see small roots emerging from the bottom of the celery base. You might also notice new leaves sprouting from the center. This is a good sign that your celery is happy and healthy! Be patient; it can take a week or two for significant root growth to occur.
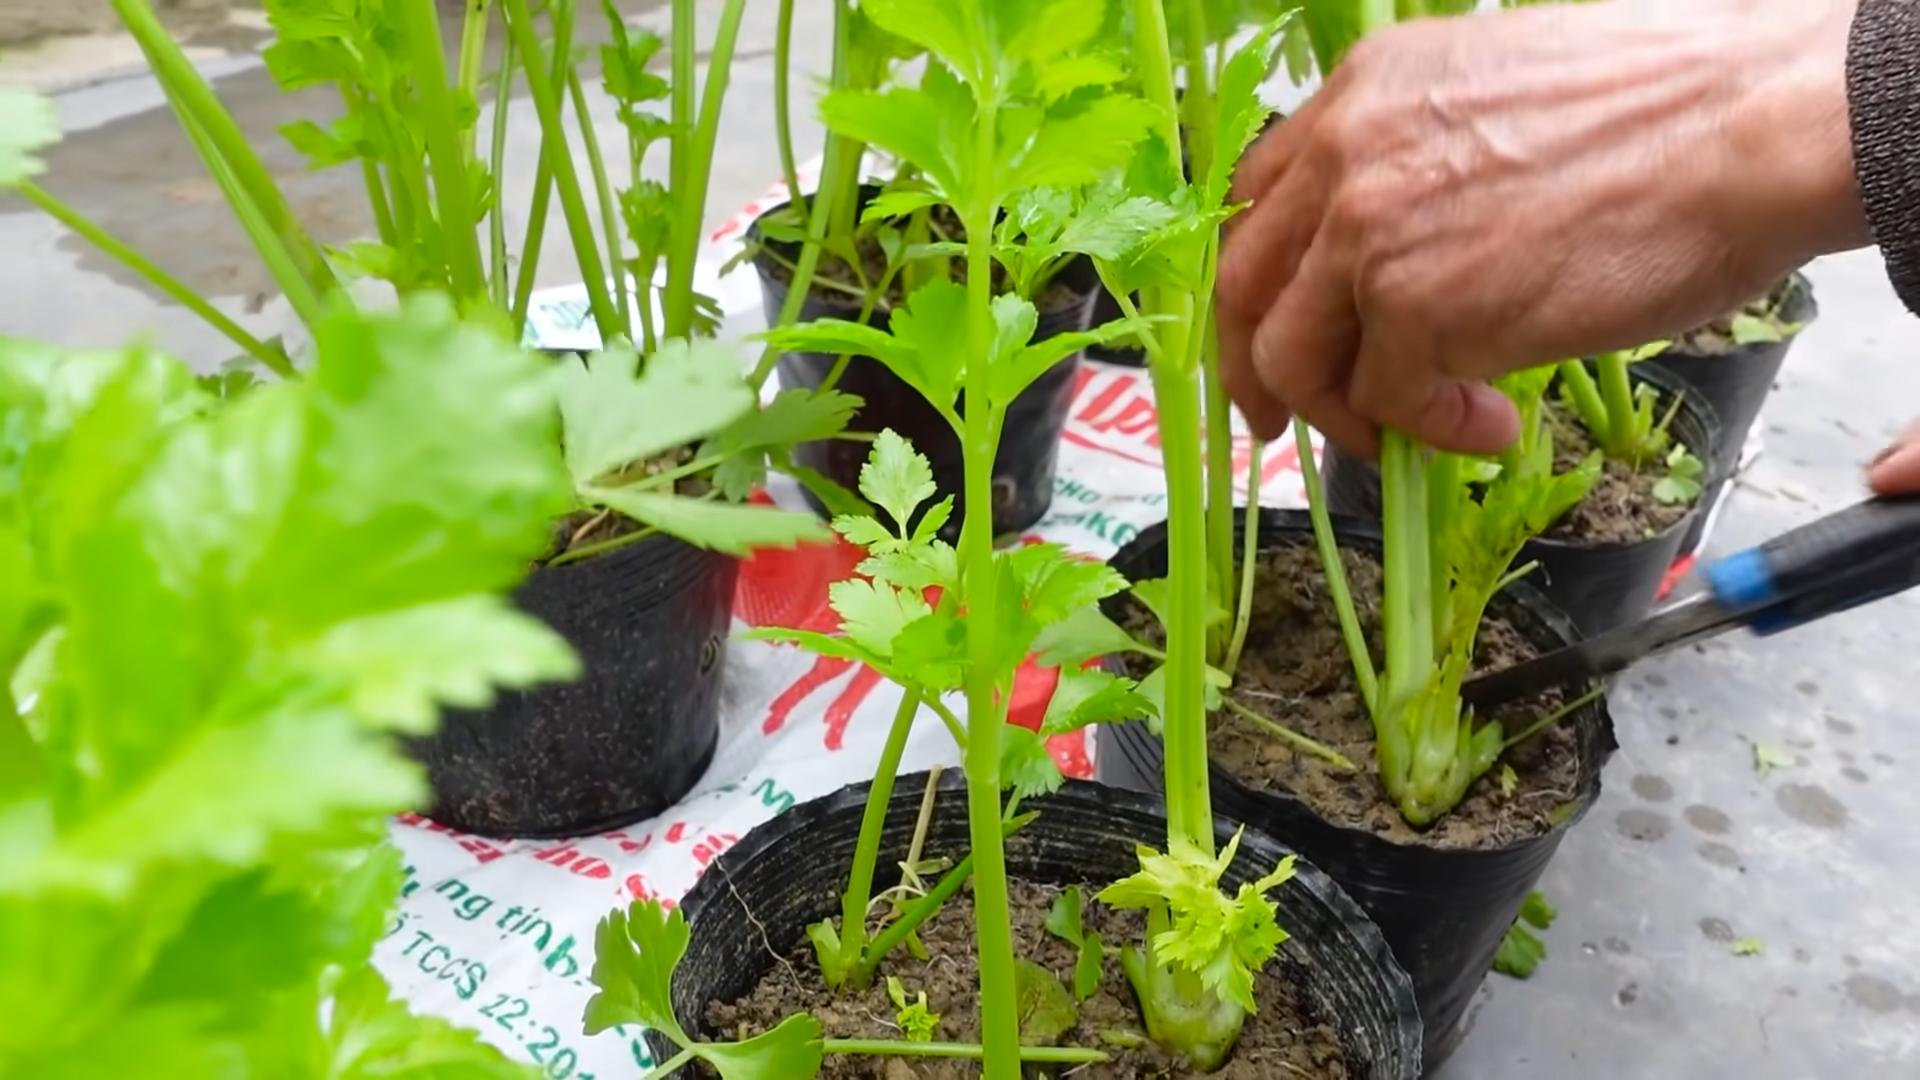
6. Prepare the Pot: Once the roots are about 1-2 inches long, it’s time to transplant your celery to a pot. Fill your pot with good-quality potting soil, leaving about an inch of space at the top.
7. Transplant to Potting Soil: Carefully remove the celery base from the water and gently plant it in the pot. Make sure the roots are covered with soil, but leave the top of the base exposed.
8. Water Thoroughly: After transplanting, water the celery thoroughly until the water drains out of the bottom of the pot. This will help settle the soil and ensure the roots are well-hydrated.
9. Continue to Provide Sunlight: Place the pot back on the sunny windowsill or under the grow light. Remember, celery loves sunlight!
10. Water Regularly: Keep the soil consistently moist, but not soggy. Water when the top inch of soil feels dry to the touch. You can also use a spray bottle to mist the leaves occasionally, which will help keep them hydrated.
11. Fertilize (Optional): While not essential, fertilizing your celery can help it grow faster and produce more stalks. Use a balanced liquid fertilizer diluted to half strength every 2-3 weeks.
Troubleshooting Tips and Tricks
Sometimes, things don’t go exactly as planned. Here are a few common issues you might encounter and how to fix them:
* Celery base is rotting: This is usually caused by too much moisture or stagnant water. Make sure you’re changing the water regularly and that the base isn’t completely submerged. If you see any signs of rot, carefully trim away the affected areas with a clean knife.
* No root growth: This could be due to a lack of sunlight, poor water quality, or a damaged celery base. Make sure your celery is getting enough light, change the water regularly, and start with a fresh celery base if necessary.
* Leaves are turning yellow: This could be a sign of overwatering or underwatering. Check the soil moisture and adjust your watering accordingly. Yellowing leaves can also indicate a nutrient deficiency, so consider fertilizing your celery.
* Slow growth: Celery can be a bit slow to grow, so be patient! Make sure it’s getting enough sunlight, water, and nutrients. You can also try moving it to a slightly larger pot to give the roots more room to grow.
Harvesting Your Celery
Okay, so you’ve nurtured your celery plant, and it’s finally starting to look like, well, celery! When can you harvest it?
* Partial Harvest: You can start harvesting individual stalks once they reach a decent size (around 6-8 inches long). Simply cut off the outer stalks near the base of the plant, leaving the inner stalks to continue growing. This allows you to harvest celery gradually over time.
* Full Harvest: If you prefer, you can harvest the entire plant at once. Simply cut the celery at the base, leaving about an inch or two of the root system in the soil. You can then try to regrow another celery plant from the remaining base, following the same steps as before.
Beyond the Basics: Taking Your Celery Growing to the Next Level
Once you’ve mastered the basics of regrowing celery from scraps, you can start experimenting with different techniques to improve your results. Here are a few ideas:
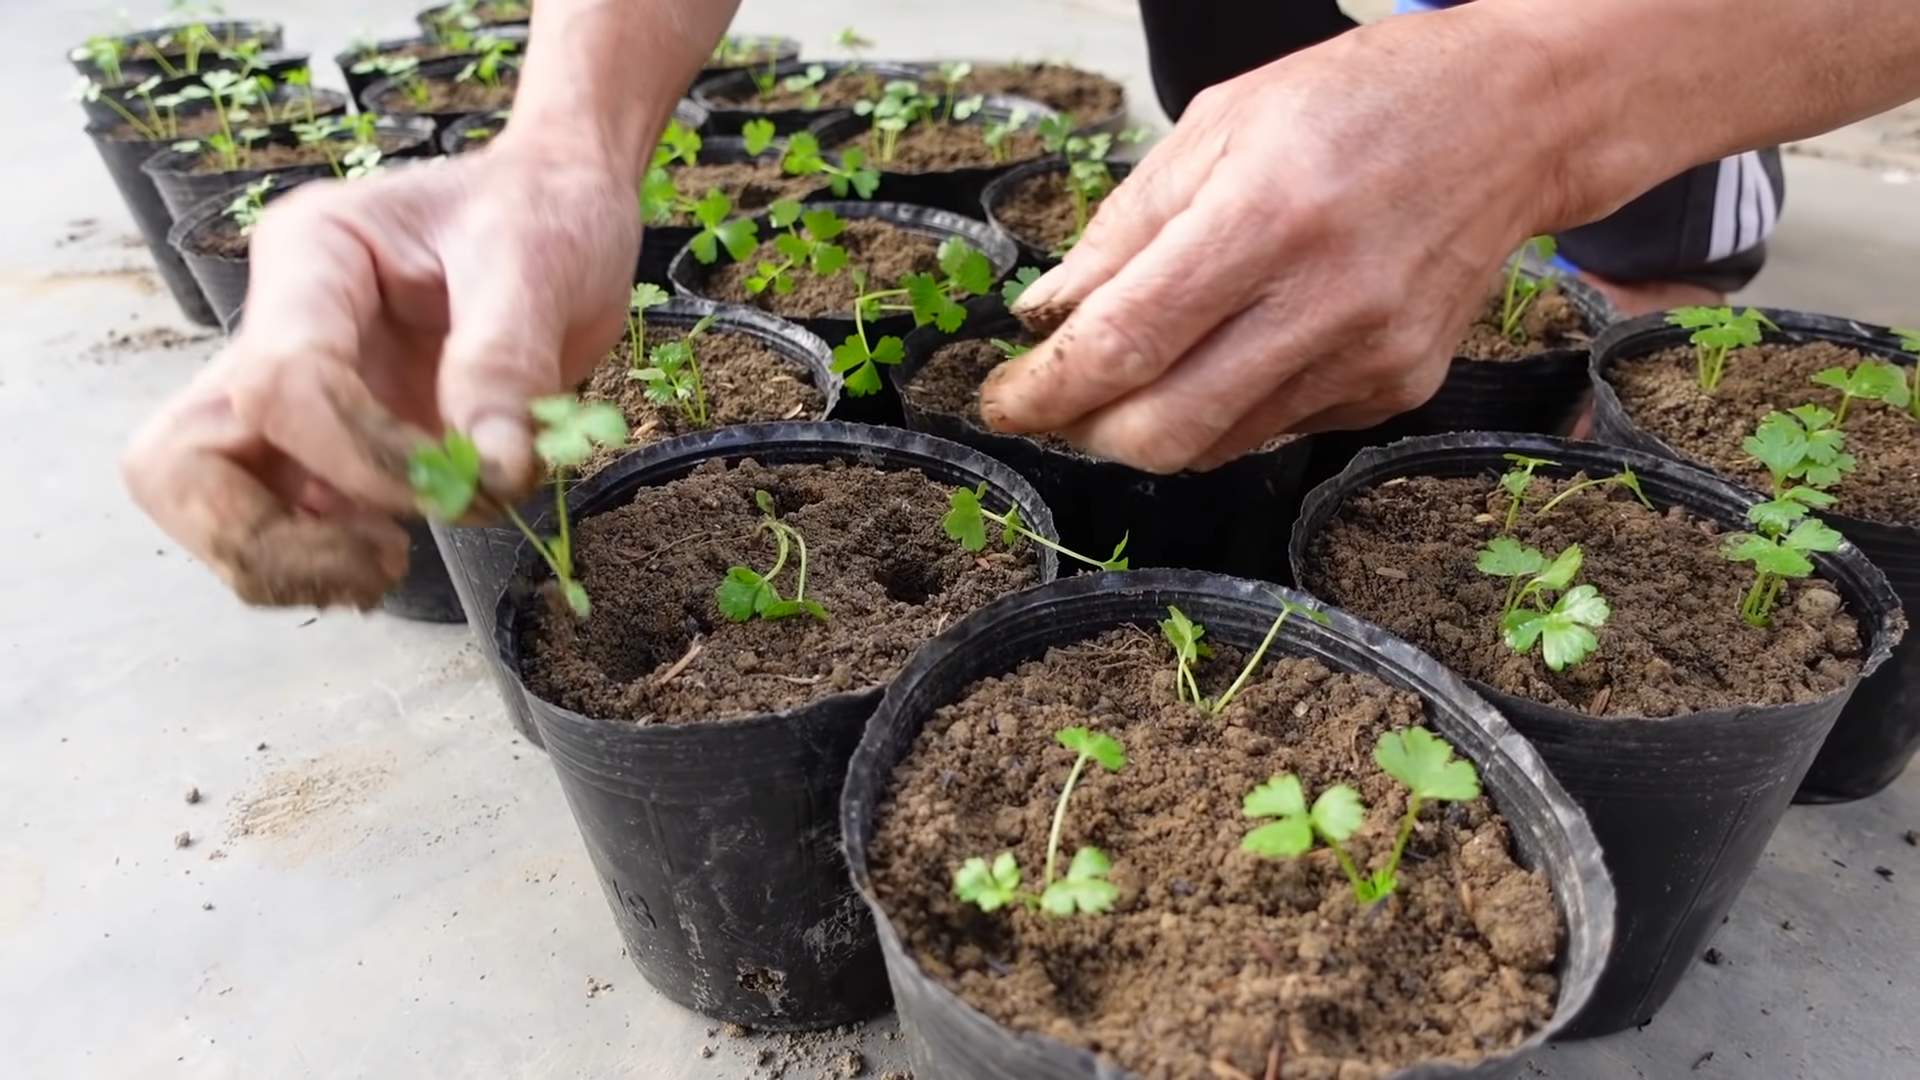
* Starting from Seed: While regrowing from scraps is a fun and easy way to get started, you can also grow celery from seed. This gives you more control over the variety of celery you grow and allows you to start plants indoors before the growing season begins.
* Hydroponics: If you’re feeling adventurous, you can try growing celery hydroponically. This involves growing plants in water without soil, using nutrient-rich solutions to provide the necessary nutrients.
* Companion Planting: Celery is a good companion plant for many other vegetables, such as tomatoes, onions, and cabbage. Planting these vegetables together can help improve their growth and protect them from pests.
* Different Varieties: There are many different varieties of celery to choose from, each with its own unique flavor and characteristics. Experiment with different varieties to find your favorite. Some popular varieties include ‘Utah Tall Green,’ ‘Golden Self-Blanching,’ and ‘Redventure.’
Enjoy Your Homegrown Celery!
And there you have it! You’ve successfully regrown celery from a scrap, right in your own home. Now you can enjoy fresh, homegrown celery in your favorite recipes, knowing that you’ve reduced food waste and created something delicious. Happy gardening!
Conclusion
So, there you have it! Transforming celery scraps into a thriving indoor garden is not just a fun experiment; it’s a sustainable way to enjoy fresh celery, reduce food waste, and add a touch of green to your home. This simple DIY trick offers a rewarding experience for gardeners of all levels, from seasoned pros to absolute beginners.
Why is this a must-try? Because it’s incredibly easy, cost-effective, and environmentally friendly. Instead of tossing those celery bases into the compost bin, you’re giving them a second life, allowing them to flourish and provide you with a continuous supply of crisp, flavorful celery stalks. Imagine the satisfaction of harvesting your own celery for salads, soups, or even just a healthy snack, all grown right on your windowsill!
But the fun doesn’t stop there. Feel free to experiment with different varieties of celery. While standard celery works beautifully, you might want to try growing red celery or even celeriac from scraps. Each variety offers a unique flavor profile and texture, adding even more versatility to your indoor garden.
Consider also experimenting with different growing mediums. While water propagation is a great starting point, you can eventually transplant your celery into a pot filled with nutrient-rich soil. This will provide the plant with the necessary nutrients to grow even larger and produce more substantial stalks. You can also add organic fertilizers to boost growth and enhance the flavor of your celery.
Another variation to explore is companion planting. Certain herbs and vegetables thrive when planted alongside celery. Consider adding basil, chamomile, or even some leafy greens to your pot. These companion plants can help deter pests, improve soil health, and even enhance the flavor of your celery.
Don’t be afraid to get creative with your indoor celery garden. Use decorative pots, add colorful pebbles, or even create a miniature terrarium to showcase your growing celery. The possibilities are endless!
Ultimately, this DIY trick is about more than just growing celery; it’s about connecting with nature, embracing sustainability, and enjoying the simple pleasures of gardening. It’s a fantastic way to teach children about plant life cycles, reduce your carbon footprint, and add a touch of freshness to your home.
We wholeheartedly encourage you to give this indoor celery gardening trick a try. It’s a rewarding experience that will not only provide you with fresh celery but also bring a sense of accomplishment and joy. Once you’ve tried it, we’d love to hear about your experience! Share your photos, tips, and tricks in the comments below. Let’s create a community of indoor celery gardeners and inspire others to embrace this sustainable and rewarding practice. Let us know what challenges you faced and how you overcame them. Did you try any variations? What worked best for you? Your insights will be invaluable to other aspiring celery gardeners.
So, grab those celery scraps, get your hands dirty (or not, if you’re starting with water propagation!), and embark on this exciting indoor gardening adventure. You’ll be amazed at how easy it is to grow your own fresh celery and enjoy the many benefits it offers. Happy gardening!
FAQ
Q: How long does it take to regrow celery from a base?
A: Typically, you’ll start to see new growth within a few days to a week after placing the celery base in water. Small leaves will begin to sprout from the center. It usually takes about 3-4 weeks to have a noticeable amount of new growth that is ready to be transplanted into soil. The exact time can vary depending on factors like temperature, sunlight, and the initial health of the celery base.
Q: What kind of water should I use?
A: Tap water is generally fine, but it’s best to let it sit out for a few hours to allow any chlorine to dissipate. Filtered water or rainwater is even better, as they are free of chemicals that could potentially harm the plant. Avoid using distilled water, as it lacks the minerals that plants need. Change the water every 1-2 days to keep it fresh and prevent bacterial growth.
Q: How much sunlight does regrowing celery need?
A: Celery needs bright, indirect sunlight. A windowsill that receives morning sun is ideal. Avoid placing it in direct sunlight, especially during the hottest part of the day, as this can scorch the leaves. If you don’t have a sunny windowsill, you can use a grow light to supplement the natural light.
Q: When should I transplant the celery to soil?
A: Once the celery base has developed a good root system (about 2-3 inches long) and has a noticeable amount of new leaves, it’s time to transplant it to soil. This usually takes about 2-3 weeks. Choose a pot that is at least 6 inches in diameter and fill it with a well-draining potting mix. Gently remove the celery from the water and plant it in the pot, making sure to cover the roots with soil. Water thoroughly after planting.
Q: What kind of soil should I use?
A: Celery prefers a rich, well-draining soil. A good potting mix that contains compost, peat moss, and perlite is ideal. You can also add some organic fertilizer to the soil to provide the plant with extra nutrients. Avoid using heavy clay soil, as it can retain too much water and lead to root rot.
Q: How often should I water the celery after transplanting it to soil?
A: Keep the soil consistently moist, but not waterlogged. Water the celery when the top inch of soil feels dry to the touch. Avoid overwatering, as this can lead to root rot. During hot weather, you may need to water more frequently.
Q: Can I grow celery indoors year-round?
A: Yes, you can grow celery indoors year-round, as long as you provide it with enough light and water. During the winter months, you may need to supplement the natural light with a grow light.
Q: How do I harvest the celery?
A: You can harvest the celery stalks as needed. Simply cut off the outer stalks near the base of the plant. The inner stalks will continue to grow. You can also harvest the entire plant at once if you prefer.
Q: What if my celery starts to turn yellow or brown?
A: Yellowing or browning leaves can be a sign of several problems, including overwatering, underwatering, lack of nutrients, or pests. Check the soil moisture and adjust your watering accordingly. If the soil is dry, water more frequently. If the soil is waterlogged, allow it to dry out slightly before watering again. You can also add some organic fertilizer to the soil to provide the plant with extra nutrients. Inspect the plant for pests and treat accordingly.
Q: Can I eat the celery that I regrow from a base?
A: Yes, the celery that you regrow from a base is perfectly safe to eat. It may not be as large or as thick as the celery that you buy in the store, but it will still have a delicious flavor.
Q: My celery is growing tall but the stalks are very thin. What am I doing wrong?
A: Thin stalks can be caused by a few factors. First, ensure your celery is getting enough light. Insufficient light leads to leggy growth. Second, make sure you’re fertilizing regularly with a balanced organic fertilizer. Celery is a heavy feeder. Finally, consistent watering is crucial. Irregular watering can stress the plant and affect stalk development.
Q: Can I grow celery from seed indoors instead of using a base?
A: Yes, you can absolutely grow celery from seed indoors. However, it’s a much longer process than regrowing from a base. Celery seeds are notoriously slow to germinate and require consistent moisture and warmth. Starting with a base is a quicker and easier way to get started with indoor celery gardening.
Q: Are there any pests that commonly affect indoor celery?
A: While indoor celery is generally less susceptible to pests than outdoor celery, aphids and spider mites can sometimes be a problem. Inspect your plants regularly for signs of infestation. If you find pests, you can try washing them off with a strong stream of water or using an insecticidal soap.
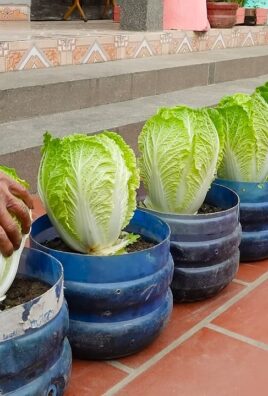
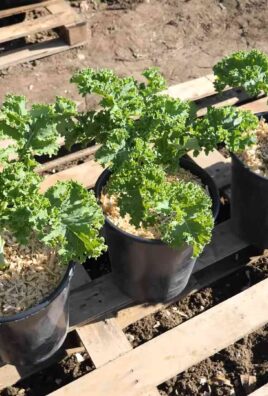
Q: Can I use this method to regrow other vegetables?
A: Yes, this method of regrowing vegetables from scraps can be used for other vegetables as well, such as lettuce, green onions, and bok choy. The process is generally the same: place the base of the vegetable in water until it develops roots, then transplant it to soil.

Leave a Comment