
Kale harvest routine: Unlock the secrets to a bountiful and continuous kale harvest right in your own backyard! Have you ever dreamt of enjoying fresh, vibrant kale in your salads, smoothies, and stir-fries, all season long? I know I have! But sometimes, knowing *when* and *how* to harvest can feel like a mystery.
Kale, a nutritional powerhouse, has been cultivated for over 2,000 years, with its origins tracing back to the eastern Mediterranean. It was a staple food in ancient Rome and Greece, and its resilience and health benefits have made it a beloved vegetable across cultures ever since. But even with its long history, many home gardeners struggle to maximize their kale yield.
That’s where this DIY guide comes in! Learning the proper kale harvest routine isn’t just about picking leaves; it’s about understanding the plant’s growth cycle and encouraging continuous production. This article will provide you with simple, actionable tips and tricks to ensure you’re harvesting your kale at its peak flavor and nutritional value, while also promoting healthy regrowth. Stop letting your kale go to waste or become bitter! Let’s dive in and transform your kale patch into a never-ending supply of delicious greens.
DIY: Supercharge Your Kale Harvest for Maximum Yield and Flavor!
Hey fellow gardeners! I’m so excited to share my tried-and-true method for harvesting kale that not only gives you a continuous supply of this leafy green goodness but also encourages healthier, more productive plants. Forget hacking away randomly; this is about strategic harvesting that benefits both you and your kale!
Understanding Kale Growth: The Key to Successful Harvesting
Before we dive into the nitty-gritty, let’s quickly understand how kale grows. Kale plants produce leaves from the center outwards. The oldest leaves are at the bottom of the plant, and the newest, tender leaves are at the top. Knowing this is crucial because we’ll be harvesting the older, outer leaves, allowing the plant to focus its energy on producing new growth.
Tools You’ll Need
* A sharp knife or garden shears: Dull tools can damage the plant and make it more susceptible to disease.
* A basket or bag: To collect your beautiful kale bounty.
* Gloves (optional): Kale can sometimes irritate sensitive skin.
* Water (optional): To wash the kale immediately after harvesting.
Harvesting Kale: Step-by-Step Guide
Here’s the breakdown of how I harvest my kale for the best results:
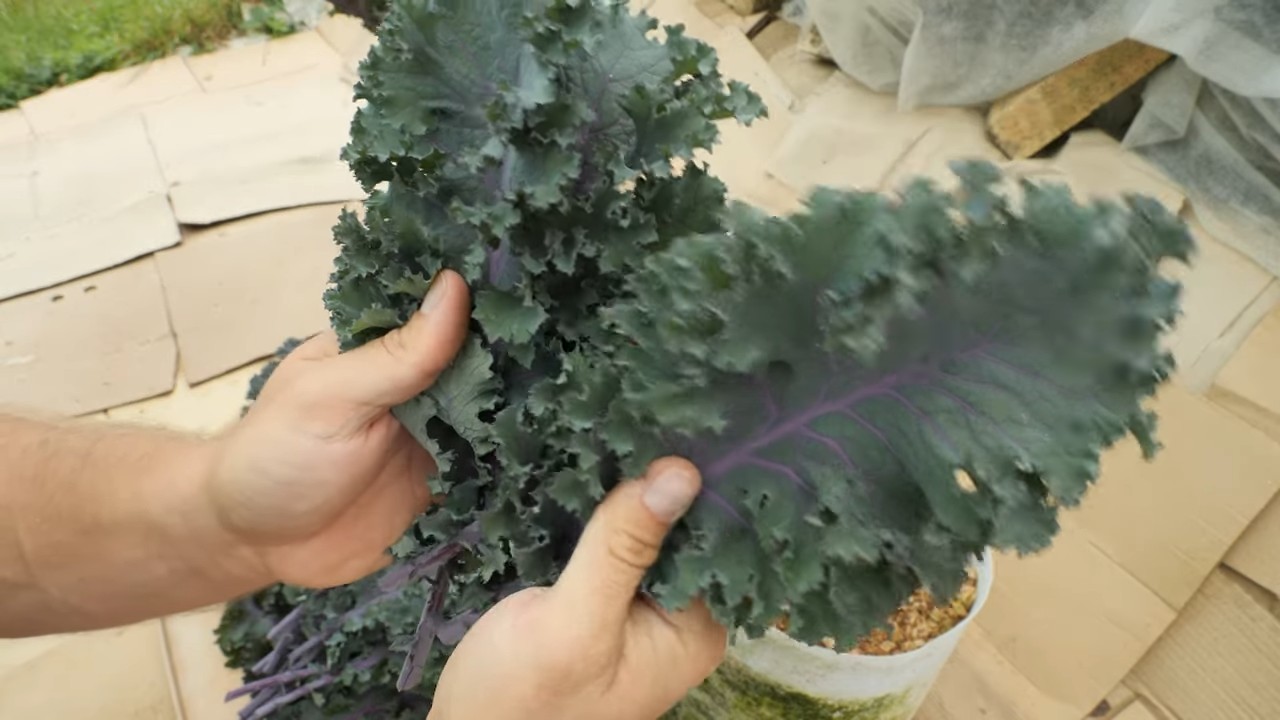
1. Choose the Right Leaves: Look for the oldest, outermost leaves. These are usually the largest and may be slightly tougher than the younger leaves. They should be a good size – at least as big as your hand. Avoid leaves that are yellowing, damaged, or have signs of pests or disease. We want only the best for our salads and smoothies!
2. Make the Cut: Using your sharp knife or garden shears, make a clean cut at the base of the leaf stem, close to the main stalk. Be careful not to damage the central stem or any of the smaller, developing leaves. A clean cut helps the plant heal quickly and prevents disease.
3. Harvest Strategically: Don’t take all the leaves from one plant at once. I usually harvest about one-third of the leaves from each plant during a single harvest. This allows the plant to continue growing and producing new leaves. Think of it as a trim, not a haircut!
4. Work from the Bottom Up: Always start harvesting from the bottom of the plant and work your way up. This ensures you’re taking the oldest leaves and leaving the younger ones to mature.
5. Leave the Terminal Bud: Never cut off the terminal bud (the growing point at the top of the plant). This will stop the plant from producing new leaves. We want a continuous harvest, so protect that bud!
6. Inspect for Pests: As you harvest, take a close look at the leaves for any signs of pests, such as aphids, cabbage worms, or slugs. If you find any, remove them by hand or treat the plant with an appropriate organic pest control method. Prevention is key!
7. Wash and Store (Optional): If you plan to use the kale immediately, wash it thoroughly to remove any dirt or debris. If you’re not using it right away, store it in a plastic bag in the refrigerator. It will stay fresh for several days. I like to wrap mine in a slightly damp paper towel to keep it hydrated.
Harvesting Different Types of Kale
The basic harvesting principles apply to all types of kale, but here are a few specific tips for different varieties:
* Curly Kale: Harvest the outer leaves as described above. The curly leaves can be a bit tougher, so you might want to massage them with olive oil and lemon juice before using them in salads.
* Lacinato (Dinosaur) Kale: This type of kale has long, narrow, dark green leaves. Harvest them in the same way as curly kale. Lacinato kale is known for its slightly sweeter flavor and is great for sautéing or adding to soups.
* Red Russian Kale: This kale has flat, fringed leaves with reddish-purple stems. It’s more tender than curly kale and has a slightly peppery flavor. Harvest the outer leaves when they are young and tender.
Extending Your Kale Harvest
Want to keep your kale harvest going strong? Here are a few tips:
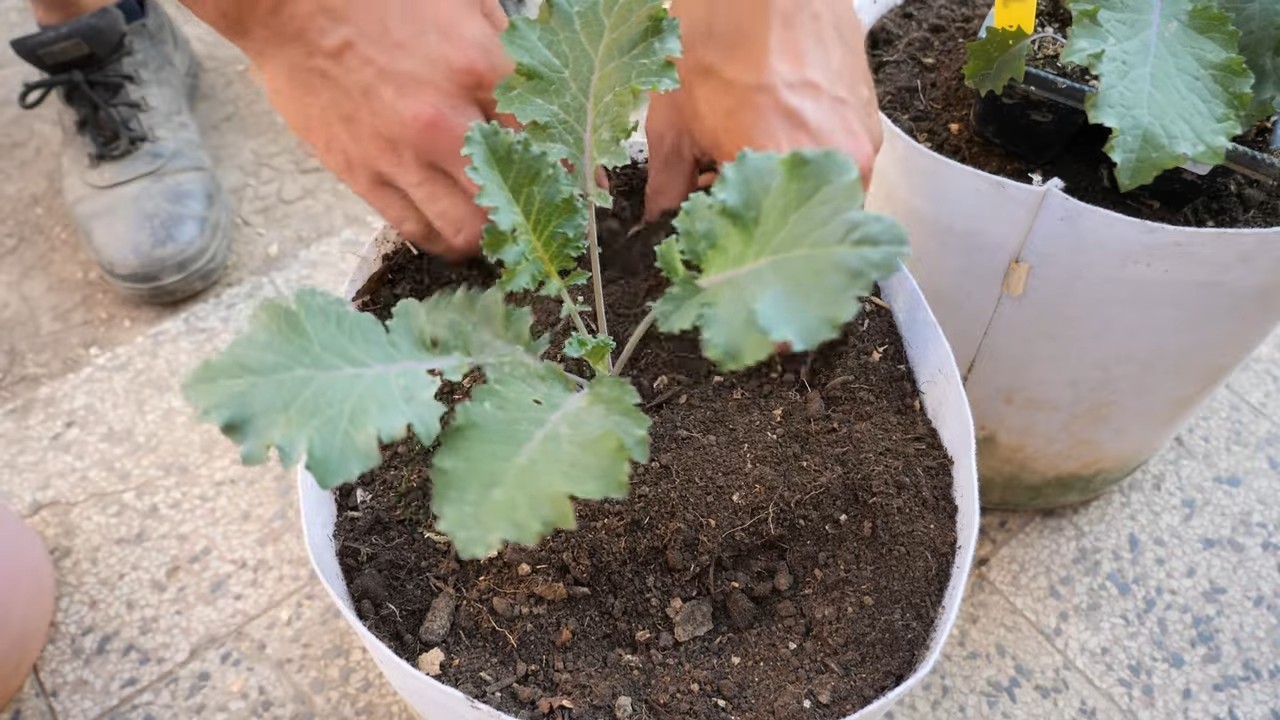
* Succession Planting: Plant new kale seedlings every few weeks to ensure a continuous supply throughout the growing season. I stagger my plantings so I always have fresh kale coming up.
* Fertilize Regularly: Kale is a heavy feeder, so fertilize it regularly with a balanced organic fertilizer. This will help the plants produce lots of healthy leaves.
* Water Consistently: Kale needs consistent moisture to thrive. Water deeply whenever the soil feels dry to the touch.
* Protect from Pests: Keep an eye out for pests and diseases and take action promptly to prevent them from spreading.
* Overwintering Kale: In many climates, kale can survive the winter. If you live in a cold climate, protect your kale plants with a layer of mulch or a cold frame. You can continue to harvest leaves throughout the winter, although the growth rate will slow down.
Troubleshooting Common Kale Harvesting Issues
Sometimes, things don’t go exactly as planned. Here are a few common issues you might encounter and how to address them:
* Yellowing Leaves: Yellowing leaves can be a sign of nutrient deficiency, overwatering, or disease. Make sure you’re fertilizing your kale regularly and that the soil is well-draining. If you suspect disease, remove the affected leaves and treat the plant with an appropriate fungicide.
* Tough Leaves: Older leaves can sometimes become tough and bitter. This is more common in hot weather. To avoid this, harvest the leaves when they are young and tender. You can also try blanching the leaves before cooking them to make them more tender.
* Pest Infestations: Pests can be a major problem for kale. Regularly inspect your plants for signs of pests and take action promptly to prevent them from spreading. Organic pest control methods, such as insecticidal soap or neem oil, can be effective.
* Slow Growth: Slow growth can be caused by a variety of factors, including poor soil, lack of sunlight, or insufficient watering. Make sure your kale plants are getting at least six hours of sunlight per day and that the soil is rich in organic matter.
Harvesting for Seed (Advanced)
If you’re feeling adventurous, you can even save your own kale seeds! This is a great way to preserve your favorite varieties and save money.
1. Allow Plants to Bolt: In their second year, kale plants will “bolt,” meaning they will send up a flower stalk. Allow a few of your healthiest plants to bolt.
2. Let Flowers Bloom: The flowers will attract pollinators, which are essential for seed production.
3. Harvest Seed Pods: Once the flowers fade, they will be replaced by seed pods. Allow the seed pods to dry on the plant until they are brown and brittle.
4. Extract Seeds: Carefully break open the seed pods and collect the seeds.
5. Dry and Store: Dry the seeds thoroughly and store them in an airtight container in a cool, dark place.
Enjoying Your Kale Harvest
Now for the best part – enjoying the fruits (or rather, leaves!) of your labor! Kale is incredibly versatile and can be used in a variety of dishes. Here are a few of my favorite ways to use kale:
* Salads: Massage kale with olive oil, lemon juice, and salt to make it more tender and flavorful. Add your favorite toppings, such as nuts, seeds, dried fruit, and cheese.
* Smoothies: Add a handful of kale to your favorite smoothie recipe for a boost of nutrients.
* Soups and Stews: Kale adds a hearty and nutritious element to soups and stews.
* Sautéed: Sauté kale with garlic, olive oil, and a pinch of red pepper flakes for a quick and easy side dish.
* Kale Chips: Toss kale with olive oil and salt and bake it in the oven until crispy for a healthy snack.
Final Thoughts
Harvesting kale strategically is a simple yet effective way to maximize your yield and enjoy fresh, delicious greens all season long. By following these tips, you’ll be well on your way to becoming a kale-harvesting pro! Happy gardening!
Conclusion
So, there you have it! Transforming your kale harvest routine from a chore into a streamlined, efficient process is entirely within your reach. This DIY trick, focusing on proper washing, drying, and storage, isn’t just about saving time; it’s about preserving the vibrant flavor and nutritional power of your freshly harvested kale. Think about it – no more soggy, wilted kale languishing in the crisper drawer. Instead, you’ll have crisp, ready-to-use greens at your fingertips, perfect for salads, smoothies, soups, or even a quick sauté.
This method is a game-changer, especially if you’re committed to incorporating more leafy greens into your diet. The convenience factor alone makes it a must-try. Imagine coming home after a long day and knowing that a healthy, delicious meal is just minutes away, thanks to your prepped kale.
But the benefits extend beyond mere convenience. Properly washed and dried kale lasts significantly longer, reducing food waste and saving you money in the long run. Plus, by controlling the washing and drying process yourself, you can ensure that your kale is free from any unwanted residues or contaminants.
This DIY kale preservation method is a win-win for your health, your wallet, and your peace of mind.
Don’t be afraid to experiment with variations to suit your specific needs and preferences. For example, if you prefer smaller pieces of kale, you can chop it before washing and drying. This is particularly useful if you plan to use the kale primarily in smoothies or soups. Alternatively, if you’re short on time, you can use a salad spinner to expedite the drying process. Just be sure to spin the kale in batches to avoid overcrowding and ensure thorough drying.
Another variation involves adding a touch of acidity to the washing water. A splash of vinegar or lemon juice can help to remove any lingering dirt or debris and may even help to brighten the color of the kale. Just be sure to rinse the kale thoroughly after soaking it in the acidic water.
Consider also the storage method. While resealable bags work well, you might find that using airtight containers helps to maintain the kale’s crispness for even longer. Experiment with different containers to see what works best for you. You can also add a paper towel to the container to absorb any excess moisture.
We wholeheartedly encourage you to give this DIY trick a try. It’s simple, effective, and will revolutionize the way you handle your kale harvest. Once you’ve experienced the convenience and freshness of prepped kale, you’ll never go back to the old way.
And most importantly, we want to hear about your experience! Share your tips, tricks, and variations in the comments below. Let us know what worked well for you, what challenges you encountered, and any creative ways you’ve adapted the method to suit your own needs. Your feedback will not only help other readers but will also contribute to a community of kale enthusiasts who are passionate about making healthy eating easy and enjoyable. So, go ahead, harvest that kale, give this DIY trick a whirl, and share your story with the world! Let’s make this the year of perfectly preserved kale!
Frequently Asked Questions (FAQ)
How long will the washed and dried kale last in the refrigerator?
Properly washed, dried, and stored kale can last for up to a week, and sometimes even longer, in the refrigerator. The key is to ensure that the kale is thoroughly dry before storing it, as excess moisture is the primary culprit for spoilage. Use a salad spinner or pat the kale dry with paper towels to remove as much water as possible. Store the kale in a resealable bag or airtight container with a paper towel to absorb any remaining moisture. Check the kale periodically and discard any leaves that show signs of wilting or discoloration.
What’s the best way to wash kale to remove dirt and pesticides?
The best way to wash kale is to submerge it in a large bowl or sink filled with cold water. Gently agitate the kale to loosen any dirt or debris. For particularly dirty kale, you can add a tablespoon of salt or vinegar to the water. Let the kale soak for a few minutes, then rinse it thoroughly under running water. Repeat the process if necessary until the water runs clear. If you are concerned about pesticides, consider using a vegetable wash specifically designed to remove pesticide residues. Always rinse the kale thoroughly after using a vegetable wash.
Can I freeze kale after washing and drying it?
Yes, you can freeze kale after washing and drying it. Freezing is a great way to preserve kale for longer periods. To freeze kale, blanch it in boiling water for 2-3 minutes, then immediately transfer it to an ice bath to stop the cooking process. This helps to preserve the kale’s color and texture. Drain the kale thoroughly and squeeze out any excess water. Spread the kale out on a baking sheet and freeze it for a few hours until it is solid. Then, transfer the frozen kale to a freezer-safe bag or container. Frozen kale can be stored for up to 8-12 months.
What are some creative ways to use prepped kale?
Prepped kale is incredibly versatile and can be used in a wide variety of dishes. Add it to smoothies for a nutritional boost, sauté it with garlic and olive oil for a quick and easy side dish, or use it in soups, stews, and casseroles. You can also add prepped kale to salads, omelets, frittatas, and even pizza. For a healthy snack, try roasting kale chips in the oven. The possibilities are endless!
Is it necessary to remove the stems from kale before washing and drying?
Whether or not to remove the stems from kale before washing and drying is a matter of personal preference. The stems are edible but can be tough and fibrous. If you prefer a more tender texture, you can remove the stems before washing and drying the kale. To remove the stems, simply hold the stem in one hand and strip the leaves off with the other hand. You can discard the stems or save them for making vegetable broth. If you don’t mind the texture of the stems, you can leave them on and chop the kale into smaller pieces before washing and drying.
What if I don’t have a salad spinner?
If you don’t have a salad spinner, you can still dry your kale effectively. After washing the kale, spread it out on a clean kitchen towel or several layers of paper towels. Gently pat the kale dry with another towel or paper towel. You can also roll the kale up in the towel and gently squeeze to remove excess water. Repeat the process until the kale is as dry as possible. Another option is to place the kale in a colander and shake it vigorously to remove excess water.
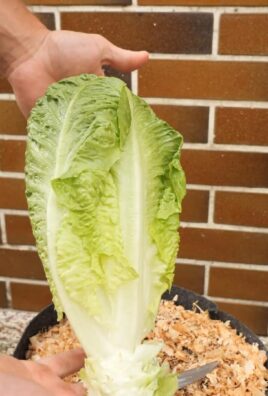
Can I use this method for other leafy greens besides kale?
Yes, this method can be used for other leafy greens besides kale, such as spinach, chard, and collard greens. The principles of washing, drying, and storing are the same for all leafy greens. However, some leafy greens may be more delicate than kale and require more gentle handling. For example, spinach tends to wilt more easily than kale, so it’s important to dry it carefully and store it in a container that prevents it from being crushed.
How do I know if my kale has gone bad?
You’ll know your kale has gone bad if it starts to wilt, turn yellow or brown, or develop a slimy texture. It may also have an unpleasant odor. If you notice any of these signs, it’s best to discard the kale. It’s always better to err on the side of caution when it comes to food safety.
What are the nutritional benefits of eating kale?
Kale is a nutritional powerhouse, packed with vitamins, minerals, and antioxidants. It’s an excellent source of vitamins A, C, and K, as well as calcium, potassium, and iron. Kale is also a good source of fiber, which is important for digestive health. The antioxidants in kale can help to protect your cells from damage and reduce your risk of chronic diseases. Incorporating kale into your diet is a great way to boost your overall health and well-being.
Leave a Comment