
Malabar Spinach High Yield: Dreaming of a lush, vibrant garden overflowing with fresh greens, but feeling limited by space or a short growing season? I get it! We all crave that homegrown goodness, and that’s where the magic of Malabar spinach comes in. This isn’t your average spinach; it’s a climbing vine that thrives in warm weather, offering a continuous harvest of nutritious leaves and stems. Think of it as the gift that keeps on giving!
Historically, Malabar spinach, also known as Basella alba, has been a staple in Asian and African cuisines for centuries. Its resilience and adaptability have made it a valuable crop in regions with challenging climates. But you don’t need to live in the tropics to enjoy its benefits. With a few clever tricks and DIY hacks, you can achieve a Malabar Spinach High Yield even in less-than-ideal conditions.
Why is this DIY article a must-read? Because let’s face it, store-bought spinach can be expensive and often lacks the fresh, vibrant flavor of homegrown produce. Plus, knowing exactly where your food comes from is incredibly rewarding. I’m going to share my tried-and-true methods for maximizing your Malabar spinach harvest, from choosing the right location and soil to implementing simple trellising techniques and pest control strategies. Get ready to transform your garden into a leafy green paradise!
Boosting Your Malabar Spinach Harvest: A DIY Guide to Abundant Greens!
Hey fellow gardeners! Are you ready to transform your Malabar spinach patch from a modest yield to a leafy green explosion? I’ve been experimenting with different techniques for years, and I’m thrilled to share my secrets to maximizing your harvest. This guide is packed with practical tips and tricks that I’ve personally tested and refined. Let’s get started!
Understanding Malabar Spinach and Its Needs
Before we dive into the DIY hacks, let’s quickly recap what Malabar spinach (Basella alba or Basella rubra) needs to thrive. This isn’t your typical spinach; it’s a heat-loving vine that flourishes in warm climates. Think of it as the spinach that loves summer!
* Sunlight: Malabar spinach craves sunshine. Aim for at least 6-8 hours of direct sunlight daily.
* Soil: Well-draining soil rich in organic matter is key. It prefers a slightly acidic to neutral pH (around 6.5-7.0).
* Water: Consistent moisture is crucial, especially during hot weather. Don’t let the soil dry out completely.
* Support: As a vine, Malabar spinach needs something to climb on. A trellis, fence, or even a sturdy stake will do the trick.
* Nutrients: Regular feeding with a balanced fertilizer will keep your plants happy and productive.
DIY Hack #1: Supercharged Soil Mix for Explosive Growth
The foundation of any successful garden is healthy soil. I’ve developed a soil mix that my Malabar spinach absolutely loves. It’s all about providing the right balance of nutrients, drainage, and water retention.
Materials You’ll Need:
* Garden soil (or topsoil)
* Compost (well-rotted)
* Coco coir (or peat moss)
* Perlite (or vermiculite)
* Bone meal
* Epsom salts
Step-by-Step Instructions:
1. Gather Your Ingredients: Make sure you have all the materials on hand before you start mixing. I usually prepare this mix in a large wheelbarrow or a plastic tub.
2. Combine the Base: Mix equal parts of garden soil, compost, and coco coir (or peat moss). This forms the base of your supercharged soil. The compost provides essential nutrients, while the coco coir (or peat moss) helps retain moisture.
3. Improve Drainage: Add perlite (or vermiculite) to the mix. This will improve drainage and prevent the soil from becoming waterlogged. Use about 1/4 the amount of the base mix.
4. Boost with Bone Meal: Bone meal is a fantastic source of phosphorus, which is essential for root development and overall plant health. Add about 1/2 cup of bone meal per cubic foot of soil mix.
5. Epsom Salt Magic: Epsom salts provide magnesium, which helps with chlorophyll production and nutrient absorption. Add about 1/4 cup of Epsom salts per cubic foot of soil mix.
6. Mix Thoroughly: Use a shovel or trowel to mix all the ingredients together thoroughly. Make sure everything is evenly distributed.
7. Test the Soil: Before planting, it’s a good idea to test the pH of your soil. You can use a soil testing kit or send a sample to your local agricultural extension office. Adjust the pH if necessary.
DIY Hack #2: Vertical Gardening for Maximum Space and Sunlight
Malabar spinach is a vine, so it naturally wants to climb. By providing a vertical support system, you can maximize your growing space and ensure that your plants get plenty of sunlight.
Choosing the Right Support:
* Trellis: A trellis is a classic choice for vertical gardening. You can buy a pre-made trellis or build your own using wood or metal.
* Fence: If you have a fence in your garden, you can train your Malabar spinach to climb it.
* Stakes: For a more rustic look, you can use sturdy stakes to support your plants.
* DIY Structures: Get creative! You can build your own vertical structures using bamboo poles, branches, or even recycled materials.
Step-by-Step Instructions:
1. Select Your Location: Choose a sunny spot in your garden where you want to grow your Malabar spinach.
2. Install Your Support: Install your chosen support system before you plant your seedlings or seeds. Make sure it’s sturdy and can withstand the weight of the mature vines.
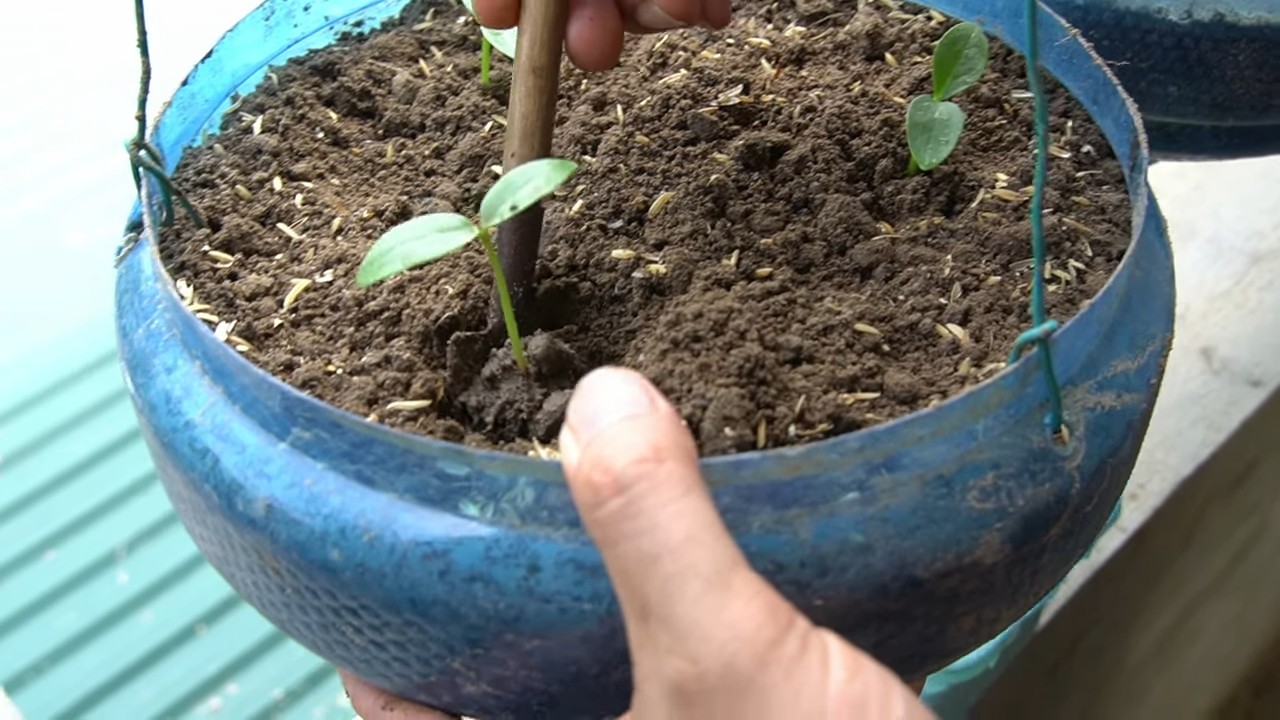
3. Plant Your Seedlings or Seeds: Plant your Malabar spinach seedlings or seeds at the base of the support structure. Space them about 12-18 inches apart.
4. Train the Vines: As the vines grow, gently train them to climb the support structure. You can use plant ties or twine to secure them in place.
5. Prune Regularly: Prune the vines regularly to encourage branching and bushier growth. This will also help to keep the plants tidy and prevent them from becoming too unruly.
DIY Hack #3: Nutrient-Rich Foliar Spray for Lush, Green Leaves
Foliar feeding is a technique where you apply liquid fertilizer directly to the leaves of your plants. This allows them to absorb nutrients more quickly and efficiently. I’ve found that a nutrient-rich foliar spray can work wonders for boosting the growth and health of my Malabar spinach.
Ingredients You’ll Need:
* Liquid seaweed extract
* Fish emulsion
* Water
* Spray bottle
Step-by-Step Instructions:
1. Dilute the Ingredients: In a clean spray bottle, mix the liquid seaweed extract and fish emulsion with water according to the instructions on the product labels. I usually use about 1 tablespoon of each per gallon of water.
2. Mix Well: Shake the spray bottle well to ensure that all the ingredients are thoroughly mixed.
3. Spray the Leaves: Spray the leaves of your Malabar spinach plants with the foliar spray, making sure to cover both the tops and bottoms of the leaves.
4. Apply in the Morning or Evening: Apply the foliar spray in the morning or evening, when the sun is not too strong. This will prevent the leaves from burning.
5. Repeat Regularly: Repeat the foliar feeding every 1-2 weeks for best results.
DIY Hack #4: Companion Planting for Pest Control and Enhanced Growth
Companion planting is the practice of planting different plants together that benefit each other. Some plants can repel pests, attract beneficial insects, or improve the soil. I’ve found that companion planting can be a great way to protect my Malabar spinach from pests and diseases and enhance its growth.
Good Companion Plants for Malabar Spinach:
* Marigolds: Marigolds repel nematodes and other soil pests.
* Basil: Basil repels aphids, whiteflies, and other common garden pests.
* Garlic: Garlic repels a wide range of pests, including aphids, Japanese beetles, and spider mites.
* Nasturtiums: Nasturtiums attract aphids away from your Malabar spinach.
* Lettuce: Provides ground cover and helps retain moisture.
Step-by-Step Instructions:
1. Choose Your Companion Plants: Select the companion plants that you want to grow alongside your Malabar spinach.
2. Plant Strategically: Plant the companion plants around your Malabar spinach plants, spacing them according to their individual needs.
3. Observe and Adjust: Observe your plants regularly to see how they are interacting with each other. Adjust your planting strategy if necessary.
DIY Hack #5: Seed Saving for Continuous Harvests
Saving seeds from your Malabar spinach plants is a great way to ensure that you have a continuous supply of seeds for future harvests. It’s also a fun and rewarding way to connect with your plants and become more self-sufficient.
Step-by-Step Instructions:
1. Allow Some Plants to Flower: Let a few of your Malabar spinach plants flower and produce seeds.
2. Harvest the Seeds: Once the seed pods have dried and turned brown, harvest them from the plants.
3. Extract the Seeds: Open the seed pods and extract the seeds.
4. Dry the Seeds: Spread the seeds out on a tray and let them dry completely.
5. Store the Seeds: Store the dried seeds in an airtight container in a cool, dark, and dry place.
6. Label the Seeds: Label the container with the name of the plant and the date of harvest.
Troubleshooting Common Malabar Spinach Problems
Even with the best care, you might encounter some problems with your Malabar spinach. Here are some common issues and how to address them:
* Yellowing Leaves: This could be a sign of nutrient deficiency, overwatering, or underwatering.
Conclusion
So, there you have it! Unlocking a Malabar Spinach High Yield isn’t some gardener’s myth or a closely guarded secret. It’s a perfectly achievable goal with a little know-how and a willingness to embrace these simple yet effective DIY techniques. We’ve explored everything from optimizing your soil composition and providing the perfect support structure to mastering the art of strategic pruning and consistent watering. Each of these elements plays a crucial role in maximizing your harvest and ensuring a thriving Malabar spinach patch.
But why is this DIY approach a must-try? Because it empowers you to take control of your garden and cultivate a truly bountiful crop. Forget relying solely on store-bought produce or settling for meager yields. With these methods, you can enjoy a continuous supply of fresh, nutritious Malabar spinach right from your backyard. Imagine the satisfaction of harvesting vibrant, leafy greens that you nurtured yourself, knowing exactly where they came from and how they were grown.
Beyond the sheer volume of your harvest, these techniques also contribute to the overall health and vitality of your plants. By providing optimal growing conditions, you’ll create a stronger, more resilient Malabar spinach that is less susceptible to pests and diseases. This translates to less time spent troubleshooting problems and more time enjoying the fruits (or rather, leaves) of your labor.
And the best part? You can easily adapt these methods to suit your specific gardening conditions and preferences. Experiment with different types of organic fertilizers to find what works best for your soil. Try various trellising systems to create a visually appealing and highly productive vertical garden. Consider companion planting with herbs like basil or marigolds to deter pests and enhance the flavor of your spinach.
For example, if you live in a particularly hot climate, you might want to focus on providing extra shade during the hottest part of the day. Conversely, if you’re in a cooler region, you could use row covers to extend your growing season. The possibilities are endless!
We encourage you to embrace the spirit of experimentation and discover what works best for you. Don’t be afraid to tweak the techniques, try new variations, and personalize your approach. Gardening is a journey of learning and discovery, and the more you engage with the process, the more rewarding it will become.
Now, it’s your turn to put these DIY tricks to the test and experience the joy of a Malabar Spinach High Yield firsthand. We’re confident that you’ll be amazed by the results. And once you’ve reaped your abundant harvest, we’d love to hear about your experience! Share your tips, tricks, and success stories in the comments below. Let’s create a community of passionate gardeners who are dedicated to maximizing the potential of this incredible leafy green. Happy gardening!
Frequently Asked Questions (FAQ)
What exactly does “high yield” mean in the context of Malabar spinach?
High yield, in this context, refers to producing a significantly larger harvest of Malabar spinach leaves than you would typically expect from a standard planting. Instead of just a handful of leaves every few weeks, you’ll be able to harvest a substantial amount regularly, enough for multiple meals and potentially even to share with friends and neighbors. The specific amount will vary depending on your growing conditions and the size of your garden, but the goal is to maximize the plant’s potential for leaf production.
How long does it take to see results from these DIY techniques?
The timeline for seeing results can vary depending on several factors, including the initial health of your plants, your local climate, and the specific techniques you implement. However, you can generally expect to see noticeable improvements within a few weeks of consistently applying these methods. For example, you might observe faster growth, more vigorous leaf production, and a healthier overall appearance. Remember that patience is key, and consistent effort will ultimately lead to a more abundant harvest.
What if I don’t have a lot of space for a trellis? Are there alternative support options?
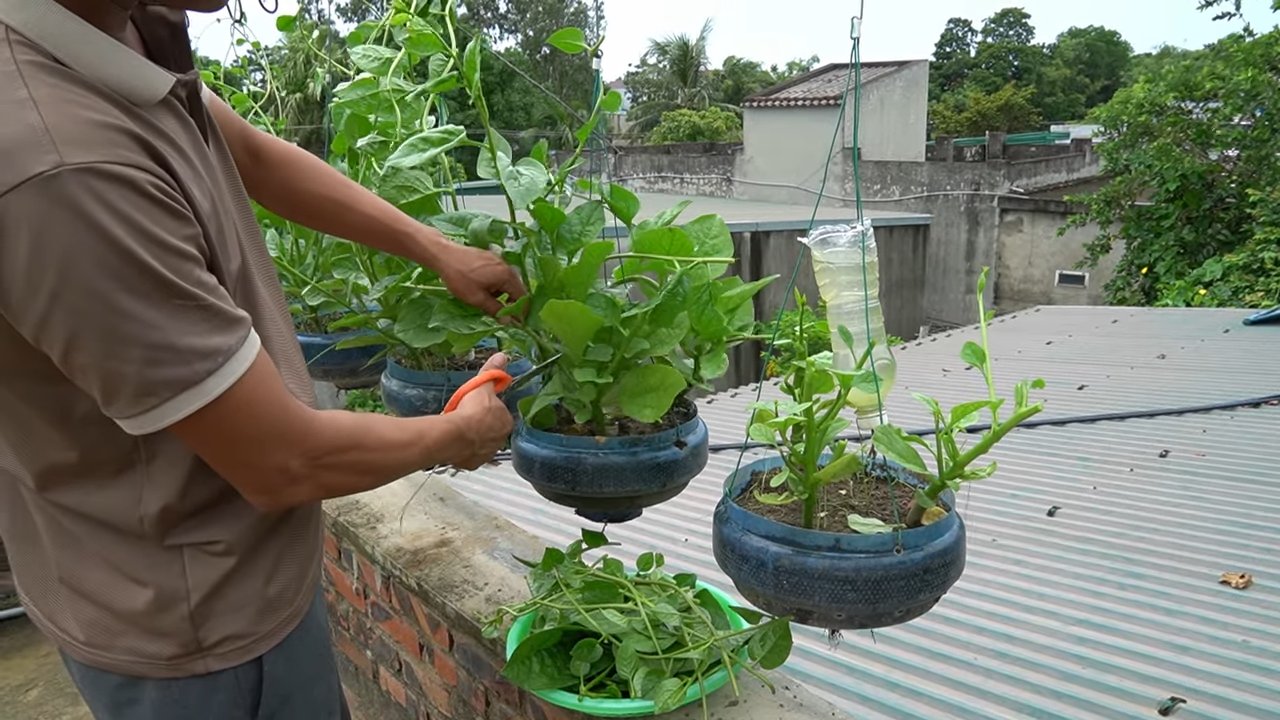
Absolutely! While a trellis is an excellent option for supporting Malabar spinach, it’s not the only one. You can also use stakes, bamboo poles, or even a sturdy fence. The key is to provide some form of vertical support that allows the vines to climb and spread out. If space is truly limited, you could even grow Malabar spinach in a hanging basket, allowing the vines to cascade downwards. Just be sure to provide adequate support for the weight of the plant as it grows.
Can I grow Malabar spinach indoors using these techniques?
Yes, you can grow Malabar spinach indoors, but it requires some adjustments. You’ll need to provide ample sunlight, either through a sunny window or with the help of grow lights. Ensure the pot is large enough to accommodate the plant’s root system, and use a well-draining potting mix. You’ll also need to provide some form of vertical support, such as a small trellis or stakes. Monitor the soil moisture carefully and water regularly, but avoid overwatering. Indoor-grown Malabar spinach may not produce as high a yield as outdoor plants, but it’s still a viable option for those with limited space or unfavorable outdoor conditions.
What are some common pests and diseases that affect Malabar spinach, and how can I prevent them?
Malabar spinach is generally quite resistant to pests and diseases, but it can occasionally be affected by aphids, spider mites, or fungal infections. To prevent these problems, maintain good air circulation around your plants, avoid overwatering, and regularly inspect the leaves for any signs of infestation or disease. If you spot any pests, you can try spraying them with insecticidal soap or neem oil. For fungal infections, remove any affected leaves and apply a fungicide if necessary. Companion planting with herbs like basil or marigolds can also help deter pests naturally.
Is it possible to over-prune Malabar spinach? How much is too much?
Yes, it is possible to over-prune Malabar spinach. While regular pruning is essential for promoting growth and increasing yield, removing too many leaves at once can stress the plant and reduce its ability to photosynthesize. As a general rule, avoid removing more than one-third of the plant’s foliage at any given time. Focus on pruning the tips of the vines to encourage branching and removing any yellowing or damaged leaves. Remember that the goal is to stimulate growth, not to deplete the plant’s resources.
What type of fertilizer is best for achieving a Malabar Spinach High Yield?
Malabar spinach benefits from a fertilizer that is rich in nitrogen, as nitrogen promotes leafy growth. Options include composted manure, fish emulsion, or a balanced organic fertilizer with a higher nitrogen content (look for a fertilizer with an NPK ratio where the first number is higher). Apply the fertilizer according to the package instructions, and avoid over-fertilizing, as this can lead to excessive foliage growth at the expense of flavor and overall plant health. Side-dressing with compost throughout the growing season can also provide a slow-release source of nutrients.
How often should I water my Malabar spinach to maximize yield?
Consistent watering is crucial for achieving a Malabar Spinach High Yield. The frequency of watering will depend on your climate, soil type, and the size of your plants. As a general rule, aim to keep the soil consistently moist but not waterlogged. Check the soil moisture regularly by sticking your finger about an inch into the soil. If it feels dry, it’s time to water. During hot, dry weather, you may need to water daily, while in cooler, wetter conditions, you can water less frequently. Mulching around the base of the plants can help retain moisture and reduce the need for frequent watering.
Can I save seeds from my Malabar spinach plant to grow more next year?
Yes, you can save seeds from your Malabar spinach plant. Allow some of the flowers to mature and develop into small, dark berries. Once the berries are fully ripe and dry, harvest them and extract the seeds. Spread the seeds out on a paper towel to dry completely, then store them in an airtight container in a cool, dark place. Keep in mind that seeds saved from hybrid varieties may not produce plants that are true to type, so it’s best to save seeds from open-pollinated varieties.


Leave a Comment