
Mint growing styrofoam box: Ever dreamed of having a constant supply of fresh, fragrant mint right outside your kitchen door? Imagine effortlessly snipping sprigs for refreshing mojitos, flavorful teas, or vibrant garnishes, all grown with your own two hands. Well, stop dreaming and start doing! This DIY guide will show you how to create a thriving mint garden using something you probably already have lying around: a styrofoam box!
Mint has been cherished for centuries, not just for its culinary uses but also for its medicinal properties. Ancient Egyptians used it for embalming, while the Romans spread it throughout Europe, valuing it for its digestive benefits and invigorating aroma. Today, mint remains a beloved herb worldwide, adding a burst of freshness to countless dishes and drinks.
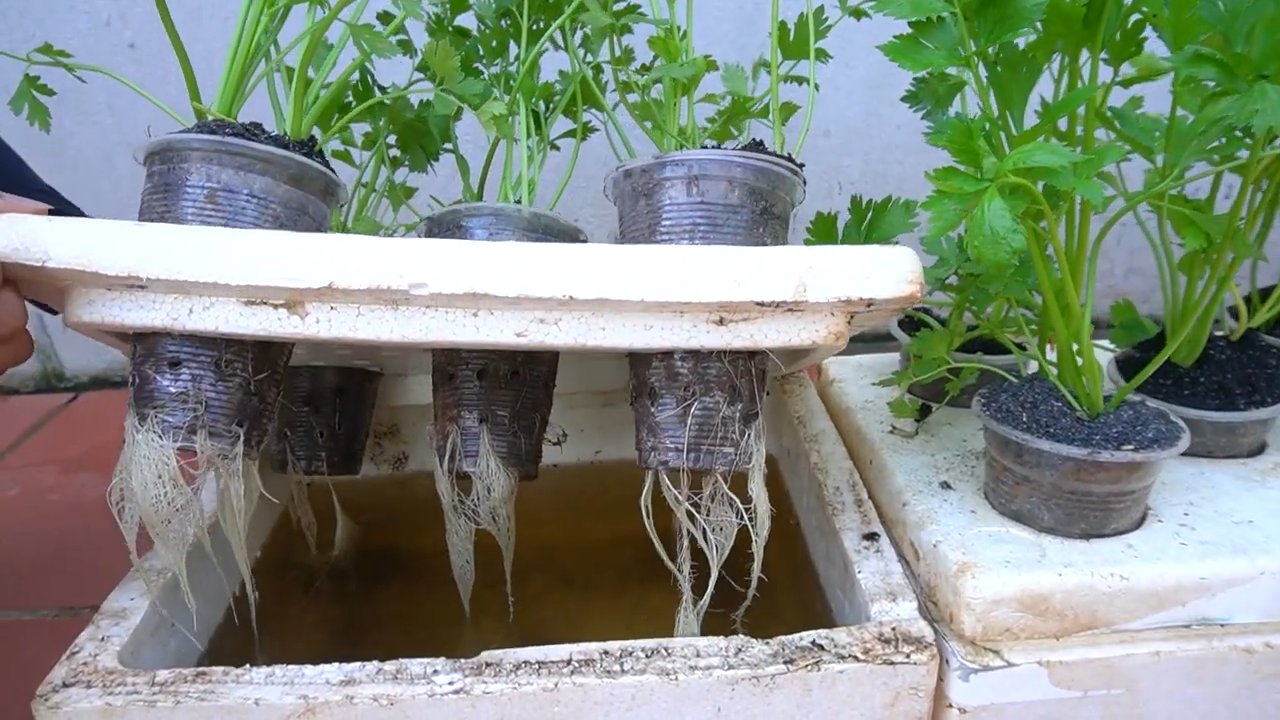
But let’s be honest, growing mint can be tricky. It’s notorious for its invasive nature, quickly taking over gardens if left unchecked. That’s where our clever DIY trick comes in! By using a styrofoam box, we can create a contained environment that allows your mint to flourish without wreaking havoc on your entire garden. Plus, it’s a fantastic way to recycle and repurpose materials, making it an eco-friendly project too. I’m excited to show you how easy it is to create your own mint growing styrofoam box and enjoy a bountiful harvest of this versatile herb!
DIY Minze-Garten aus einer Styroporbox: Ein duftendes Projekt für Jedermann
Hallo liebe Gartenfreunde! Habt ihr auch so eine Leidenschaft für frische Kräuter wie ich? Und vielleicht auch das Problem, dass der Platz im Garten begrenzt ist oder ihr gar keinen Garten habt? Keine Sorge, ich habe die perfekte Lösung für euch: Einen Minze-Garten aus einer einfachen Styroporbox! Das ist nicht nur super einfach und kostengünstig, sondern auch eine tolle Möglichkeit, eure eigenen Kräuter anzubauen, egal wo ihr wohnt. Minze ist nicht nur unglaublich vielseitig in der Küche (denkt an Mojitos, Tee oder leckere Saucen!), sondern duftet auch herrlich und hält sogar lästige Insekten fern. Also, lasst uns loslegen!
Benötigte Materialien:
* Eine Styroporbox (am besten eine, die ihr sonst wegwerfen würdet – Recycling ist super!)
* Ein Cuttermesser oder eine Schere
* Pflanzfolie oder eine dicke Plastiktüte
* Drainagematerial (z.B. Blähton, Kies oder Tonscherben)
* Hochwertige Pflanzerde (speziell für Kräuter oder Gemüse)
* Minze-Pflanzen (am besten verschiedene Sorten für noch mehr Vielfalt!)
* Gießkanne
* Handschuhe (optional, aber empfehlenswert)
* Ein Marker oder Stift
Warum eine Styroporbox?
Styroporboxen sind ideal für kleine Gärten aus mehreren Gründen:
* Isolierung: Sie halten die Erde warm, was besonders für Kräuter wie Minze von Vorteil ist.
* Leichtgewicht: Auch befüllt sind sie noch relativ leicht zu transportieren.
* Recycling: Eine tolle Möglichkeit, Styropor wiederzuverwenden.
* Kostengünstig: Oft bekommt man sie sogar kostenlos!
Schritt-für-Schritt-Anleitung: Dein eigener Minze-Garten
1. Die Vorbereitung der Styroporbox:
* Zuerst solltet ihr die Styroporbox gründlich reinigen. Entfernt alle Etiketten und Klebereste.
* Überprüft die Box auf Risse oder Beschädigungen. Kleinere Risse könnt ihr mit Klebeband reparieren.
* Wichtig: Bohrt oder schneidet unbedingt Abflusslöcher in den Boden der Box. Das ist essentiell, damit überschüssiges Wasser ablaufen kann und die Wurzeln der Minze nicht faulen. Ich empfehle mindestens vier bis fünf Löcher, je nach Größe der Box.
* Die Löcher sollten einen Durchmesser von etwa 1 cm haben. Ihr könnt dafür einen Bohrer, ein Cuttermesser oder sogar einen Schraubenzieher verwenden. Seid vorsichtig, damit ihr euch nicht verletzt!
2. Auskleiden der Box mit Pflanzfolie:
* Die Pflanzfolie dient dazu, das Styropor vor Feuchtigkeit zu schützen und die Lebensdauer der Box zu verlängern.
* Schneidet die Folie so zu, dass sie die gesamte Innenseite der Box auskleidet. Lasst an den Rändern ruhig etwas Überstand, den ihr später abschneiden könnt.
* Legt die Folie sorgfältig in die Box und drückt sie an die Wände und den Boden. Achtet darauf, dass sie gut anliegt und keine Luftblasen entstehen.
* Schneidet die Folie an den Stellen der Abflusslöcher aus, damit das Wasser ungehindert ablaufen kann.
* Befestigt die Folie am oberen Rand der Box mit Klebeband oder Klammern, damit sie nicht verrutscht.
3. Drainage-Schicht anlegen:
* Eine Drainage-Schicht ist unerlässlich, um Staunässe zu vermeiden und die Wurzeln der Minze gesund zu halten.
* Füllt den Boden der Box mit einer etwa 5-10 cm dicken Schicht Drainagematerial. Ich verwende am liebsten Blähton, aber auch Kies oder Tonscherben sind gut geeignet.
* Die Drainage-Schicht sorgt dafür, dass überschüssiges Wasser schnell abfließen kann und die Erde nicht zu feucht wird.
4. Die richtige Erde:
* Verwendet unbedingt hochwertige Pflanzerde, die speziell für Kräuter oder Gemüse geeignet ist. Diese Erde ist in der Regel nährstoffreicher und besser durchlässig als normale Blumenerde.
* Füllt die Box mit der Erde, bis etwa 5-10 cm unter den Rand.
* Lockert die Erde mit einer kleinen Schaufel oder euren Händen auf, damit sie nicht zu verdichtet ist.
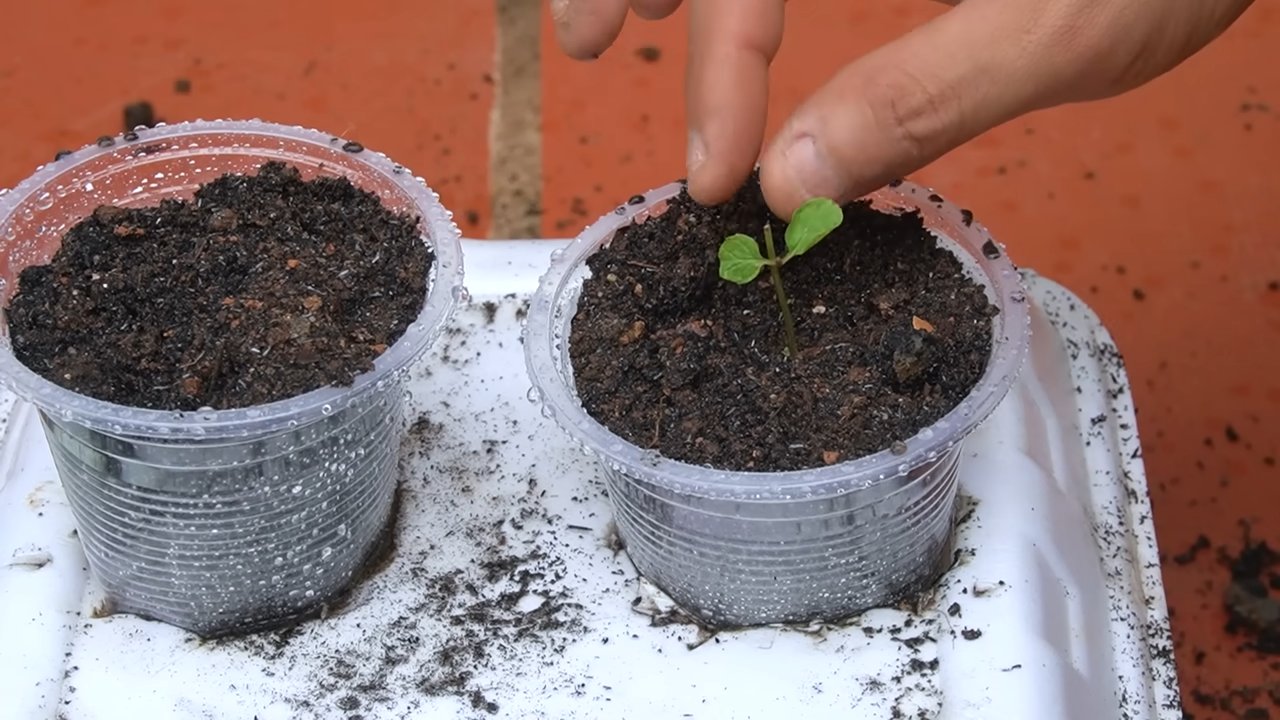
5. Das Einpflanzen der Minze:
* Nehmt die Minze-Pflanzen vorsichtig aus ihren Töpfen. Lockert die Wurzeln etwas auf, bevor ihr sie in die Erde setzt.
* Macht kleine Löcher in die Erde, die groß genug sind, um die Wurzelballen der Minze aufzunehmen.
* Setzt die Pflanzen in die Löcher und füllt die Löcher mit Erde auf. Drückt die Erde leicht an.
* Achtet darauf, dass die Pflanzen genügend Abstand zueinander haben, damit sie sich gut entwickeln können. Ich empfehle einen Abstand von mindestens 15-20 cm.
* Wenn ihr verschiedene Minze-Sorten habt, könnt ihr sie nach Belieben anordnen. Achtet aber darauf, dass die Sorten, die sich stark ausbreiten, nicht zu nah an den weniger wüchsigen Sorten stehen.
6. Das Angießen:
* Gießt die Minze-Pflanzen nach dem Einpflanzen gründlich an. Verwendet dafür eine Gießkanne mit einem feinen Brausekopf, damit die Erde nicht zu stark aufgewühlt wird.
* Gießt so lange, bis das Wasser aus den Abflusslöchern läuft.
* Achtet darauf, dass die Erde immer leicht feucht ist, aber nicht zu nass.
7. Der richtige Standort:
* Minze liebt einen sonnigen bis halbschattigen Standort. Am besten stellt ihr die Styroporbox an einen Ort, an dem die Pflanzen mindestens 4-6 Stunden Sonne pro Tag bekommen.
* Achtet darauf, dass der Standort windgeschützt ist, da Minze empfindlich auf starken Wind reagiert.
* Wenn ihr keinen Garten oder Balkon habt, könnt ihr die Box auch auf die Fensterbank stellen.
Pflege-Tipps für deinen Minze-Garten:
* Gießen: Gießt die Minze regelmäßig, besonders an heißen Tagen. Die Erde sollte immer leicht feucht sein, aber nicht zu nass. Vermeidet Staunässe.
* Düngen: Düngt die Minze alle paar Wochen mit einem organischen Kräuterdünger.
* Schneiden: Schneidet die Minze regelmäßig zurück, um das Wachstum anzuregen und die Pflanzen buschiger zu machen. Ihr könnt die abgeschnittenen Blätter zum Kochen, für Tee oder für Cocktails verwenden.
* Überwintern: Minze ist winterhart, aber in kalten Regionen solltet ihr die Styroporbox im Winter an einen geschützten Ort stellen oder sie mit Vlies abdecken.
* Schädlinge: Achtet auf Schädlinge wie Blattläuse oder Spinnmilben. Bei Befall könnt ihr die Pflanzen mit einem natürlichen Insektizid behandeln.
Minze ernten und verwenden:
* Ihr könnt die Minze ernten, sobald die Pflanzen groß genug sind. Schneidet die Stängel mit einer Schere oder einem Messer ab.
* Erntet die Minze am besten am Morgen, wenn die ätherischen Öle am konzentriertesten sind.
* Verwendet die frische Minze zum Kochen, für Tee, Cocktails oder zur Dekoration von Speisen.
* Ihr könnt die Minze auch trocknen, um sie länger haltbar zu machen. Bindet die Stängel zu kleinen Bündeln zusammen und hängt sie an einem luftigen, schattigen Ort auf.
Zusätzliche Tipps und Tricks:
* Verschiedene Minze-Sorten: Probiert verschiedene Minze-Sorten aus, wie z.B. Pfefferminze, Krauseminze, Schokoladenminze oder Orangenminze. Jede Sorte hat ihren eigenen Geschmack und Duft.
* Minze im Topf: Wenn ihr keinen Platz für eine Styroporbox habt, könnt ihr die Minze auch in einem Topf anpflanzen.
* Minze vermehren:
Conclusion
So, there you have it! Transforming a simple styrofoam box into a thriving mint garden is not just a fun project; it’s a game-changer for anyone who loves fresh herbs. We’ve walked you through the process, highlighting the benefits of this DIY approach – from its cost-effectiveness and space-saving design to its superior drainage and insulation properties, perfect for nurturing your mint plants.
Why is this DIY trick a must-try? Because it empowers you to grow an abundance of fresh, fragrant mint right at your fingertips, regardless of your gardening experience or available space. Imagine the possibilities: refreshing mojitos, flavorful teas, vibrant salads, and aromatic desserts, all enhanced by the mint you grew yourself. No more trips to the grocery store for wilted, overpriced herbs! This method provides a sustainable and readily available source of fresh mint, elevating your culinary creations and adding a touch of green to your life.
But the beauty of this project lies in its adaptability. Feel free to experiment with different sizes of styrofoam boxes to suit your needs. Consider painting the exterior of the box to match your patio decor or adding drainage holes to the sides for even better ventilation. You could even create a tiered system by stacking multiple boxes, creating a stunning vertical mint garden. For those in colder climates, this styrofoam box provides excellent insulation, extending your growing season and protecting your mint from frost.
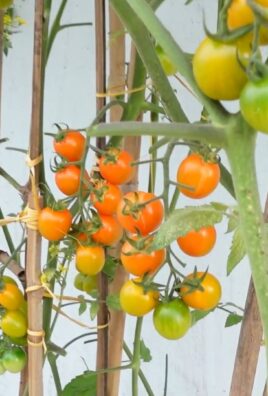
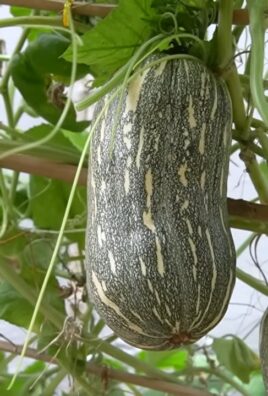
Don’t limit yourself to just mint! This method works wonders for other herbs like basil, parsley, and chives. You can even try growing small vegetables like lettuce or spinach in your styrofoam box garden. The key is to choose plants with similar watering and sunlight requirements.
We are confident that you’ll find this DIY mint growing styrofoam box project incredibly rewarding. It’s a simple, effective, and eco-friendly way to enjoy fresh herbs year-round. The improved drainage compared to traditional pots is a huge advantage, preventing root rot and ensuring healthy, vigorous growth. Plus, the insulation provided by the styrofoam helps regulate soil temperature, creating an optimal environment for your mint to thrive.
We strongly encourage you to give this DIY project a try. It’s a fantastic way to connect with nature, enhance your cooking, and add a touch of green to your home. Once you’ve built your own mint growing styrofoam box, we’d love to hear about your experience! Share your photos, tips, and variations in the comments below. Let’s create a community of thriving mint gardeners! What are you waiting for? Get started on your mint growing adventure today!
Frequently Asked Questions (FAQ)
What type of styrofoam box is best for growing mint?
Ideally, you should use a food-grade styrofoam box, like the kind used for shipping produce or seafood. These are generally safe and won’t leach harmful chemicals into the soil. Avoid using styrofoam boxes that have been used to store chemicals or other potentially toxic substances. Make sure the box is clean and free of any debris before you start. The size of the box will depend on how much mint you want to grow, but a box that’s at least 12 inches deep and 18 inches wide is a good starting point. Remember to consider the weight of the soil and plants when choosing a box, as you’ll need to be able to move it easily.
How many drainage holes should I drill in the styrofoam box?
A good rule of thumb is to drill at least four to six drainage holes in the bottom of the styrofoam box. These holes should be evenly spaced to ensure proper drainage throughout the container. The size of the holes should be about ¼ to ½ inch in diameter. You can also add a layer of gravel or small stones at the bottom of the box before adding the soil to further improve drainage. Overwatering is a common problem when growing plants in containers, so adequate drainage is crucial for preventing root rot and ensuring healthy growth.
What type of soil is best for growing mint in a styrofoam box?
Mint thrives in well-draining, nutrient-rich soil. A good potting mix specifically formulated for containers is ideal. Avoid using garden soil, as it can be too heavy and compact, leading to poor drainage. You can also amend your potting mix with compost or other organic matter to improve its fertility and water retention. A slightly acidic to neutral pH (around 6.0 to 7.0) is optimal for mint growth. Consider adding a slow-release fertilizer to the soil at planting time to provide your mint plants with a steady supply of nutrients.
How much sunlight does mint need when grown in a styrofoam box?
Mint prefers partial shade to full sun, but it can tolerate a wide range of light conditions. In hotter climates, it’s best to provide some afternoon shade to prevent the leaves from scorching. In cooler climates, mint can tolerate full sun. Aim for at least 4-6 hours of sunlight per day for optimal growth. If you’re growing your mint indoors, place the styrofoam box near a sunny window or use a grow light to supplement natural light. Rotate the box regularly to ensure that all sides of the plant receive adequate sunlight.
How often should I water my mint plants in a styrofoam box?
Water your mint plants regularly, keeping the soil consistently moist but not waterlogged. The frequency of watering will depend on the weather, the size of the styrofoam box, and the type of soil you’re using. Check the soil moisture by sticking your finger about an inch into the soil. If it feels dry, it’s time to water. Avoid overwatering, as this can lead to root rot. During hot, dry weather, you may need to water your mint plants daily. In cooler weather, you can water less frequently.
Can I grow different varieties of mint in the same styrofoam box?
While it’s possible to grow different varieties of mint in the same styrofoam box, it’s generally not recommended. Mint is a vigorous grower and can quickly spread and take over the entire container. Different varieties of mint can also cross-pollinate, resulting in unpredictable flavors and characteristics. If you do decide to grow multiple varieties of mint in the same box, be sure to provide ample space between them and monitor their growth closely. Consider using dividers to separate the different varieties and prevent them from intermingling.
How do I harvest mint from my styrofoam box?
Harvest mint regularly to encourage new growth and prevent the plants from becoming leggy. Simply snip off the stems with scissors or pruning shears, leaving about 2-3 inches of growth. You can harvest up to one-third of the plant at a time without harming it. The best time to harvest mint is in the morning, after the dew has dried but before the sun gets too hot. This will help to preserve the essential oils and flavor of the mint. You can use the fresh mint immediately or dry it for later use.
How do I overwinter my mint plants in a styrofoam box?
In colder climates, mint plants grown in styrofoam boxes may need to be overwintered indoors. Before the first frost, move the box to a sheltered location, such as a garage or shed. Water the plants sparingly throughout the winter, keeping the soil just barely moist. In early spring, move the box back outdoors and gradually acclimate the plants to warmer temperatures and sunlight. You can also propagate new mint plants from cuttings taken in the fall to ensure a continuous supply of fresh mint. The insulation of the styrofoam box will help protect the roots from freezing temperatures.
Leave a Comment